I posted an article to this site “How to Back up your Travel Photos.” about 2 years ago. The info in this post is still accurate and relevant except I’ve also discovered a way of backing up on the go without using a laptop. Now I am talking about backing up memory cards not images taking on a smartphone. The smartphone images should be automatically backed up to the cloud if you have the settings correct. But even with the latest DSLR”s and Mirrorless Cameras being able to send images to the cloud, their systems are still clunky. So let’s get into it. This video takes you through it:
For those who like pictures and words you need the following: A Smartphone. I use an android so I’m not sure about iPhones. But I believe this system works with the latest models. So, if you’re in the Apple ecosphere you’ll need to do your own research.
A hub that has a USB-C cable and USB-A (and/or USB-C) connections.
A hard drive.
A memory card reader
Put it altogether and plug into the smartphone and then open “My Files” and you’ll see “USB Storage 1” and “USB Storage 2” plus “USB Storage 3” if you’ve plugged in 2 hard drives.
Go to the memory card storage, which is usually the one with the smallest storage, and find your way to the images.
On the settings button (in this case 3 vertical dots) and select edit and then select all. Tap “copy” and then go back and select the hard drive. Find where you want the images copied to and tap “copy here” and you’ll get a progress pop up.
The operation is complete once the pop up disappears.
Rinse and repeat if you’ve got another hard drive to back up to (recommended).
G’day, I’ve been playing around with another useful piece of software from Pixbim. It’s called Pixbim Animate Photos AI. It’s a photo animation software that helps you animate faces in photos with the click of a button. Pixbim animate face app uses artificial intelligence to automatically animate a photo and generate a video from it. Besides being easy to use, it gives perfect results that you can feel comfortable in sharing with others. The software animates photos using models that result in images with blinking eyes and changing facial features. AND it doesn’t require professional video editing skills to animate still photos.
One other benefit is Face Enhancement
So let’s check it out
It also has as added value the ability to upscale a photo by 2X plus you can batch and select the type of animation you want to try.
Currently they have it for sale at $49.99 but if you use the following code KATINCSAI20, you’ll get another 10% off. To buy or get a free trial go to pixbim.com/animate-photos
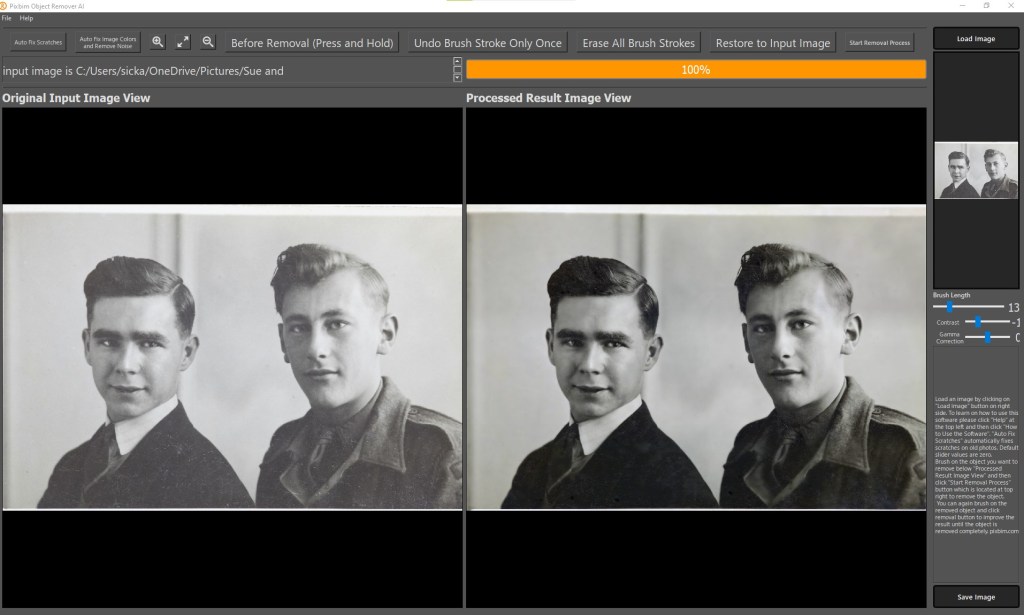
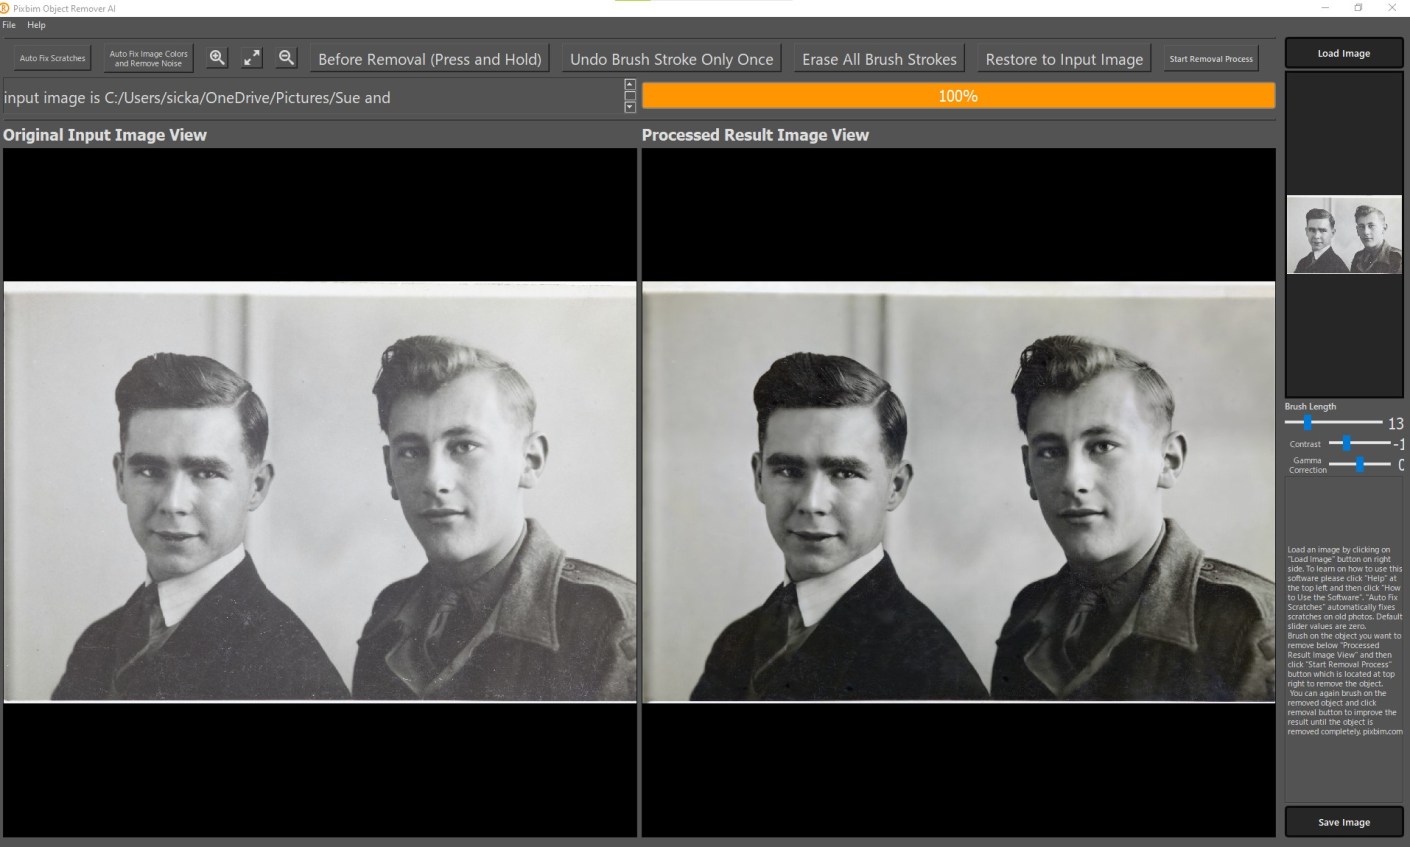
Been a while since I posted any Pxbim editing software reviews. I’ve introduced you to Color Surprise AI and Unblur Shake AI but they also have Animate Photos AI New, Enlarge AI, Video Colorize AI and what I’m about to show you, Object Remover AI. This one is a little different as I don’t use it for object removal, I have other software such as Luminar Neo or AI and Photoshop for that. What it is good at however, is removing scratches from old photos as you can see from the above screen shot. This video runs through the fairly simple process of removing scratches.
Pixbim Object Remover
If you want to get a copy of this go to Pixbim Object Remover and you’ll get a 20% discount off the current discounted price of US$37.99 if you use my code KATINCSAI20. For this price you can’t go wrong if your are looking for an easy way of cleaning up old photos.
Pixbim have a new software called Unblur Shake AI. As it sounds it reduces the blur in a photo.
See the video to watch it in action or scroll down for more info.
Ready to get now? Go to Unblur Shake AI enter the code KATINCSAI20 for a discount
So why should you care? Well there would have been times when you took a photo whether it be with a mobile, DSLR, or mirrorless camera, and found that when you enlarged it looked blurry. The most common form of blur is caused by camera shake, which for those who don’t know, is when you have taken a handheld photo with a shutter speed that’s too low for the light available or the photographer just hasn’t kept the camera still. Very common with mobile images. There are other types of blur of course. Not being in focus is one kind. Motion is another.
So, if this has happened to you then you’ll like this program which can fix the majority of images that have blur. Although it struggles with bad blur and motion blur (a speeding car for example).
Let’s take a look. First you open the program and then click on the “load Image” button, select a photo and ‘boom’ the magic starts. Straight away it starts analysing the image and quite quickly previews the results. Once the preview is loaded you can see another part of the image by going to the preview panel and moving the red square.
The buttons at the top (the magnifying glass and the double arrow) don’t work very well or maybe it’s just my copy. But they’re irrelevant anyway.
There is also a an “Unblur Factor” slide that allows you to increase the process. At this stage there are only 2 settings “Low”, the default setting, and “High”. Setting it to high is going to take longer and sometimes can be too much.
If you are happy with the result, just click on the “start process full image and save”. A window will pop up asking you to save it to a location of your choice with the same file name plus “unblurSAI_result”
One last thing, the image formats you can use with exclude raw and psd files. I’ve only tried tiff, png and jpeg images so I’m not sure if you can use other non-raw files.
Look it’s not fancy but at US$34.99 less 20% if you use my code KATINCSAI20, I think it’s steal and a great tool for photography enthusiasts. It’s a once off purchase with free updates for life. Go to Unblur Shake AI to grab this and enter the code KATINCSAI20 for a discount
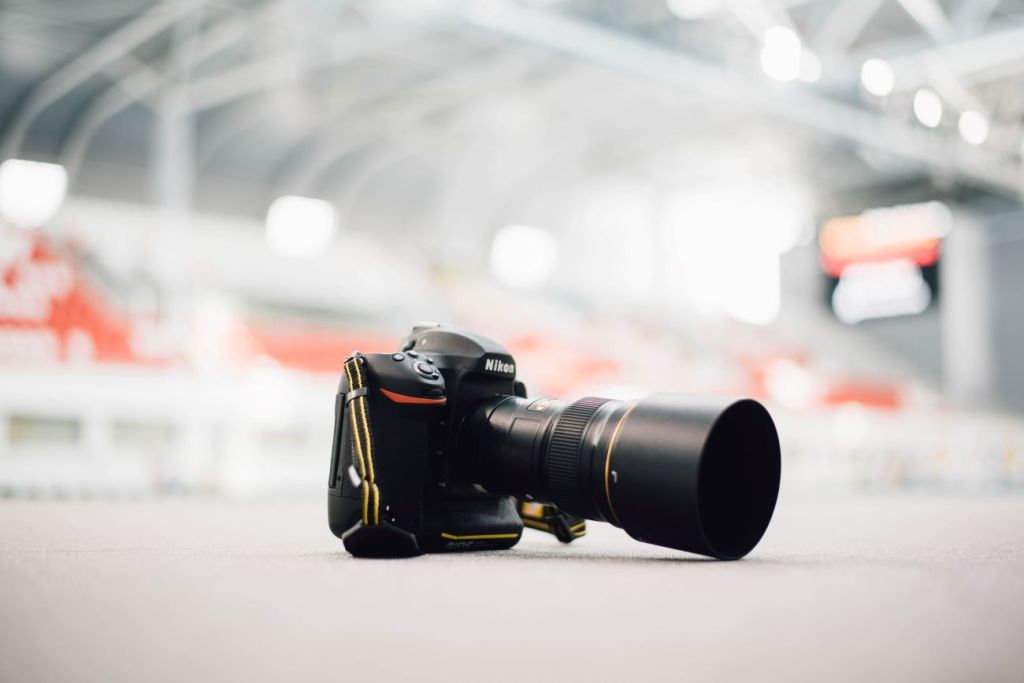
Finding the best Camera for your Travels Part 3 DSLR
In The basics of camera equipment – Best camera equipment for travel photography, I mentioned That “despite those who say its’s not about the gear, you need a camera that will suit your style and objectives.” This is especially true when you are off travelling. Having a camera that you are comfortable with and that can help you take photos that you will proud to bring home with you is essential.
Maybe you aspire to getting your travel photos published. If one or all of these is YOUR goal, I can help. Sign up in the box below to subscribe to my exclusive Travel Photo Tips Newsletter.
Remember if you want to take great travel photos
that you can share and display.
that help you relive your travel experience
that give you a chance to have your travel photos published
then sign up below and subscribe to my exclusive Travel Photo Tips Newsletter.
Smartphones are amazing things. You can live your whole life on one. From doing your banking to checking your email to turning on your lights; hell! it even talks to you now!
It’s a great device for managing almost anything on the go.
The one thing that it was lagging on was the camera. But over the last 2-3 years that’s all changed.
Samsung and Apple lead the race on this but Google, Nokia and HTC are catching up quickly.
Is the Smartphone as good as a DSLR or Mirrorless I.e. Interchangeable lens camera or high-end compacts?
Not yet.
The quality of the image and more importantly the flexibility and options are not there yet and whilst I’m reluctant to say it, they may never be.
So how do you get the best images from that small device you have in your hand.
Here’s 8 Tips on how to use a Smartphone Camera
1 Hold the camera still
In my recent article How to hold a camera correctly there is some detailed information on how to hold a smartphone camera but it’s worth repeating some of that here:
Most smartphones these days have the option to operate the shutter with a physical button like a volume control instead of tapping the screen. So, if you have that option then use it for the landscape position. It’s a big more awkward in the portrait position so the virtual button is better to use in most situations
Tuck in your elbows and bring it close to you. Holding it away from your body makes it much more difficult to hold still.
Use both hands. It gives me nightmares watching some people take photos one handed.
Ever taken a picture of a loved one and they look like a rabbit caught in headlights. Yes. Well that’s cos you had the flash on.
As with any camera with a built-in flash they are not in the right position for most shots. So, if you can, avoid using it.
3 Familiarise yourself with the settings
These days the smartphones come with lots of different settings.
They are there to give you options rather than just leave it on auto.
Nothing wrong with auto of course but if you can improve an image by using a different setting then why not?
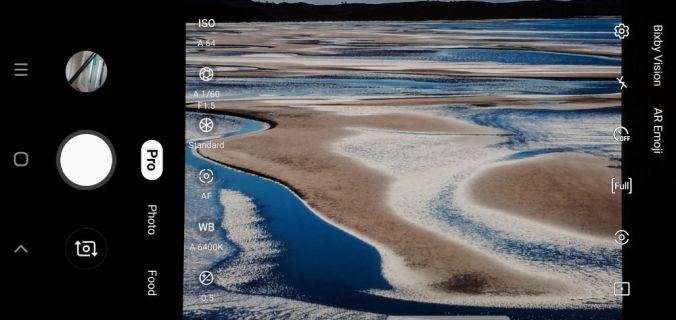
For example, the Samsung Smartphone camera has a “Pro” mode. This allows you to change the ISO, White Balance and shutter speed amongst other things.
Samsung Galaxy Pro Camera Settings
4 Use apps
The Camera Apps for the smartphone, as I mentioned before in 4, are improving and coming up with more ways that allow to you control your image.
However, there are a number of apps out there that not only give you ways of filtering and editing but shooting as well.
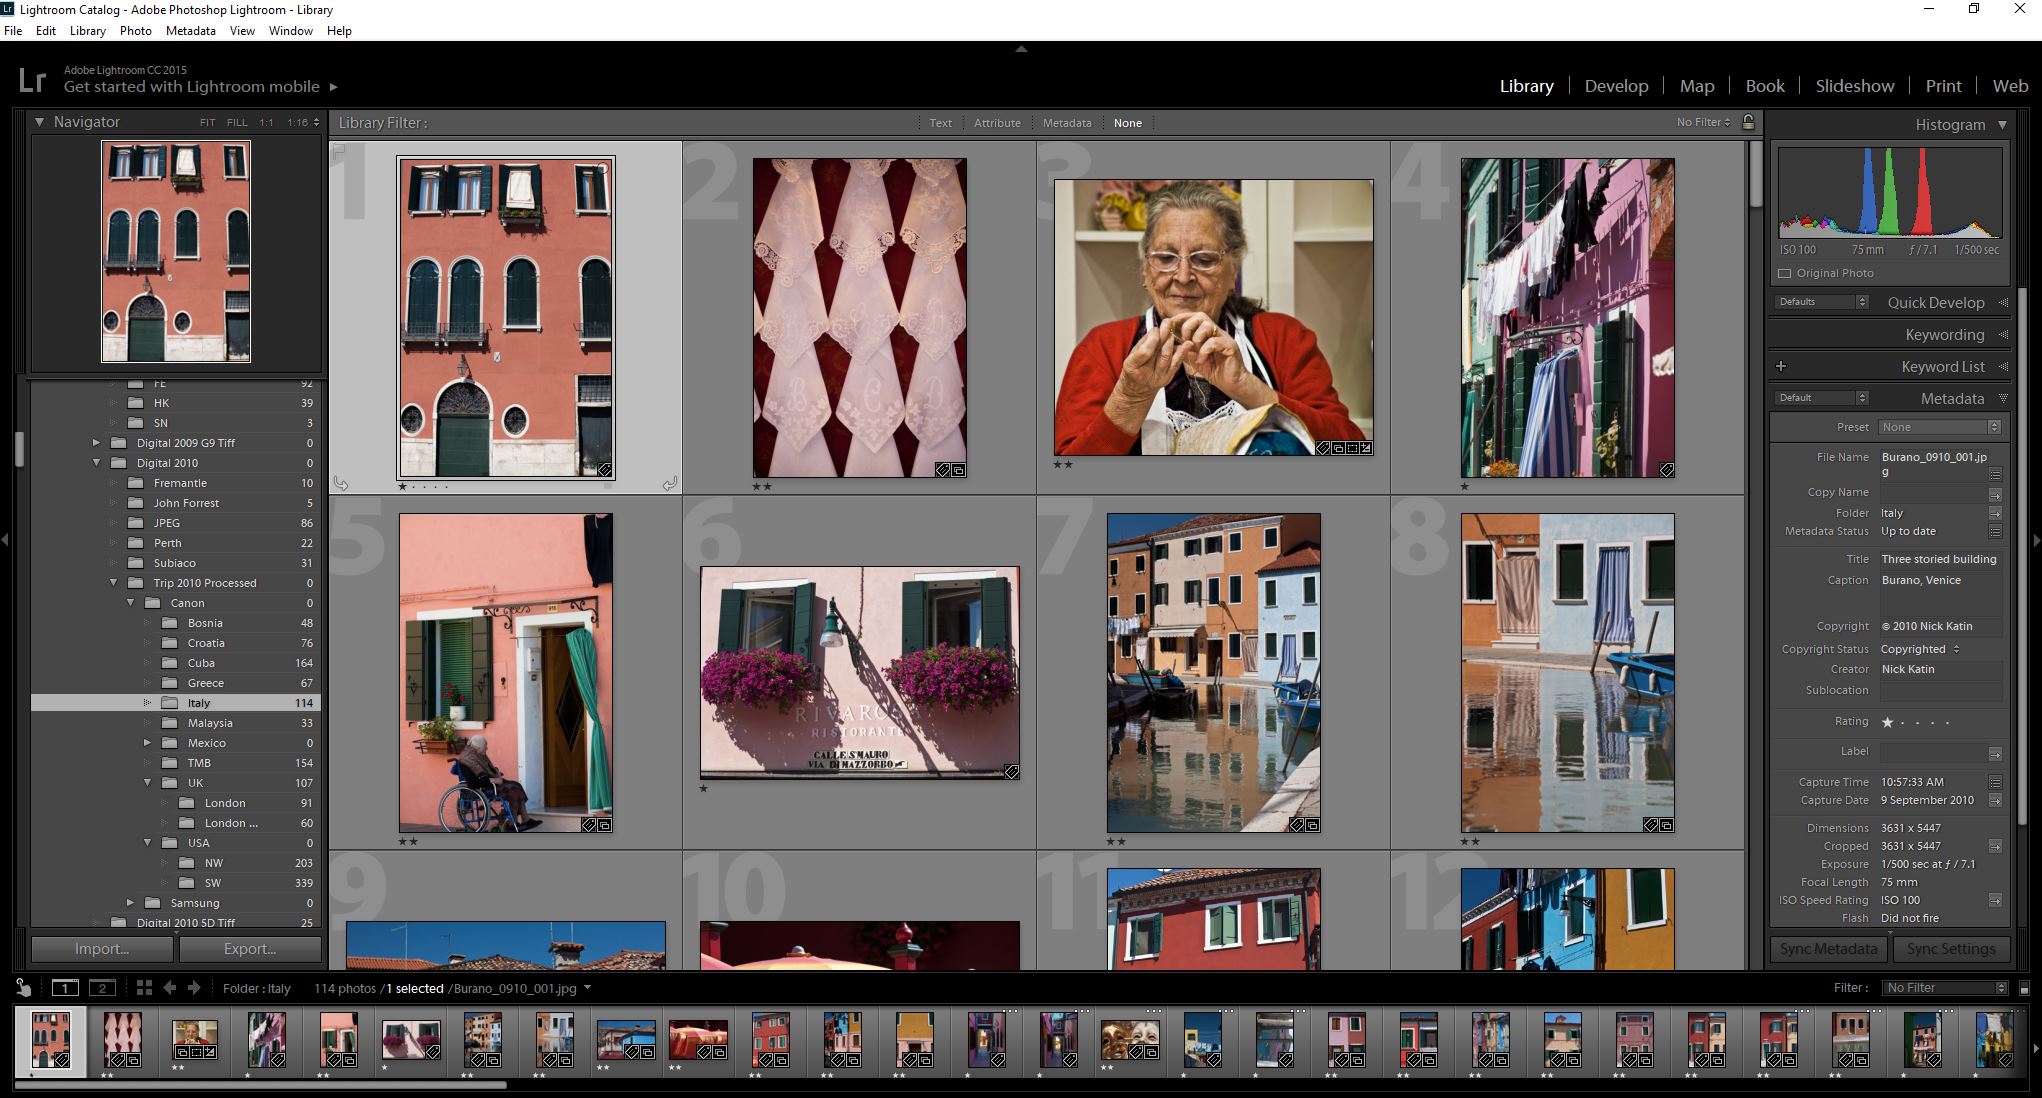
My favourite is Lightroom but you need to have Lightroom on a desktop or Laptop for it to sync to.
What I like about is that it allows you to shoot in RAW using the Adobe DNG format. That way when you sync to your desktop version you have much more flexibility in editing.
Lightroom Library View
5 Photo size
Now you should always shoot with the maximum size selected so that you have options on the size print you can have.
The camera setting will allow you to choose this so select maximum size id if you are only sharing by text or on social media. Sharing apps have the algorithms necessary to automatically reduce the size.
6 Watch your storage
Once you start increasing the size of your photos then storage can be an issue.
But these days there are plenty of ways to overcome this. The obvious one is to increase your storage with a mini SD or equivalent.
However, some phones won’t allow you to do this so cloud services are the next, in fact they are probably the best, option. I mentioned Lightroom earlier.
When it syncs with the desktop version, it downloads into a folder on your hard drive.
Other more well-known ones though are Google Photos, Dropbox, iCloud or OneDrive.
So, once you’ve uploaded (usually you set the service to do this on auto) delete the ones you don’t need on your smartphone. You should be able to view the photo via the app rather than your gallery.
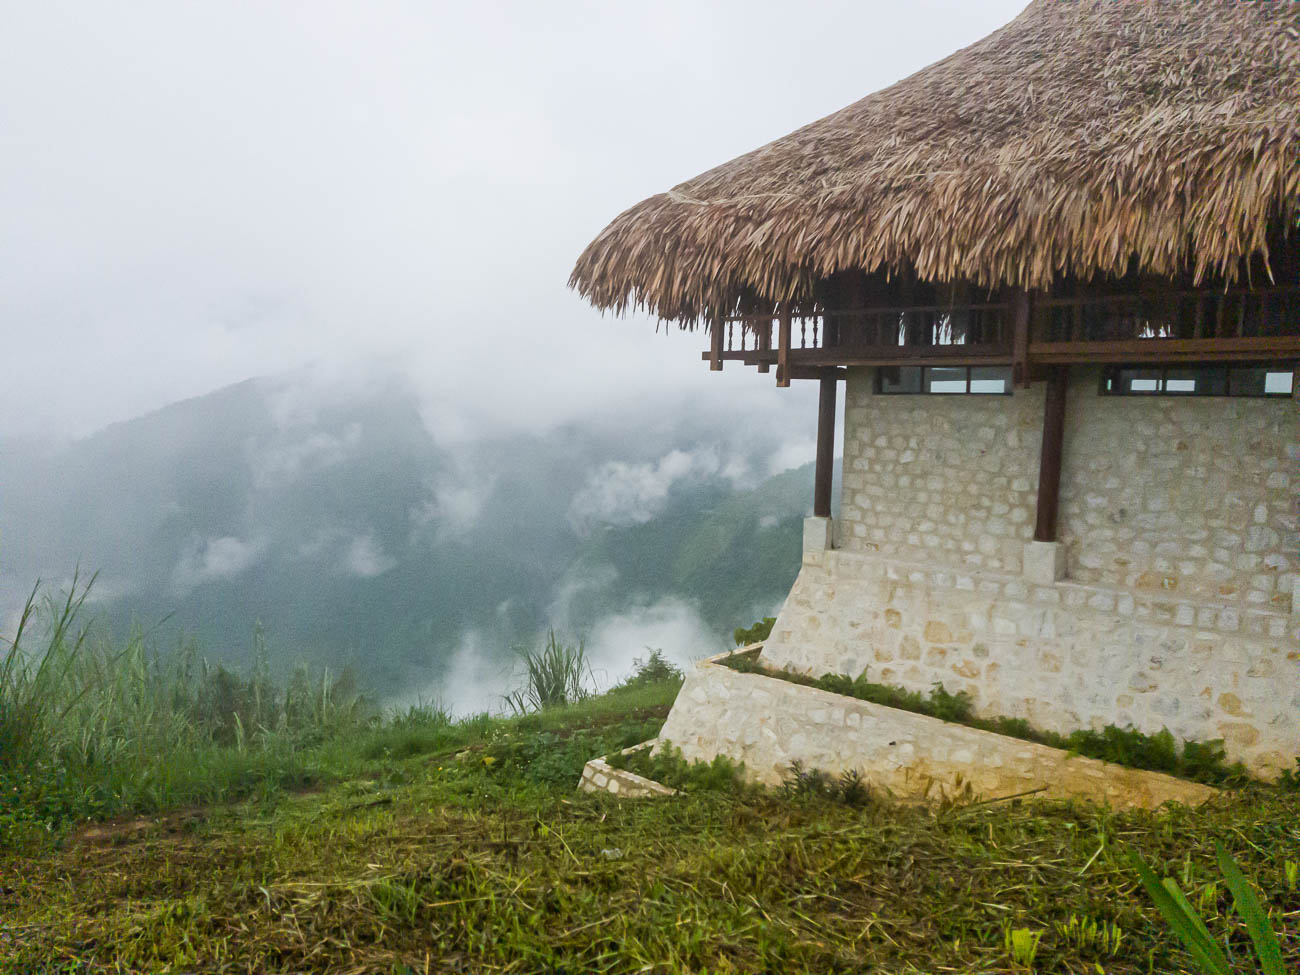
Sapa Mountain Resort Vietnam. Taken with Samsung S8
7 Remember that the Camera Lens is at the top of the Phone.
This is something that can be confusing.
Usually the Camera Lens on a Smartphone is, when looking at it vertically or in the Portrait position, about 25mm (1”) from the top.
Not a problem if you are taking what you see but if you are mounting it on a Tripod or propping it up just bear it in mind otherwise you will end up with a lopsided photo or you might not capture what you wanted.
8 Forget Bokeh unless you have the latest Model
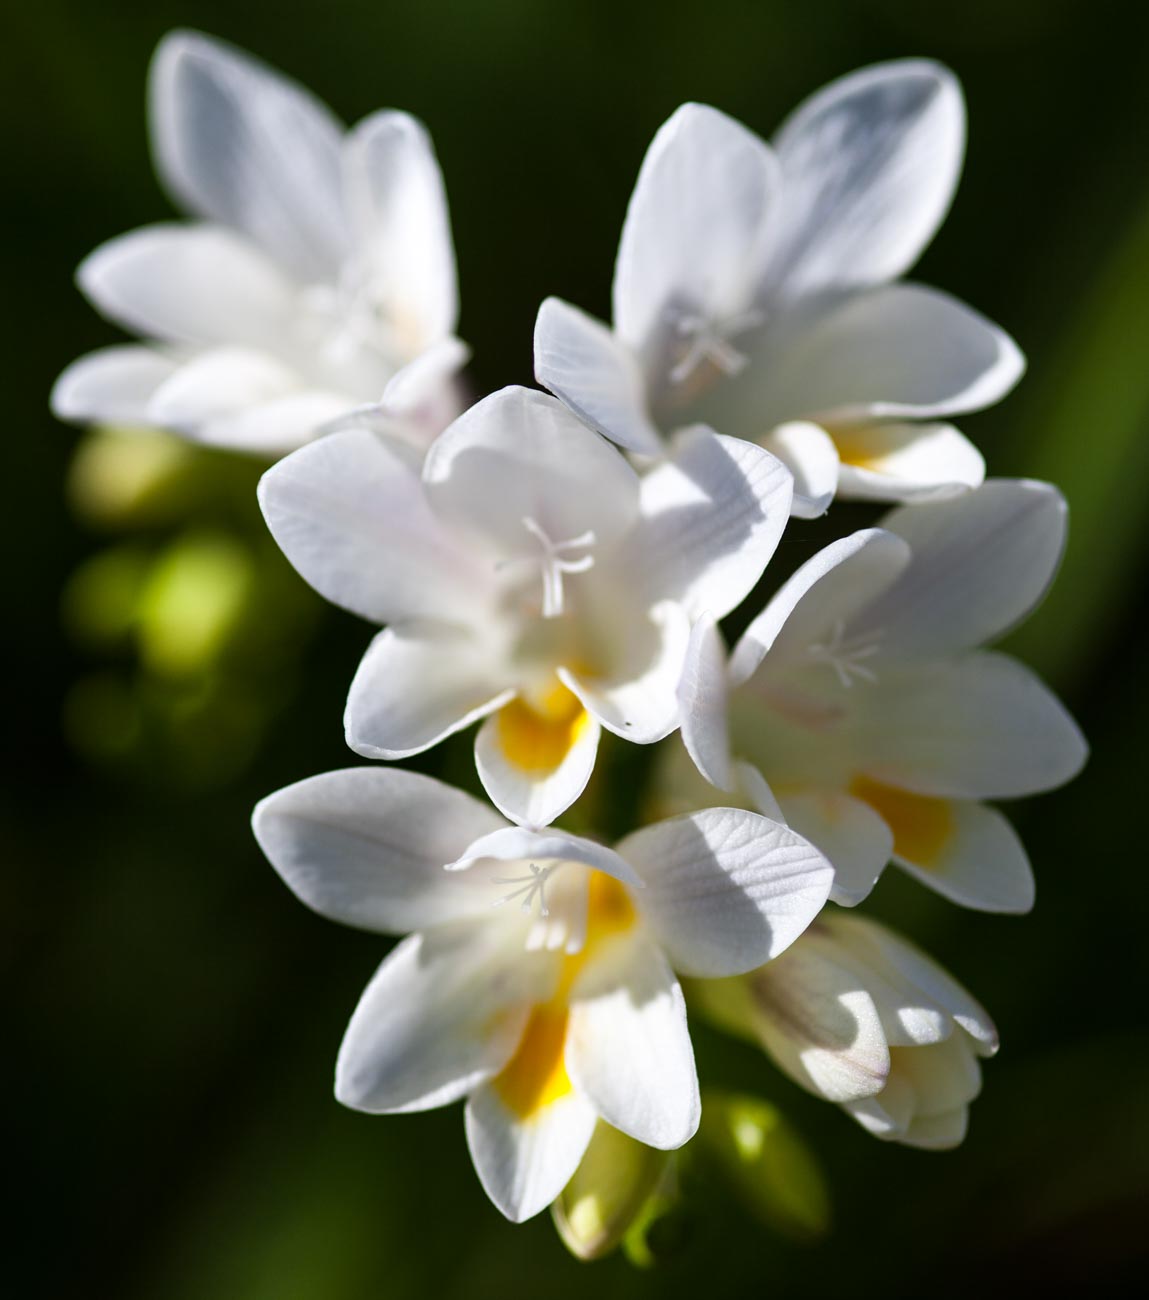
Bokeh what’s that? Well it’s the picture of the flower with little or no focus in the background but a good focus on the flower.
I’m not going to go deep into that here but if want that ‘effect you need to find a decent app that will do it after the shot has been taken. Alternatively the latest smartphones such as Googles’ Pixel, Samsung S10 or the iPhone X etc. have duel or triple lens with some grunty alogoritms that will create that bokeh effect. However outside of those you are not going to get good results with a smartphone when you attempt to get that sort of image.
The sensor is just too small.
However, I did say you can use an app. These apps can be easily found but have varying reviews and I haven’t really found one that performs as well as a DSLR or Mirrorless camera for Bokeh.
The problem is that they simulate by software and that is a long way from being perfect – Yet!
Wildflower Kings Park Perth
So, in conclusion if you follow some or all of these tips, you should end up with a half decent image
Summary for 8 Tips on how to use a Smartphone
1 Hold the camera still
2 Turn off that flash
3 Familiarise yourself with the settings
4 Use apps
5 Photo size
6 Watch your storage
7 Remember that the Camera Lens is at the top of the Phone.
8 Forget Bokeh unless you have the latest model
Remember if you want to take great travel photos
that you can share and display.
that help you relive your travel experience
that give you a chance to have your travel photos published
then sign up below and subscribe to my exclusive Travel Photo Tips Newsletter.
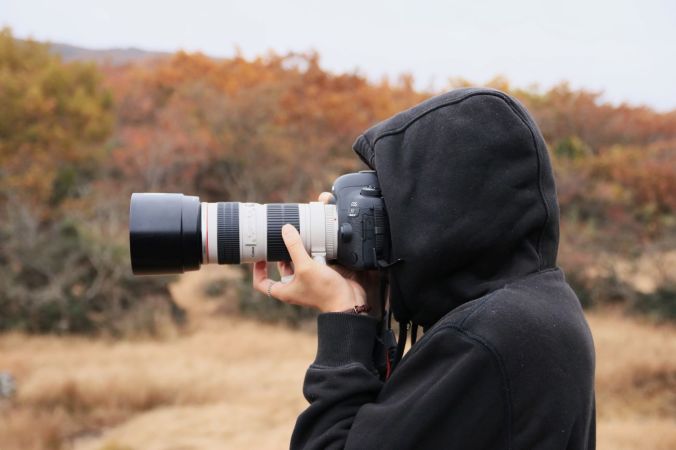
How to hold a camera correctly (Photo by Hyunwon Jang on Unsplash)
So, you think you can hold a camera or smartphone correctly? Well how do you know? In this article learn why camera shake can be avoided with a little of knowledge.
Take a good look at your photos.
No, not on the camera or phone screen but on your PC, Mac or Laptop. Even a tablet is better than a smartphone or camera screen but the bigger the better.
Now does it look really sharp or does look a little bit blurred (the industry phrase is “soft”) in parts or may even a quite a bit blurred?If so, there is a good chance you are not paying enough attention to the fact that a camera moves when you hold it. Now that’s not the camera moving on its own but you moving it. Got It?
Techniques
Now there are several techniques to overcome this but I’m going to basically cover how you should be holding your camera and smartphone.
Camera with a Viewfinder.
If it has a view finder – then use it!
When you use the view finder you are putting the camera up to your face and therefore bracing it on your face.
Now to add to that, tuck your elbows in against your side.
Depending on the weight of the camera, grip one side with one hand usually the right where the shutter button is and the position the other hand underneath the body or if it’s a fairly long lens then under the lens. .
Camera with no Viewfinder
Ok so it doesn’t have a viewfinder or you don’t want to use it! If either one of those is you. You need to know that:
The overwhelming majority of people taking pictures using the view finder do not hold it correctly
And consequently get pictures that are ‘soft’.
If you have studied physics you will know what the pendulum theory is. Holding the camera at arm’s length creates a pendulum effect and ‘soft’ or blurry photos unless the light is very good and you have a high shutter speed.
So just like using the viewfinder tuck those arms in against your sides and bring the camera closer to your eyes.
Again, depending on the weight of the camera, grip one side with one hand usually the right where the shutter button is and the position the other hand underneath the body or if it’s a fairly long lens then under the lens.
Ideally you want to stand with your legs shoulder width apart so that you well grounded.
If there happens to be a handy surface, say a wall, rest the camera on that.
Alternatively you can support yourself against a vertical surface such as a tree or a wall if practical.
The portrait position is similar for both the viewfinder and rear screen. You just need to decide which side is more comfortable for the shutter button. The shutter speed at the bottom is the most practical so that you can use the bottom to help support the bottom of the camera.
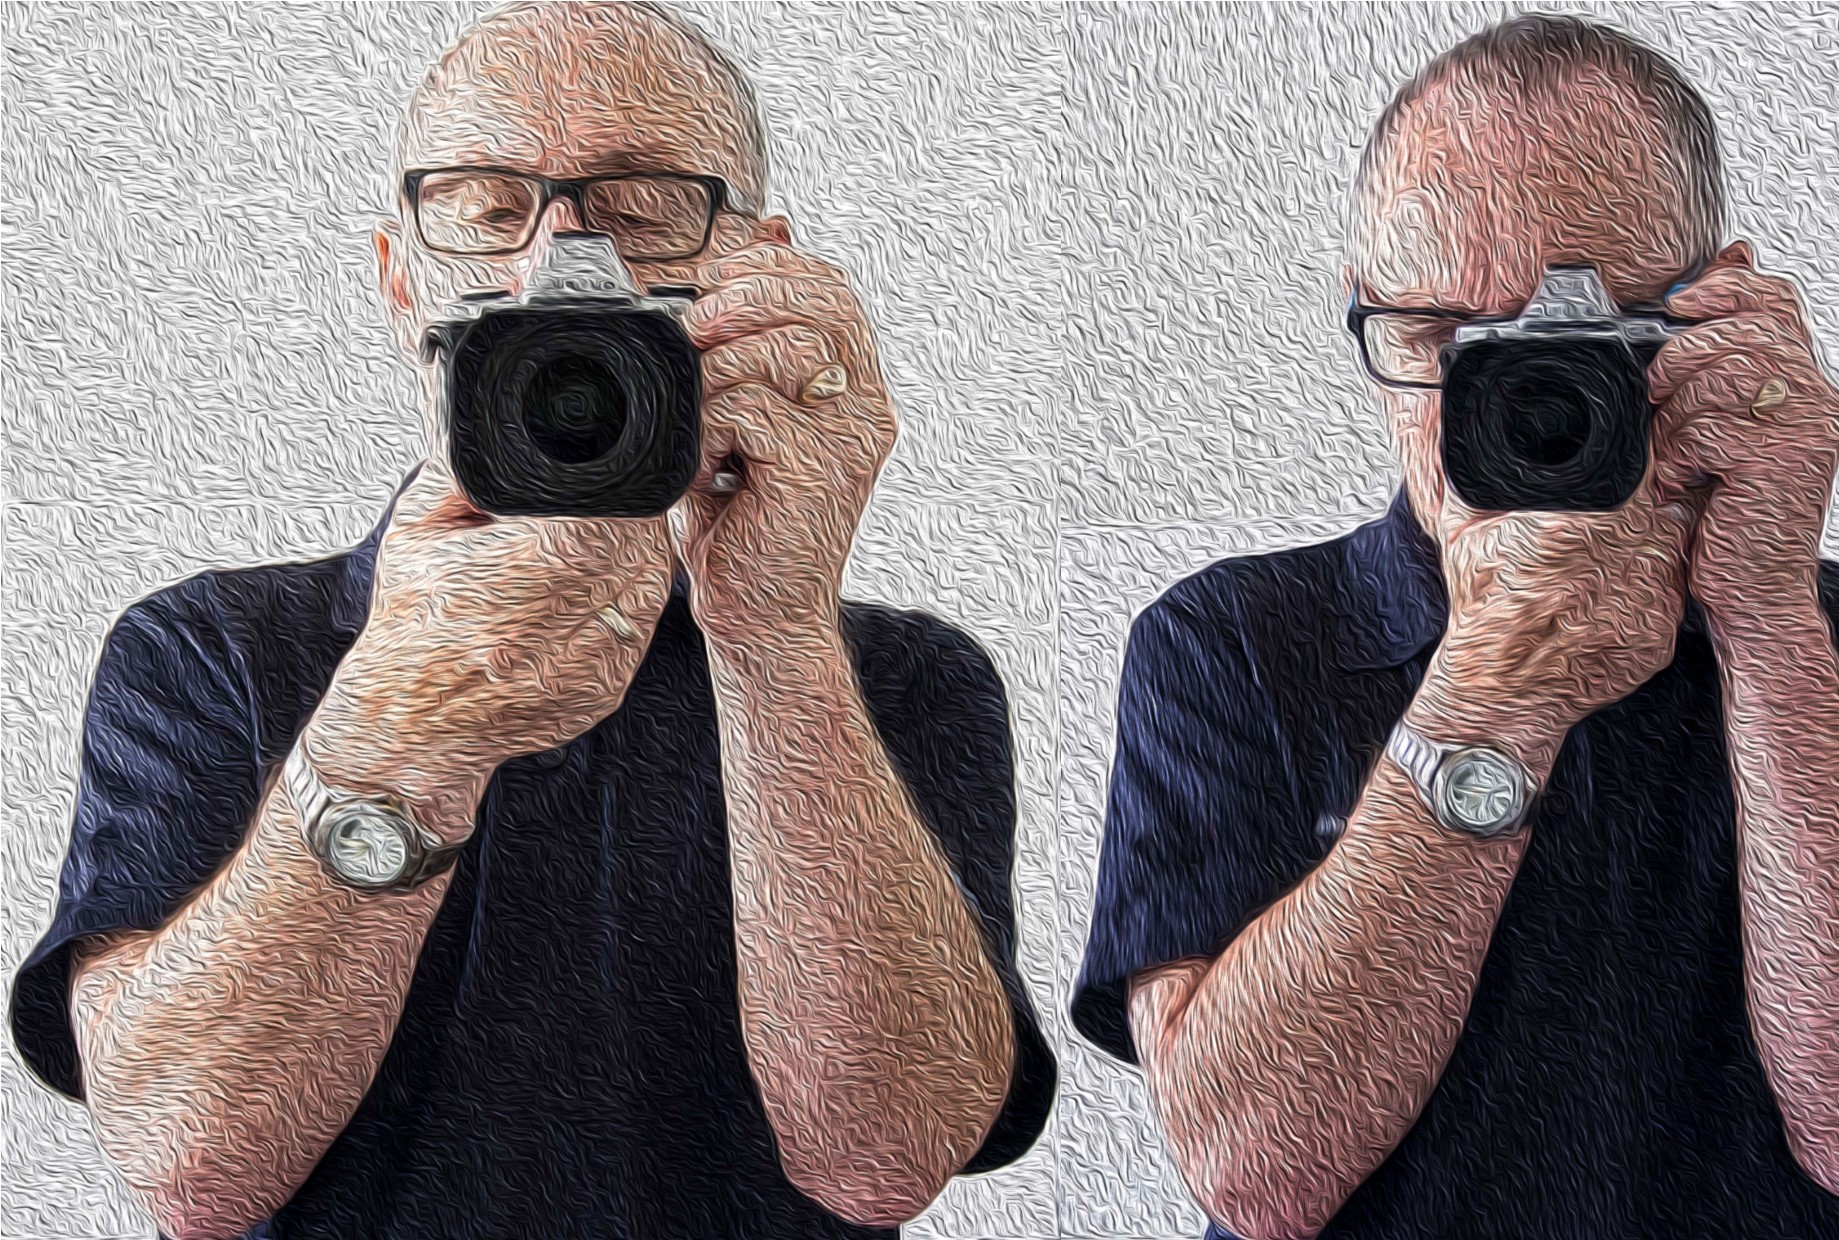
Camera Holds
The Smartphone
Most smartphones these days have the option to operate the shutter with a physical button like a volume control instead of tapping the screen. So, if you have that option then use it! Especially for the landscape position.
As with a camera most people using a smartphone camera often don’t hold it correctly. So tuck in your elbows
Use both hands. It gives me nightmares watching some people take photos one handed. With a smartphone, you need to use 2 different handling techniques.
In the horizontal or landscape position hold it with your hands in the same spot on each side.
With whatever hand you are using to press the shutter button make sure you have that trigger finger free so that you can tap the virtual shutter or press the physical shutter button.
Now the vertical or portrait position is bit trickier.
If you are using a physical shutter, then hold the phone with whichever side it’s on and curl it around the back the lens with the thumb operating the shutter.
The other hand can hold the bottom of the phone with the index finger and thumb.
For a virtual button the difference is that it’s the hand at the bottom that presses the virtual button and can’t in that case grip the bottom of the smartphone at the same time.
When in portrait mode, it’s often better to use the virtual button.
Smartphone Holds
Other Situations
In some situations, you may not be physically vertical.
You may have to lie or sit to take the photo.
If you are lying down, you have the added support of the ground or floor but you need to rest the elbows on the ground or you will end taking a steady image of the ground which may not be your intended subject.
If you are sitting, then usually there is something you can rest the camera on.
Other ways to avoid that Blurry or soft Photo.
Use a tripod,
Have image stabilisation turned on (if fitted),
Ensure that your shutter speed is fast enough,
Use the timer
And so on.
But this piece is just the basics on holding the camera.
More on those tips on the next post.
If you have any tips, please don’t be shy just stick ’em in the comment box below?
Is there anything else that you want explained? Again just ask.
Finding the best Camera for your Travels Part 2 Mirrorless
In The basics of camera equipment – Best camera equipment for travel photography, I mentioned That “despite those who say its’s not about the gear, you need a camera that will suit your style and objectives.” This is especially true when you are off travelling. Having a camera that you are comfortable with and that can help you take photos that you will proud to bring home with you is essential.
In the second of this series I will defer to some reputable camera reviewers who can help guide you. Only two this time as DP Review don’t distinguish between SLR’s and Mirrorless
So, without further ado please read this one from Camera Labs below
Do you see yourself taking some great travel photos that you can share or display? Or can you see yourself reliving your travel experience by bringing home some emotive travel photos? Maybe you aspire to getting your travel photos published. If one or all of these is YOUR goal, I can help. Sign up in the box below to subscribe to my exclusive Travel Photo Tips Newsletter.
Remember if you want to take great travel photos
that you can share and display.
that help you relive your travel experience
that give you a chance to have your travel photos published
then sign up below and subscribe to my exclusive Travel Photo Tips Newsletter.
In previous posts I’ve talked about having the need to have
a decent self-portrait or ‘selfie’ on your website or publication to show the
human face.
If you don’t have a website or business you almost certainly
will have a social media presence, whether it’s LinkedIn, Facebook, Instagram,
Twitter or anything else.
In this day and age of digital social interactions I believe
it’s still important to control your personal image and make sure any ‘selfie’ is
a true representation of you.
That’s right, ‘you’ not your dog, kids, motorbike or picture
taken on holiday in a bar in Bali.
Once you get ahead around that you then need to decide what sort of self-portrait or selfie you think represents you best
You may want a more conservative head shot.
Or a full-length portrait with business like clothes like jacket and trousers.
On the other hand, you may want to convey a trendy relaxed image.
There are no rules except to be true to yourself.
The four most crucial factors to getting a professional
‘selfie’ or self portrait
1 Equipment
I’m going to show you on a smartphone but any camera should do the job provided it works
2 Light
Light is everything. If the light is dull or too bright the image can be too dark or ‘blown out’ (a term for images that have the highlights way too bright).
3 A way of mounting the camera.
A tripod is undoubtable the best way if someone is not taking it for you.
4 Staging
Make sure you select the correct pose. You
may have to take several different images at different angles to get one you
want to use.
Incidentally there is no rule that says you must use the same image across the all platforms or for the same purpose
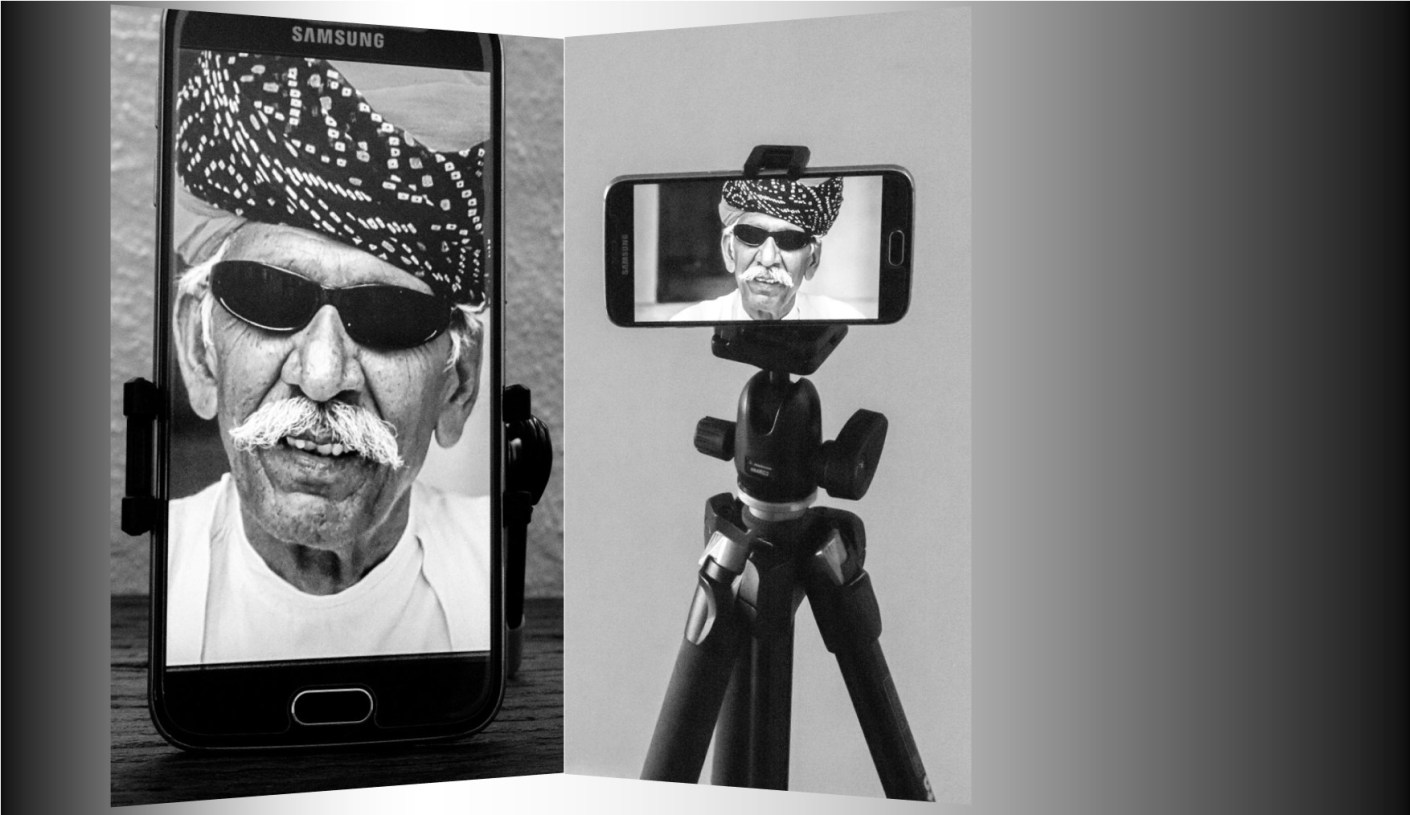
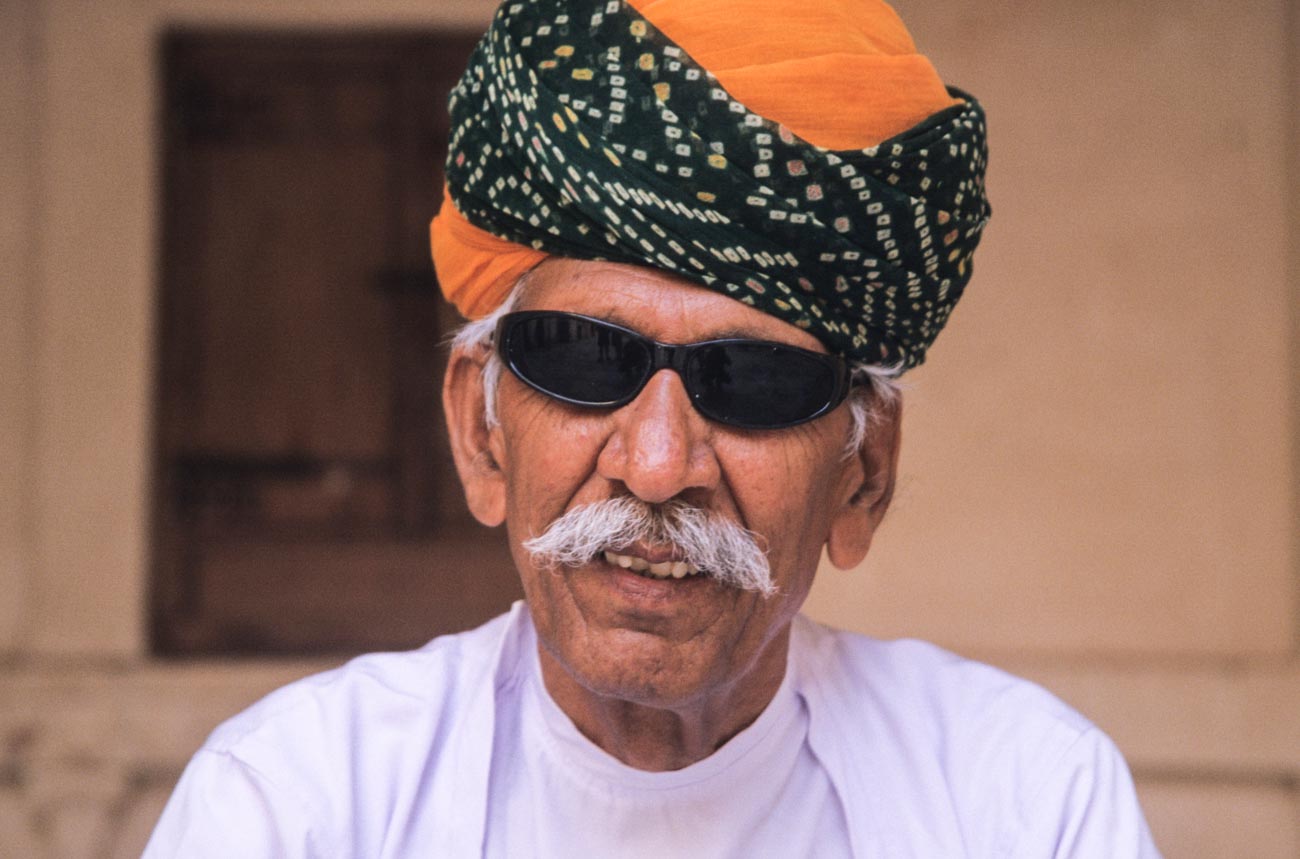
Man in turban at Mehrangarh Fort in Jodhpur, Rajasthan.
Set the camera up;
1 Regardless of what the use is, make sure you have the biggest resolution.
Much better to size down than try to upsize. For example on the Samsung S series smartphone cameras you will find picture size next to the settings icon. Select 16M or 12M or whatever the largest number is. The resolution on the IPhone is set to maximum and has no adjustment from that except with the use of a third-party app. Some other brands only give you the option to select large or high Note: The front camera usually has a much smaller resolution than the main camera, so avoid using it for this application
Find the timer and set it to 10 seconds You can usually just leave the camera on auto if the light is pretty good. But you can change the settings on some smartphones. The only settings I recommend changing are either the ISO and/or the exposure compensation.
Mount the camera on a tripod or any other way you can find to mount. I use the Joby Grip Tight Micro Stand a great little find that has a mini stand. It can also be fitted to a standard tripod head.
2 Set the scene
Find a well-lit position. You can be creative by sitting or standing near a window and allow the light to be strongest on one side. Alternatively, if you want to light up both sides, use a whiteboard on the side away from the light.
Think about the background. Make sure it’s not cluttered and distracting to the eye. Again, a whiteboard is handy. White (or off white) backgrounds are always the best way.
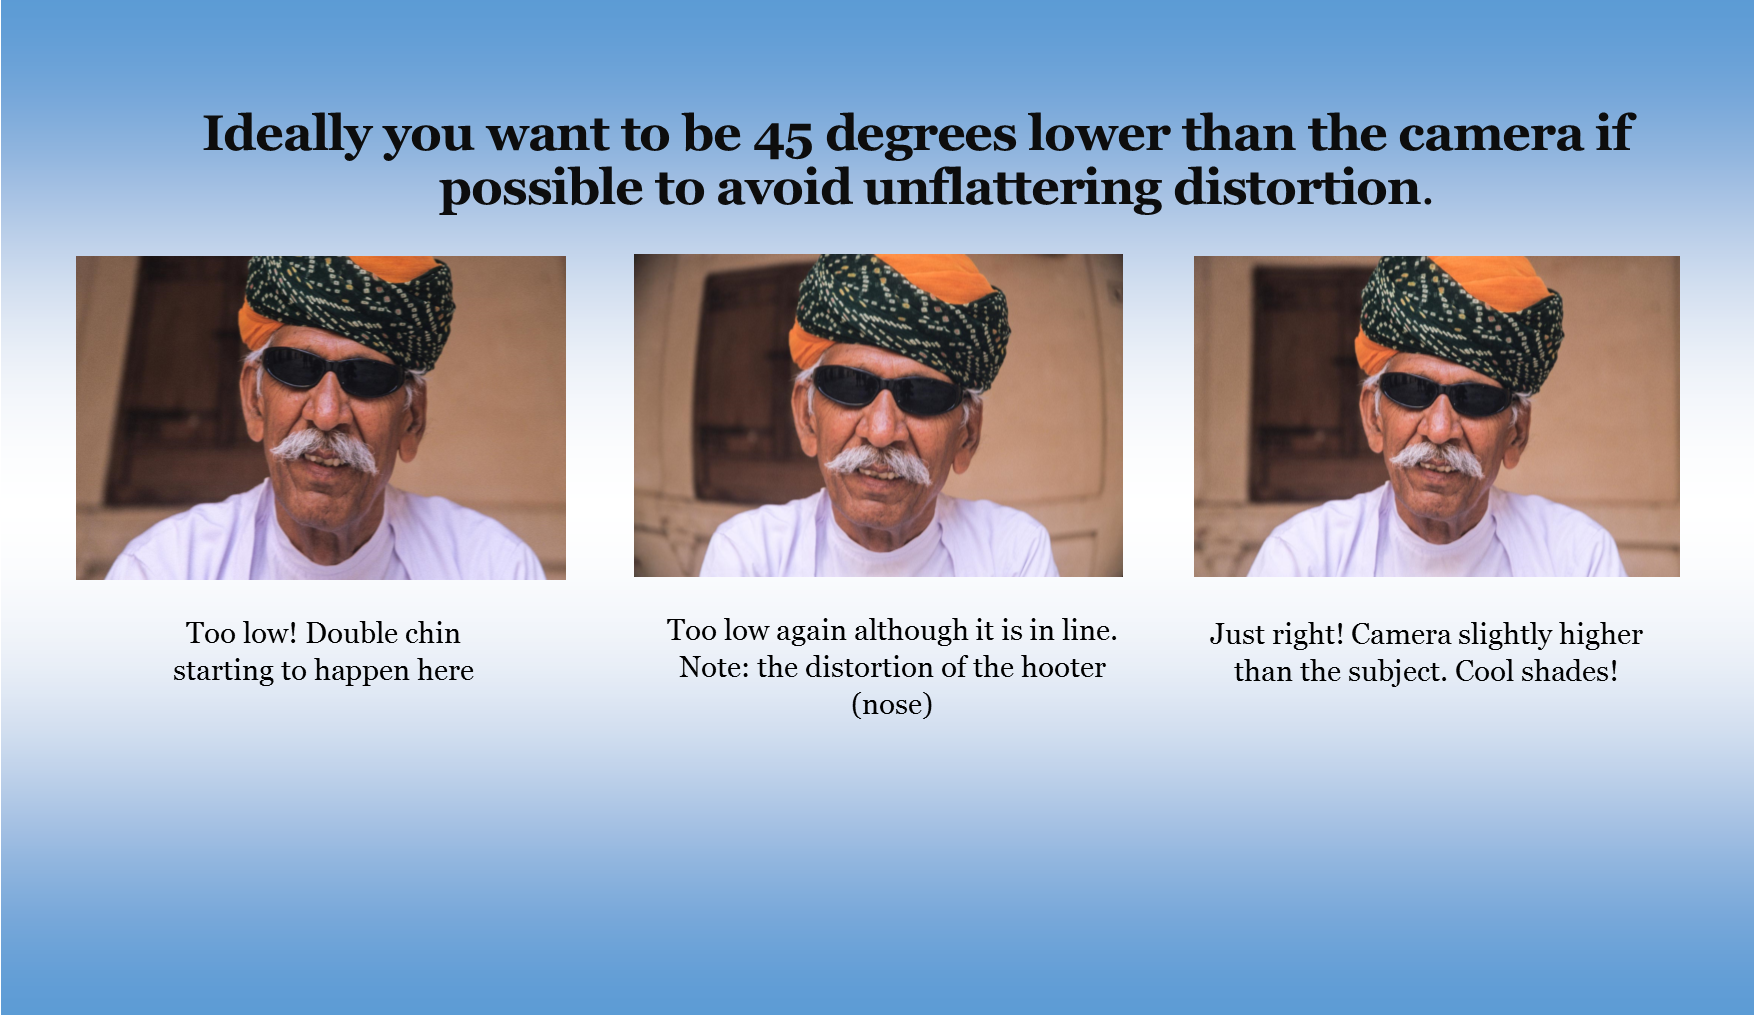
Think about your position. Ideally you want to be slightly lower than the camera if possible to avoid unflattering distortion.
Now comes the tricky bit. Unless you have someone else helping, you are going to have to focus the camera on your final position, be it a full length or head shot. The easiest way to do this is to put something in that position and then focus on it.
Just press the shutter button and then get into
position.
Take plenty of images, trying different poses
and maybe different locations.
You can’t take too many!
3 Review
Review on your phone and add a filter if you wish. There’s plenty of them out there!
Load the images onto your computer.
Look for softness (slightly blurry), unwanted distractions or items and light
Crop if required. You may need to crop for different applications.
Upload to your platform of choice
Finally
Rinse and repeat if need be. You may think you’ve got it right but there’s always room to improve.
Summary for “How to take an ‘awesome’ selfie”
Make sure you are true to yourself and have a
‘selfie’ that truly represents you.
Decide on your orientation and pose
Four crucial factors for selfies are:
Equipment
Light
Mounting
Staging
Set the camera up
Set the scene
Review
Do you see yourself taking some great travel photos that you
can share or display?
Or can see yourself reliving your travel experience by
bringing home some emotive travel photos?
Maybe you want to get your travel photos published.
If one or all of these is YOUR goal, I can help.
If you go to the form below you can sign up and get my free
eBook “9 ways to improve your Travel Photography”.
At the same time, you will also subscribe to my Travel Photo
Tips Newsletter which is exclusive to those who have signed up.
Remember if you want to take great travel photos
that you can share and display.
that help you relive your travel experience
give you a chance to have your travel photos published
Then go to the form below and subscribe to my Travel Photo Tips Newsletter and for your trouble get my eBook “9 ways to improve your Travel Photography”
Any questions then please write your comments below or contact me here
Now that you’ve got down this far can I ask a favour.
Please share this with anyone who is going on a trip and
wants to take and bring back some great travel photos.
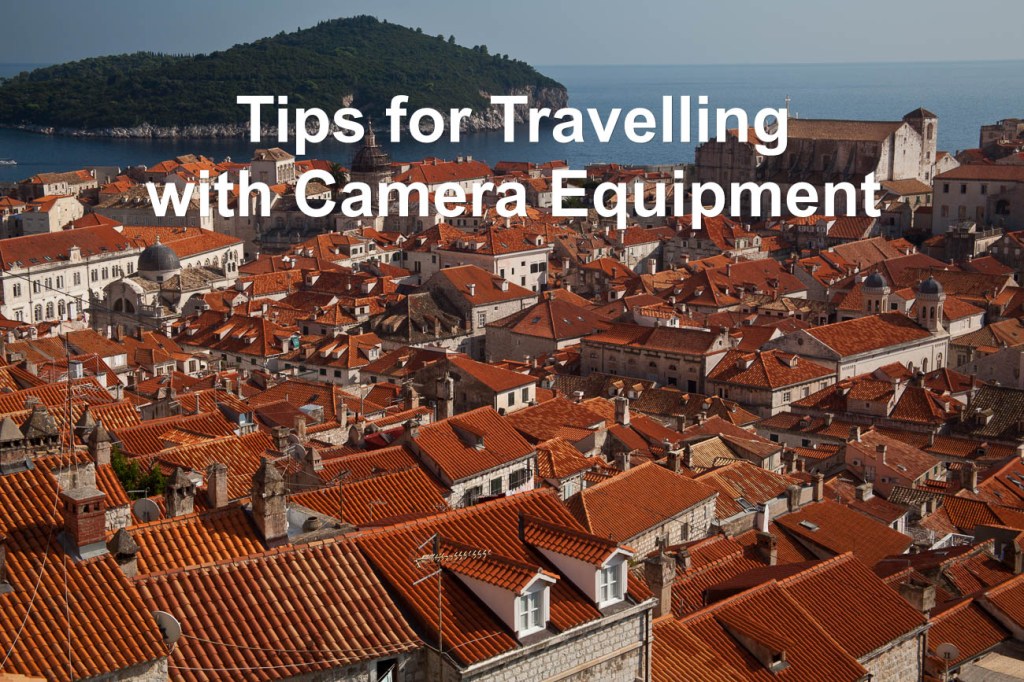
Rooftops of Dubrovnik’s old town. click on the image for other views
If you are off on some travels soon and you want to ensure that you make best use of photographic opportunities you will discover, it’s worth having a plan. Especially about the Camera Equipment you are going to take with you.
However, it’s always worth getting other perspectives.
Rooftops of Dubrovnik’s old town. Used extensively in the Game of Thrones TV series. Click on the image for a larger view
This episode of the podcast TWIP (This Week in Photo) is called “Why you be trippin”. In it Frederick the host, is joined by 2 travel photographers, frequent-flyer Jeff Cable and globe-trotting photographer Giulio Sciorio. They discuss what camera equipment to take with you, and what to leave at home. They also reveal some secret packing tips that may just change the way you think about luggage!
Do you see yourself taking some great travel photos that you
can share or display?
Or can see yourself reliving your travel experience by
bringing home some emotive travel photos?
Maybe you want to get your travel photos published.
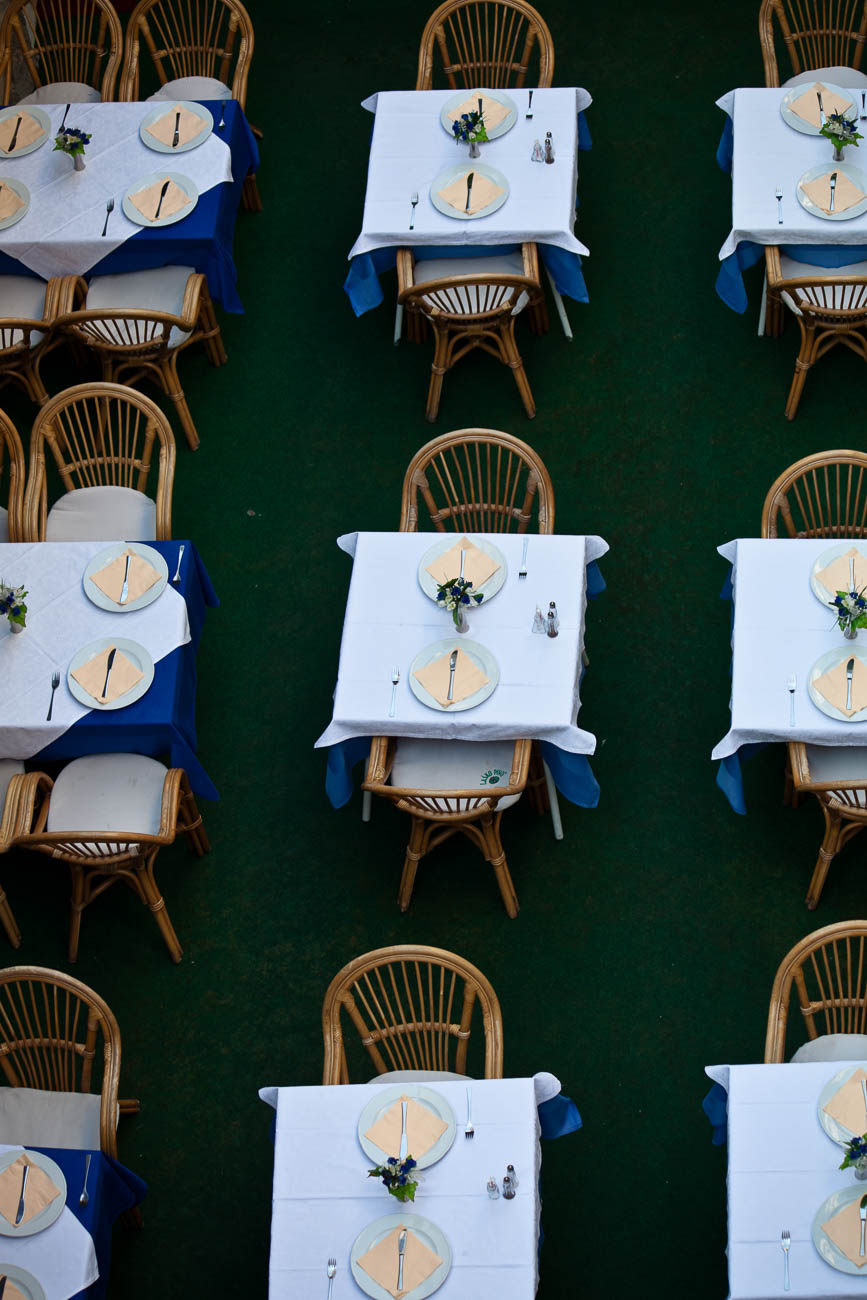
An aerial view of a cafe and it’s tables settings in Dubrovnik, Croatia. Click on the image for a larger view
If one or all of these is YOUR goal, I can help.
If you go to the form below you can sign up and get my free eBook “9 ways to improve your Travel Photography”.
At the same time, you will also subscribe to my Travel Photo
Tips Newsletter which is exclusive to those who have signed up.
Remember if you want to take great travel photos
that you can share and display.
that help you relive your travel experience
give you a chance to have your travel photos
published
Then subscribe to my Travel Photo Tips Newsletter and for your trouble get my eBook “9 ways to improve your Travel Photography”
Any questions then please write your comments below or contact me here
Now that you’ve got down this far can I ask a favour?
Please share this with anyone who is going on a trip and
wants to take and bring back some great travel photos.
You’ll not only be doing both them and me a favour.
In The basics of camera equipment – Best camera equipment for travel photography, I mentioned That “despite those who say its’s not about the gear, you need a camera that will suit your style and objectives.” This is especially true when you are off travelling. Having a camera that you are comfortable with and that can help you take photos that you will proud to bring home with you is essential.
In the first of this series I will defer to some reputable camera reviewers who can help guide you.
Do you see yourself taking some great travel photos that you can share
or display?
Or can you see yourself reliving your travel experience by bringing home some
emotive travel photos?
Maybe you aspire to getting your travel photos published.
If one or all of these is YOUR goal, I can help. Sign up in the box below to
subscribe to my exclusive Travel Photo Tips Newsletter.
You’ll also get my free eBook “9 ways to improve your Travel Photography”.
Remember if you want to take great travel photos
that you can share and display.
that help you relive your travel experience
that give you a chance to have your travel photos published
then sign up below and subscribe to my exclusive Travel Photo Tips
Newsletter and for your trouble get my eBook “9 ways to improve your Travel
Photography”.
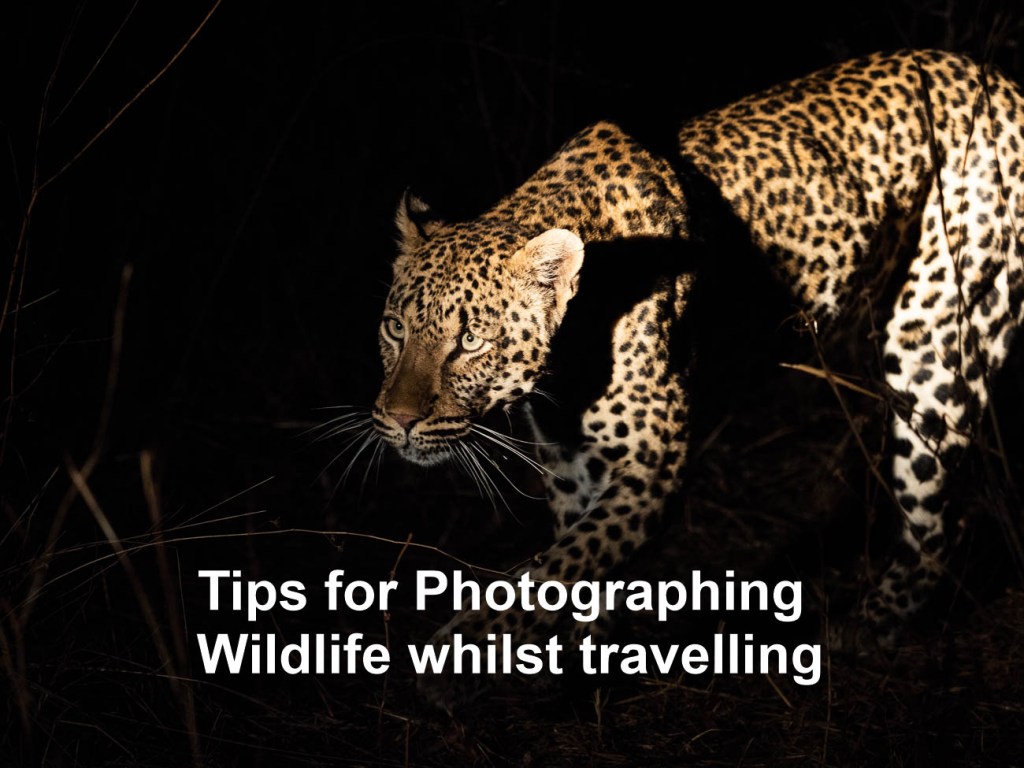
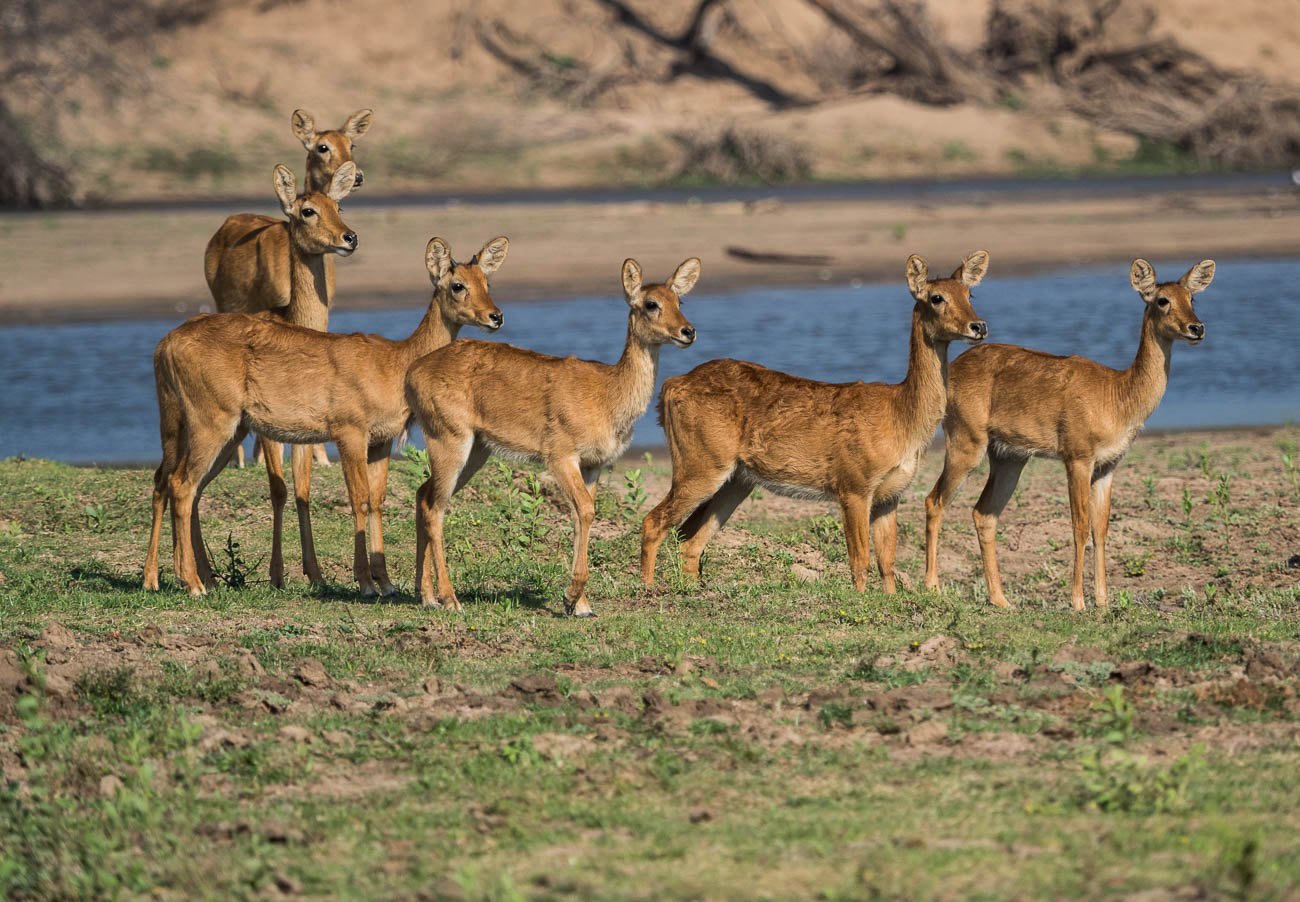
Leopard stalking his prey in South Luangwa NP in Zambia
In Tips to Prepare for Photographing Wildlife while Travelling I gave you some handy tips on preparing for photographing wildlife while travelling. Now it’s time to give you some tips on actually photographing wildlife whilst travelling.
As I stated in the previous article travellers like us will never reach the level of expertise of a wildlife photographer. Of course, if you aspire to be a wildlife photographer that’s different. But in general, there are photographers out there who specialise in photographing wildlife. They are meticulous in their preparation. They leave almost nothing to chance, have lots of patience and spend a huge amount of time trying to get that “shot”.
So now to the tips
Puku near a riverbed in south Luangwa NP Zambia
Basic equipment.
1. Zoom or Telephoto lenses. This is non-negotiable. Sure you can take
pictures without a zoom if you have a long fixed or prime lens. But that’s
restrictive as you can only be a set distance away. Having a long zoom of at least
300mm (in 35mm) gives you flexibility.
2. Either a DSLR or Mirrorless camera so you can swap out lenses. You
also get better control of the exposure and focus with an interchangeable lens
camera.
3. Smartphone? Well unless you going to get really close, which in most
cases is not recommended, leave it for the happy snaps.
4. If you want to get serious get a fast write speed memory card.
Nothing worse than shooting away only to find the camera is buffering.
5. Weather protector like a hood or a Rain
and Dust Cover for your camera. Going on safari or wildlife spotting can
often be dry and dusty or wet and raining. Don’t forget to protect the rest of
your gear as well. Most backpacks come with rain covers that offer a reasonable
amount of protection against both the rain and dust.
Settings:
1. Aperture Set to wide open (lowest F-Stop). And on Aperture priority
(A). Why?
A couple of reasons: You want to make sure that you eliminate any background distractions as much as possible. You also want to allow plenty of light in. See also no 2.
2. ISO
Set to auto Even in the tropics or sub tropics, light can vary from bright sunshine to dark shadows. More often than not, animals tend to be in the shadows. Where it’s quite dark you may need to override the auto and set the ISO to an even higher setting.
3. Shutter
As you should have the camera set on Aperture priority the shutter will
take care of itself. Unless of course you are looking to try some advanced
motion techniques which is outside the scope of this article.
4. Focus
Think you can take wildlife photos with your camera set to manual focus? Think again! You need your focus set to auto. Animals are always on the move. Even if they are lying down, they can jump up quickly leaving you struggling to maintain focus on auto, let alone manual
Lilac breasted roller in South Luangwa NP Zambia
5. Frame Speed
Set your frame speed to continuous or sequential or whatever your camera’s equivalent is. You’ll need to do some controlled spray and pray in some instances. Note: Check the camera default setting for continuous. I didn’t check the number of frames per second on a new camera. I ended up with 100 shots of an elephant hardly moving, as the default setting was 60FPS.
Last tip: GET UP CLOSE
There are some basic rules in getting up close to wildlife:
1. Be very careful in choosing what wildlife to get close to. They are
WILDlife which means they can be unpredictable. So stay safe
2. Where possible use a telephoto lens to get a close up shot.
3. Be quick. Wildlife is always on the move. If you are close you will
need to have your wits about you. It’s easy to get distracted when you are
behind the camera.
4. Consider using a shutter speed of 1/250 to reduce the chance of blur
5. As I mentioned in point 5 of the previous section, it’s worth
setting your frame speed on continuous or sequential.
6. Sometimes the wildlife is behind a fence or in a cage, or you are
the one in a cage or compound, as I’ve experienced. In these cases, it is
possible to reduce or totally eliminate the wire of a fence or cage in a photo,
by going up close. Same applies to any glass enclosures found mostly in Zoos.
Get up close and have your lens, or lens hood, touching the glass to reduce
reflections.
Hyaena in South Luangwa NP in Zambia
Extra tip on this one is that you can also use a polariser filter to reduce
reflections
Summary of 16 Tips for Photographing Wildlife whilst travelling
· Unless you are prepared to invest in a lot of time and patience it is
extremely unlikely that you will consistently take ‘National Geo” quality
photos
· For best results use an interchangeable lens camera with a Zoom
lenses
· In most cases it’s best to have a wide-open aperture (small F-Stop),
ISO set to auto, Focus on Auto and Frame speed should be set to continuous
· Get in close, if not physically then with your telephoto zoom lens
Thanks for reading this article
Do you see yourself taking some great travel photos that you can share
or display?
Or can you see yourself reliving your travel experience by bringing home some
emotive travel photos?
Maybe you aspire to getting your travel photos published.
If one or all of these is YOUR goal, I can help. Sign up in the box below to
subscribe to my exclusive Travel Photo Tips Newsletter.
You’ll also get my free eBook “9 ways to improve your Travel Photography”.
Remember if you want to take great travel photos
that you can share and display.
that help you relive your travel experience
that give you a chance to have your travel photos published
then sign up below and subscribe to my exclusive Travel Photo Tips
Newsletter and for your trouble get my eBook “9 ways to improve your Travel
Photography”.
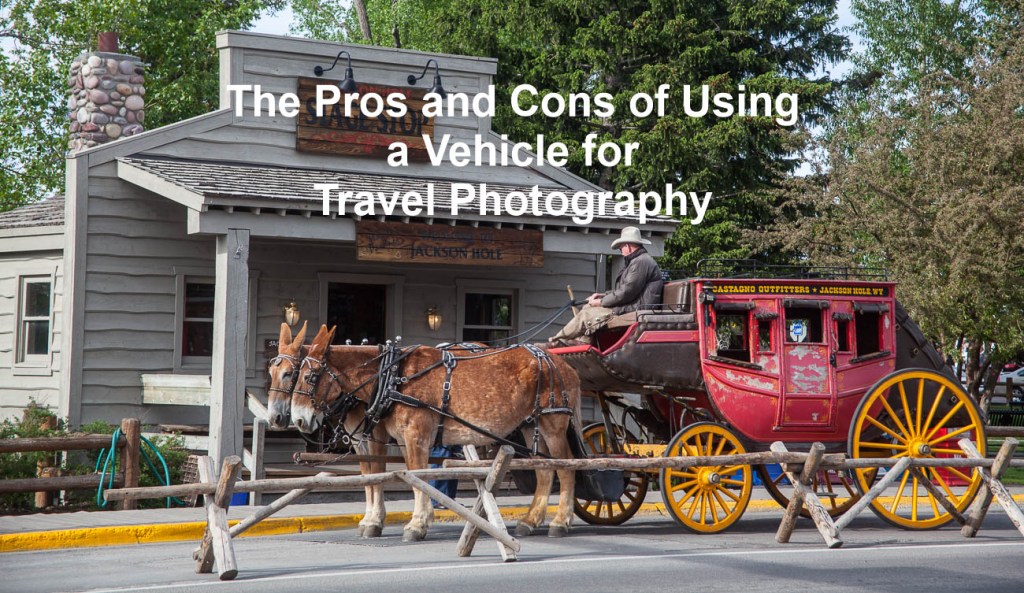
Whilst we tend to think of photographic
equipment as items that closely assist in taking travel photos. One piece of
equipment is rarely mentioned.
What is that?
Well one that should be the most expensive,
a motorized vehicle.
In the video below from Mitchell
Kanashkevich (website) he does
a great job of explaining the pros and cons of having wheels whilst travelling
and taking travel photos.
There are some countries where driving
yourself can be dangerous and others easy.
But a lot depends on your own comfort
level.
I’ve met people who won’t drive a vehicle
in any country that doesn’t drive on the same side as their home.
And then I’ve met others who would drive
anything anywhere with no concerns at all.
I tend to think that it’s horses for
courses.
I’ve hired and bought vehicles in several
different countries but also used public transport.
I adopted the latter approach by using nothing but public transport for 3 weeks in Japan last year.
Those bullet trains are unbelievable!
The Shinkansen Bullet Train in Japan
Enjoy!
Do you see yourself taking some great travel photos that you can share or display?
Or can see yourself
reliving your travel experience by bringing home some emotive travel photos?
Maybe you want to get
your travel photos published.
If one or all of these
is YOUR goal, I can help.
If you go to the form below you can sign up and get my free eBook “9 ways to improve your Travel Photography”.
At the same time, you
will also subscribe to my Travel Photo Tips Newsletter which is exclusive to
those who have signed up.
Remember if you want
to take great travel photos
• that you can share and display.
• that help you relive your travel
experience
• give you a chance to have your
travel photos published
Then subscribe below to my Travel Photo Tips Newsletter and for your trouble get my eBook “9 ways to improve your Travel Photography”
Any questions then please write your comments below or contact me here
Now that you’ve got down this far can I ask a favour?
Please share this with
anyone who is going on a trip and wants to take and bring back some great
travel photos.
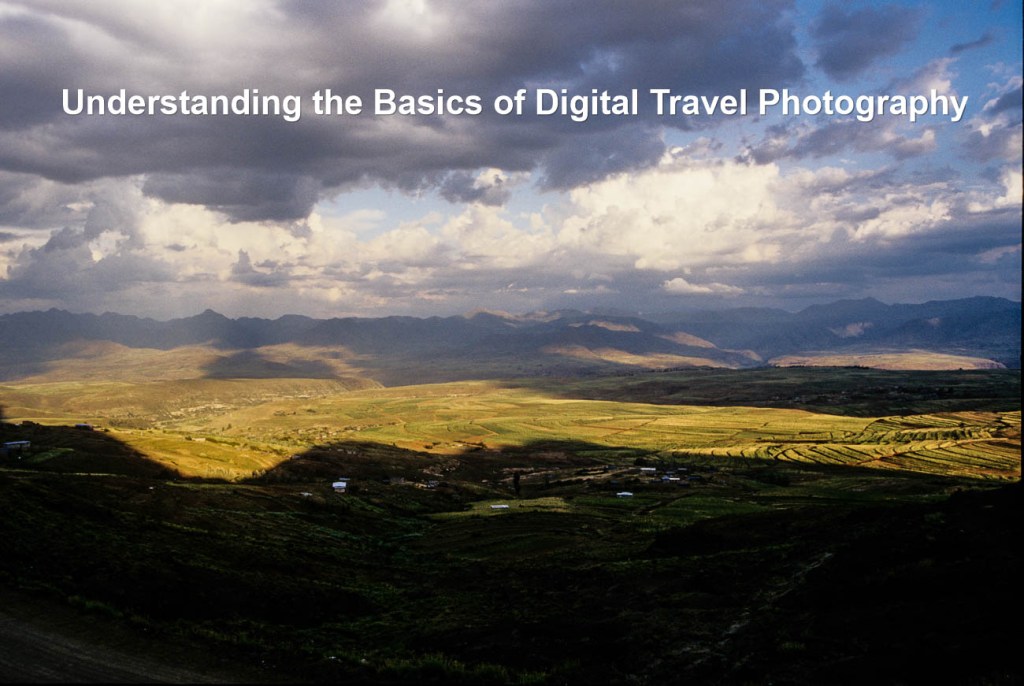
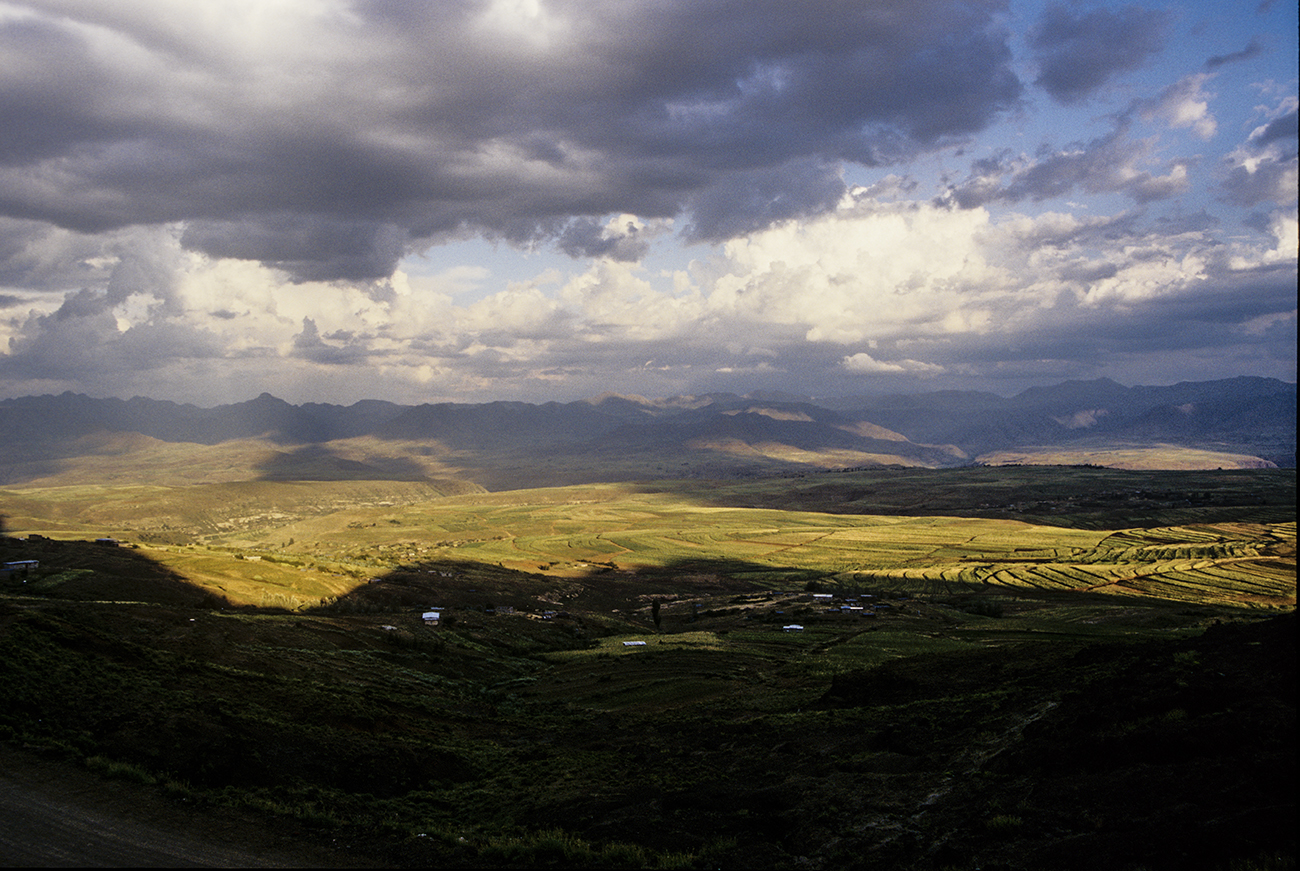
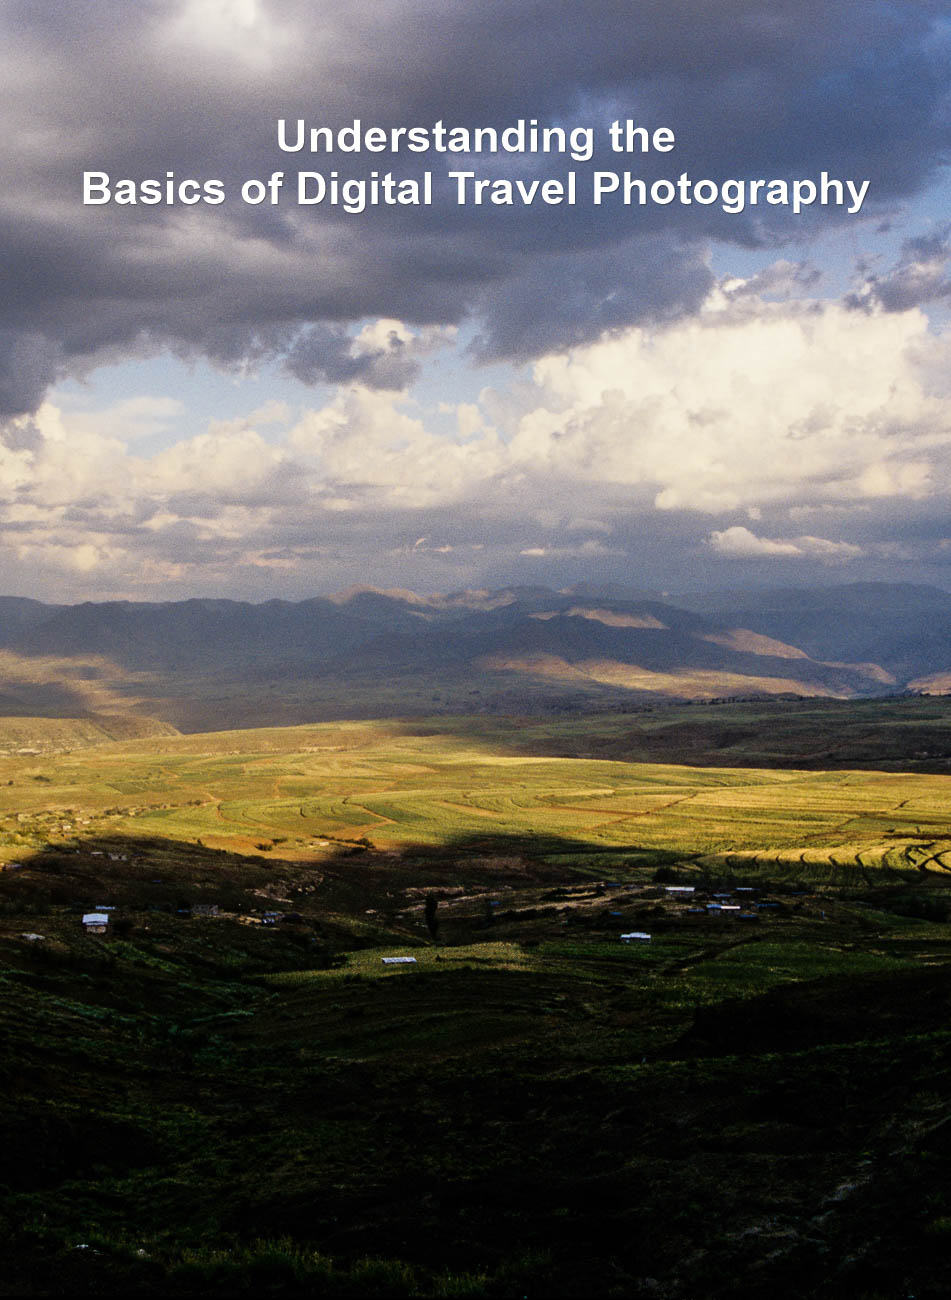
Maloti Mountains of Lesotho in the late afternoon light.
The majority of us use digital cameras these days for our travel
photography.
But do we really understand it?
In this article, understanding digital travel photography, I’ll explain in
simple words, some of technicalities we should all know about digital travel
photography.
Digital Travel Photography
So, what is digital travel photography? Well of course we know what travel photography is, don’t we? If you don’t, head over to An Introduction to Travel Photography to get a better understanding. But what about the digital bit? When we push that shutter button whether it be a physical or virtual one, a complex process takes place in less than a second. Let’s look at the components of this process:
Hoh river rainforest on the Olympic Peninsula, Washington, USA Click on image to see a larger view
The Sensor
The heart of all cameras is the sensor. It’s integral to the camera as it
dictates pretty much everything.
There are lots of different sensors manufactured, but the most common in
digital cameras are the CCD (Charge Coupled Device) and the CMOS (Complementary
Metal Oxide Semiconductor). Sensors are semiconductors that consist of a grid
of tiny light-sensitive cells called photodiodes.
Because photodiodes are black and white devices, a coloured filter is placed
over the sensor so it can record colour.
When you take a photo, you allow light to hit the photodiode which then
generates an electrical charge.
The individual photodiode records the brightness and colour of the light and
generates a pixel that is placed in a grid.
The number of pixels in the grid determines how much information is recorded.
Sensor Quality
The sensor’s quality is affected by how the following factors:
a. The physical size of the sensor.
b. The build quality.
c. The quality, size and spacing of the actual pixels.
d. The way the camera’s image processor treats the data.
Photo by Mika Baumeister on Unsplash
Sensor Size
Larger sensors allow the use of larger pixels, which can process more light. Usually that results in the capture of sharper images. Sharper images have more detail, less noise, wider dynamic range and smoother tonal gradation. But it doesn’t stop there. For example, I have an Olympus OMD1 MKII and a Canon 5D MKII. Whilst the Canon is a lot older, it is a full frame camera which means it has a larger sensor than the Olympus which has a crop sensor of 1/2. The image quality on both is excellent and I would challenge anyone to tell the difference. In fact, my opinion is that the Olympus is slightly better. And I’m taking into account that it could also be because of a difference in the quality of the lens.
Resolution
Ah, resolution! Disturbingly misunderstood and incorrectly used as a
benchmark of quality
A camera’s resolution is the number of pixels on both the vertical and horizontal sides of the sensor. That’s called the total pixel count and is usually in the millions and is described in megapixels (MP). One million pixels equal a megapixel. For example, a camera with a sensor size of 5184 x 3456 pixels has total pixel sum of 17,915,904. Camera manufacturers round it up to 18 MP and so it is an 18 MP camera. You should find this number somewhere on the camera body. In the past it has been used to justify the price. I.E. More MP’s more dollars! Nowadays that is no longer the case. Although there are exceptions, image quality is much more important. The actual quality of the image file is affected by the same variables used to determine a sensor’s quality. See Sensor Quality
Print Size
The other important factor is the maximum print size that the camera can be expected to produce. This is based on the sensor pixel count.
Most printers print at the international professional standard of 300 Pixels
per inch. Therefore, by going back to the above example 5184 x 3456, you divide
5184 by 300 you get 17.28”.
And then divide the other side 3456 by 300 you end up with a 17.28” x 11.52”
(or 432mm x 288mm) paper size.
Now it’s not my intention to get into the black art of printing. But some
printers will print at 240 whilst others might print at 350.
What does that mean? Well basically if you use the same calculation of 240 then
you can be forgiven for thinking that you will get a bigger print. However, the
quality is not as good because those pixels are being scattered over a bigger
area. On the other hand, printing at 350 should give you a smaller picture but
it actually works out that you will get a better print. There are lots of
articles and charts available online if you really want to get into print
sizes.
The one takeaway is that if you want to print a A4 (8 x 10”) size print you
must have at the very minimum a 7-8 MP Camera. 2400 x 3000 Pixels divided by
300 comes to 8 x 10”. 2400 x 3000 = 7200000 or 7.2MP
A good inexpensive eBook on this whole topic is Making
the Print by Martin Bailey
Screen size
Having said all that, most of us these days only view photos on a screen.
And the smaller the screen the smaller the photos you need to display it
without pixilation.
Most cameras have different “image quality” settings. That’s a rather
misleading way of telling you that you can adjust the size of your images.
That is also usually only for JPEG images as RAW is fixed.
Having smaller images has the benefit of requiring less space with both your
memory card and your computer storage. But can also mean that you are
restricted to a maximum size screen when you view it on a larger screen as it
will drop in quality if you try to enlarge to fit.
If you were to view it’s original size on a larger screen, you will get a
border, usually white, around it taking up the space from the edges of the
image to the edge of the screen.
Conversely viewing an image that is larger than the screen means that you will
not see all the image as it will fill the screen.
In the examples below you can see an image of 4608 x 3456 on a screen of
2560 x 1440 which is on a 25” computer screen. If you look in the right-hand
corner of the second image you can see a box that tells how much of the image
you are looking at.
Whatever software you are using to view will allow you to zoom in or out.
But you can see how the dimensions of an image directly relate to the physical
viewing medium
Upscaling
Of course, there are exceptions.
When viewing images on your TV with something like a Chromecast or an Apple TV
you’ll see that they will fill the screen regardless of size.
That’s because they do a great job of sizing it according to the size of the
TV.
In fact most of the newer TV’s do the same.
That’s called scaling the image.
On a larger TV they usually have to upscale. Although there are limitations of
what these devices and TV’s can do. A very small image of say 320 x 240 Pixels
just won’t be able to be upscaled on a 65” TV and still look great. It may be just
OK but more likely it will be pixelated or shown at its original size.
Summary for understanding digital travel photography basics
· Digital travel photography is the process that happens once you press that
shutter button.
· At the heart of all cameras is the sensor
· A sensor is an electrical device for absorbing light and then transmitting
it in a form of electrical current
· There are several factors that determine the quality of a sensor.
· Resolution is no longer an indicator of quality
· When considering printing always consider that quality printers print at 300 pixels per inch. So size your camera (min 8MP) and then your image accordingly
Viewing on electronic screens allow you the luxury of having smaller image sizes
Thanks for reading this article
There must have been something that piqued your interest.
Is it that you see yourself taking some great travel photos that you can share or display?
Or is it you can see yourself reliving your travel experience by bringing home some emotive travel photos?
Maybe you aspire to getting your travel photos published.
If one or all of these is YOUR goal, I can help.
If you sign up in the box below you’ll get my free eBook “9 ways to
improve your Travel Photography”. At the same time, you will also
subscribe to my Travel Photo Tips Newsletter.
Remember if you want to take great travel photos
that you can share and display.
that help you relive your travel experience
give you a chance to have your travel photos published
then sign up below and subscribe to my Travel Photo Tips Newsletter and for
your trouble get my eBook “9 ways to improve your Travel Photography”
Any questions then please write your comments below or contact me here and please say hello at these places:
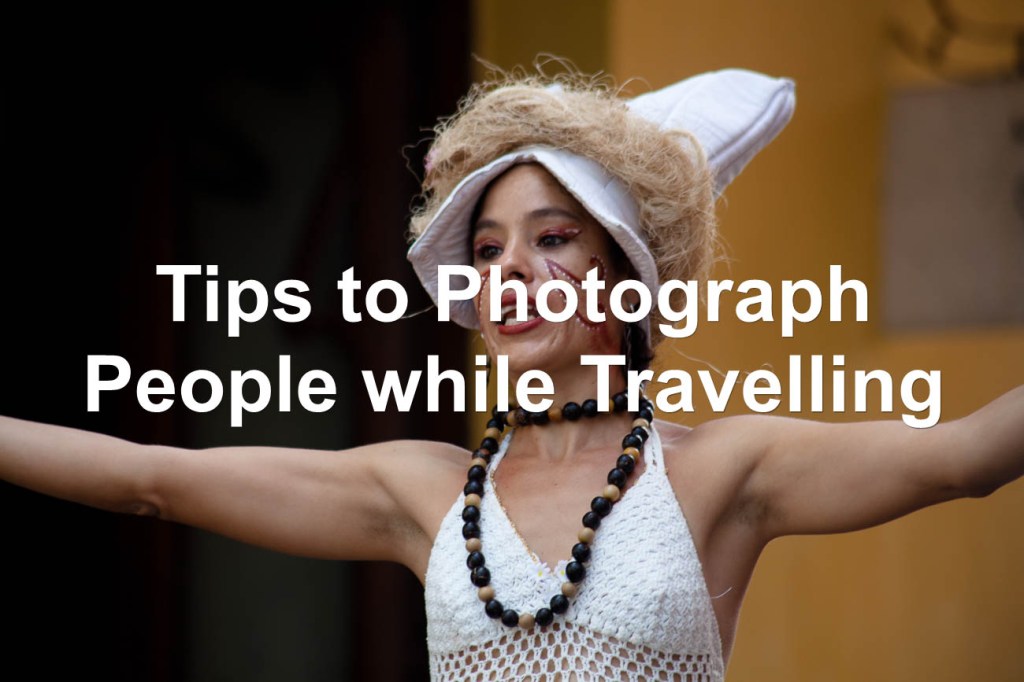
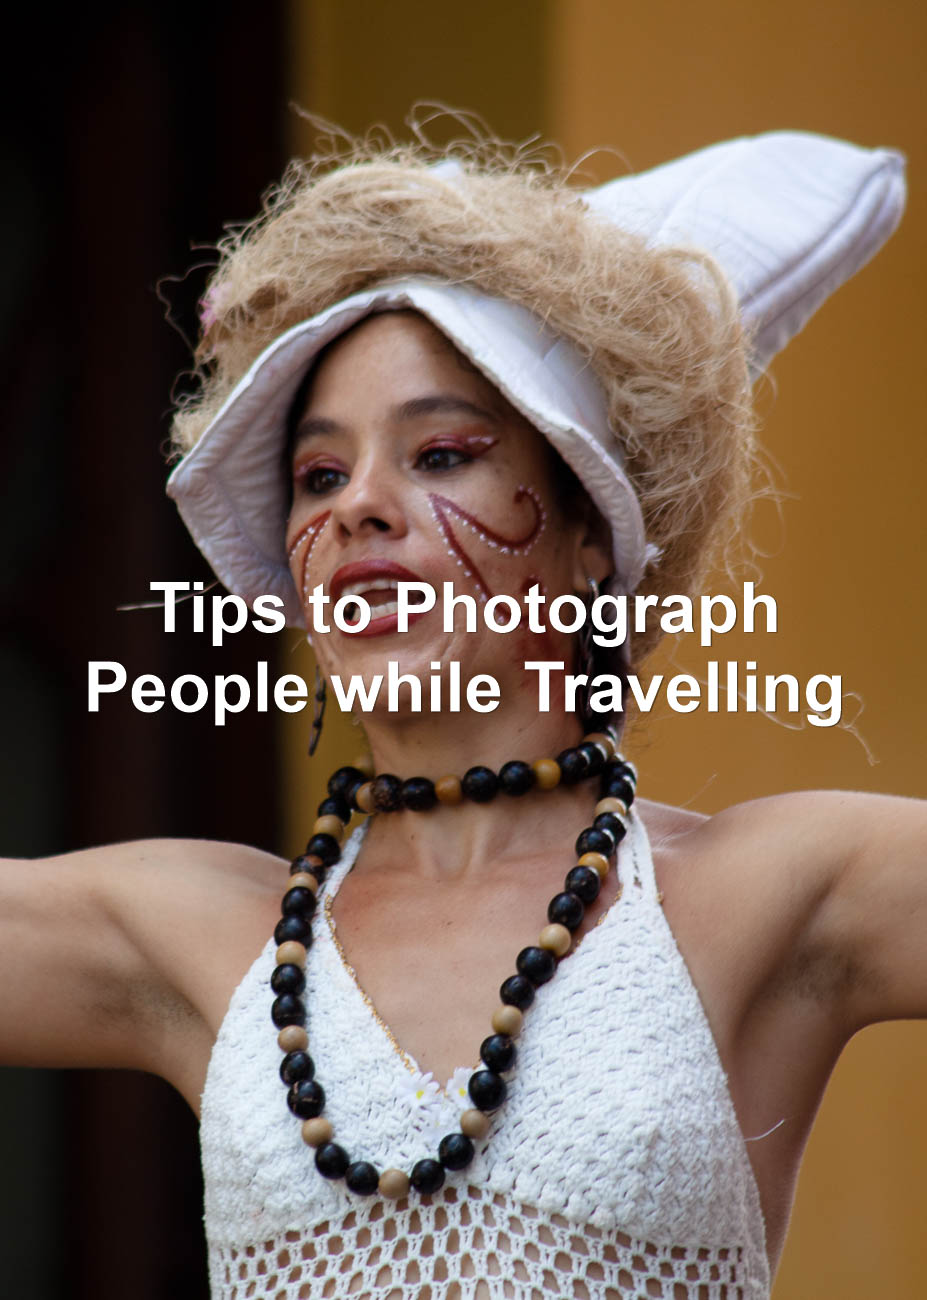
This is quite a common genre. Anybody who travels and takes pictures will need
to know how to take photos of people.
It’s the reason why we travel, although we may not know it. We look to connect,
observe and absorb different cultures and that comes from people
Read on below to get tips to photograph people while travelling
Types of people photos
Photos of people are one of 2 types
Portraits
For the purposes of this article I’m going to describe portraits as posed
photos of people.
In other words they know they are having their pictures taken and are posing
for the camera.
Candid
Candid is taking photos of people, usually but not always without them
knowing that they are the subject.
In other words, they are going about their normal lives.
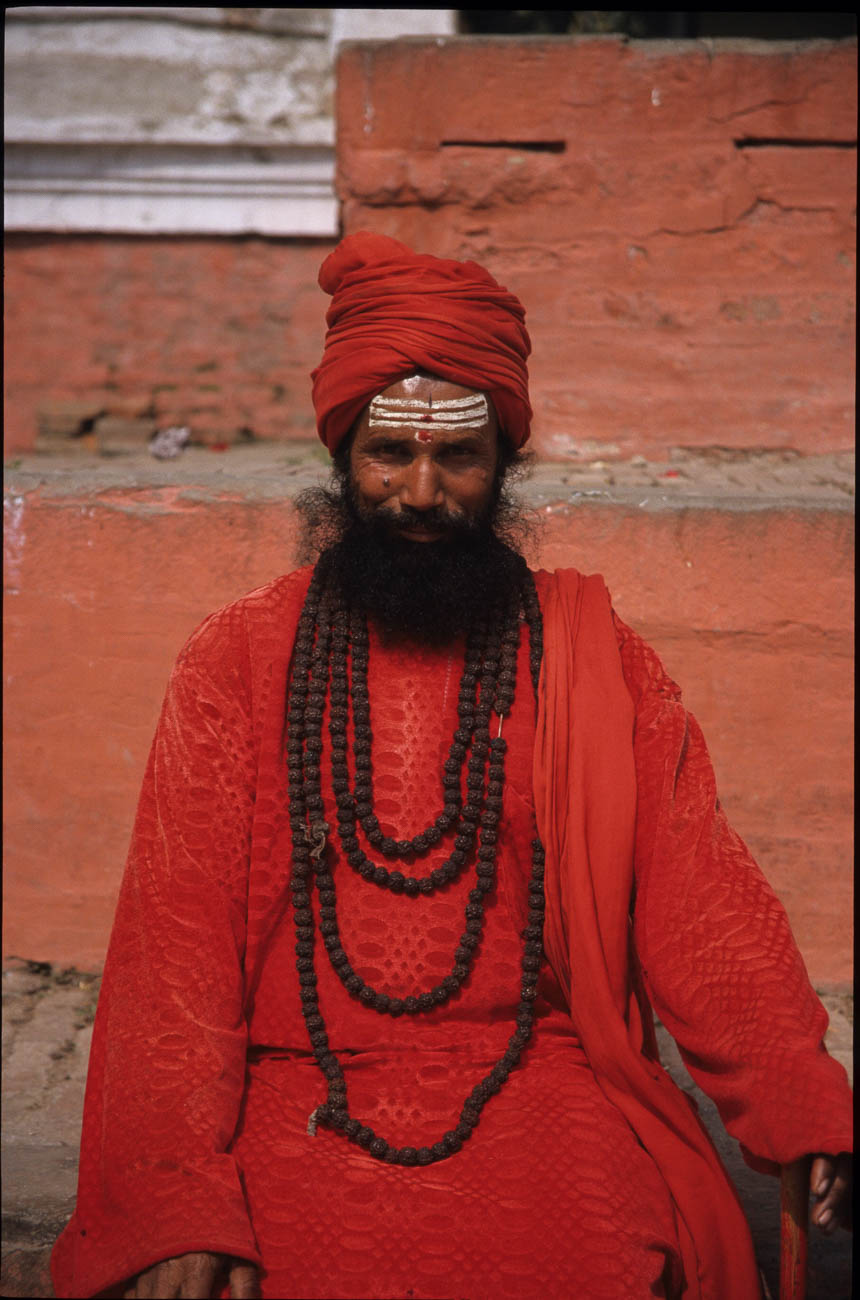
Portraits
Holyman in Durbar Sq Katmandu, Nepal
We all love to get that photo that conveys emotion in bucket loads
Well it takes a little bit of sensitivity and planning.
Sensitivity
Before you do anything or approach anyone you must be across the local
custom and culture.
For example, most of us think that, in general, people in most western societies
don’t have any cultural aversion to having their picture taken.
Yet nowadays the ethnic mix is not only white homo sapiens.
People of all sorts of backgrounds and cultures live permanently in Western
Europe, North America, Australia and New Zealand.
So we need to be just as sensitive in the west as we do when visiting places in
the Middle East or Africa.
Planning
Planning is not only knowing what you want your subject to be doing. But it’s also working out the setting or the area around the type of subject you are looking for. You may be looking for people shopping or serving in a market or walking the street. Whatever it is, have a plan and picture what you want to get out of it.
Once you have taken into account sensitivity and completed your plan that then you need to ask for permission. If you intend taking a posed portrait then you will need to approach someone to get permission. At least that is the polite way, as I’m sure you wouldn’t like someone thrusting a camera in your face.The two main complications in approaching potential subjects are:
The two main complications in approaching potential subjects are:
Cultural sensitivity and
The fact that some people for whatever reason don’t want their picture take
The former is about doing your homework. For example some cultures or religions have a belief that a photograph can steal a soul. Some Australian Aboriginal people have cultural reasons for not wanting their photo taken. If you find this out beforehand then don’t ask! There’s not much you can do about this. Don’t beg or try to bribe. Just move on
Paying money
There will be opportunities to take pictures of people who want to charge
you. You’ll find this usually in developing countries and it’s not expensive.
I’ve had approaches from a bell ringer in Buddhist temple and a Bedouin with a
turban in an Egyptian temple. They wanted me to take their photo at a price.
Relationship
The best way to get permission is to get to know them first.
By that I don’t mean take them to lunch or coffee but have a conversation with
them so that they feel at ease.
If they are being active in some way, ask them what they are doing or ask some
general questions.
Let’s say you want to ask a shopkeeper if it’s ok to take his portrait. Then
you could start by asking about his shop and how long has he had it.
What else does he do? Ask if his family are involved and what they do.
As human beings we love to talk about ourselves and what we are doing.
Most will start to relax once someone takes an interest in them.
Once relaxed that’s a good time to ask for permission to take their photo.
A little tip is to continue the conversation even after taking photos.
If you are subtle about it, you can continue to take photos with the camera
loose around your neck or on a tripod.
A remote release is handy for this because then you are remote from the camera
shutter button.
Sure, some of the images you take won’t be very good. But I bet you can get
some very good pictures because your subject is relaxed and talking instead of
posing.
Taking portraits is challenging and to some can be uncomfortable. But its worth getting out of your comfort zone and asking to take their photo. Once you’ve done it a few times you’ll be surprised at how easy it becomes and how enjoyable it is.
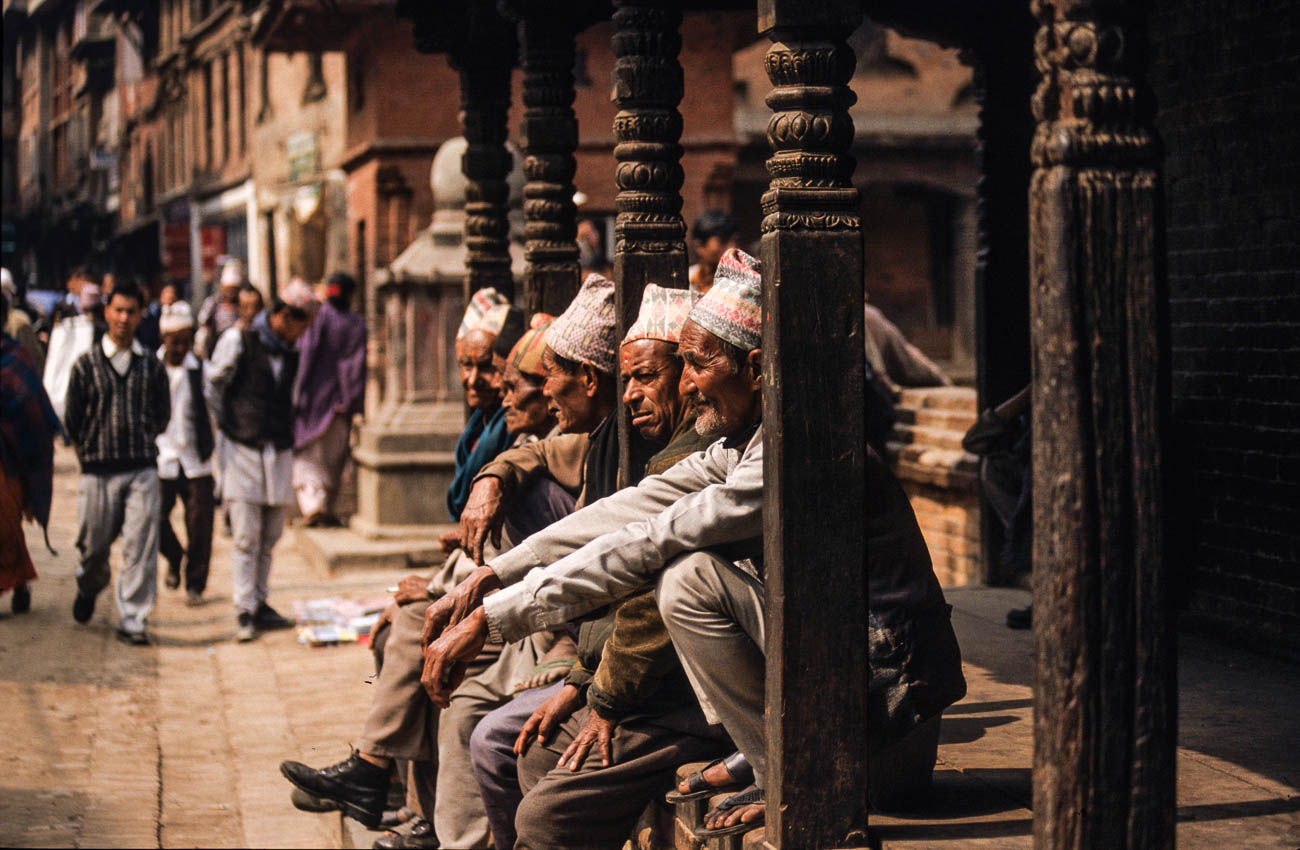
Candid
A group of men sitting on a wall in astreet in Katmandu, Nepal
Of course, if portraits really aren’t your thing or you want to mix it up,
then taking candid shots is the way the go.
Again, the main factors are sensitivity and planning
Sensitivity
Even though you are usually taking photos of people without them knowing.
You do still have to have some degree of sensitivity.
I can remember taking a candid shot of a stall owner in a Marrakesh market. I
didn’t think he saw me, but he did and asked me to delete it.
I could have said no, as in general you can take photos of pretty much anyone
in a public place.
But, I didn’t mean to upset him and gladly deleted it.
I did ask him whether I could take a posed photo which he agreed to. He asked
me to come back later and when I did, he was nowhere to be seen.
Can’t win them all.
So, the point is don’t make it obvious that you are ‘stealing’ a photo.
It’s not just that you might upset someone. It can work the other way where
they actually pose which may not be what you were after. Or they could put
their hand out for payment which I’ve discussed earlier
Planning
Planning for candid photos can be as in deep as knowing exactly what photos
you want to take.
Or doing what a lot of street photographers do and park yourself in one spot,
cafés are good for this.
Then wait patiently for opportunities to present themselves.
Of course walking the streets keeping your eye out for opportunities can also
work.
I will say, that whilst you are on the move you can easily get distracted so
you tend not to anticipate what’s likely to happen.
Techniques
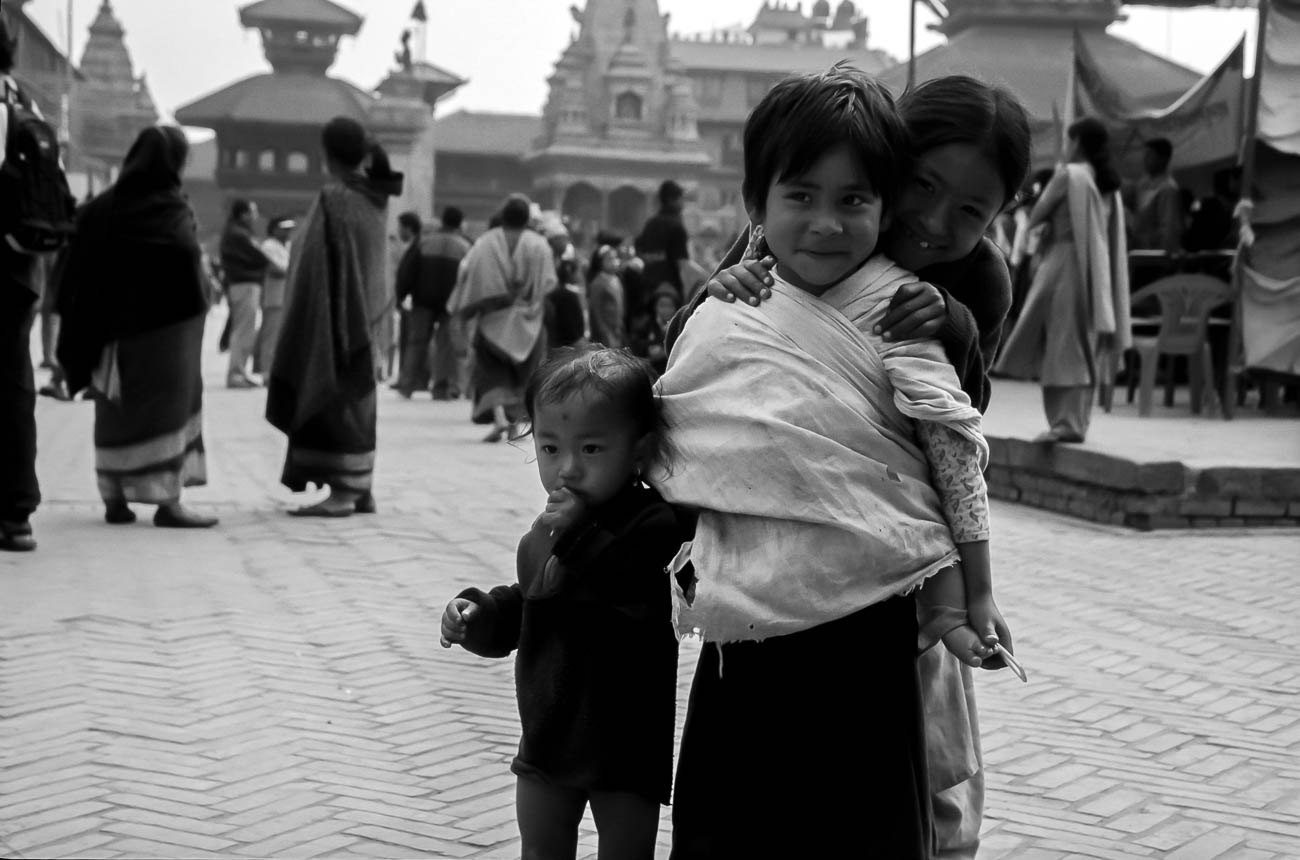
Children, toddler and baby in Bhakatupur square, Bhakatupur, Nepal
There are various schools of thought on how to set up your camera for
Portrait and Candid shots.
A lot also depends on what equipment you have.
For both 80-105mm in the old language is standard.
Some photographers like to use a wide angle, say 24mm.
Others like the look of the compression created by zooming in with a long
telescopic lens.
If you want that blurry background with the subject nice and crisp, then you
will need to go for a large aperture (small F-stop). The equivalent of f2.4
should do it. Of course, not all cameras give you that option. Most smartphone
can’t at all without some devilish app trickery.
If on the other hand you are taking photos where the person is part of an
overall scene, then an aperture of F8-11 will do the job.
Whatever settings you need, make sure they are set correctly. Especially
before embarking on taking people portraits.
Don’t make your subject wait for you to set up the camera. They will soon run
out of patience. And you will be putting yourself under unnecessary pressure.
Light
Of course, the above recommendations are for ‘normal’ light.
If the light is poor, then you will need to make sure your ISO is set quite
high. If you have it set to auto then it might be already.
The alternative is having the aperture set as wide as you can, to let what
little light there is in.
Summary of Tips to Photograph People while Travelling
There are two main ‘genres’ of people travel photos.
Portrait
Portraits are taking photos of people who are posing. I.e. They know they
are having their photo taken
Candid
Candid is taking photos of people usually without them knowing that they are
the subject.
To take people photos it’s important to:
Plan well
Be sensitive to local cultures and respect the wishes of the individual
Be ready to recognise and take advantage of any opportunities
Have your Camera on the correct setting.
What to do now
You’ve got down this far and I do appreciate that.
There must have been something that piqued your interest.
Is it that you see yourself taking some great travel photos that you can share
or display?
Or is it you can see yourself reliving your travel experience by bringing home
some emotive travel photos?
Maybe you aspire to getting your travel photos published.
If one or all of these is YOUR goal, I can help.
If you sign up in the box below, you’ll get my free eBook “9 ways to
improve your Travel Photography”. At the same time, you will also
subscribe to my Travel Photo Tips Newsletter.
So, let me repeat that.
If you want to take great travel photos
that you can share and display.
that help you relive your travel experience
give you a chance to have your travel photos published
Then sign up below and subscribe to my Travel Photo Tips Newsletter AND get
my eBook “9 ways to improve your Travel Photography”
Any questions then please put your comments below or contact me here and please say hello at these places: