

How to Hold a Camera Correctly
So, you think you can hold a camera or smartphone correctly?
Well how do you know?
In this article learn why camera shake can be avoided with a little of knowledge.
Take a good look at your photos.
No, not on the camera or phone screen but on your PC, Mac or Laptop. Even a tablet is better than a smartphone or camera screen but the bigger the better.
Now does it look really sharp or does look a little bit blurred (the industry phrase is “soft”) in parts or may even a quite a bit blurred?If so, there is a good chance you are not paying enough attention to the fact that a camera moves when you hold it. Now that’s not the camera moving on its own but you moving it.
Got It?
Techniques
Now there are several techniques to overcome this but I’m going to basically cover how you should be holding your camera and smartphone.
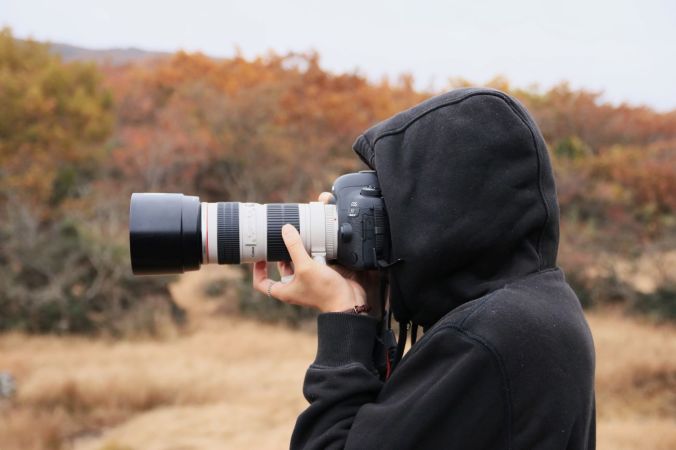
Camera with a Viewfinder.
- If it has a view finder – then use it!
- When you use the view finder you are putting the camera up to your face and therefore bracing it on your face.
- Now to add to that, tuck your elbows in against your side.
- Depending on the weight of the camera, grip one side with one hand usually the right where the shutter button is and the position the other hand underneath the body or if it’s a fairly long lens then under the lens. .
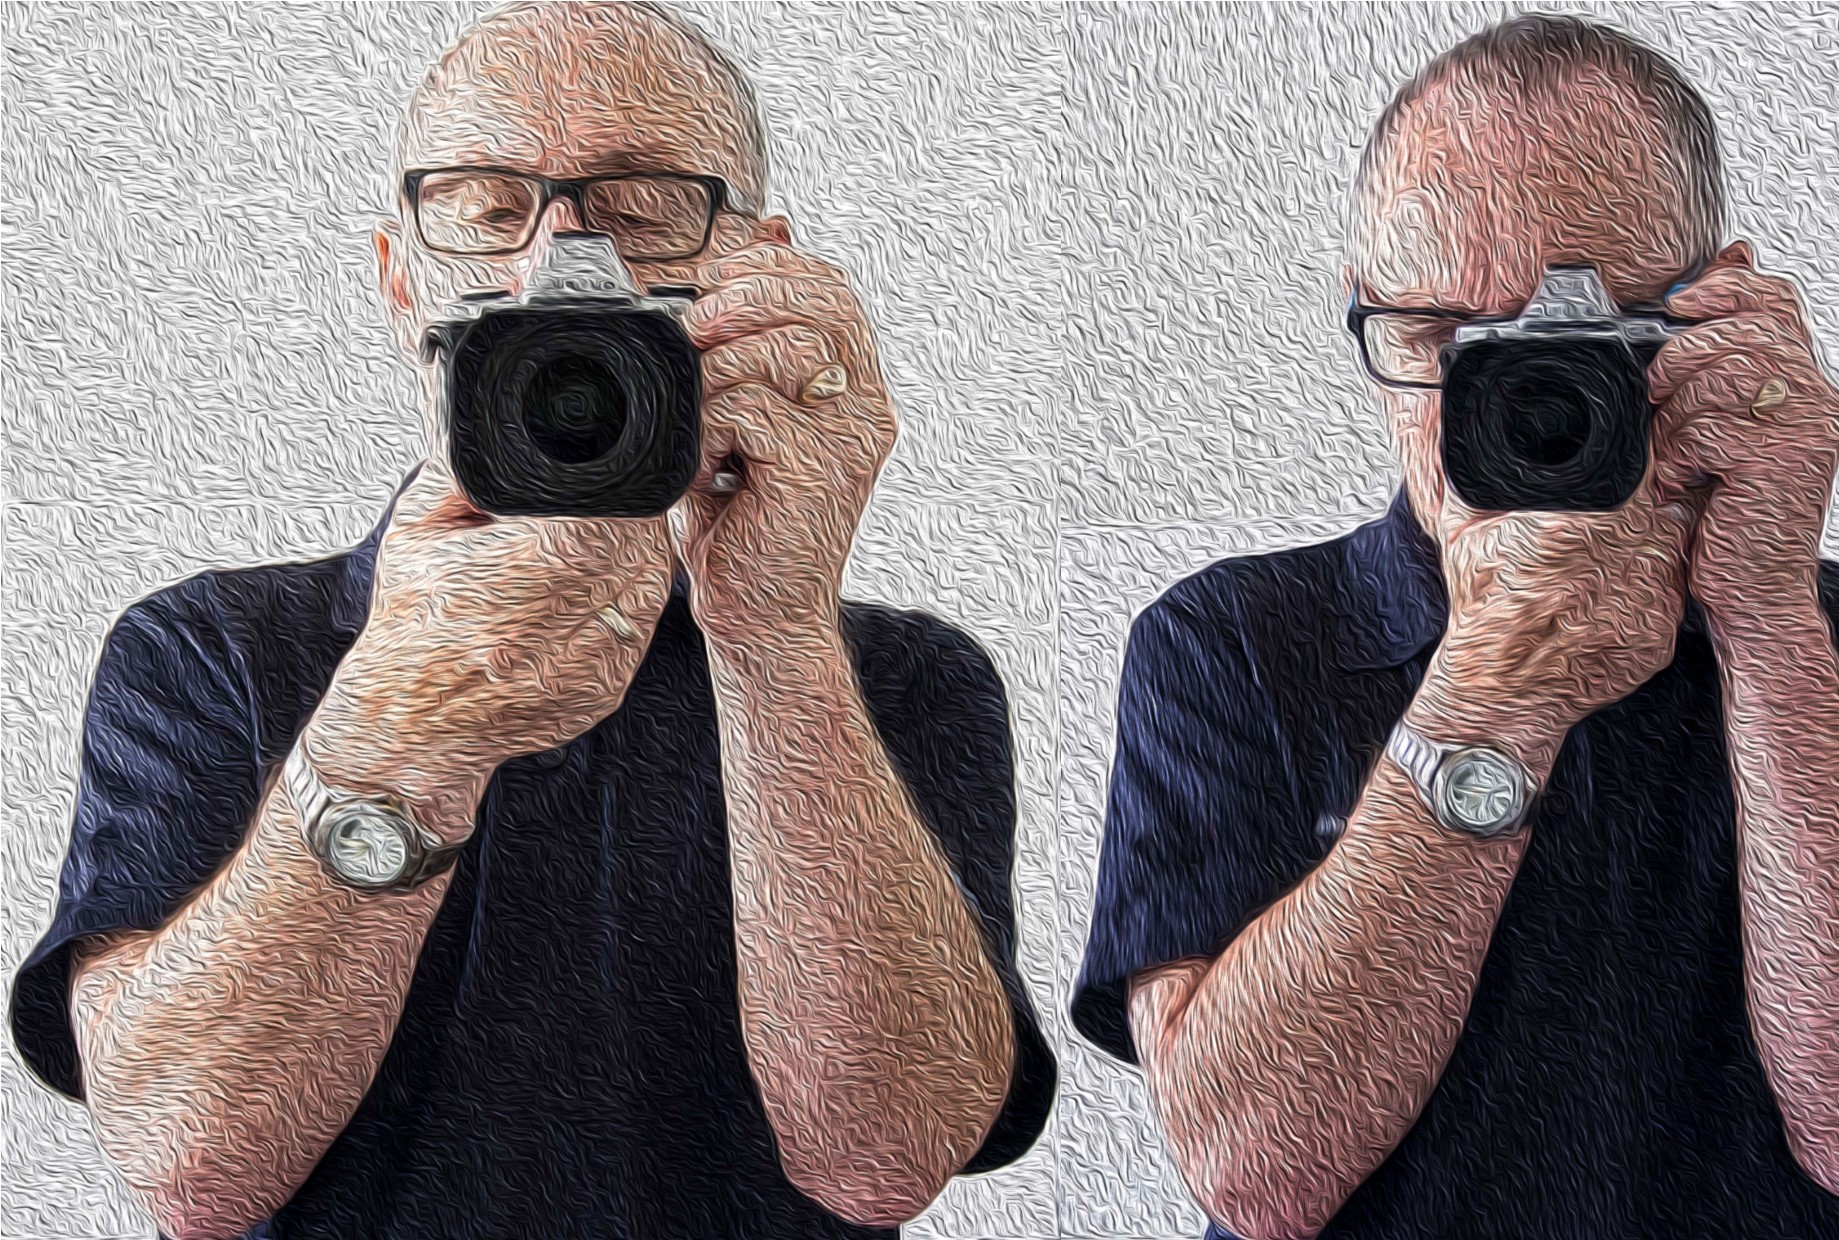
Camera with no Viewfinder
Ok so it doesn’t have a viewfinder or you don’t want to use it!
If either one of those is you. You need to know that:
- The overwhelming majority of people taking pictures using the view finder do not hold it correctly
- And consequently get pictures that are ‘soft’.
If you have studied physics you will know what the pendulum theory is.
Holding the camera at arm’s length creates a pendulum effect and ‘soft’ or blurry photos unless the light is very good and you have a high shutter speed.
So just like using the viewfinder tuck those arms in against your sides and bring the camera closer to your eyes.
- Again, depending on the weight of the camera, grip one side with one hand usually the right where the shutter button is and the position the other hand underneath the body or if it’s a fairly long lens then under the lens.
- Ideally you want to stand with your legs shoulder width apart so that you well grounded.
- If there happens to be a handy surface, say a wall, rest the camera on that.
- Alternatively you can support yourself against a vertical surface such as a tree or a wall if practical.
- The portrait position is similar for both the viewfinder and rear screen.
You just need to decide which side is more comfortable for the shutter button. The shutter speed at the bottom is the most practical so that you can use the bottom to help support the bottom of the camera.
The Smartphone
- Most smartphones these days have the option to operate the shutter with a physical button like a volume control instead of tapping the screen.
So, if you have that option then use it! Especially for the landscape position. - As with a camera most people using a smartphone camera often don’t hold it correctly. So tuck in your elbows
- Use both hands. It gives me nightmares watching some people take photos one handed.
With a smartphone, you need to use 2 different handling techniques. - In the horizontal or landscape position hold it with your hands in the same spot on each side.
- With whatever hand you are using to press the shutter button make sure you have that trigger finger free so that you can tap the virtual shutter or press the physical shutter button.
Now the vertical or portrait position is bit trickier. - If you are using a physical shutter, then hold the phone with whichever side it’s on and curl it around the back the lens with the thumb operating the shutter.
- The other hand can hold the bottom of the phone with the index finger and thumb.
- For a virtual button the difference is that it’s the hand at the bottom that presses the virtual button and can’t in that case grip the bottom of the smartphone at the same time.
- When in portrait mode, it’s often better to use the virtual button.

Other Situations
- In some situations, you may not be physically vertical.
- You may have to lie or sit to take the photo.
- If you are lying down, you have the added support of the ground or floor but you need to rest the elbows on the ground or you will end taking a steady image of the ground which may not be your intended subject.
- If you are sitting, then usually there is something you can rest the camera on.
Other ways to avoid that Blurry or soft Photo.
- Use a tripod,
- Have image stabilisation turned on (if fitted),
- Ensure that your shutter speed is fast enough,
- Use the timer
- And so on.
But this piece is just the basics on holding the camera.
More on those tips on the next post.
If you have any tips, please don’t be shy just stick ’em in the comment box below?
Is there anything else that you want explained? Again just ask.


Leave a comment