
The majority of us use digital cameras these days for our travel
photography.
But do we really understand it?
In this article, understanding digital travel photography, I’ll explain in
simple words, some of technicalities we should all know about digital travel
photography.
Digital Travel Photography
So, what is digital travel photography?
Well of course we know what travel photography is, don’t we?
If you don’t, head over to An Introduction to Travel Photography to get a better understanding.
But what about the digital bit?
When we push that shutter button whether it be a physical or virtual one, a complex process takes place in less than a second.
Let’s look at the components of this process:

The Sensor
The heart of all cameras is the sensor. It’s integral to the camera as it
dictates pretty much everything.
There are lots of different sensors manufactured, but the most common in
digital cameras are the CCD (Charge Coupled Device) and the CMOS (Complementary
Metal Oxide Semiconductor). Sensors are semiconductors that consist of a grid
of tiny light-sensitive cells called photodiodes.
Because photodiodes are black and white devices, a coloured filter is placed
over the sensor so it can record colour.
When you take a photo, you allow light to hit the photodiode which then
generates an electrical charge.
The individual photodiode records the brightness and colour of the light and
generates a pixel that is placed in a grid.
The number of pixels in the grid determines how much information is recorded.
Sensor Quality
The sensor’s quality is affected by how the following factors:
a. The physical size of the sensor.
b. The build quality.
c. The quality, size and spacing of the actual pixels.
d. The way the camera’s image processor treats the data.

Sensor Size
Larger sensors allow the use of larger pixels, which can process more light. Usually that results in the capture of sharper images. Sharper images have more detail, less noise, wider dynamic range and smoother tonal gradation.
But it doesn’t stop there.
For example, I have an Olympus OMD1 MKII and a Canon 5D MKII.
Whilst the Canon is a lot older, it is a full frame camera which means it has a larger sensor than the Olympus which has a crop sensor of 1/2.
The image quality on both is excellent and I would challenge anyone to tell the difference.
In fact, my opinion is that the Olympus is slightly better.
And I’m taking into account that it could also be because of a difference in the quality of the lens.
Resolution
Ah, resolution! Disturbingly misunderstood and incorrectly used as a benchmark of quality
A camera’s resolution is the number of pixels on both the vertical and horizontal sides of the sensor. That’s called the total pixel count and is usually in the millions and is described in megapixels (MP).
One million pixels equal a megapixel.
For example, a camera with a sensor size of 5184 x 3456 pixels has total pixel sum of 17,915,904. Camera manufacturers round it up to 18 MP and so it is an 18 MP camera.
You should find this number somewhere on the camera body. In the past it has been used to justify the price. I.E. More MP’s more dollars!
Nowadays that is no longer the case. Although there are exceptions, image quality is much more important.
The actual quality of the image file is affected by the same variables used to determine a sensor’s quality. See Sensor Quality
Print Size
The other important factor is the maximum print size that the camera can be expected to produce.
This is based on the sensor pixel count.
Most printers print at the international professional standard of 300 Pixels
per inch. Therefore, by going back to the above example 5184 x 3456, you divide
5184 by 300 you get 17.28”.
And then divide the other side 3456 by 300 you end up with a 17.28” x 11.52”
(or 432mm x 288mm) paper size.
Now it’s not my intention to get into the black art of printing. But some
printers will print at 240 whilst others might print at 350.
What does that mean? Well basically if you use the same calculation of 240 then
you can be forgiven for thinking that you will get a bigger print. However, the
quality is not as good because those pixels are being scattered over a bigger
area. On the other hand, printing at 350 should give you a smaller picture but
it actually works out that you will get a better print. There are lots of
articles and charts available online if you really want to get into print
sizes.
The one takeaway is that if you want to print a A4 (8 x 10”) size print you
must have at the very minimum a 7-8 MP Camera. 2400 x 3000 Pixels divided by
300 comes to 8 x 10”. 2400 x 3000 = 7200000 or 7.2MP
A good inexpensive eBook on this whole topic is Making
the Print by Martin Bailey
Screen size
Having said all that, most of us these days only view photos on a screen.
And the smaller the screen the smaller the photos you need to display it
without pixilation.
Most cameras have different “image quality” settings. That’s a rather
misleading way of telling you that you can adjust the size of your images.
That is also usually only for JPEG images as RAW is fixed.
Having smaller images has the benefit of requiring less space with both your
memory card and your computer storage. But can also mean that you are
restricted to a maximum size screen when you view it on a larger screen as it
will drop in quality if you try to enlarge to fit.
If you were to view it’s original size on a larger screen, you will get a
border, usually white, around it taking up the space from the edges of the
image to the edge of the screen.
Conversely viewing an image that is larger than the screen means that you will
not see all the image as it will fill the screen.
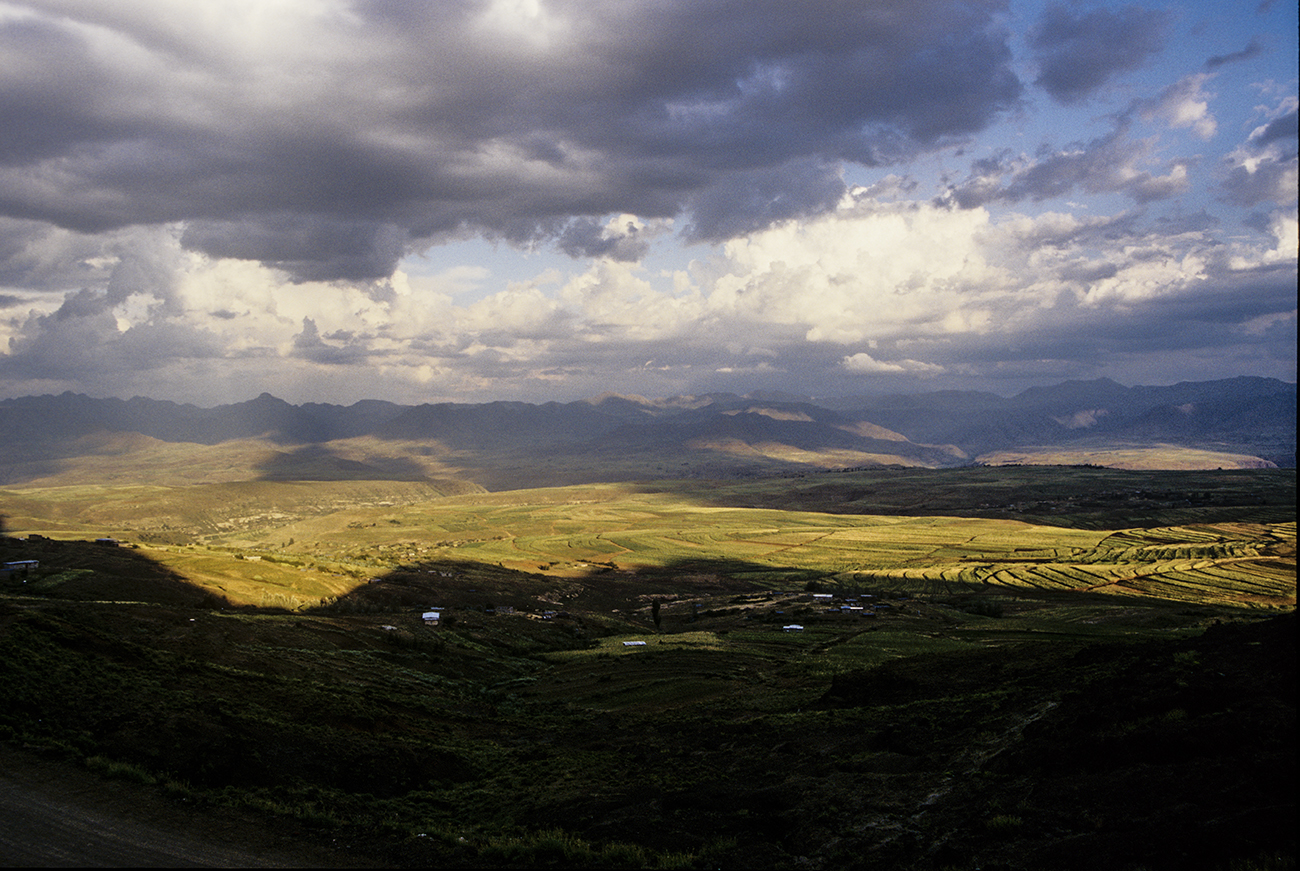
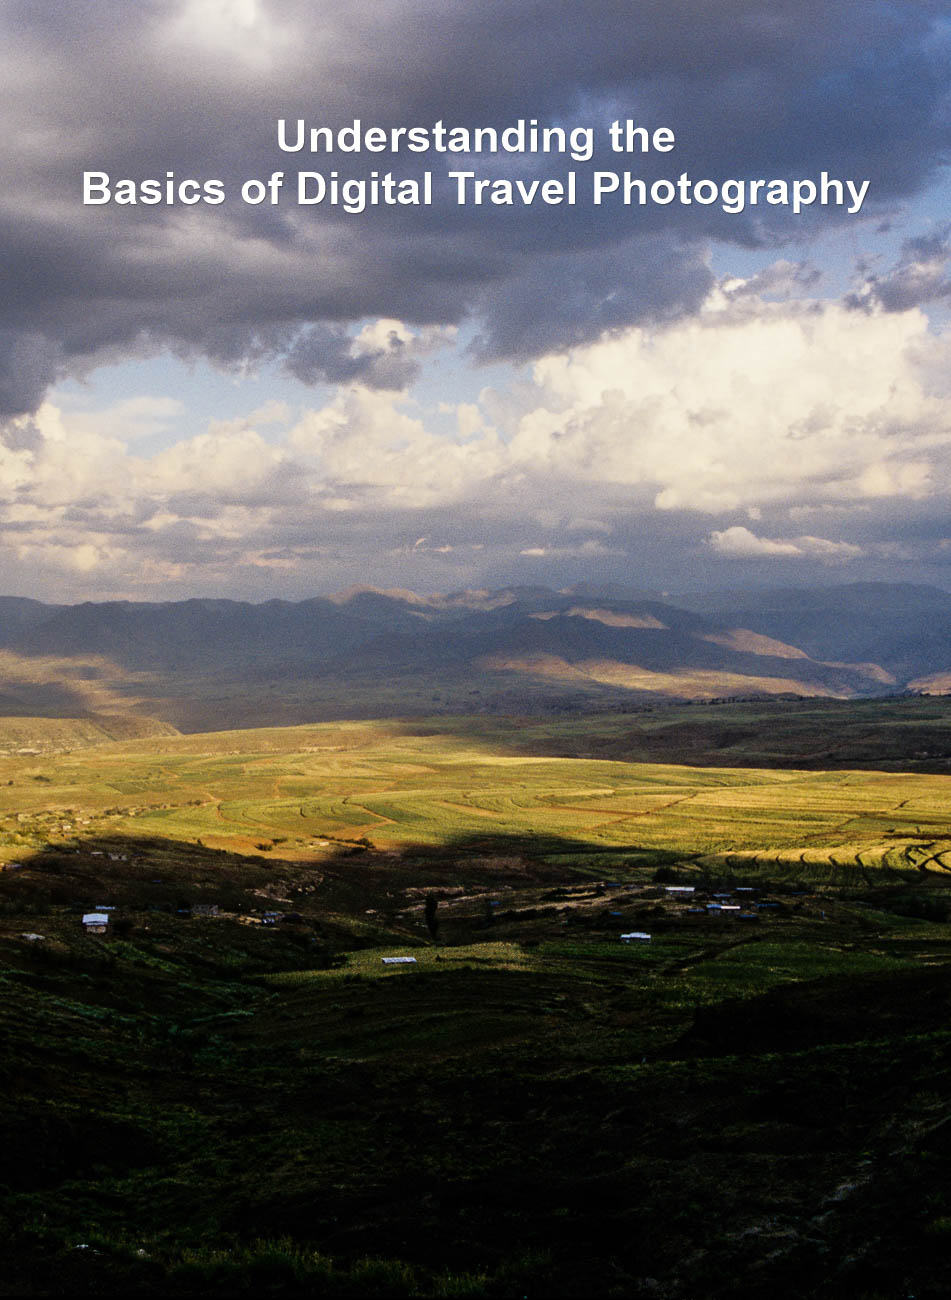
In the examples below you can see an image of 4608 x 3456 on a screen of 2560 x 1440 which is on a 25” computer screen. If you look in the right-hand corner of the second image you can see a box that tells how much of the image you are looking at.


Whatever software you are using to view will allow you to zoom in or out. But you can see how the dimensions of an image directly relate to the physical viewing medium
Upscaling
Of course, there are exceptions.
When viewing images on your TV with something like a Chromecast or an Apple TV
you’ll see that they will fill the screen regardless of size.
That’s because they do a great job of sizing it according to the size of the
TV.
In fact most of the newer TV’s do the same.
That’s called scaling the image.
On a larger TV they usually have to upscale. Although there are limitations of
what these devices and TV’s can do. A very small image of say 320 x 240 Pixels
just won’t be able to be upscaled on a 65” TV and still look great. It may be just
OK but more likely it will be pixelated or shown at its original size.
Summary for understanding digital travel photography basics
· Digital travel photography is the process that happens once you press that shutter button.
· At the heart of all cameras is the sensor
· A sensor is an electrical device for absorbing light and then transmitting it in a form of electrical current
- · There are several factors that determine the quality of a sensor.
- · Resolution is no longer an indicator of quality
- · When considering printing always consider that quality printers print at 300 pixels per inch. So size your camera (min 8MP) and then your image accordingly
- Viewing on electronic screens allow you the luxury of having smaller image sizes
Thanks for reading this article
There must have been something that piqued your interest.
Is it that you see yourself taking some great travel photos that you can share or display?
Or is it you can see yourself reliving your travel experience by bringing home some emotive travel photos?
Maybe you aspire to getting your travel photos published.
If one or all of these is YOUR goal, I can help.
If you sign up in the box below you’ll get my free eBook “9 ways to improve your Travel Photography”. At the same time, you will also subscribe to my Travel Photo Tips Newsletter.
Remember if you want to take great travel photos
- that you can share and display.
- that help you relive your travel experience
- give you a chance to have your travel photos published
then sign up below and subscribe to my Travel Photo Tips Newsletter and for your trouble get my eBook “9 ways to improve your Travel Photography”
Any questions then please write your comments below or contact me here and please say hello at these places:
Facebook: Twitter: Instagram: LinkedIn:
Feel free to share this to your social media of choice


Leave a comment