Whilst we tend to think of photographic
equipment as items that closely assist in taking travel photos. One piece of
equipment is rarely mentioned.
What is that?
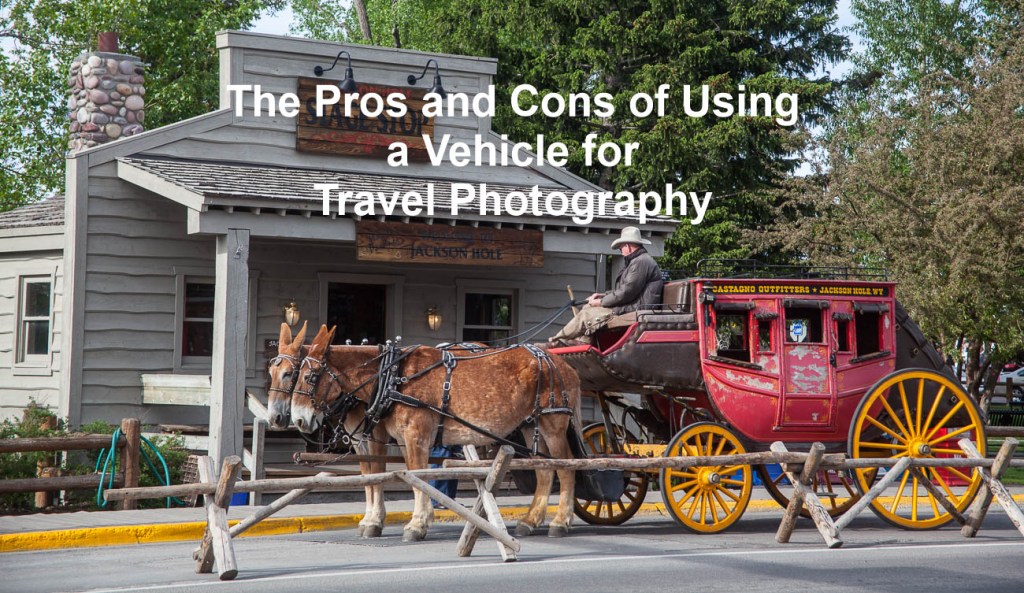
Well one that should be the most expensive,
a motorized vehicle.
In the video below from Mitchell
Kanashkevich (website) he does
a great job of explaining the pros and cons of having wheels whilst travelling
and taking travel photos.
There are some countries where driving
yourself can be dangerous and others easy.
But a lot depends on your own comfort
level.
I’ve met people who won’t drive a vehicle
in any country that doesn’t drive on the same side as their home.
And then I’ve met others who would drive
anything anywhere with no concerns at all.
I tend to think that it’s horses for
courses.
I’ve hired and bought vehicles in several
different countries but also used public transport.
I adopted the latter approach by using nothing but public transport for 3 weeks in Japan last year.
Those bullet trains are unbelievable!
The Shinkansen Bullet Train in Japan
Enjoy!
Do you see yourself taking some great travel photos that you can share or display?
Or can see yourself
reliving your travel experience by bringing home some emotive travel photos?
Maybe you want to get
your travel photos published.
If one or all of these
is YOUR goal, I can help.
If you go to the form below you can sign up and get my free eBook “9 ways to improve your Travel Photography”.
At the same time, you
will also subscribe to my Travel Photo Tips Newsletter which is exclusive to
those who have signed up.
Remember if you want
to take great travel photos
• that you can share and display.
• that help you relive your travel
experience
• give you a chance to have your
travel photos published
Then subscribe below to my Travel Photo Tips Newsletter and for your trouble get my eBook “9 ways to improve your Travel Photography”
Any questions then please write your comments below or contact me here
Now that you’ve got down this far can I ask a favour?
Please share this with
anyone who is going on a trip and wants to take and bring back some great
travel photos.
Seals and Icebergs, near Sawyer glacier in Tracy Arm Fjord, Alaska. Click on the image for other viewing options.
One of the most
exciting and challenging genres is Wildlife.
When we travel, we often find ourselves in a situation where there is an opportunity to take wildlife pictures. This is the first article of two about this subject. Part two is Tips for Photographing wildlife whilst travelling. This article offers some tips on the preparation for photographing wildlife while travelling.
First things first
Before we begin.
It’s important to understand that there are photographers out there who specialise in photographing wildlife. They are meticulous in their preparation and leave almost nothing to chance. Unless you aspire to be a wildlife photographer you will never reach their level of expertise. Sure, you might get lucky and get a great shot by being at the right place at the right time. But in the main you will find wildlife photography disappointing if you think you can get a winner every time.It’s a bit like golf. Unless you practice continuously then most of your golf shots will anything from poor to just OK. What keeps you coming back is that one great shot you hit every 5th or 6th round.
So it is with Wildlife Photography.
Wildlife photography
takes a lot of patience, time and it has to be said, luck, to come home with
some great shots. Animals are elusive and do not behave as you would like them
to.
Having said all that,
being on safari or a wildlife tour with a camera is an exciting experience. One
that cannot be measured by the number of great photos you get.
Puffin in the Alaska SeaLife Center in Seaward, Alaska. Click on the image for a larger view and other images
Some Basic Preparations
You should know beforehand, whether your destination will offer you the chance to take some wildlife photos.
Of course, if you are
on the road without any thought on when and where you are going to travel to
then that may not be the case.
So, here’s a few things to think about.
Equipment
Most of the wildlife
is outside Europe and usually in a developing country or in areas that are
remote and away from major population centres.
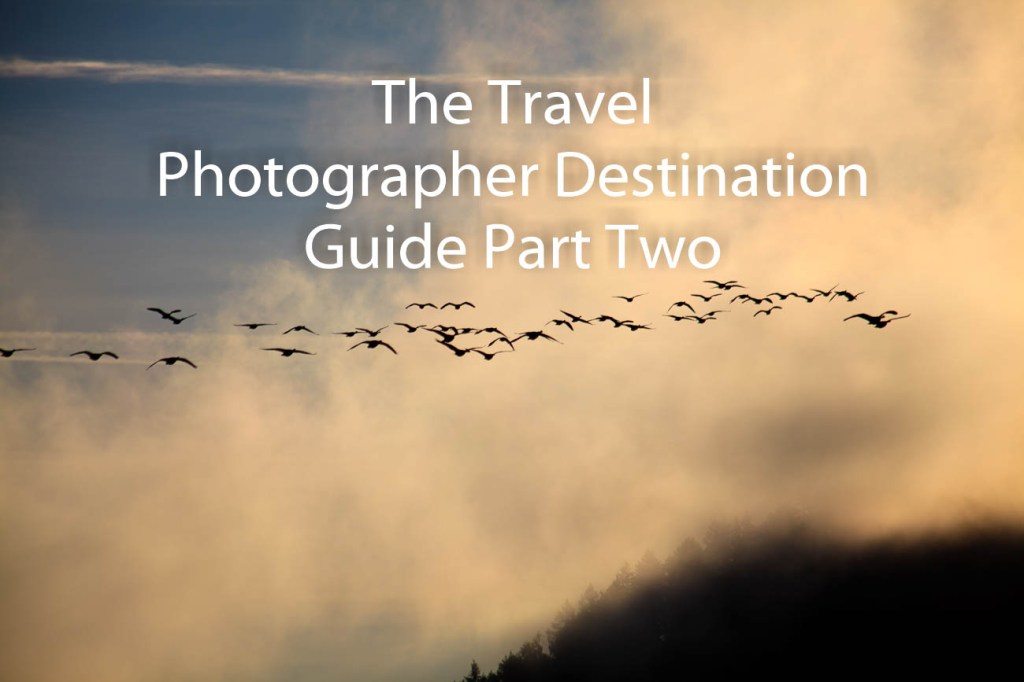
That means that often the only support for your camera equipment is what you take with you. No good trying to buy a spare battery or memory card when you are in the Masai Mara photographing Lions. That’s not to say that consumables like memory cards aren’t available. They are, but they may have been sitting on a shelf in the heat for some time. There’s also every chance that you will pay a lot more for them than at home. Most photographic electronics are made to a high standard set by companies in developed countries. That can make them expensive elsewhere. It pays to take the items with you I’ve listed in “Before setting off” section of The Travel Photographer Destination Guide Part Two.
Destination
If you are going somewhere where there’s a good chance that you will be photographing wildlife, you need to do the research to find out the following:
How far away will the wildlife be?
On my visit to Yellowstone NP in Montana USA, I wanted to take photos of Wolves. Whilst I did research and found out that they can be extremely elusive, I wasn’t prepared for how elusive. The only ones I saw were that far away, that you needed a strong telescope to see them. There was no way even with the 200-400mm telescopic lens I had, that I would be able to take any photos of wolves that day.
What’s the frequency
of spotting wildlife?
Depending on your
timing and budget it may be too difficult to see wildlife.
At certain times of the year in the African Plains the grass can be too long to see anything. Some of the Northern American Parks are closed in winter. If not closed, restricted due to winter weather. No good being in Churchill, Canada to see Polar Bears in summer. They won’t be there!
Will I be travelling
around the wildlife Parks in a group or can I use my own wheels?
There are two trains of thought on this. I’ve done both. Sometimes you have no choice but to go on a group tour.
In Denali National Park in Alaska the only way to get into the Park is by a bus. You don’t have the choice of using your own transportation. In some of the Southern African parks, like Kruger and Etosha, driving around in your ‘own’ vehicle is easy.
How close to the
wildlife will you get?
Using the Yellowstone
example again. I had been used to photographing wildlife in Southern and
Eastern Africa. There you can get up close due to the number of roads (tracks)
that took you into areas where the wildlife was likely to be.
Not so in Yellowstone, there are only a few roads and places to stop. Trying to get up close was not the same. You had to stop and wait for the Wildlife to come to you.
What wildlife am I
likely to see?
This is a big question
as often this will dictate what equipment you will take.
Obviously, Africa has
all the large animals.
But if you are going
whale watching then that cranks it up a notch.
At the opposite end, Australia has some of the most diverse wildlife on the planet, but the majority is small and quite hard to see. If you are into Birds and what to get some close-up shots, then you will need to plan accordingly.
Elephant in South Luangwa National Park in Zambia. Click on the image for a larger view and other images
Summary for Tips to prepare for photographing wildlife while travelling
Understand
that being a casual Wildlife photographer does not mean you will get great
shots
Be patient
and allow time to give yourself every chance to get good shots
Take as
much equipment that you think you will need with you
Research
your destination/s for Wildlife Photographic opportunities.
Thanks for reading this article
There must have been
something that piqued your interest.
Is it that you see yourself taking some great travel photos that you can share or display? Or is it you can see yourself reliving your travel experience by bringing home some emotive travel photos? Maybe you aspire to getting your travel photos published.
If one or all of these is YOUR goal, I can help. If you sign up in the
box below, you’ll get my free eBook “9 ways to improve your Travel
Photography”. At the same time, you will also subscribe to my exclusive Travel
Photo Tips Newsletter.
Remember if you want
to take great travel photos
that you can share and display.
that help you relive your travel experience
that give you a chance to have your travel photos published
then sign up below and subscribe to my exclusive Travel Photo Tips Newsletter and for your trouble get my eBook “9 ways to improve your Travel Photography”
Next up: Tips for Photographing Wildlife whilst travelling
Any questions? Please write your comments below or contact me here and please say hello at these places:
Elliot Bay, Seattle Washington USA. Click on image for a larger view and other options
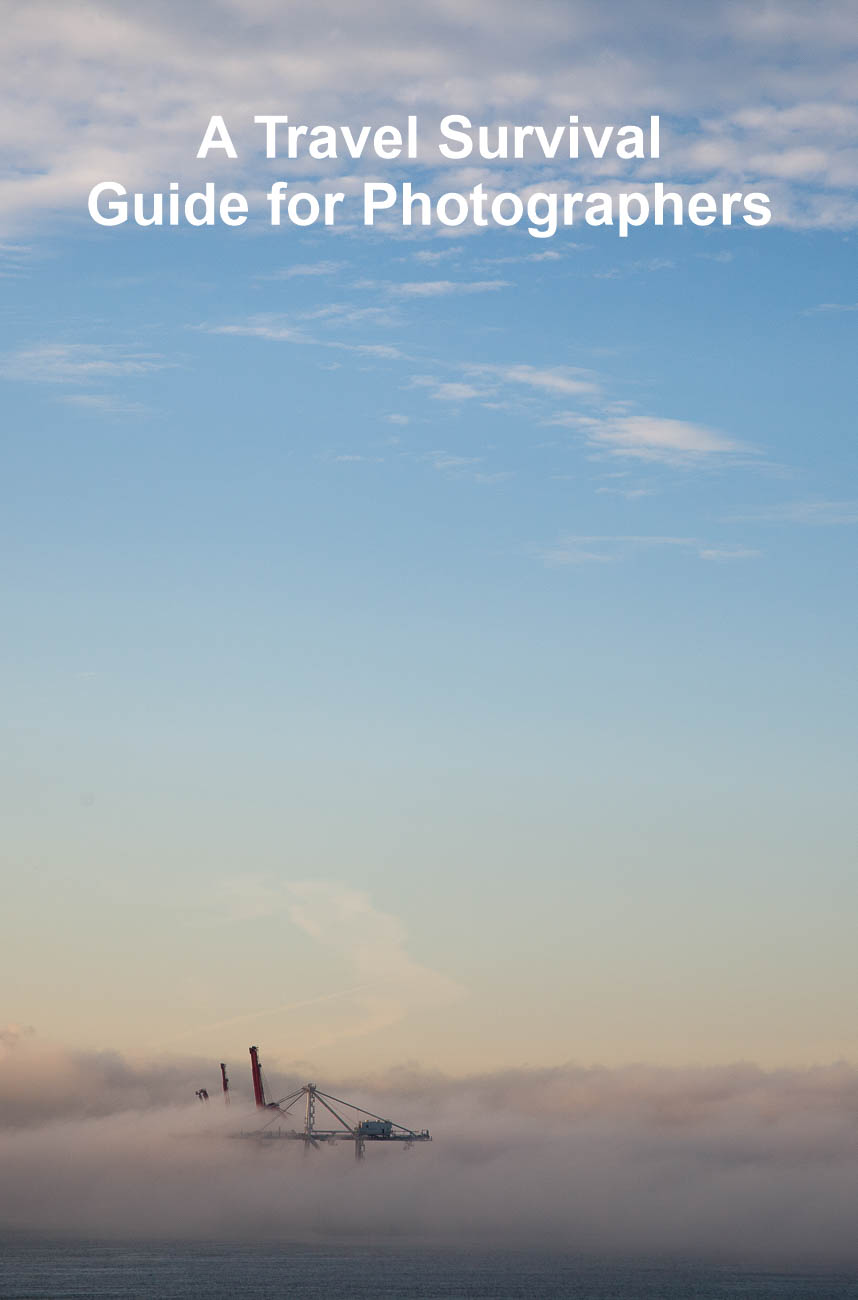
When we travel there are lots of challenges on the road. And the longer you travel the more challenges you face. In this travel survival guide for photographers, I cover most of the common challenges. I also cover a few of the least know but equally as important challenges as well
Weather
We have no control over the weather whilst travelling. But we do have control on how we manage it. There are various situations that need us, as potential photographers to have our wits about us. So, we need to adopt some special precautions.
Cold
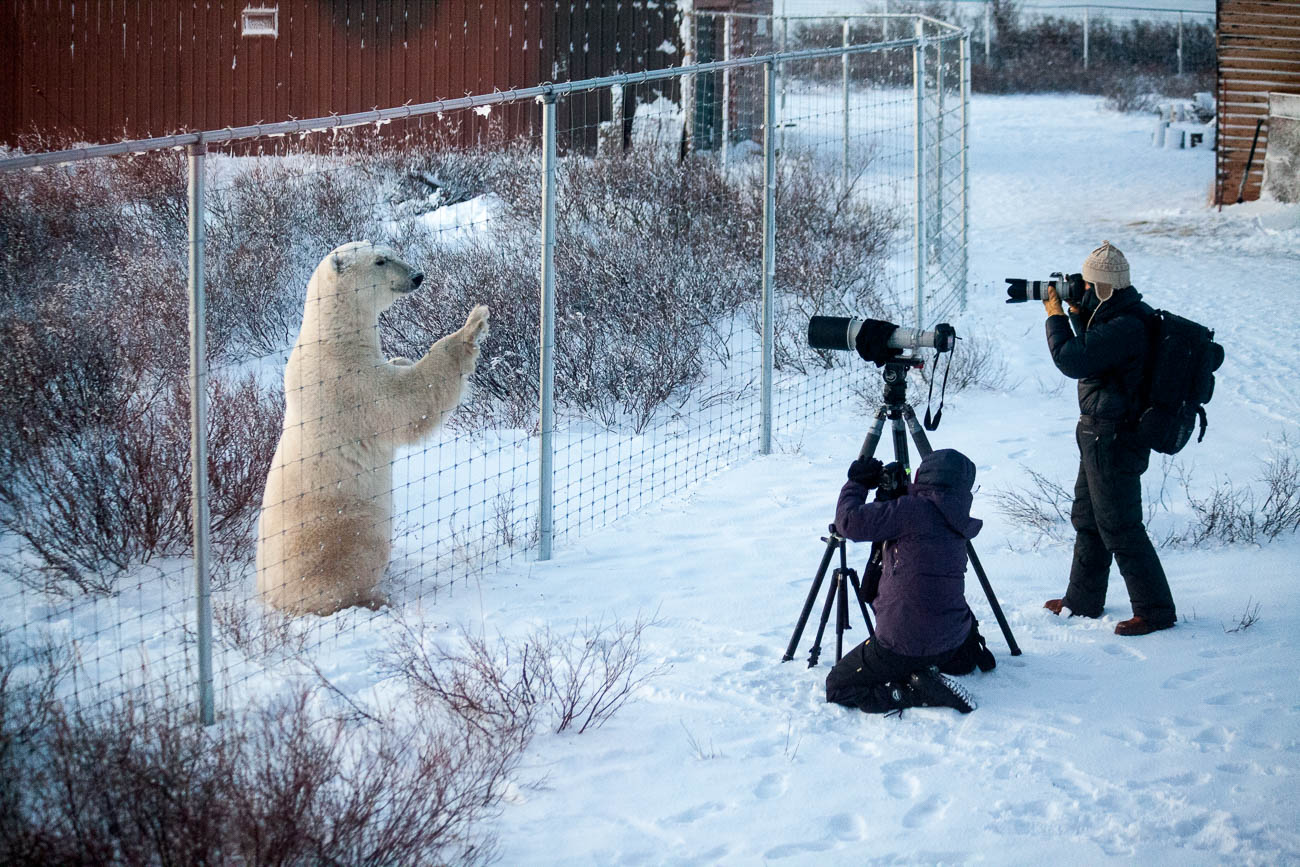
A few years back I went on a Polar Bear safari near Churchill in North East Canada. It was November and the first day or so was at 5°C which was reasonably mild. The cold came quickly! It reached around -20°C for the next 3 days.
What I learnt is that whilst we could be warm inside the lodge, we couldn’t afford to have our cameras warm. It was OK to bring them in overnight, although even then they had to be in the coldest part of the lodge. But when we had much shorter breaks, like lunch time, we had to leave them hanging up outside. Why? If you wear glasses, then you will know that when you walk into a warm building from a cold outside area, your glasses steam up. The same happens to your camera except it will need a lot more time for the moisture to dry. If you took your camera back out after only half an hour or so and the temperature is low enough, the moisture will freeze. What can happen then is that it can damage not only your lens but your sensor as well, not to mention other working parts.
Polar Bear outside Diamond Creek Lodge near Churchill Canada
So, be very careful with your camera equipment and I mean a smartphone as well, in very cold weather. Give your camera plenty of time to acclimatise in both the heat of your digs and the outside cold.
Humidity
Leading on from cold challenges, humidity can also be a danger to
cameras.
Again, to use the same analogy of glasses but now in reverse. If you go outside
from an airconditioned space into high humidity, chances are that they too will
fog up.
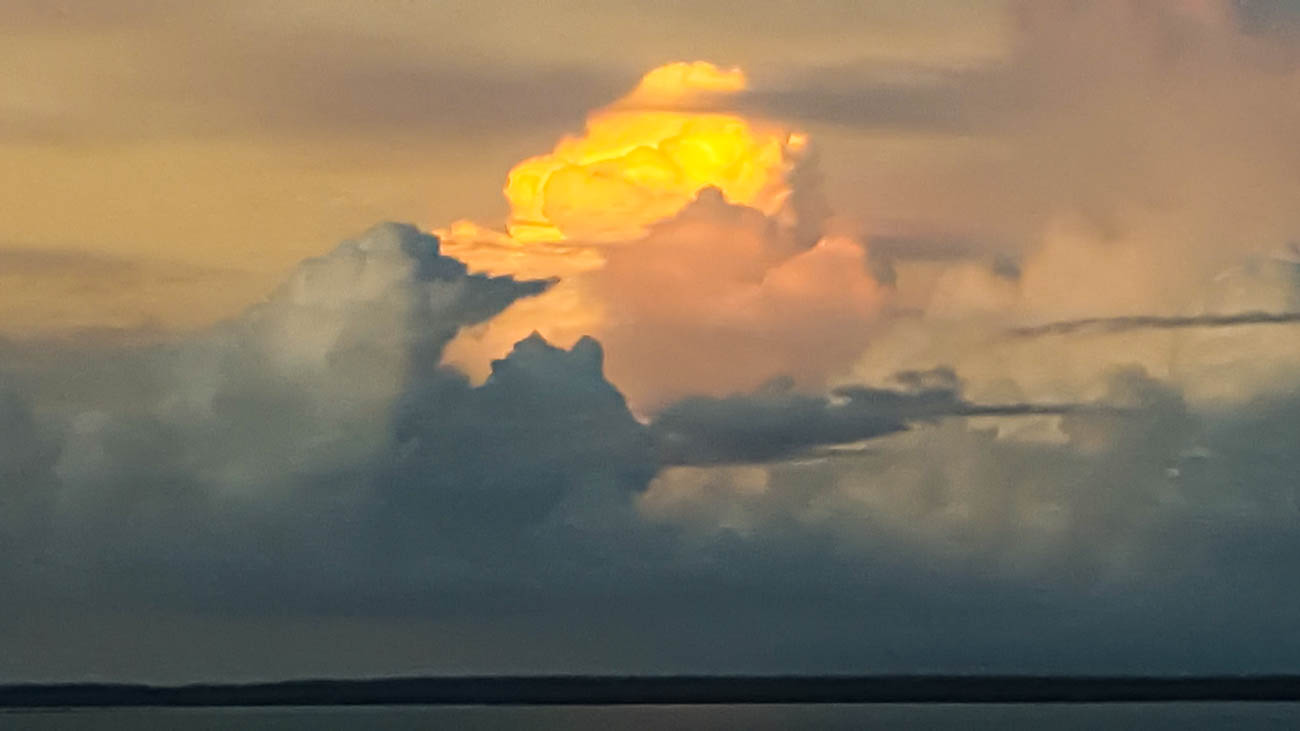
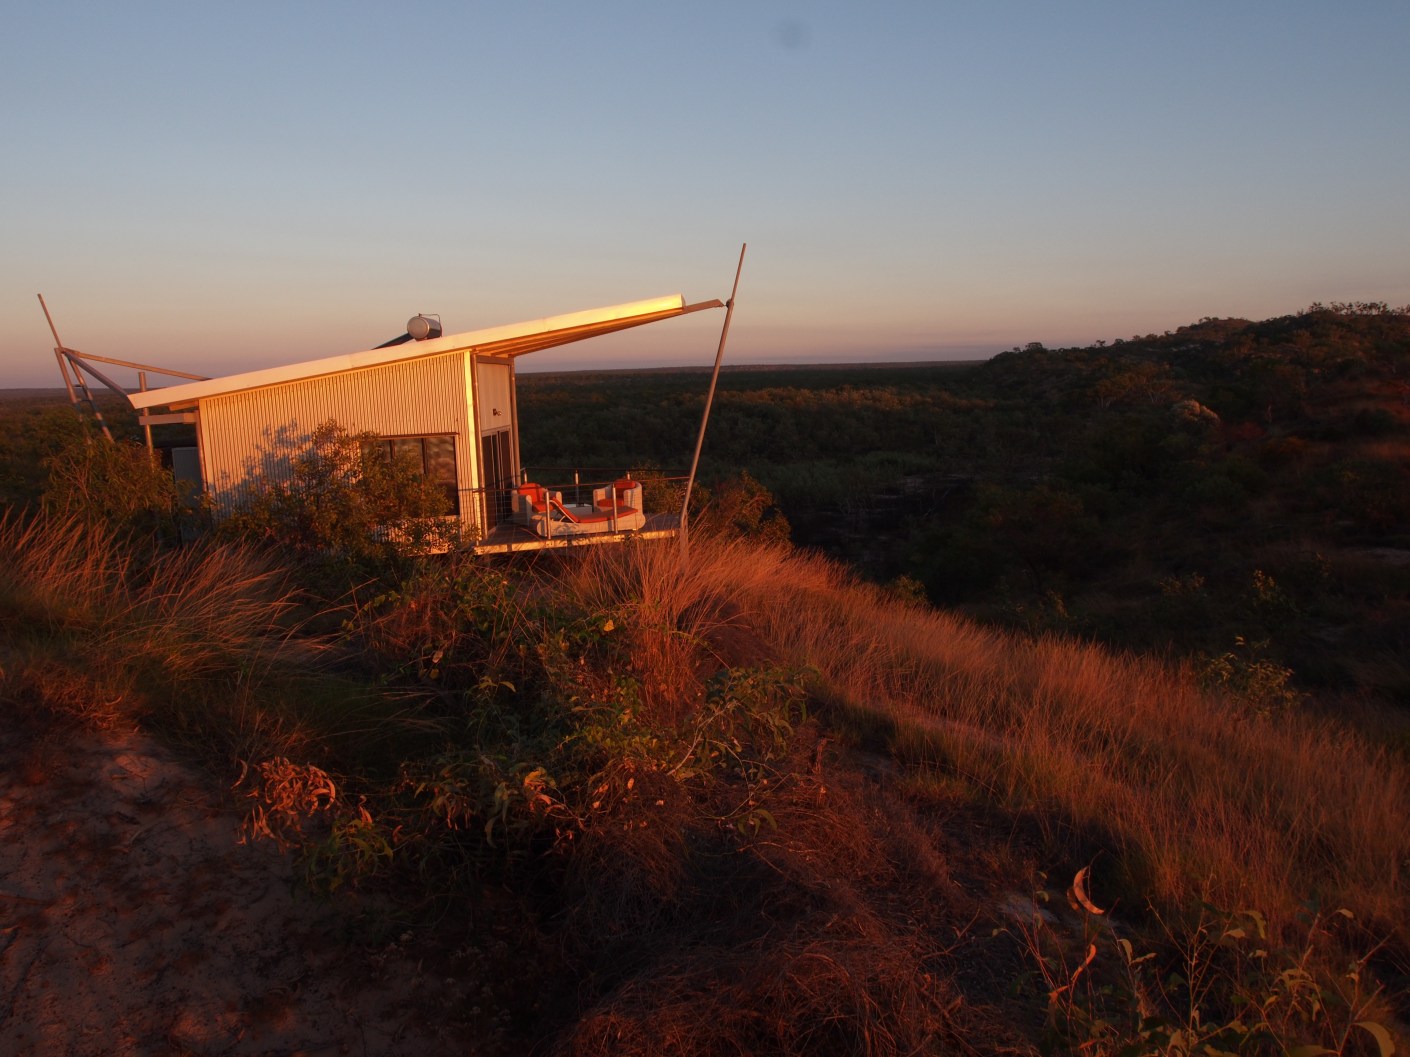
When I was in Darwin in the North of Australia I was out walking early in the
morning.
I went to take a shot and guess what?
You guessed it.
What I saw through the lens was just fog! I had forgotten that that whilst it
didn’t seem too humid, there was enough moisture in the air to condense onto
the cold lens.
It took around 10 minutes for it to clear.
I also had my smartphone with me which also had fogged up.
But a small lens clears a lot quicker, so I didn’t end up missing the shot!
Sky above Darwin, Australia, during the the wet season
So how do you prevent this from happening? Get organised! If you know you are going to go outside into the humidity with your camera, put it out there at least an hour before you intend using it. You can do this by taking it outside for coffee or breakfast or putting it out onto your balcony.
Heat
In the heat and by the heat I mean anything above 30°C, everything gets hot. Whilst it won’t necessarily affect its picture making capability, Cameras don’t like heat. Most cameras are black which means they absorb the heat and can then be too hot to handle. Not only that but the electronic circuitry in a camera or smartphone is not made to withstand high temperatures. Whilst most cameras have an operating range of 0°C – 40°C, the recommended temperature for using a camera is a mere 25°C!
Dust
Dust is the enemy of all cameras. There are some high-end cameras that
are meant to be sealed to prevent dust ingress, but I doubt very much if that
is 100%.
As we all know from our personal interactions with dust, it comes in many forms
and can get into everything.
However the sort of dust I’m talking about is the particles you find on a beach
or in the desert. Sometimes the fine dust can be found in old properties where
it has been disturbed.
It’s essential that dust doesn’t get into the camera or smartphone.
Yes, smartphones are not immune.
Katelious beach in Kefalonia. Click on image for a larger view and other options
If I’m taking pictures on the beach or on sand dunes, I always have a
Ziplock plastic bag that I can quickly put the camera into. It’s not just wind
or sandstorms you need to be careful of. Vehicles, people and animals can all
churn up enough dust to make a big nuisance.
Wet
As I mentioned before there are some Cameras that are sealed against
Dust. Well the same cameras are also ‘water resistant’. Again, that’s not
foolproof. Common sense tells us that we should keep any electronic gear away
from water. So be careful around bodies of water like swimming pools, rivers,
lakes etc.
Be especially careful around the ocean, as sea breezes have minute
water particles as well.
Rain, on the other hand, is little bit harder to protect gear from. Not
to mention that it may not be the right time to take photos when it’s raining.
Mind you I have got some good shots during rain showers. There are covers that
you can buy like the Ruggard
RC Rain Cover that will protect your camera and allow you to keep shooting.
You can also make your own with a plastic bag or Ziplock bag.
Batteries
Batteries don’t like extremes of temperature, water or humidity, so
make sure you protect them from the elements as best as possible. They tend to
discharge much quicker and can charge a lot more slowly in temperature
extremes.
Theft
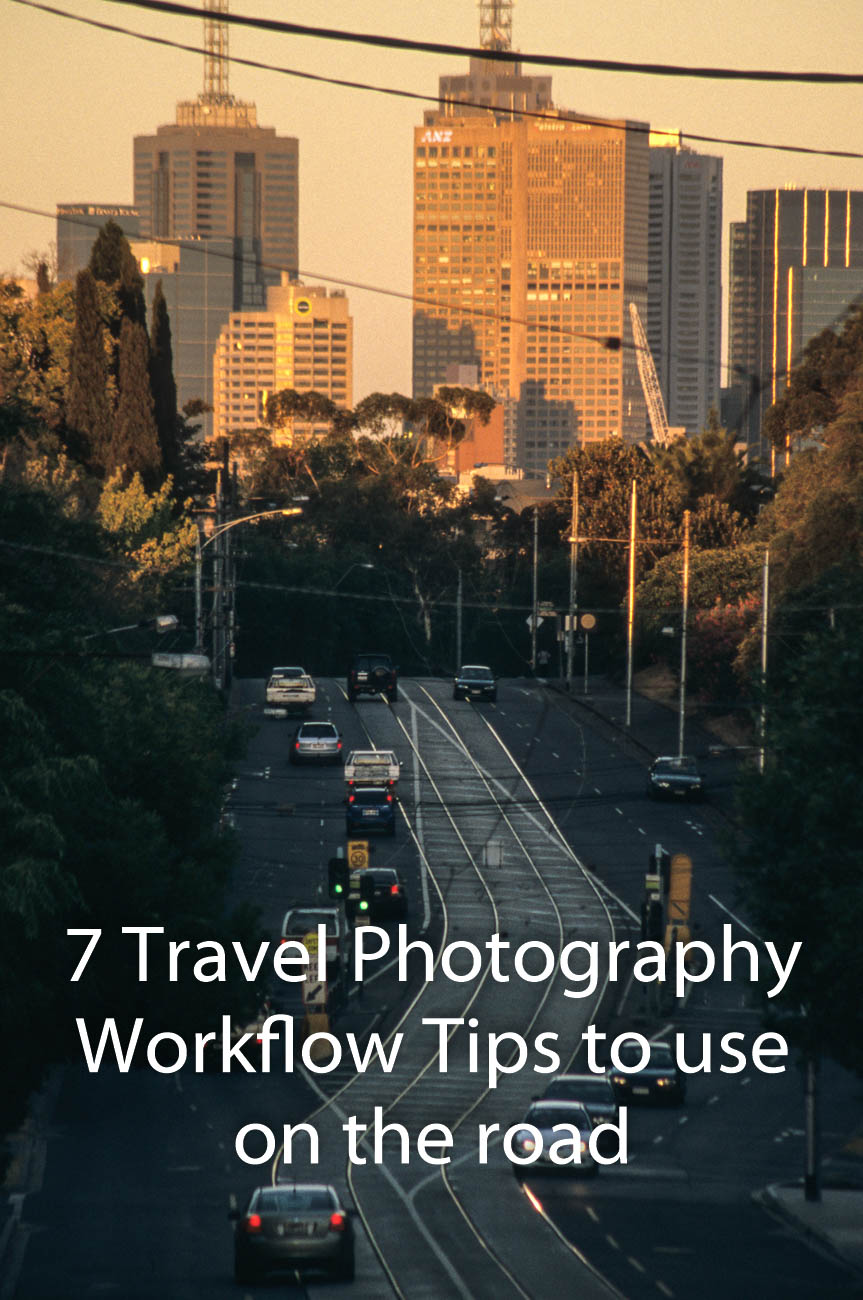
I covered this briefly in 7
Travel Photography Workflow Tips to use on the road.
I firmly believe that the majority of the Earth’s population is honest. But,
especially in developing countries, it pays to be careful.
Here’s a few tips:
Don’t check your camera gear in on public transport like air planes, trains or buses
If your camera strap has the camera logo and model on it, change for one that’s blank. Not only will that make your camera less noticeable, you’ll get a better strap anyway.
Carry your camera across your shoulder i.e. not around your neck. It makes it less conspicuous and is actually more comfortable
If you have a safe in your hotel room, use it! Lock up your gear when you are out without your camera and even when you go to bed. If there’s no safe use your suitcase and lock it up.
Whilst we all want to get that earthy, gritty shot, don’t take your gear (or yourself for that matter) into a known dangerous area. You are asking for trouble.
Don’t leave your gear sitting around without being secure
Remember that $500-$1000 worth of camera gear can feed a family for 3 or 4 months in some countries.
Damage control
Of course, it’s not only the elements or other people who can damage
your equipment.
Stats prove that more accidents happen at home than in the workplace.
They also show that the camera user is the most likely to damage photographic
equipment.
That’s you!
In the main most cameras are fairly hardy but don’t assume that they are bullet
proof!
Any piece of electronic equipment doesn’t like being dropped, thrown around or
slid around with movement. There’s a reason that camera bags have padding.
The best thing you can do is keep with you and don’t sling the bag around. Be
careful how you load onto transport and that includes planes.
Here’s some more tips:
Keep your equipment in a bag that has some sort of padding.
Don’t carry it one handed with the strap doing nothing. There’s every chance that you could get knocked and the camera ends up in the dirt.
Keep the lens and body clean.
Extra tip on this one, don’t use the same cloth to clean your spectacles if you wear them. You could end up scratching one or the other because you’ve picked up grit from either one.
Don’t leave your gear hanging around without being secure, even in your hotel room. Things get knocked around unintentionally.
Summary for a survival guide for photographers whilst travelling
Be mindful of the potential for freezing moisture damaging camera equipment in very cold climates
Allow your camera to acclimatise to humidity before you need it, so that any ‘fog’ has dried first.
Keep your camera out of the heat and especially the sun, in warm to hot climates. Excessive heat can damage the electronic componentry
Use protection e.g. plastic bags or purpose made products to protect your camera equipment from Dust and Rain
Make sure you guard and protect your camera equipment from theft by avoiding situations where that may be possible.
Treat your gear well and it will look after you. Even the most ‘bullet” proof camera can get damaged if you are not careful with it.
Thanks for reading this article
There must have been something that piqued your interest.
Is it that you see yourself taking some great travel photos that you can share or display? Or is it you can see yourself reliving your travel experience by bringing home some emotive travel photos? Maybe you aspire to getting your travel photos published.
If one or all of these is YOUR goal, I can help.
If you sign up in the box below, you’ll get my free eBook “9 ways
to improve your Travel Photography”. At the same time, you will also subscribe
to my Travel Photo Tips Newsletter.
Remember if you want to take great travel photos
that you can share and display.
that help you relive your travel experience
that give you a chance to have your travel photos published
then sign up below and subscribe to my Travel Photo Tips Newsletter and
for your trouble get my eBook “9 ways to improve your Travel
Photography”
Any questions? Please write your comments below or contact me here and please say hello at these places:
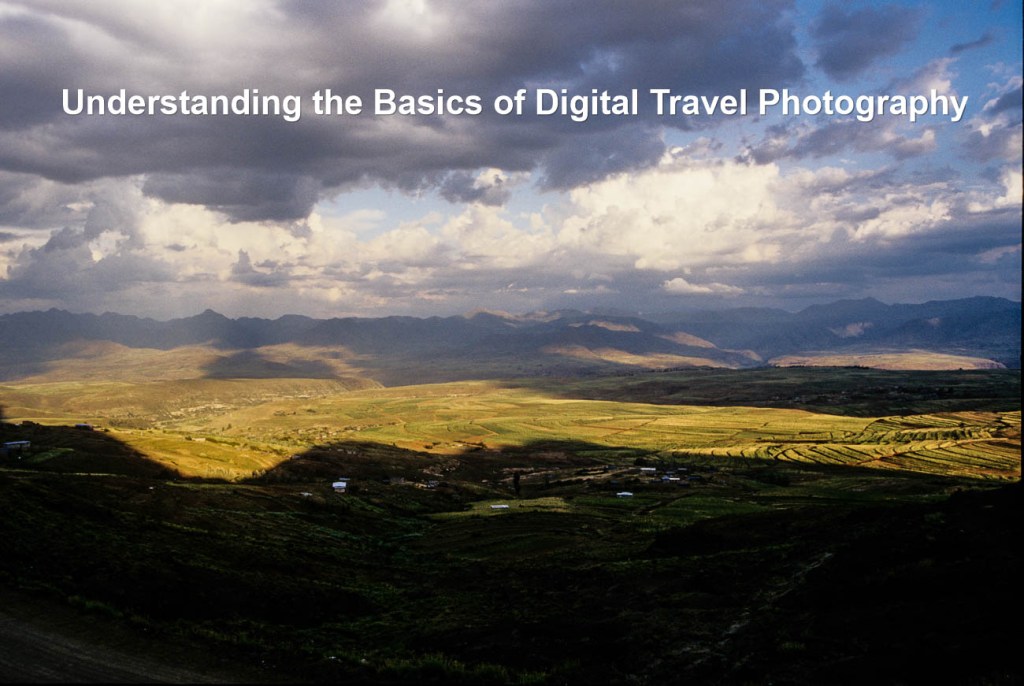
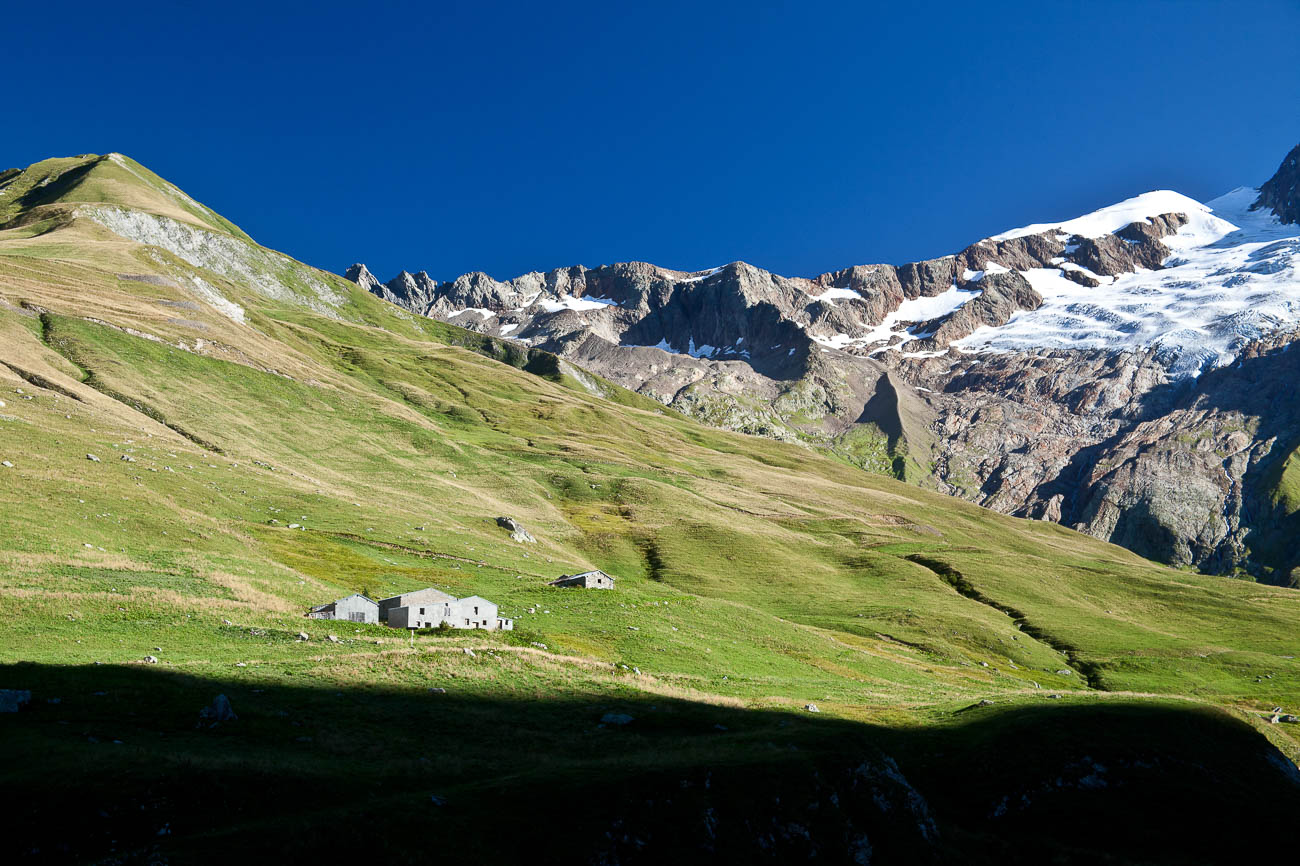
Maloti Mountains of Lesotho in the late afternoon light.
The majority of us use digital cameras these days for our travel
photography.
But do we really understand it?
In this article, understanding digital travel photography, I’ll explain in
simple words, some of technicalities we should all know about digital travel
photography.
Digital Travel Photography
So, what is digital travel photography? Well of course we know what travel photography is, don’t we? If you don’t, head over to An Introduction to Travel Photography to get a better understanding. But what about the digital bit? When we push that shutter button whether it be a physical or virtual one, a complex process takes place in less than a second. Let’s look at the components of this process:
Hoh river rainforest on the Olympic Peninsula, Washington, USA Click on image to see a larger view
The Sensor
The heart of all cameras is the sensor. It’s integral to the camera as it
dictates pretty much everything.
There are lots of different sensors manufactured, but the most common in
digital cameras are the CCD (Charge Coupled Device) and the CMOS (Complementary
Metal Oxide Semiconductor). Sensors are semiconductors that consist of a grid
of tiny light-sensitive cells called photodiodes.
Because photodiodes are black and white devices, a coloured filter is placed
over the sensor so it can record colour.
When you take a photo, you allow light to hit the photodiode which then
generates an electrical charge.
The individual photodiode records the brightness and colour of the light and
generates a pixel that is placed in a grid.
The number of pixels in the grid determines how much information is recorded.
Sensor Quality
The sensor’s quality is affected by how the following factors:
a. The physical size of the sensor.
b. The build quality.
c. The quality, size and spacing of the actual pixels.
d. The way the camera’s image processor treats the data.
Photo by Mika Baumeister on Unsplash
Sensor Size
Larger sensors allow the use of larger pixels, which can process more light. Usually that results in the capture of sharper images. Sharper images have more detail, less noise, wider dynamic range and smoother tonal gradation. But it doesn’t stop there. For example, I have an Olympus OMD1 MKII and a Canon 5D MKII. Whilst the Canon is a lot older, it is a full frame camera which means it has a larger sensor than the Olympus which has a crop sensor of 1/2. The image quality on both is excellent and I would challenge anyone to tell the difference. In fact, my opinion is that the Olympus is slightly better. And I’m taking into account that it could also be because of a difference in the quality of the lens.
Resolution
Ah, resolution! Disturbingly misunderstood and incorrectly used as a
benchmark of quality
A camera’s resolution is the number of pixels on both the vertical and horizontal sides of the sensor. That’s called the total pixel count and is usually in the millions and is described in megapixels (MP). One million pixels equal a megapixel. For example, a camera with a sensor size of 5184 x 3456 pixels has total pixel sum of 17,915,904. Camera manufacturers round it up to 18 MP and so it is an 18 MP camera. You should find this number somewhere on the camera body. In the past it has been used to justify the price. I.E. More MP’s more dollars! Nowadays that is no longer the case. Although there are exceptions, image quality is much more important. The actual quality of the image file is affected by the same variables used to determine a sensor’s quality. See Sensor Quality
Print Size
The other important factor is the maximum print size that the camera can be expected to produce. This is based on the sensor pixel count.
Most printers print at the international professional standard of 300 Pixels
per inch. Therefore, by going back to the above example 5184 x 3456, you divide
5184 by 300 you get 17.28”.
And then divide the other side 3456 by 300 you end up with a 17.28” x 11.52”
(or 432mm x 288mm) paper size.
Now it’s not my intention to get into the black art of printing. But some
printers will print at 240 whilst others might print at 350.
What does that mean? Well basically if you use the same calculation of 240 then
you can be forgiven for thinking that you will get a bigger print. However, the
quality is not as good because those pixels are being scattered over a bigger
area. On the other hand, printing at 350 should give you a smaller picture but
it actually works out that you will get a better print. There are lots of
articles and charts available online if you really want to get into print
sizes.
The one takeaway is that if you want to print a A4 (8 x 10”) size print you
must have at the very minimum a 7-8 MP Camera. 2400 x 3000 Pixels divided by
300 comes to 8 x 10”. 2400 x 3000 = 7200000 or 7.2MP
A good inexpensive eBook on this whole topic is Making
the Print by Martin Bailey
Screen size
Having said all that, most of us these days only view photos on a screen.
And the smaller the screen the smaller the photos you need to display it
without pixilation.
Most cameras have different “image quality” settings. That’s a rather
misleading way of telling you that you can adjust the size of your images.
That is also usually only for JPEG images as RAW is fixed.
Having smaller images has the benefit of requiring less space with both your
memory card and your computer storage. But can also mean that you are
restricted to a maximum size screen when you view it on a larger screen as it
will drop in quality if you try to enlarge to fit.
If you were to view it’s original size on a larger screen, you will get a
border, usually white, around it taking up the space from the edges of the
image to the edge of the screen.
Conversely viewing an image that is larger than the screen means that you will
not see all the image as it will fill the screen.
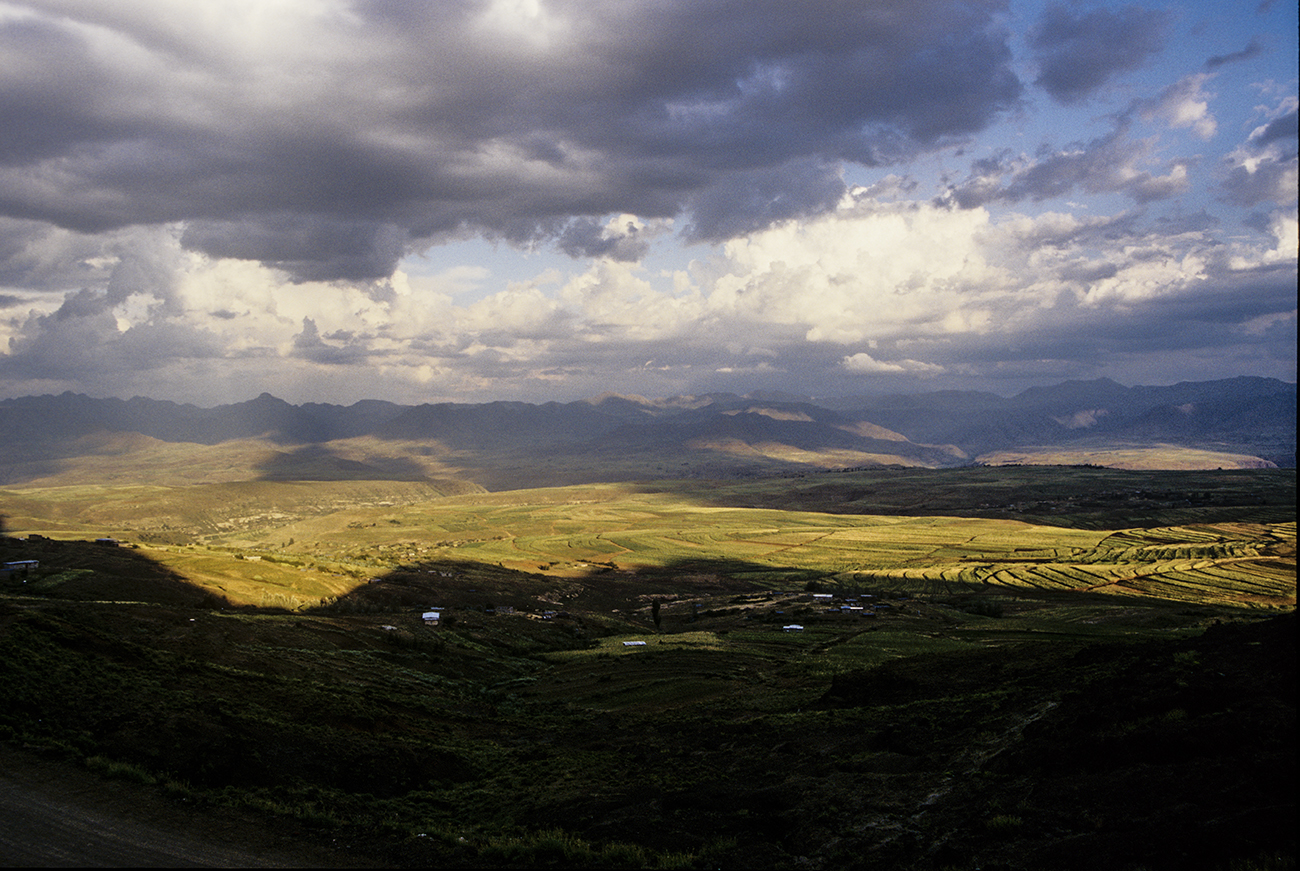
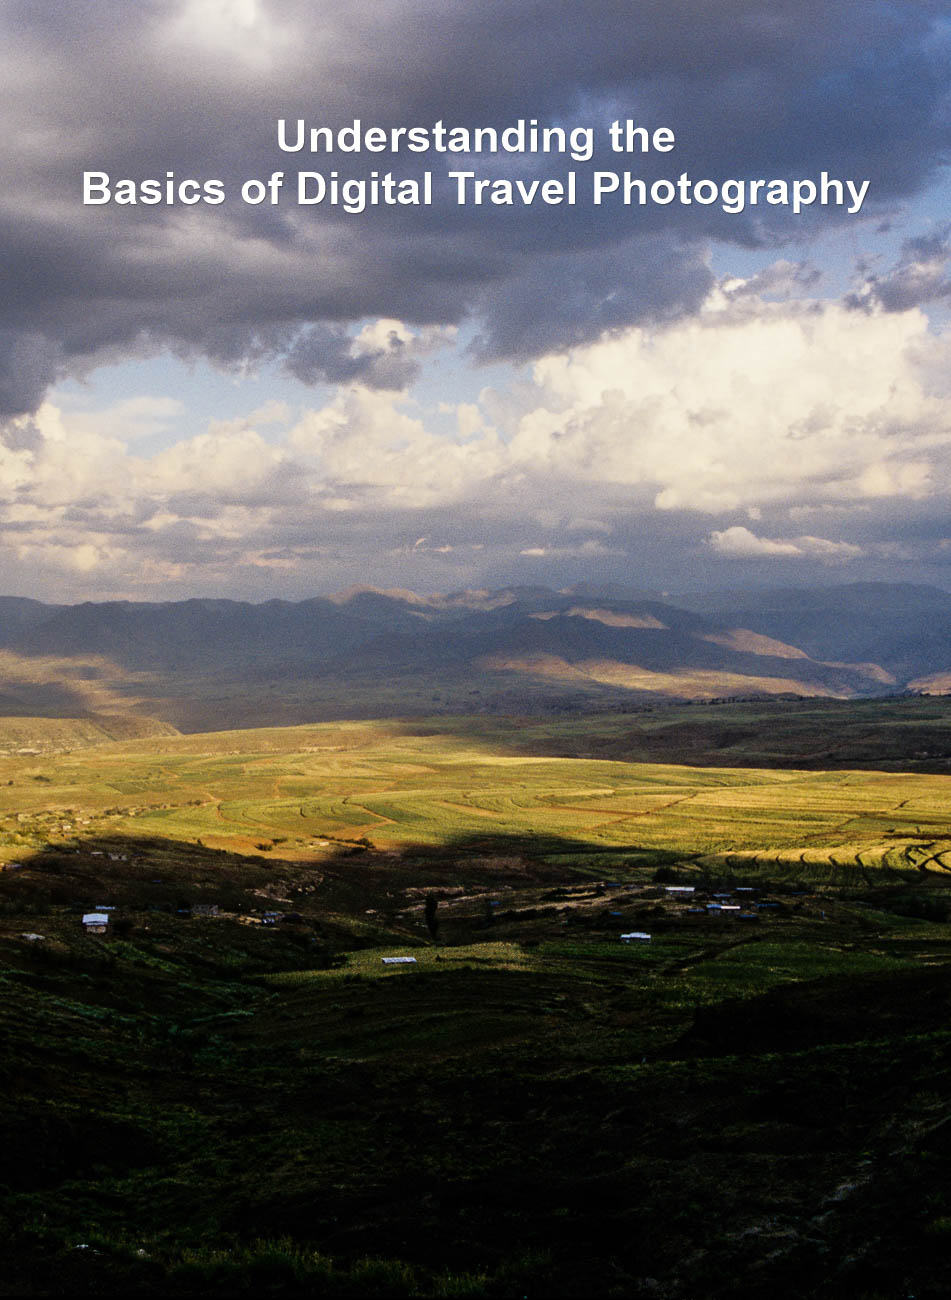
In the examples below you can see an image of 4608 x 3456 on a screen of
2560 x 1440 which is on a 25” computer screen. If you look in the right-hand
corner of the second image you can see a box that tells how much of the image
you are looking at.
Whatever software you are using to view will allow you to zoom in or out.
But you can see how the dimensions of an image directly relate to the physical
viewing medium
Upscaling
Of course, there are exceptions.
When viewing images on your TV with something like a Chromecast or an Apple TV
you’ll see that they will fill the screen regardless of size.
That’s because they do a great job of sizing it according to the size of the
TV.
In fact most of the newer TV’s do the same.
That’s called scaling the image.
On a larger TV they usually have to upscale. Although there are limitations of
what these devices and TV’s can do. A very small image of say 320 x 240 Pixels
just won’t be able to be upscaled on a 65” TV and still look great. It may be just
OK but more likely it will be pixelated or shown at its original size.
Summary for understanding digital travel photography basics
· Digital travel photography is the process that happens once you press that
shutter button.
· At the heart of all cameras is the sensor
· A sensor is an electrical device for absorbing light and then transmitting
it in a form of electrical current
· There are several factors that determine the quality of a sensor.
· Resolution is no longer an indicator of quality
· When considering printing always consider that quality printers print at 300 pixels per inch. So size your camera (min 8MP) and then your image accordingly
Viewing on electronic screens allow you the luxury of having smaller image sizes
Thanks for reading this article
There must have been something that piqued your interest.
Is it that you see yourself taking some great travel photos that you can share or display?
Or is it you can see yourself reliving your travel experience by bringing home some emotive travel photos?
Maybe you aspire to getting your travel photos published.
If one or all of these is YOUR goal, I can help.
If you sign up in the box below you’ll get my free eBook “9 ways to
improve your Travel Photography”. At the same time, you will also
subscribe to my Travel Photo Tips Newsletter.
Remember if you want to take great travel photos
that you can share and display.
that help you relive your travel experience
give you a chance to have your travel photos published
then sign up below and subscribe to my Travel Photo Tips Newsletter and for
your trouble get my eBook “9 ways to improve your Travel Photography”
Any questions then please write your comments below or contact me here and please say hello at these places:
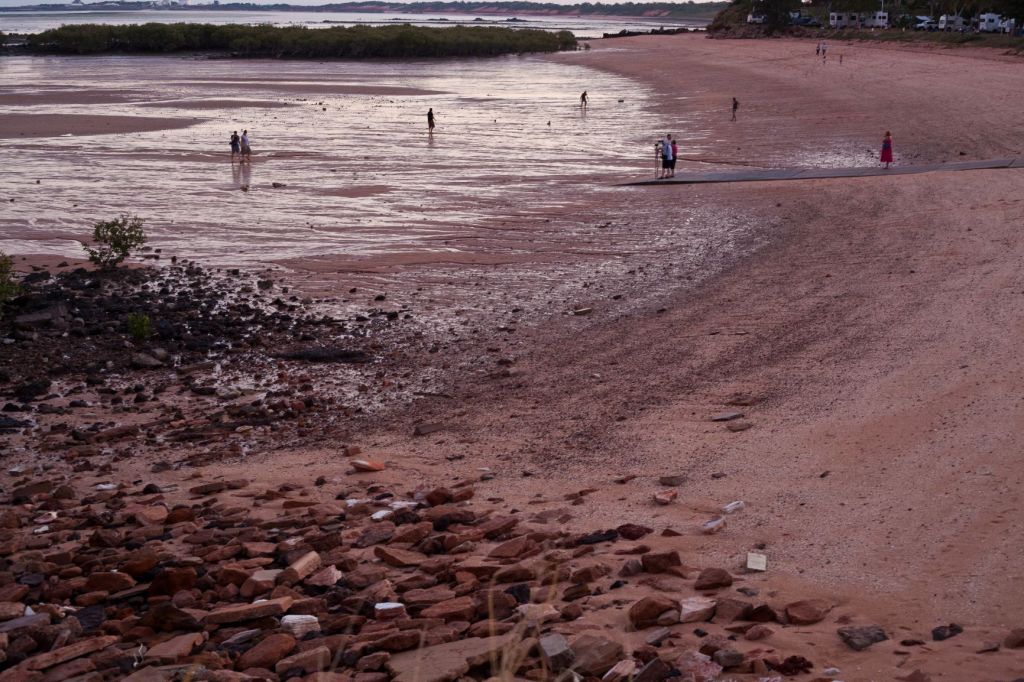
Looks like social distancing at the Town Beach, Broome, Western Australia
I had to ask myself an important question recently. Should I continue to post articles on travel photography during this terrible crisis. After all if we can still afford to travel we can’t! And if we can’t afford to travel now due to a tragic change in our employment status, is travel going to be something we will think about?
Well, if you are following this site then you are interested in travel photography and I imagine you have a camera. Even on the off chance you sold your camera because you now need the money then you will still have a mobile (cell) phone which has a camera. So now is a good opportunity to fine tune your travel photography skills, especially if you have a bit more time. It’s a hobby to most and a good way of taking your mind off the chaos around us at the moment.
If like, most of us across the world, you can’t go far, use your home and garden as photography sets. There are many interesting subjects waiting for you to take imaginative shots of them.
You’ll be amazed how much you can do in the confines of four walls or fences.
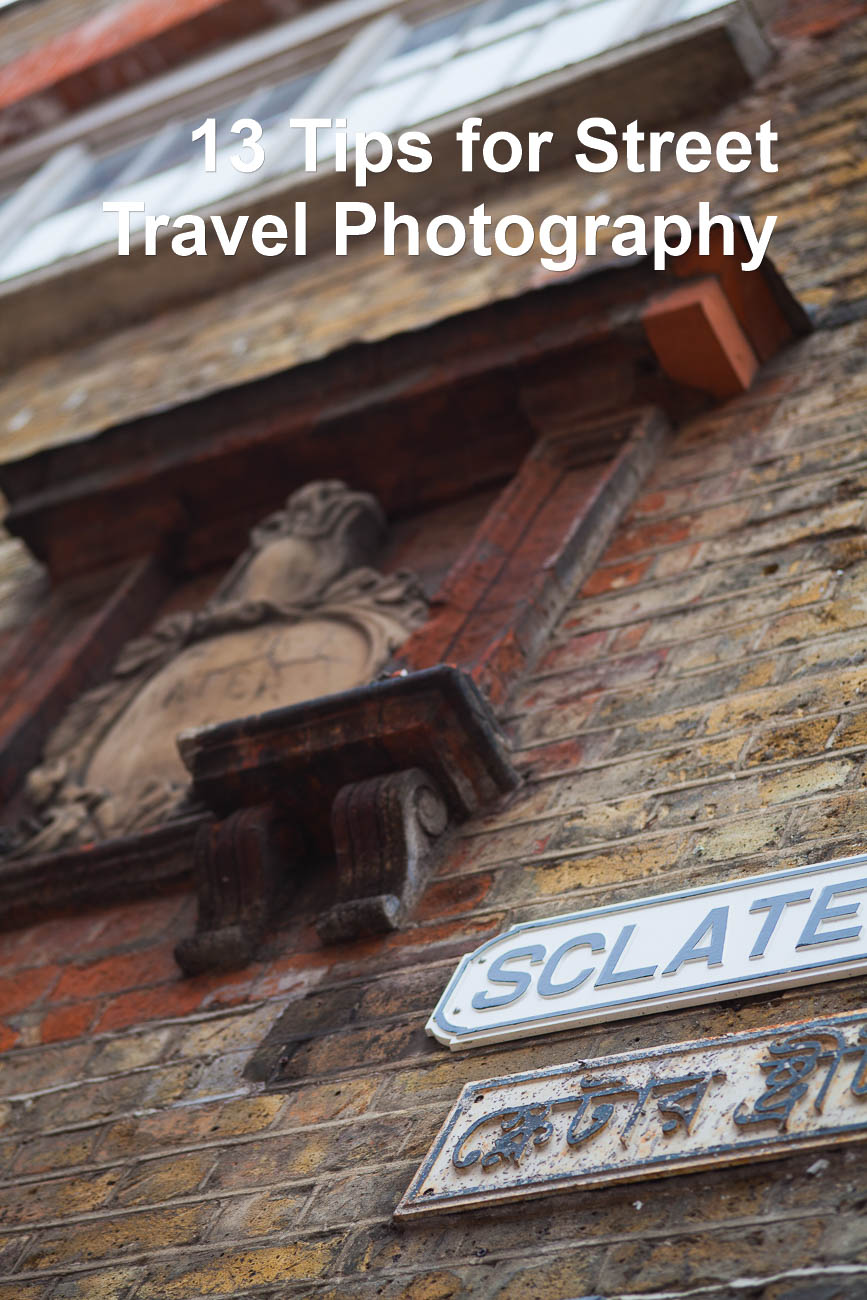
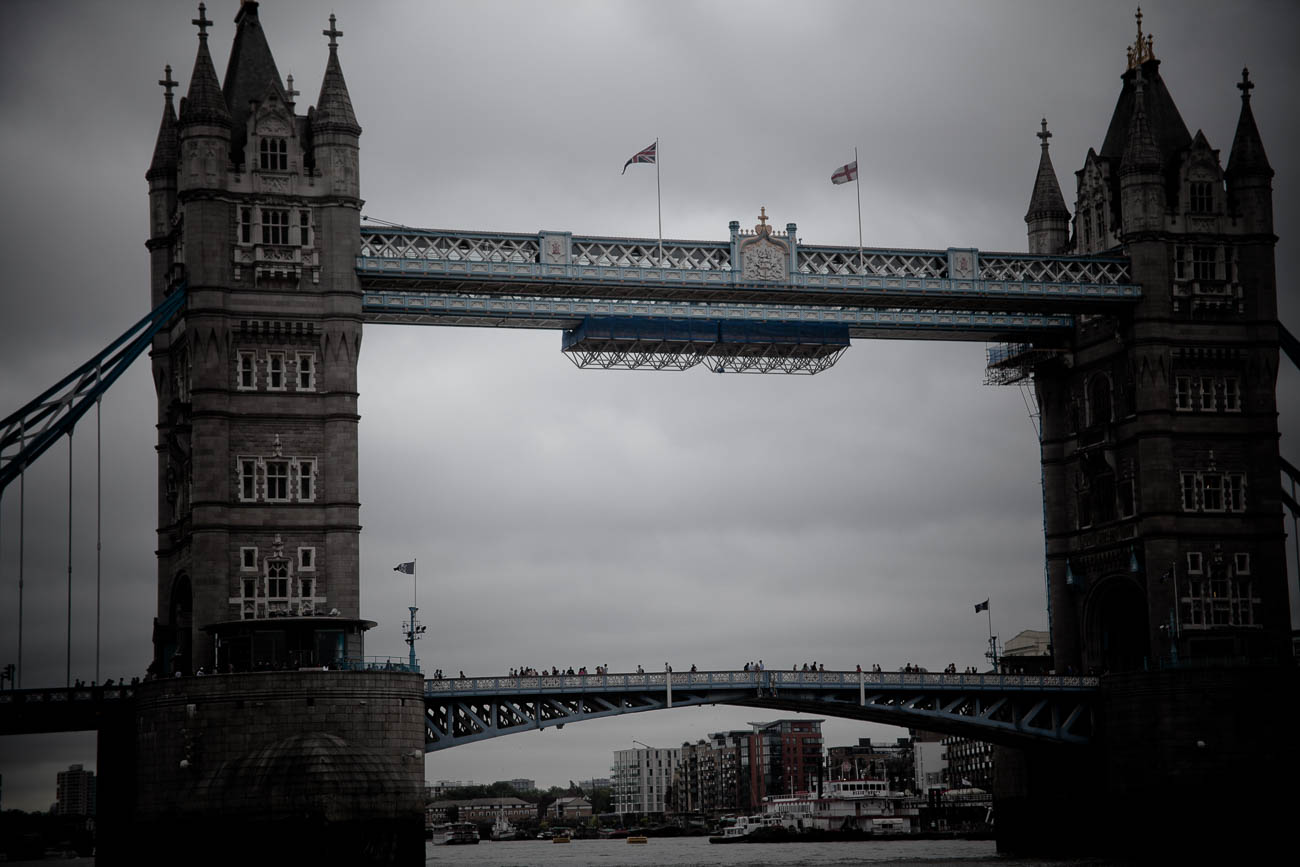
Brick Lane Street Sign Poplar, East London Click on the image for a larger view and for other options
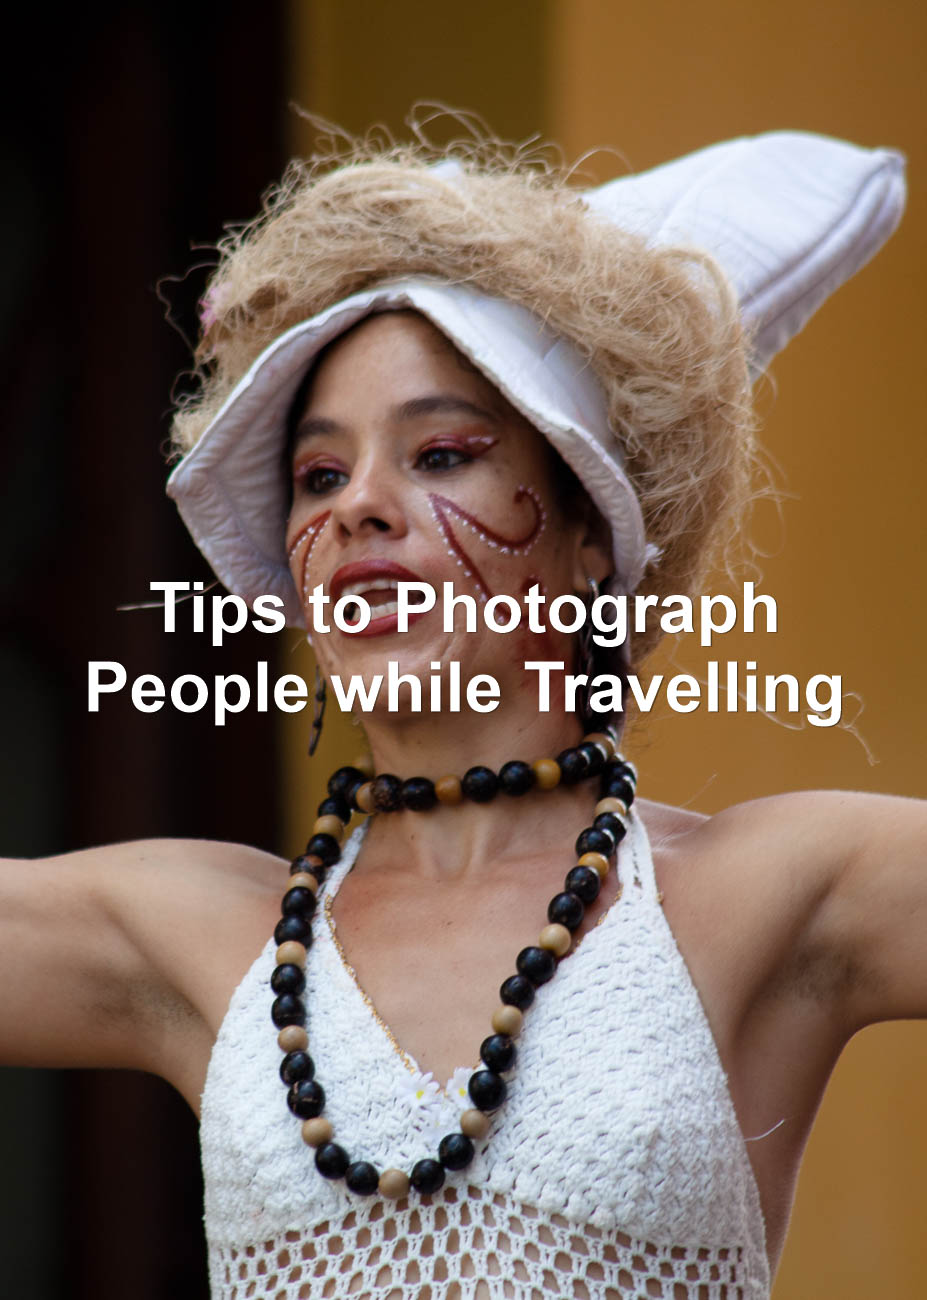
In Tips to Photograph
People while Travelling I said that some of the most interesting
subjects can be people going about their normal day.
I would also add to that the environment that surrounds them as well.
In this article I will give you 13 Tips for street travel photography.
Street Photography
Before we begin , what is street photography?
Interpretations and definitions of street travel photography abound.
My take on it is that it’s photography that captures the moment in settings
that are predominantly man made like cities, towns and villages.
So now we have rough idea of what it is, let’s get into my 13 tips for
street travel photography
1. Being Organised
I’ve mentioned in articles like Planning and Preparation for Travel Photos or The Travel Photographer Destination Guide Part One, about the benefit of planning and organisation. I’ll repeat it here again. Doesn’t matter what type of travel photos you wish to take, being organised is the single most important facet of travel photography. Particularly if you want to give yourself the best opportunities to take home some great photos.
2. Have a Plan
By plan I mean know what sort of street travel photography you want to
practice.
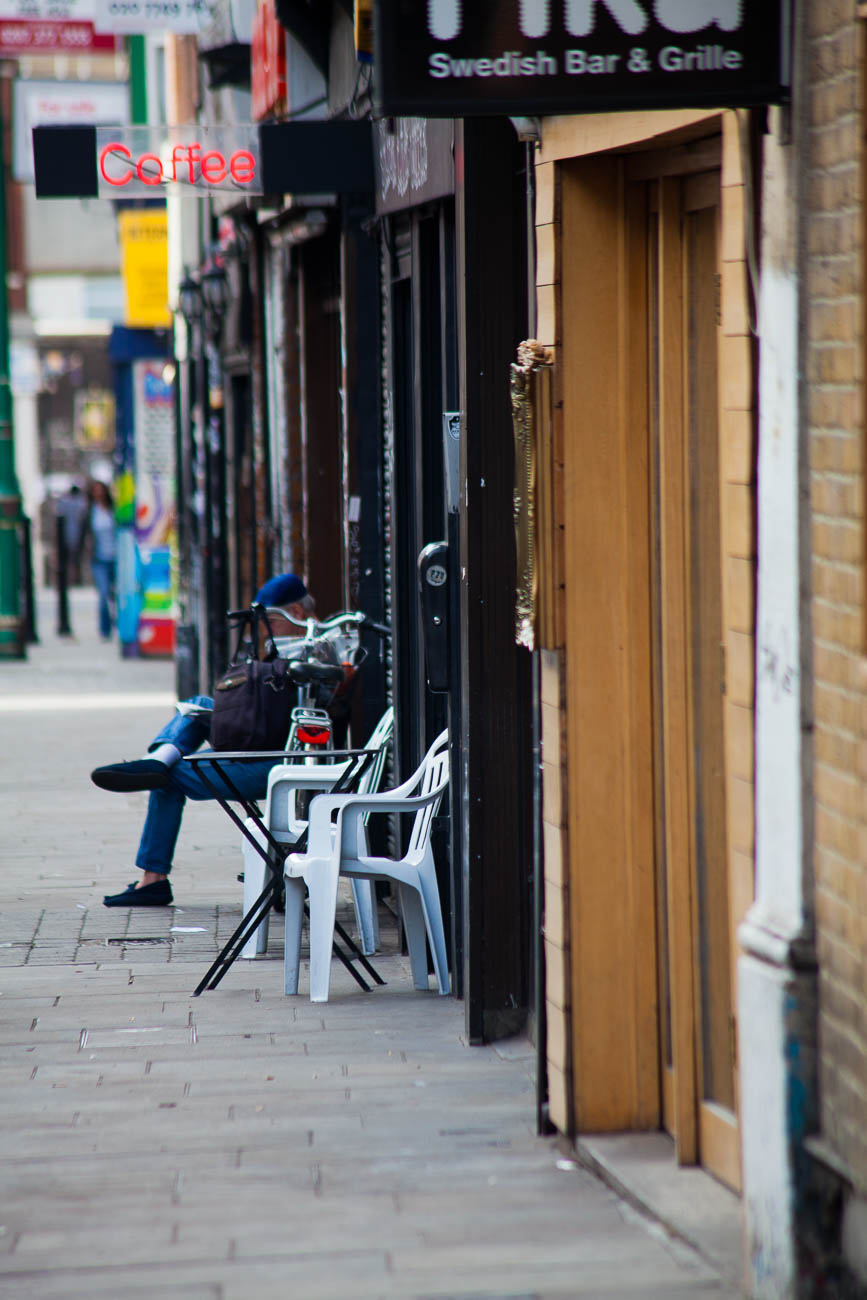
Are you looking for a certain type such as people looking at their mobile
(cell) phones? Maybe you want to get images of people working in café’s and the
café’s themselves.
Whatever it is, focus on that and find the right location/s.
It’s no good wandering down a suburban street looking for cafés.
Brick lane cafe, Poplar London, England. Click on the image for a larger view and for other options
3. Have Patience
In How I took this Travel Photography Image I took quite a good picture of 2 guys laughing outside a bar. I ‘camped’ in one place to take advantage of any possible photo opportunity. Sometimes you must be patient and keep your eyes open. In most areas something will turn up. It’s not much different to taking wildlife. Wildlife doesn’t pose or turn up when you want it to, you have to be in the right spot and wait to grab that picture.
4. Batteries and Memory
Ensure you have the camera battery and your spare (you have a spare don’t
you?) are fully charged.
Also make sure your memory card has plenty of capacity.
If it’s nearly full, change it NOW for an empty one. And of course, make sure
you have at least a couple of empty spares.
32GB is a good size these days. It’s not just memory you are after. Sometimes
memory cards play up or fail, so a backup or 2 is essential
Can’t do street travel photography without battery power and spare memory cards
In the case of smartphones, most modern smartphones don’t have the option to
change batteries. But you can have a mobile power bank to keep it charged.
Similarly, with memory if your phone has the option of micros SD cards or if
not, flash drives, it’s worth investing in either.
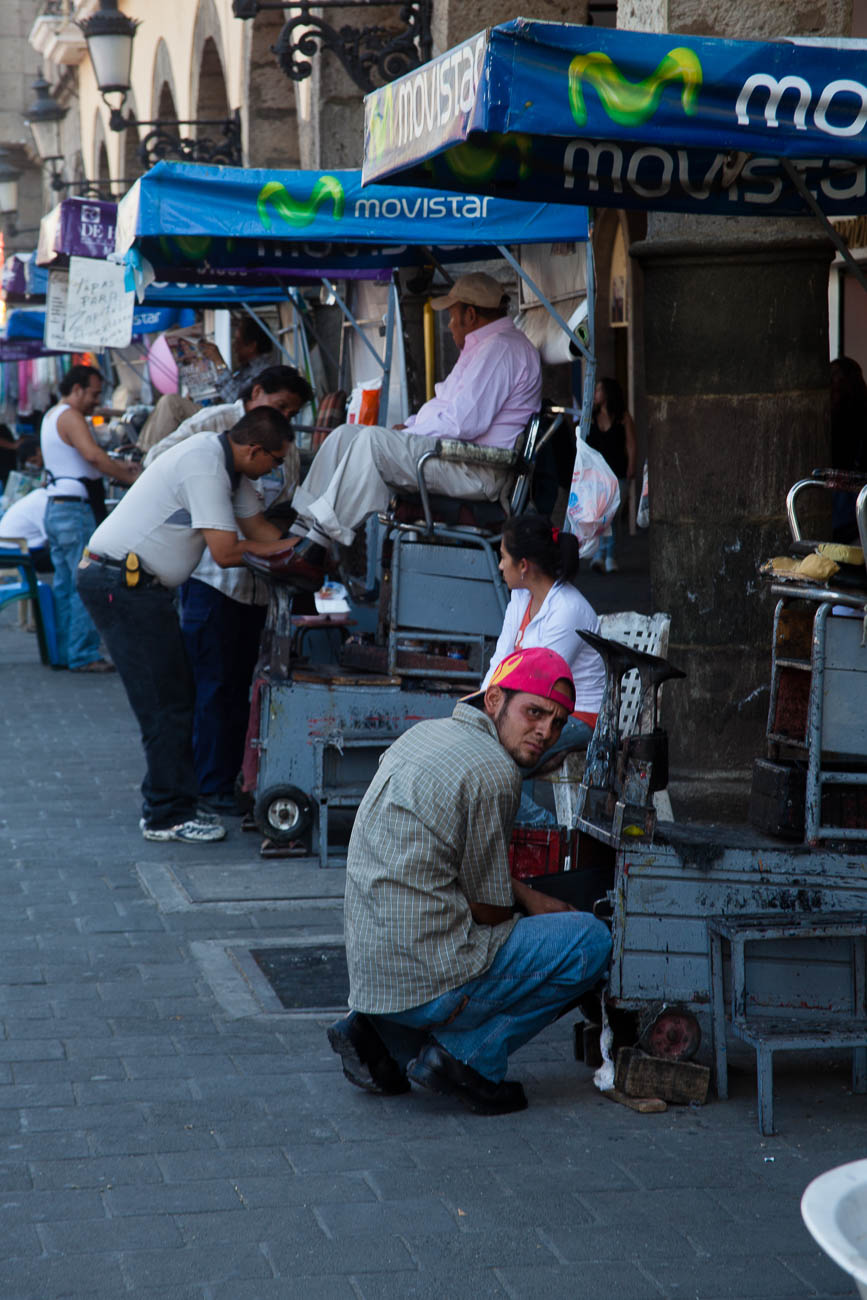
5. Have the Camera Switched On
One reason for having plenty of battery power is that you should always have
your camera on.
If you have a smartphone then make sure the camera app is open and if possible
turn off the lock or adjust the time to turn off the app.
Street photography is very much about being ready and in the moment. If your
camera is off, then you will miss opportunities that you would get with the
camera on.
Shoeshine carts, Guadalajara, Mexico. Click on the image for a larger view and for other options
6. Have that Lens Cap Off
Leading on from the last point. Any extra step you have to take to have your
camera ready can be one step too much. Use a lens hood instead if you are
worried about damaging the lens.
7. Get Close In
When you have a telescopic lens, there is the temptation to position yourself away from possible subjects. Now there are times when this is a good idea. But some of the best street photos have been taken whilst close in. That’s not to say you need to be in someone’s’ space with a camera up their nostril. No, that’s not what I mean. For example, if you are taking a picture of some street art, don’t try and get it all. Pick some small parts and concentrate on that. For more on that see The One Big Creative Travel Photo Idea
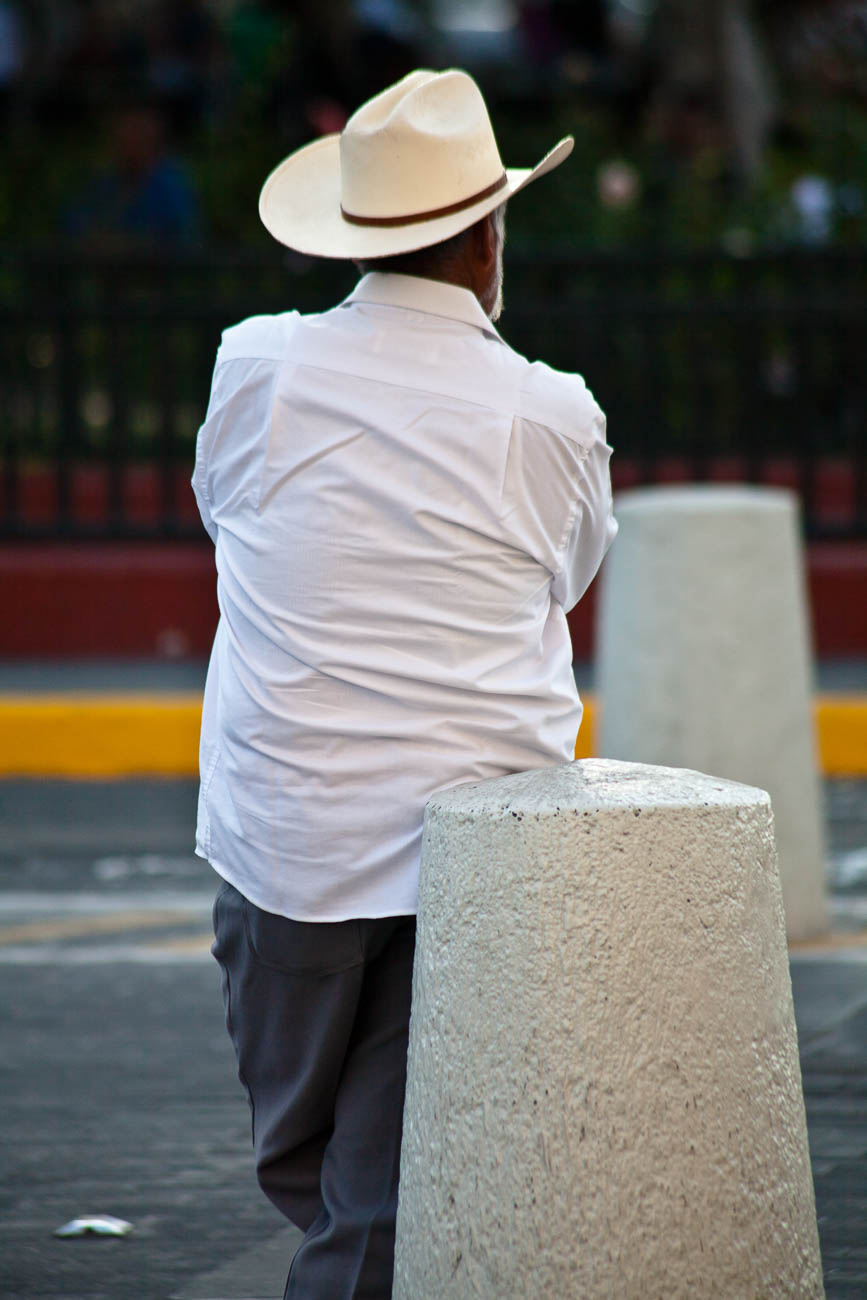
8. Be Respectful
Taking pictures of people can be done quite close without them knowing. If you are going to have people as your subjects, be aware of any cultural sensitivities. Always ask when it’s a situation where it’s pretty obvious that you want to take their picture. For more on that go to my last article Tips to Photograph People while Travelling
Leaning Mexican Cowboy, Guadalajara, Mexico. Click on the image for a larger view and for other options
9. Use your Flash Sparingly
If you have the on camera flash on auto – turn it off!
On camera flash should only be used as a last resort. Much better to jack up
the ISO and have some grain or noise than have that “rabbit in headlights”
look.
As you can see, I don’t use it.
If you do have off camera flash then use it.
You don’t have to have an arm with a flash hanging off your camera to have off
camera flash. There are lots of ways of lighting a subject without flash.
Having someone shine a torch (flashlight) onto the subject can work as well.
10. Be Imaginative
Street photography is an open ended opportunity to take photos. You have
permission to take pretty much anything. Regulatory and cultural sensitivities
permitting, of course. So you have an opportunity to be creative and
imaginative.
Take something you’ve never seen before, use different angles, heights and
positions. Often, we get stuck in the standard position of holding the camera
at our standing height.
11. Shoot in Shade.
On sunny or bright days then it’s best to try and reduce contrasts.
Unless you are taking a photos that highlights light e.g. backlighting or
individual light falling on a subject. If you’re in an area with lots of
reasonably high buildings that shouldn’t be too hard and makes for a more even
exposure. Getting a great photo of a subject only to find some of it is badly
overexposed can be disappointing.
12. Shoot from the Hip
There will be times when you want to grab a shot without being seen. Whilst
you can do this with a telescopic lens, you may not be in the right position to
use it.
A technique, which takes a bit of practice, is to shoot from the hip.
That is have your camera hanging down by your hip, with your finger on the
shutter button. I would also suggest you have the rear LCD screen set on live
view, so you can get a rough idea on what sort of photos you are taking.
If you have a reticulated screen on your camera, one that can be manipulated
at angles away from the camera body, then that’s even better.
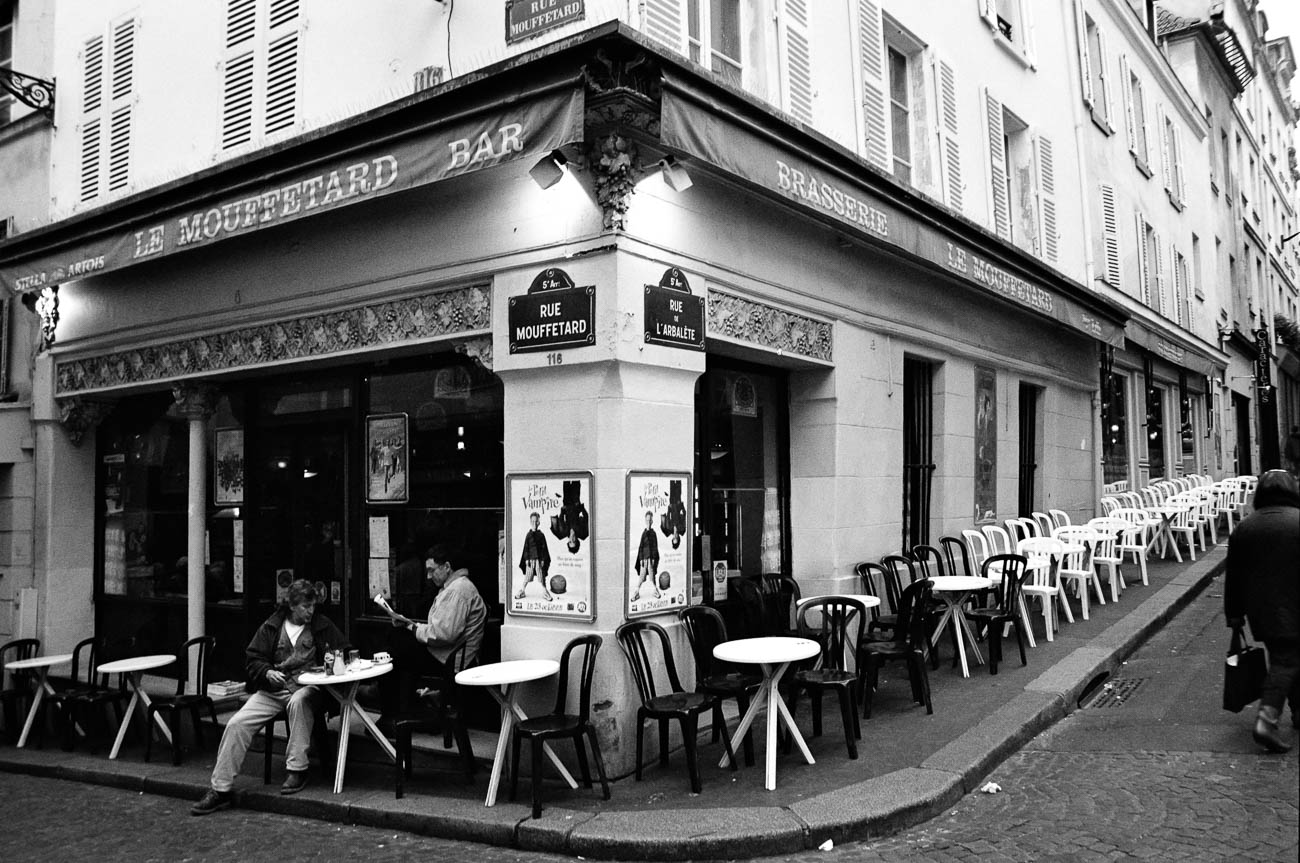
13. Convert to Black and White
Lastly, whilst not compulsory, street photography seems to lend itself to
black and white. Most cameras allow you to shoot in black and white. I would
suggest that you don’t do that. Instead choose and convert the photos that you
think will look good in black and white with your post processing software.
Whilst you can take photos in black and white, you want to have the choice
about whether colour or black and white is better for a particular photo.
Of course, there’s nothing to stop you challenging yourself and shooting
everything in Black and White. In other words, don’t worry about whether it
would have looked better in colour.
Le mouffetard bar on Rue Mouffetard, home to one of Paris’s many markets. Click on the image for a larger view and for other options
Summary for 13 Tips for Street Travel Photography
1. Being organised
2. Have a plan
3. Have patience
4. Batteries and memory
5. Have the camera switched on
6. Have that lens cap off
7. Get close
8. Be respectful
9. Use your flash sparingly
10. Be imaginative
11. Shoot in shade.
12. Shoot from the hip
13. Convert to black and white
You’ve got this far and I appreciate that.
But there must have been something that piqued your interest.
Is it that you see yourself taking some great travel photos that you can
share or display?
Or is it you can see yourself reliving your travel experience by bringing
home some emotive travel photos?
Maybe you aspire to getting your travel photos published.
If one or all of these is YOUR goal, I can help.
If you sign up in the box below you’ll get my free eBook “9 ways to
improve your Travel Photography”. At the same time, you will also
subscribe to my Travel Photo Tips Newsletter.
Remember if you want to take great travel photos
• that you can share and display.
• that help you relive your travel experience
• give you a chance to have your travel photos published
then sign up below and subscribe to my Travel Photo Tips Newsletter and for
your trouble get my eBook “9 ways to improve your Travel Photography”
Any questions then please write your comments below or contact me here and please say hello at these places:
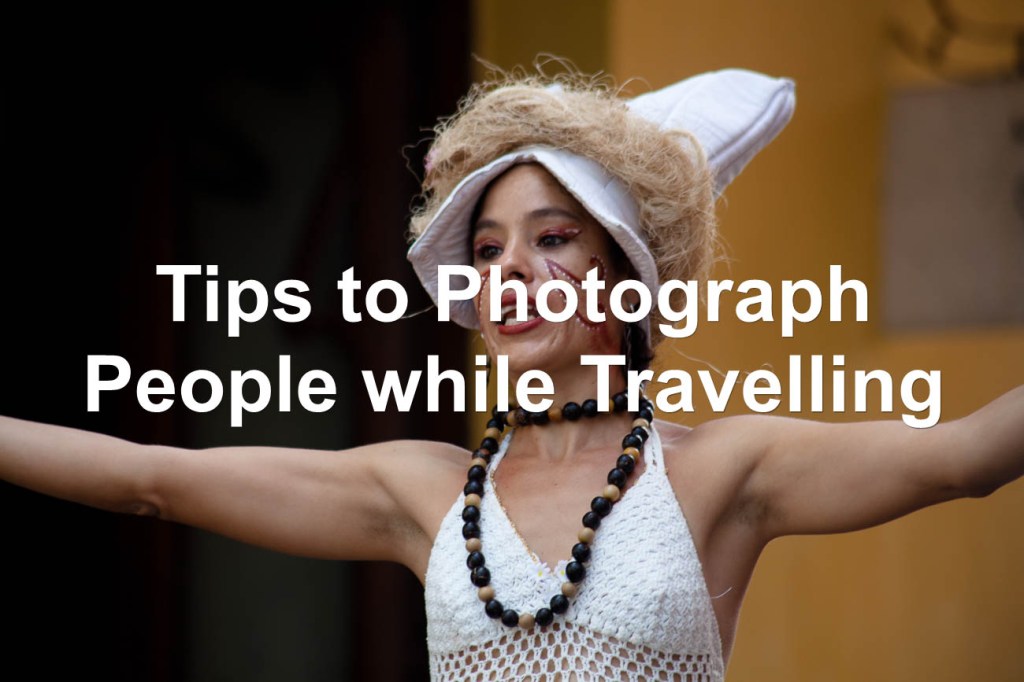
This is quite a common genre. Anybody who travels and takes pictures will need
to know how to take photos of people.
It’s the reason why we travel, although we may not know it. We look to connect,
observe and absorb different cultures and that comes from people
Read on below to get tips to photograph people while travelling
Types of people photos
Photos of people are one of 2 types
Portraits
For the purposes of this article I’m going to describe portraits as posed
photos of people.
In other words they know they are having their pictures taken and are posing
for the camera.
Candid
Candid is taking photos of people, usually but not always without them
knowing that they are the subject.
In other words, they are going about their normal lives.
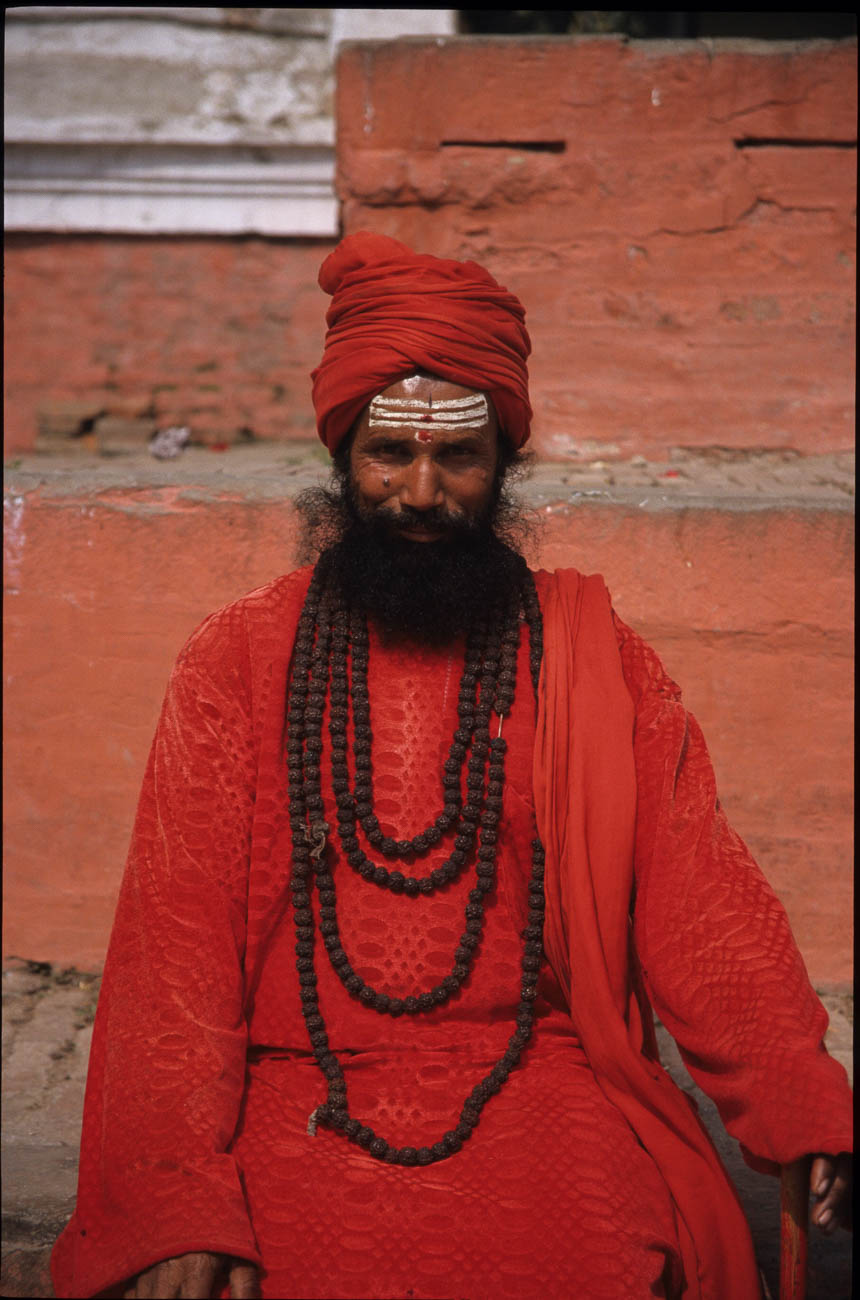
Portraits
Holyman in Durbar Sq Katmandu, Nepal
We all love to get that photo that conveys emotion in bucket loads
Well it takes a little bit of sensitivity and planning.
Sensitivity
Before you do anything or approach anyone you must be across the local
custom and culture.
For example, most of us think that, in general, people in most western societies
don’t have any cultural aversion to having their picture taken.
Yet nowadays the ethnic mix is not only white homo sapiens.
People of all sorts of backgrounds and cultures live permanently in Western
Europe, North America, Australia and New Zealand.
So we need to be just as sensitive in the west as we do when visiting places in
the Middle East or Africa.
Planning
Planning is not only knowing what you want your subject to be doing. But it’s also working out the setting or the area around the type of subject you are looking for. You may be looking for people shopping or serving in a market or walking the street. Whatever it is, have a plan and picture what you want to get out of it.
Once you have taken into account sensitivity and completed your plan that then you need to ask for permission. If you intend taking a posed portrait then you will need to approach someone to get permission. At least that is the polite way, as I’m sure you wouldn’t like someone thrusting a camera in your face.The two main complications in approaching potential subjects are:
The two main complications in approaching potential subjects are:
Cultural sensitivity and
The fact that some people for whatever reason don’t want their picture take
The former is about doing your homework. For example some cultures or religions have a belief that a photograph can steal a soul. Some Australian Aboriginal people have cultural reasons for not wanting their photo taken. If you find this out beforehand then don’t ask! There’s not much you can do about this. Don’t beg or try to bribe. Just move on
Paying money
There will be opportunities to take pictures of people who want to charge
you. You’ll find this usually in developing countries and it’s not expensive.
I’ve had approaches from a bell ringer in Buddhist temple and a Bedouin with a
turban in an Egyptian temple. They wanted me to take their photo at a price.
Relationship
The best way to get permission is to get to know them first.
By that I don’t mean take them to lunch or coffee but have a conversation with
them so that they feel at ease.
If they are being active in some way, ask them what they are doing or ask some
general questions.
Let’s say you want to ask a shopkeeper if it’s ok to take his portrait. Then
you could start by asking about his shop and how long has he had it.
What else does he do? Ask if his family are involved and what they do.
As human beings we love to talk about ourselves and what we are doing.
Most will start to relax once someone takes an interest in them.
Once relaxed that’s a good time to ask for permission to take their photo.
A little tip is to continue the conversation even after taking photos.
If you are subtle about it, you can continue to take photos with the camera
loose around your neck or on a tripod.
A remote release is handy for this because then you are remote from the camera
shutter button.
Sure, some of the images you take won’t be very good. But I bet you can get
some very good pictures because your subject is relaxed and talking instead of
posing.
Taking portraits is challenging and to some can be uncomfortable. But its worth getting out of your comfort zone and asking to take their photo. Once you’ve done it a few times you’ll be surprised at how easy it becomes and how enjoyable it is.
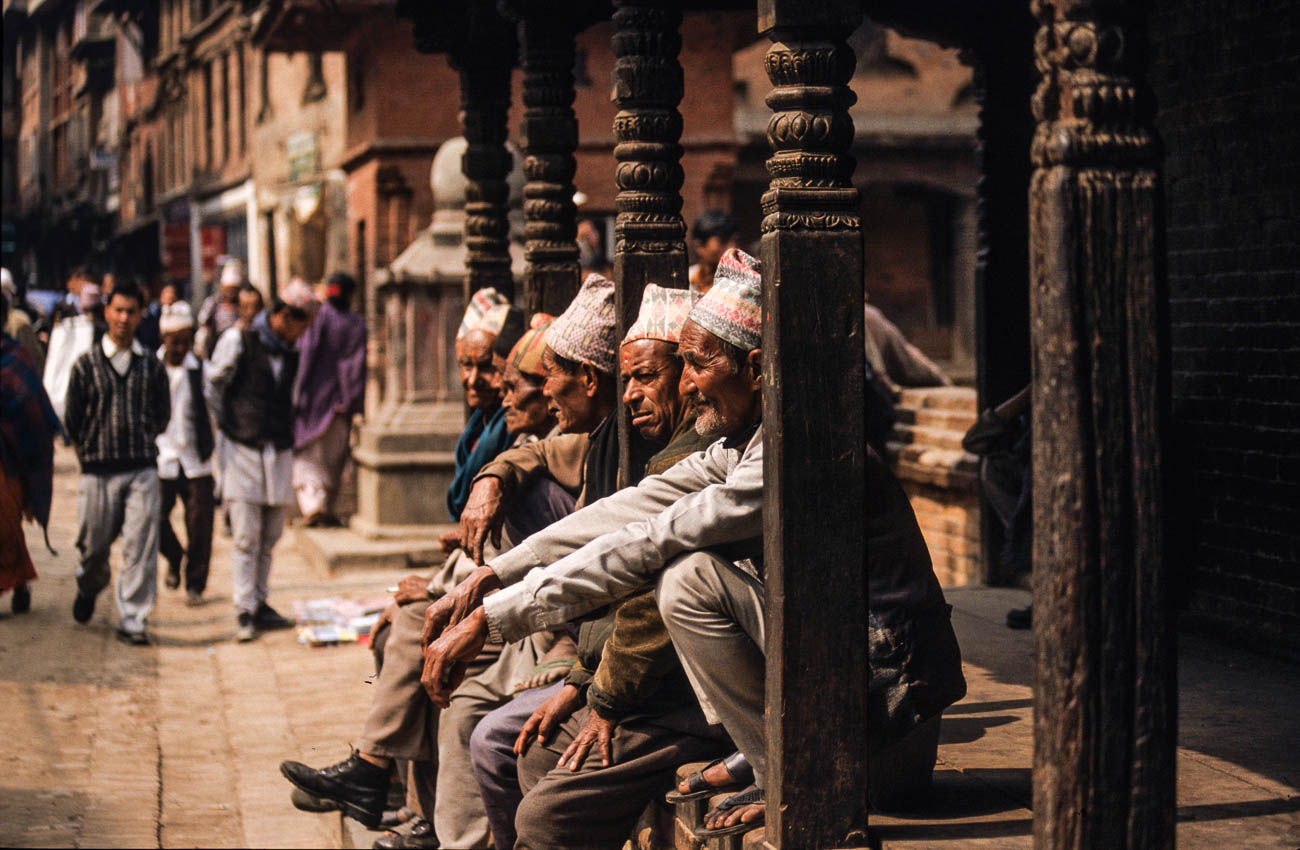
Candid
A group of men sitting on a wall in astreet in Katmandu, Nepal
Of course, if portraits really aren’t your thing or you want to mix it up,
then taking candid shots is the way the go.
Again, the main factors are sensitivity and planning
Sensitivity
Even though you are usually taking photos of people without them knowing.
You do still have to have some degree of sensitivity.
I can remember taking a candid shot of a stall owner in a Marrakesh market. I
didn’t think he saw me, but he did and asked me to delete it.
I could have said no, as in general you can take photos of pretty much anyone
in a public place.
But, I didn’t mean to upset him and gladly deleted it.
I did ask him whether I could take a posed photo which he agreed to. He asked
me to come back later and when I did, he was nowhere to be seen.
Can’t win them all.
So, the point is don’t make it obvious that you are ‘stealing’ a photo.
It’s not just that you might upset someone. It can work the other way where
they actually pose which may not be what you were after. Or they could put
their hand out for payment which I’ve discussed earlier
Planning
Planning for candid photos can be as in deep as knowing exactly what photos
you want to take.
Or doing what a lot of street photographers do and park yourself in one spot,
cafés are good for this.
Then wait patiently for opportunities to present themselves.
Of course walking the streets keeping your eye out for opportunities can also
work.
I will say, that whilst you are on the move you can easily get distracted so
you tend not to anticipate what’s likely to happen.
Techniques
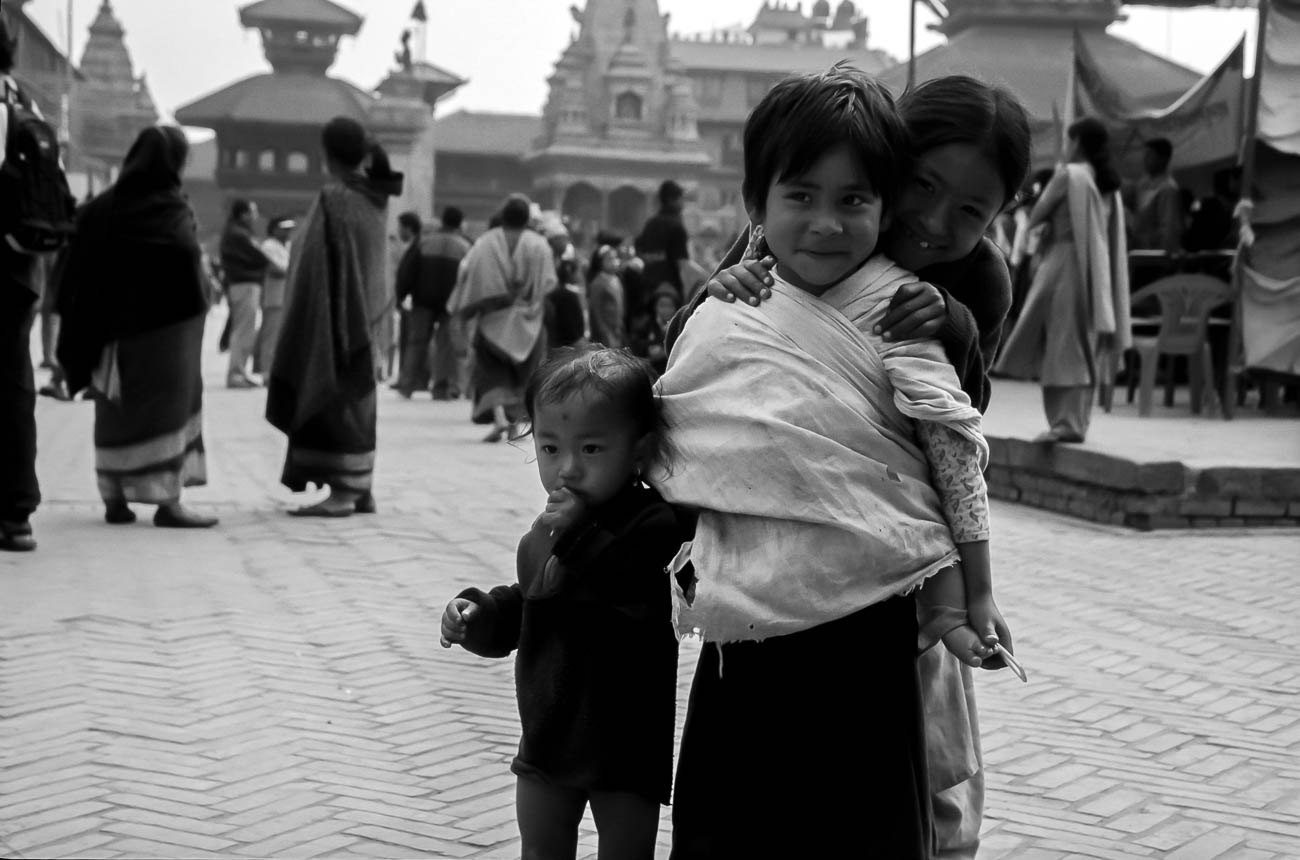
Children, toddler and baby in Bhakatupur square, Bhakatupur, Nepal
There are various schools of thought on how to set up your camera for
Portrait and Candid shots.
A lot also depends on what equipment you have.
For both 80-105mm in the old language is standard.
Some photographers like to use a wide angle, say 24mm.
Others like the look of the compression created by zooming in with a long
telescopic lens.
If you want that blurry background with the subject nice and crisp, then you
will need to go for a large aperture (small F-stop). The equivalent of f2.4
should do it. Of course, not all cameras give you that option. Most smartphone
can’t at all without some devilish app trickery.
If on the other hand you are taking photos where the person is part of an
overall scene, then an aperture of F8-11 will do the job.
Whatever settings you need, make sure they are set correctly. Especially
before embarking on taking people portraits.
Don’t make your subject wait for you to set up the camera. They will soon run
out of patience. And you will be putting yourself under unnecessary pressure.
Light
Of course, the above recommendations are for ‘normal’ light.
If the light is poor, then you will need to make sure your ISO is set quite
high. If you have it set to auto then it might be already.
The alternative is having the aperture set as wide as you can, to let what
little light there is in.
Summary of Tips to Photograph People while Travelling
There are two main ‘genres’ of people travel photos.
Portrait
Portraits are taking photos of people who are posing. I.e. They know they
are having their photo taken
Candid
Candid is taking photos of people usually without them knowing that they are
the subject.
To take people photos it’s important to:
Plan well
Be sensitive to local cultures and respect the wishes of the individual
Be ready to recognise and take advantage of any opportunities
Have your Camera on the correct setting.
What to do now
You’ve got down this far and I do appreciate that.
There must have been something that piqued your interest.
Is it that you see yourself taking some great travel photos that you can share
or display?
Or is it you can see yourself reliving your travel experience by bringing home
some emotive travel photos?
Maybe you aspire to getting your travel photos published.
If one or all of these is YOUR goal, I can help.
If you sign up in the box below, you’ll get my free eBook “9 ways to
improve your Travel Photography”. At the same time, you will also
subscribe to my Travel Photo Tips Newsletter.
So, let me repeat that.
If you want to take great travel photos
that you can share and display.
that help you relive your travel experience
give you a chance to have your travel photos published
Then sign up below and subscribe to my Travel Photo Tips Newsletter AND get
my eBook “9 ways to improve your Travel Photography”
Any questions then please put your comments below or contact me here and please say hello at these places:
There are so many features now on a camera that its’ both mind blowing and confusing.
The TV Analogy
When we were in the market for a new TV, we discussed all the different features and benefits with retailers.
By the time we had finished we were totally confused. Salespeople in different shops seem to tell us something different about the same TV. For example, one would say this TV doesn’t have Freeview plus, whilst another would say that it does. In the end, I researched on each manufacturers website. I even rang them to ensure that the information I had gathered was accurate. After doing that we went and bought the TV we wanted.
So, what about Camera features? Well compared to TV’s there are way more things to think about.
In my opinion there are too many Camera features that are not needed! This article is to help you navigate the different Camera features. I’m going to suggest some essential camera features you need to consider having.
Either when you are in the market for a new camera or mobile phone or that you should review on your existing camera. This article consists of 4 sections:
1. The single essential camera feature you must have 2. Four Camera features you need 3. Eight Camera features to have 4. Six Camera features you don’t need
After each Camera feature is a rating out of 10 – 10 being must have.
The single essential Camera feature you must have
So, let’s start with absolute must!!
Mechanical Exposure controls
Usually on most cameras there are a P, A, S and M modes.On small compacts there usually is only a P mode.
On smartphone cameras, even the best ones, they don’t yet have the option to adjust the exposure the “old fashioned way”. So what’s with the “old fashioned way”? Well without going into a great deal of details on how a camera works, I’ll explain: All cameras have an aperture and a shutter. Both allow light into the sensor but in different ways.
The aperture allows in light by changing the size of its hole, the shutter allows in light by the speed of its movement. Having the option of being able to control both or at least one of these is one of the keys to getting great photography.
What do all these letters mean?
P stands for program and is a more sophisticated way of shooting in auto. The camera decides which aperture and shutter speed to use.
However the difference is that you can also weigh in by using what’s called in the industry “shift”. A stands for aperture priority and S stands for shutter priority. In both these modes you control one whilst the other one is controlled by the camera.
Most pro photographers depending on their specialisation will shoot in aperture priority. M is where you have complete control. You set both the aperture and the shutter speed.
This is not something a beginner would dabble in until they have got some experience with the other modes
Confused? Let’s go into more detail
If you want to take a photo of a subject with all the background blurred then you would need to adjust the aperture. If on the other hand you want to take a photo of movement.
Let’s say, a dancer practicing or performing then you would more than likely want to adjust the shutter to capture the type of movement you want.
That can be blurred motion or freezing the action. So, it’s handy to have that degree of control.
What’s that you say? You’re only beginning so you only need auto!
That’s fine. However I would suggest that if you want to create images that you can be proud of, then at some time in the future you will need more control.
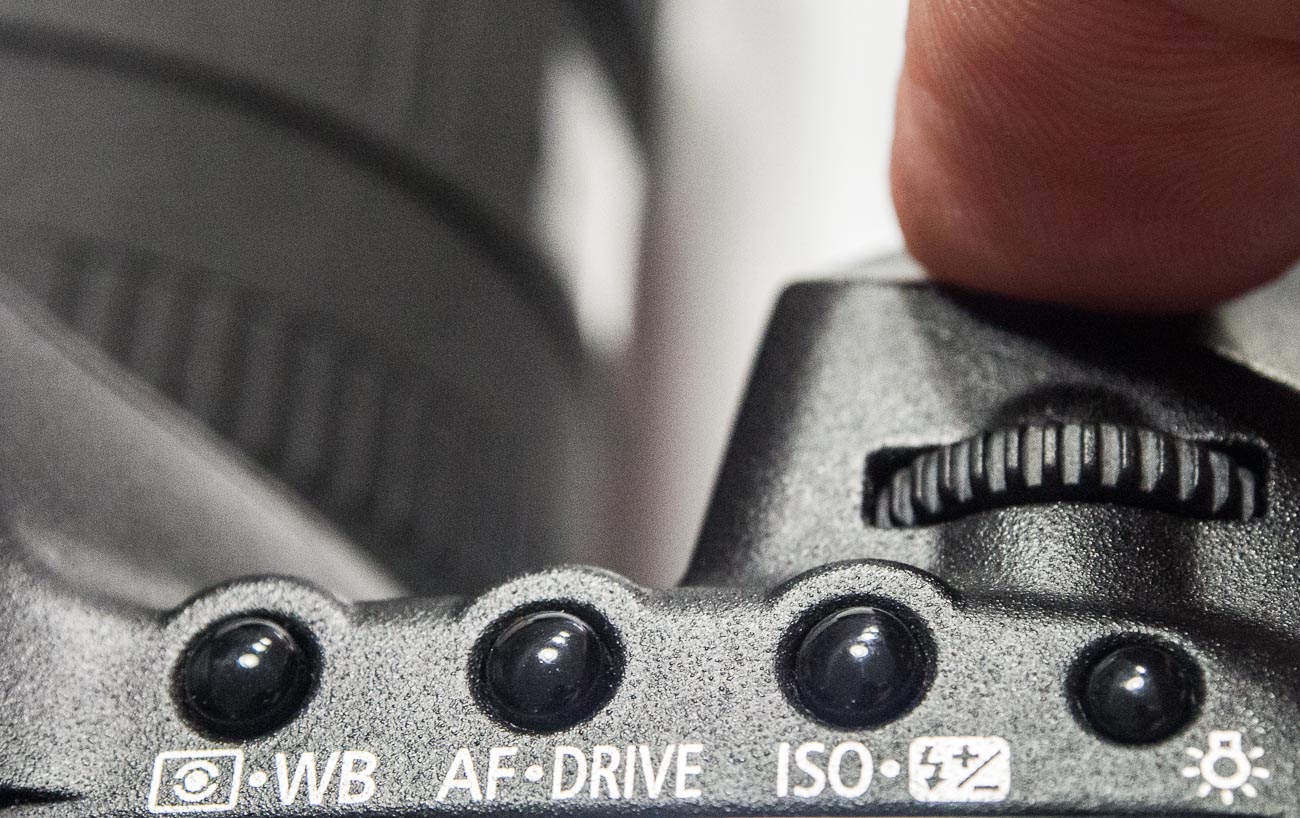
The ISO factor
One extra control that goes hand in hand with exposure is ISO adjustment. In fact, the aperture, shutter speed and ISO make up the exposure triangle. That is to say that the adjustment of one affects the other two. With each camera manufacturer trying to outdo each other, the ISO on a top end DSLR can now be adjusted to over 400,000.
Which is crazy, as now the camera can take pictures in the dark! When you change your ISO setting, you’re adjusting your camera’s sensitivity to light. ISO settings are normally anywhere from 100 to 10,000 (or higher). These numbers have a direct relationship with the sensor’s light sensitivity.
Therefore the affect both the aperture and shutter speed. so a low setting means you need more light whilst a high setting needs less.
Rating: A or S is 10/10
Four Camera features you need
Drive
Drive selection is the option to select single, continuous or timer shooting. Single is one shot each time the shutter button is pressed.
Whilst continuous can be anything up to 15 frames per second (FPS) which is great for action pictures. The self-timer option is great for selfies. It’s also handy if the self-timer has two intervals. For example, a short, say 2 second, interval can be handy to use if on a tripod in low light instead of using a remote cable or wireless device. One thing to be aware of is that cameras these days are really mini computers.
So sometimes there can be a lag if you shoot in continuous, especially in Raw format due to the larger file size. Drive selection is standard on most cameras.
Rating: 10/10
Bracketing
I mentioned earlier that I’m a champion for getting the shot right first time in the camera, well bracketing helps this. Bracketing allows you to automatically take 3 shots of the same subject at different exposures, usually by one or half a stop each. I.e. aperture and/or shutter speed settings. You take the shot at the setting you think is correct and the camera will adjust the exposure settings for your next 2 shots to make those images lighter and darker. Handy when taking images of scenes or subjects where there is a lot of contrast. Some cameras allow you to bracket at different ISO, white balance and flash settings. Apart from the flash option these are a little superfluous.
Rating: Exposure bracketing 8/10 ISO, white balance and flash settings 3/10
Viewfinder
In the early years of digital cameras, very few had viewfinders.
Camera manufacturers thought that everyone would migrate to the rear screen or monitor on the back of the camera. However, the exception to the rule was the DSLR which retained the optical view finder. Nowadays Electronic Viewfinders have come into their own and very good they are too. Why use a view finder at all? Why not the rear monitor? Well 3 reasons come to mind
1. Camera shake is reduced. Holding the camera out from your body means it is a lot harder to keep still.
2. Competing light. Ever looked at the rear screen on a sunny day? You can’t see a bloody thing!
3. Battery power. An LCD screen will always use a lot more power than a viewfinder either optical or electronic.
But there are viewfinders and there are viewfinders. Make sure it feels comfortable. The frame should be 100% not have any cropping, has a central view i.e. as if you were looking through the Lens.
Rating: 10/10
Shooting and viewing videos
This is usually on most cameras and is the rapidly becoming the number one medium on social media. This is a whole article on its own so I won’t go too deep. I would say that at this stage the only recommendation is to ensure that the camera shoots in high definition (HD) at the minimum. A lot of cameras are now able to shoot in 4K but like 3D there are still limitations on being able to view 4K videos. That will change as it’s only a matter of time until 4K TV’s and Monitors will be more common as the price drops. Unfortunately, the image and video quality available is not yet matched by the audio quality that comes standard with most cameras. So, make sure you buy a good microphone that’s compatible.
Rating: 10/10
Eight Camera features to have
Being able to turn off Flash.
Controversially I used to rarely use flash, preferring natural light. Yet the degree of control some of these cameras allow you to have over flash means that it can be used to enhance daylight and improve the image. Because of this, I use it more and more these days. There are options to use flash in several different ways, Fill in, Slow, Red Eye reduction, Auto, Off or On etc. But it’s the option to be able to turn it off, especially if the camera comes with an inbuilt flash, that’s so important. Speaking of inbuilt flash. Avoid using them as much as possible. The ideal flash should be off camera. Something I’ll discuss in a future post.
Rating: On camera flash 4/10. Turn off flash 10/10
Focus targeting
Like most cities in the USA, Anchorage has a big fourth of July parade. This one was in 2012
Another option again almost universally supplied is focus targeting. Looking through the viewfinder and/or the rear screen you can bring up a rectangular or square grid of around 30 boxes that you can select to use as a focus target. Options usually include single, selected groups or all targets.
Rating: 6/10
Exposure Compensation
Exposure compensation is great!
The ability with just a twist of a dial to alter the exposure or brightness without having to alter the aperture or shutter speed that you’ve already set is very handy. Of course, it does adjust something so it should only be used for small incremental changes.
Rating: 10/10
Metering
Metering, whilst another handy option to have, is not used much. I think that’s because it’s not understood by most camera buyers. That too is a post for another day but suffice to say it’s a must have for the future.
Rating: 7/10
Image Stabilisation
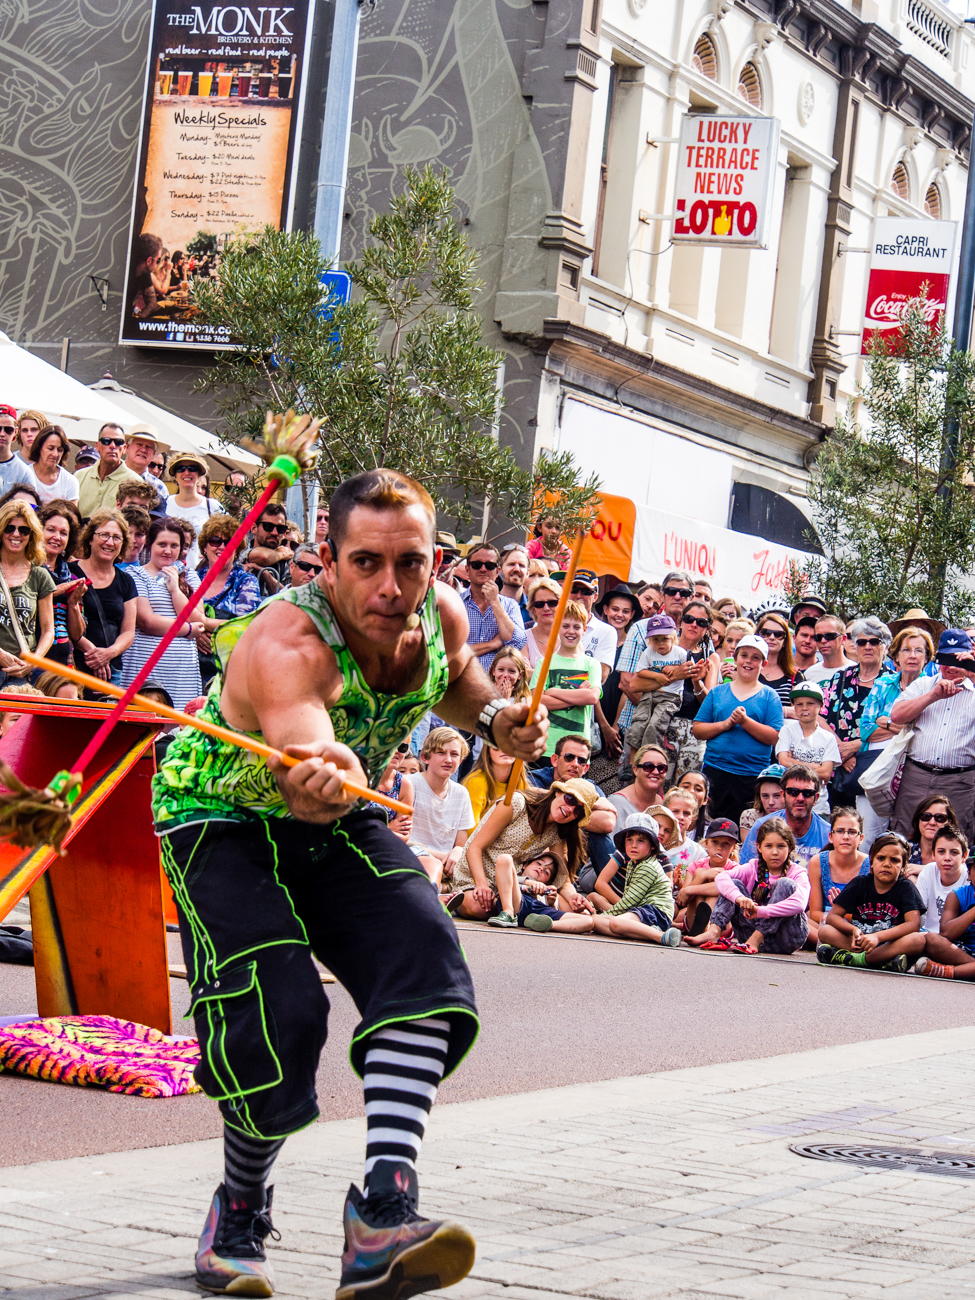
The street art act, Dream State Circus at the Street arts festival in Fremantle, Western Australia. the festival attracts over 100,000 spectators over the Easter long weekend.
Many years ago, I met a photographer who was taking clear and sharp images of wildlife at dusk without a tripod. That was my first introduction to image stabilisation. Basically, it compensates for camera shake caused by slow shutter speeds and is a must have. Initially they were only available on the lens but nowadays most cameras have it inbuilt. So now you don’t have to worry about what lens to use. Again, a must have.
Rating: On camera 10/10
AEL/AFL Lock
(Auto exposure Lock/Auto Focus Lock)
I use this option all the time. The ability to be able to lock your exposure and/or focus is invaluable. How does work? Well usually there is a button on the camera that allows you lock the exposure and or the focus and then recompose. When would you use it? In lots of situations Landscapes, Portraits, Products, even macro work
Rating: 10/10
White Balance
What’s white balance?
Well it’s on every camera these days, so if you leave the setting on auto you don’t have to think about it.
But (always a but) there are times when auto doesn’t get it right. For example, tungsten or fluoro lighting tend to confuse it a bit. That’s when you take it off auto and set it to appropriate setting like, duh, tungsten or flouro
Rating: 8/10
RAW Format (Image Quality)
One phrase that is somewhat misleading is the term “Image quality”. Used for having the choice of what format to use i.e. JPEG or Raw.
I’m not about to expand too much on what the difference is but if you shoot in Raw then you will need to do some post processing whilst JPEG is mostly ready to go. That’s simplifying it but to do the argument justice I like to use a cooking analogy.
You could say that Cooking a supermarket bought ready to go meal that you sling in the microwave is a JPEG.
Whilst a meal that contains the raw ingredients you have bought at the local farmer’s market and prepared and cooked from scratch is a Raw file. The former is what you see is what you get (unless you can’t cook and cock it up altogether).
Whilst the latter is a creation that you can manipulate to give you whatever flavour and presentation you like. Clear? Another future post maybe. Anyway, most cameras will give you the option to select either and/or both and other variations. But the option to be able to shoot in Raw is a must, if not to use now but in the future!
Rating: Raw Option 10/10
The 6 features you don’t need on your camera
Cafe in Lixouri. Coffee drinkers in Lixouris main square
As you can see I have strong opinion on what you should have on your new (or existing) camera but guess what?
I have an equally strong opinion on what you didn’t need as well.
So, let’s get into it:
Picture Styles
Pike Place markets in Seattle, Washington, USA
Often there are picture styles, modes or scenes available and they can be countless;
Action, Portrait, Landscape, Panorama, Sunset, Candle, Fireworks, Beach & Snow, Fisheye, Wide-angle, Macro etc Some models also give you some tips for certain photo genres in the same mode. E.G. “Tips for flower Photos” What is often not discovered until the camera is used is that some of these modes, e.g. Fisheye, Wide-angle or Macro need to have lens that support those scenes. There is, however, one camera that it’s probably better to have some modes available for and that’s a good smartphone camera, e.g. the Samsung, Google or Apple varieties.
Most images taken by a smartphone are shared so it can be a shortcut to getting a good image first time.
Rating: 2/10
3D
Here’s a useless option ‘3D Photography’.
3D TV’s bombed and as far as I can tell there’s not many 3D monitors either, so why would anyone want to shoot a 3D image or video. It is used for some specific industries e.g. Computer-graphics, Architecture or Health. However, in my humble opinion, it’s useless as it relies on the viewer having the equipment to view it.
Rating: 0/10
Multiple Exposures
Not so useless but not essential is the recording of multiple exposures.
Multiple Exposures are photographs in which two or more images are superimposed in a single frame.
If you really want to try this for your travel photography be aware that it is somewhat tricky. In fact it’s much easier to do it in something like Photoshop.
Rating: 4/10
Digital Zooms
Digital Zooms are commonplace at the compact level and all phone cameras have it.
Personally I avoid using them as much as possible and will use an optical zoom over a digital one. What’s the diff? Well an optical zoom is a true zoom lens. They produce much better-quality images. A digital zoom uses some in-camera image processing.
When you use a digital zoom, the camera enlarges the image area at the centre of the frame and trims away the outside edges of the picture. The result is the same as when you open an image in your photo-editing program, crop away the edges of the picture, and then enlarge the remaining portion of the photo. By using the in camera digital zoom you lose the information around the crop. Whilst if it’s cropped during post processing you can keep the entire frame for use later on.
Rating: 2/10
Face Priority
My pet irritation is Face Priority. Personally, I think it’s a gimmick.
Originally in small compacts it’s spread its way into smartphone cameras and now even DSLR’s. If you are taking a portrait, then supposedly the camera will aid your focus by detecting the face.
Rating: 0/10
Printing
Printing is on its way back. Whilst the option to directly print from the camera could be handy, it’s also generally restrictive.
This feature often requires certain functions to be available on the printer. At the end of the day, if you are going to do any post processing even if it’s minimal, you should be able to print from that software.
Another option is to take it to a print shop if you are looking for high quality. Of course, you can always use the self-service machines that are everywhere.
Rating: 2/10
Conclusion
Of course, there are other Camera Features not mentioned here. But these are the main ones you will most likely come across. As you can see there are lots of different Camera features and I didn’t cover them all.
But the one thing to remember is it’s not the camera that takes the images, it’s you. All features and benefits do is give you more options a lot of which you will never use or use once or twice a year at best. A short cut is to decide how much you are prepared to spend, go into a shop and test drive those within your budget, decide on the most comfortable and buy it. When you pick it up it needs to feel comfortable. Does the weight seem too heavy, too light or, just right? If it has a viewfinder, does that fit comfortably against your eye? Is the rear screen easy to see? How easy is it to see when you are holding it? How easy is it to adjust the dials and access the menu/s? Does the grip feel good? Is it easy to turn to portrait or landscape mode? That’s what you need to look for in a new camera and to revisit your existing Camera.
Make your life easier and double check the features on your new or existing Camera by downloading a e-book to Camera Features. Just pop your name in the box below.
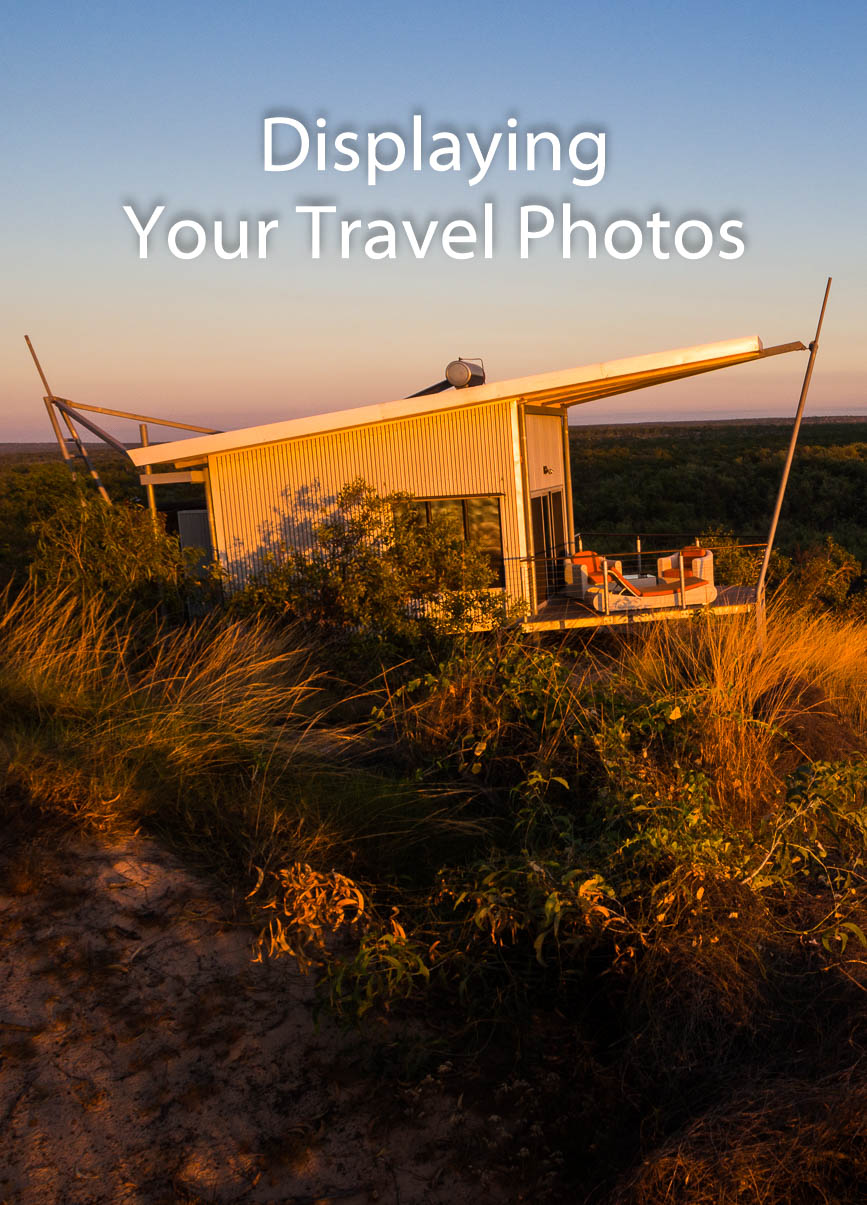
Let’s see what the best ways are for displaying your travel photos
Physical or Hard Copies
The most obvious one is to print them out and then display them in several different ways.
Printing
A word on printing. Printing is very much one of the dark arts. Getting the calibration correct so that what you see in print matches what you see on screen is no easy feat.
At some later date, I will cover this and if you have never delved into printing, then I suggest you get them printed by a third party.
Of course, that’s not that straightforward either. You will need to decide three important elements:
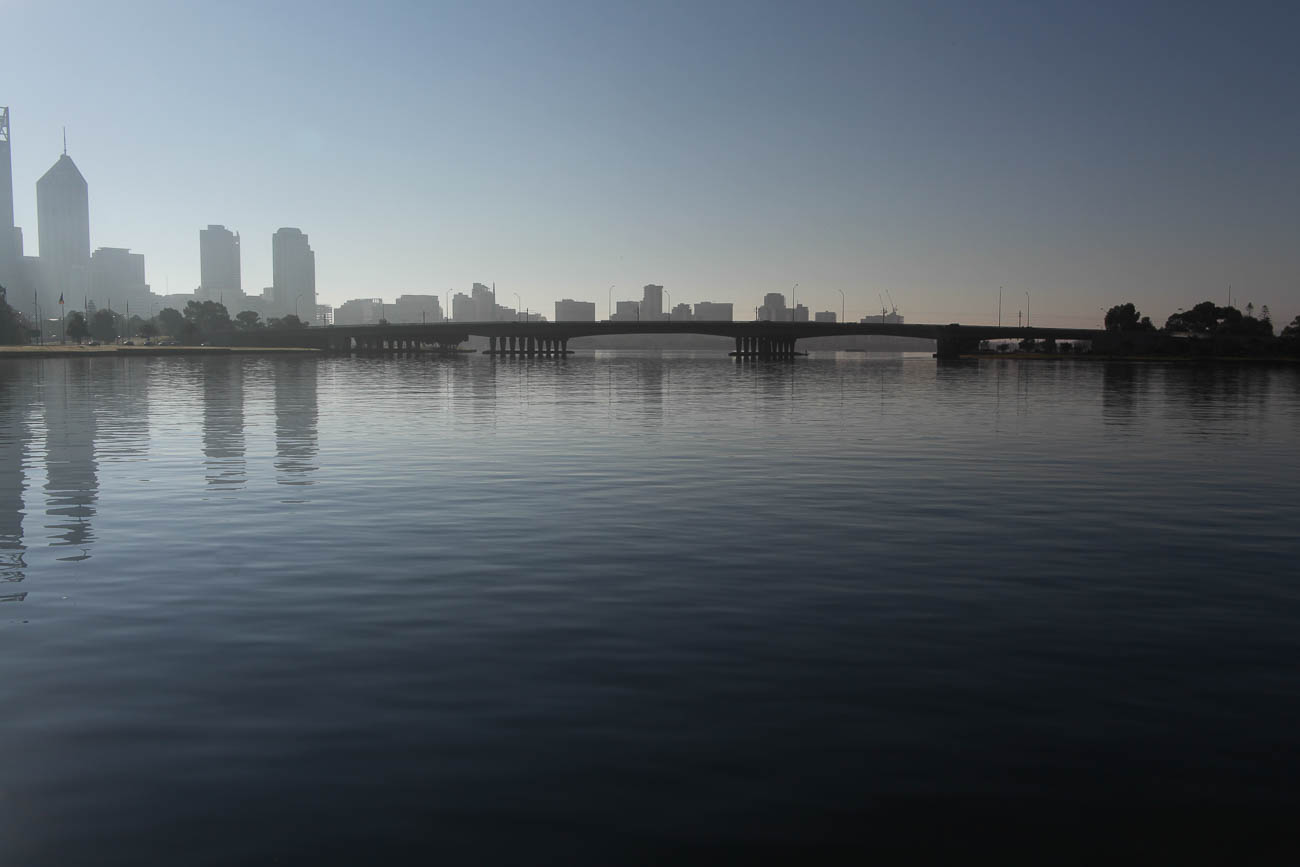
Perth from the Old Swan Brewery on the Swan River in Western Australia. Click on the image for a larger view and for other options
Quality
Quality can be subjective.
Make sure that the digital photo you want printed has had some post processing and you are happy enough with the result to want to get it printed.
There are many different organisations that will print your beloved photo.
This is where quality comes in. If you want to have something that you can mount on your wall (or even someone else’s) then I would recommend that you go to a specialist printing lab. They have varying degrees of quality that you can choose according to your budget and requirements.
For example, they can colour match and also will offer different process’s that will enhance your photo.
There are still some Shopping Mall Photo Printing Labs that will give your photo some attention before printing.
But most stick it through their process and you get what you get. As in most things you get what you pay for.
Some of these also have DIY booths or machines where you can do some of your own ’tweaking’ like contrast and brightness.
You can also find these booths at some department stores like Walmart or K-Mart,
Paper
Again, depending on what you are looking to achieve, choosing the correct paper will be very important.
There are multitudes of different papers available.
To decide on which paper to have you will need to take into consideration things like wear and tear, framing, reflective surfaces etc.
There are 3 main types of paper; Gloss, Lustre and Matte. Gloss is punchy, Lustre is a bit more subdued and Matte will tend to be used to evoke a moody and artistic feel to a photo.
Size
You will need to decide whether you are going to frame the photo and where you will display it. If you intend to display it you want to make sure it’s a reasonable size, at least foolscap, which is A4 or USA Letter.
If on the other hand you just want to show and tell, then 6 x 4” is adequate.
One tip about framing is that unless your budget is big, go for paper sizes that suit standard frames. Going to a framing company is not necessary these days. I like Ikea frames as they are a reasonable quality at an inexpensive price
You want a simple frame that enhances the photo without being a distraction.
Digital
The more likely option of displaying your photos is digitally.
Often, we will get our memory cards, load them on our computer and then forget about them.
Let’s assume you are organised. That your images are all sitting in well organised folders on your computer. If they are not then go to 7 Ways to Organise Your Travel Photos to get some tips on how to do that.
Private Display
What do I mean by private display? The most important person to see your photos is you. We can all get carried away in the moment of taking photos without looking at them. You need to view them on a large screen and learn what worked and what didn’t.
I would suggest you do that before you have even edited any of them, otherwise you will never look at them. Like most photographers, I run well behind my post processing. but I still like to view them even if they are not at their best!
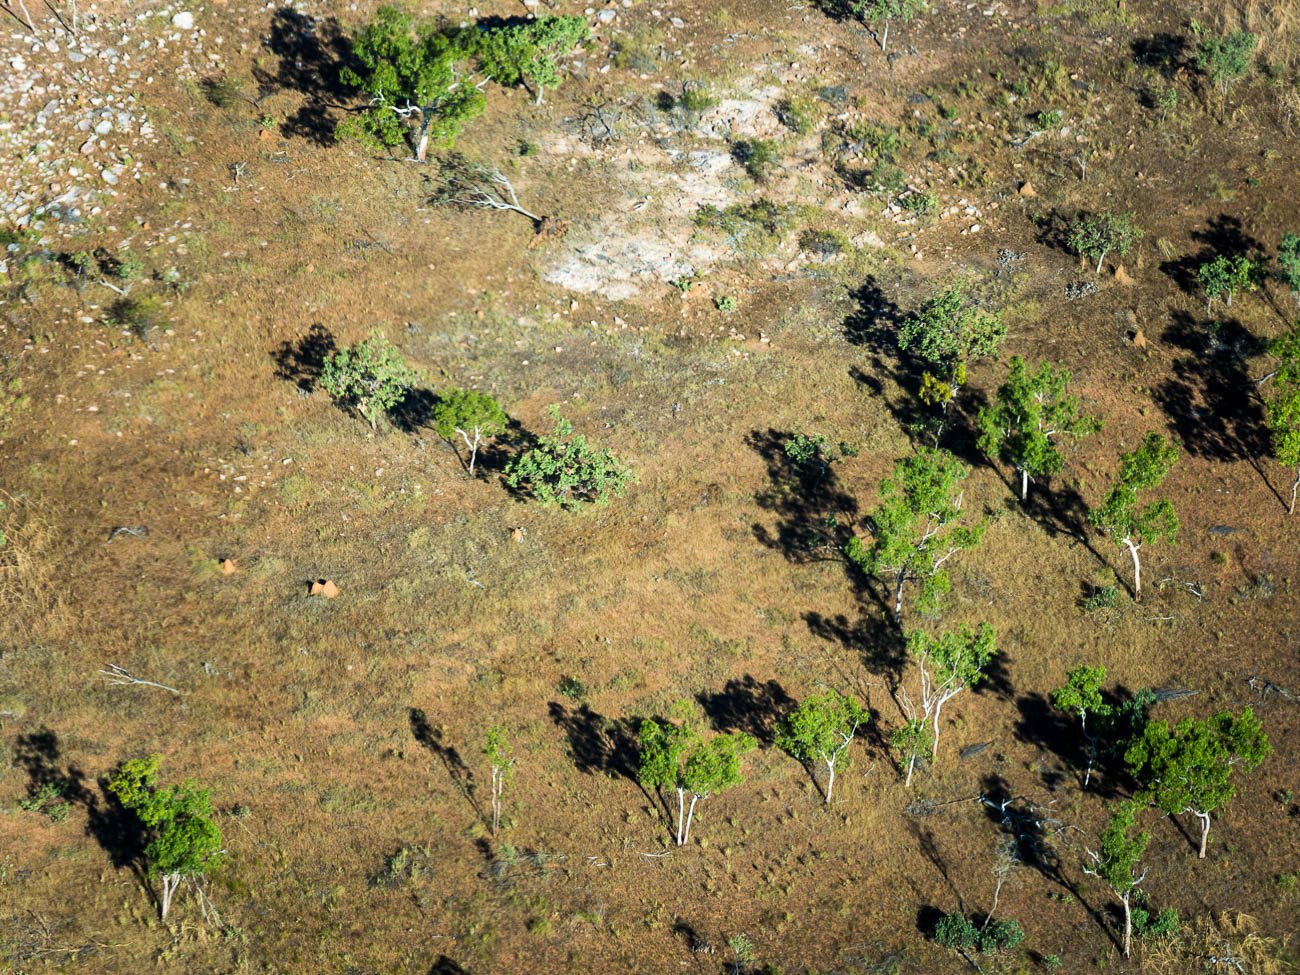
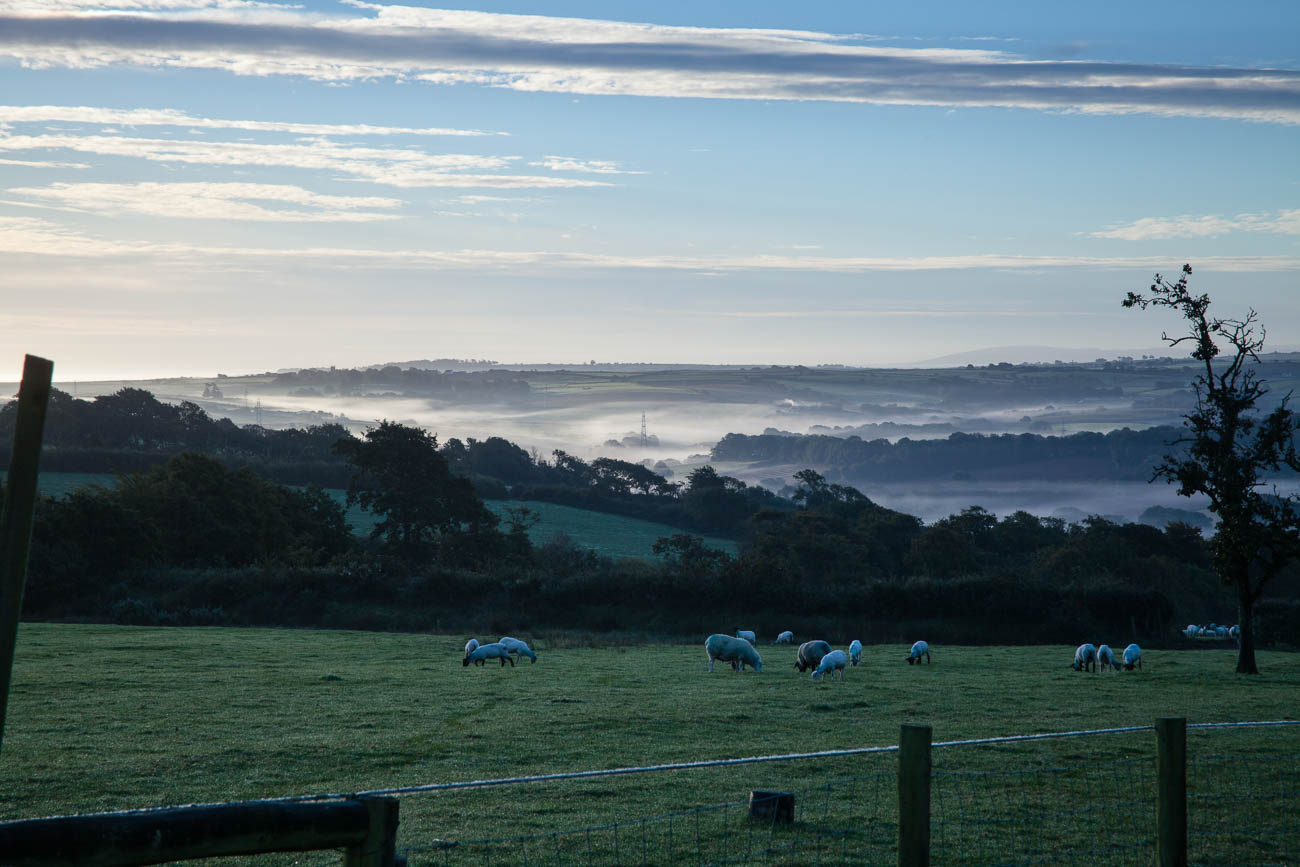
Near Berkley River in the Kimberleys Western Australia, from the air
JPEG Double Up
If you shoot in RAW, which you should be, then a good idea is to also shoot in a small JPEG format, which is usually around 1280 × 960Px.
Then when you take a photo you have 2 versions, the RAW untouched version and a JPEG. The Camera does do some minor processing on the JPEG version which is what you see on the camera rear view screen or monitor. That way you can dump the JPEGs into a separate folder. Note: If you intend printing the JPEG then it’s best to go full size.
Display Options
There are lots of options for displaying at home.
From a physical point of view, you can use a computer or TV screen. The bigger the better, so a TV screen is usually best.
So now how do you get them on your TV?
There are many ways of displaying your photos on a TV. Let’s list the most common of them starting with the most basic:
1 Plugged in Flash Drive. Load your photos onto a flash drive and plug it into your TV
2 Plugged in Hard Drive. Load your photos onto a hard drive and plug it into your TV
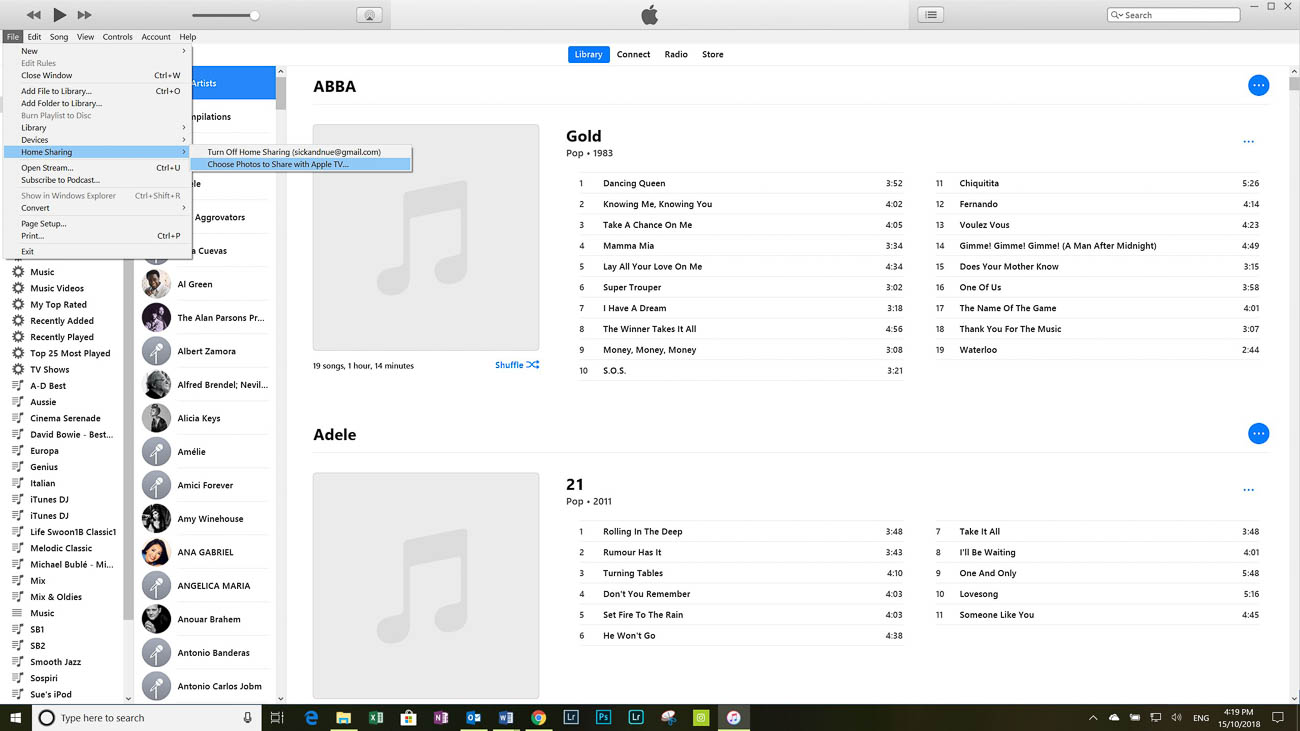
3 Apple TV. Using iTunes select file – home sharing – select photos to share with Apple TV
4 Google. You can cast your photos if you have a Chromecast from either your mobile device or Laptop
5 Plex. Plex is free software that allows you to play music, video and view photos on your TV. There are other smart TV apps that do the same as Plex but not as well.
6 Home Network. One of the best ways to display your photos on TV is to have them on drives or your computer on a home network. But you will need a smart TV or a device that makes your TV ‘Smart’.
Depending on your TV and which of the above methods you use, the images can be set up to have continuous slide shows. I do that with the Apple TV. If I’m playing music via the Apple TV, the screen saver kicks in. Or If I’m not watching my TV I can just have the Apple TV scrolling the images in the background.
Viewing on a computer monitor
If you have a decent size computer screen. By that I mean anything from 18” upwards then looking at your photos is a snip compared to a TV.
If you are either a PC or Mac user, you can view them from the default photo viewers. Both have pretty good photo viewing apps. There are also plenty of free and paid options of course. Ones like Gimp and Ifranview have been around for a while. Whilst Google has Polarr (which is more of an editing suite) and Photos.
However the market leader, Adobe, has the best options for viewing, organising and editing. Especially with it’s very popular Lightroom.
Sharing
If you are using a smartphone to take your travel photos, then there are a lot of ways of sharing your photos. You can share using MMS (text messages) email, social media, Dropbox, iCloud, One Drive, Google Photos and Bluetooth. The list is endless
If there is an application missing, you can change that by granting the app permission (assuming you already have it installed).
Sharing your photos to multiple social media and photo sharing sites can be made easy by using apps like Buffer, Hootsuite and Meet Edgar
So that’s pretty easy but what if you are using a camera that has a memory card?
In How to Back up your Travel PhotosI talked about wireless memory cards and cameras that may also have wireless built in. This is a big advantage as it gives you the option to share to your mobile device and then on to other places. With older cameras without wireless capabilities you have to remove the memory card. Once removed you can use an adaptor and load it onto your mobile device or Laptop and again share it from there.
There are also wireless hard drives like WD’s My Passport Wireless Pro. You can load the contents of an SD card on to it and then stream or view its content on another device turning it into a media server.
Photo Sharing Sites
Another way to share is via a photo sharing site like Flickr, Smugmug or 500px.
There are several ways of uploading your photos to one of these sites.
With Smugmug I counted around 20 different ways. The most common is via Adobe Lightroom. The Smugmug Lightroom Extension will mirror your galleries and photos.
Once you have loaded your pics you can copy and share a link for a photo or gallery.
Click on the image below and you will be taken to one of my galleries on my Smugmug Site.
Colourful umbrellas outside a cafe
Displaying your travel photos – Summary
There are many ways of displaying your photos:
Whilst printing is not so popular these days, with the right print, paper and frame you can enhance a really good image
It’s best to have your own way of displaying your photos for your own personal consumption whether it be through a Smart TV or a large Monitor. If you don’t, you’ll never look at them again which is a shame. Like a good wine, age can improve them and bring back fond memories at the same time.
Once you have selected photos for others to view, then it’s time to share them, whether it’s via Social Media, Photo sharing sites or via cloud services. Most sharing is via a mobile device.
If your camera doesn’t have wireless facilities then there are several workarounds that allow you to share your travel photos on a memory card.
So how do you display and share your travel photos?
I’ve come clean and told you what I do. What about you? How do you display and share your travel photos? I’d love to hear from you. Leave your comments below
Do you want to come home with great Travel Photos?
Pop your email in the box below to learn how and for your trouble, get a free E-Book. 9 ways to improve your Travel Photography”. You’ll also get exclusive content that’s not posted here or anywhere else.
Any questions then please contact me here and/or please say hello at these places:
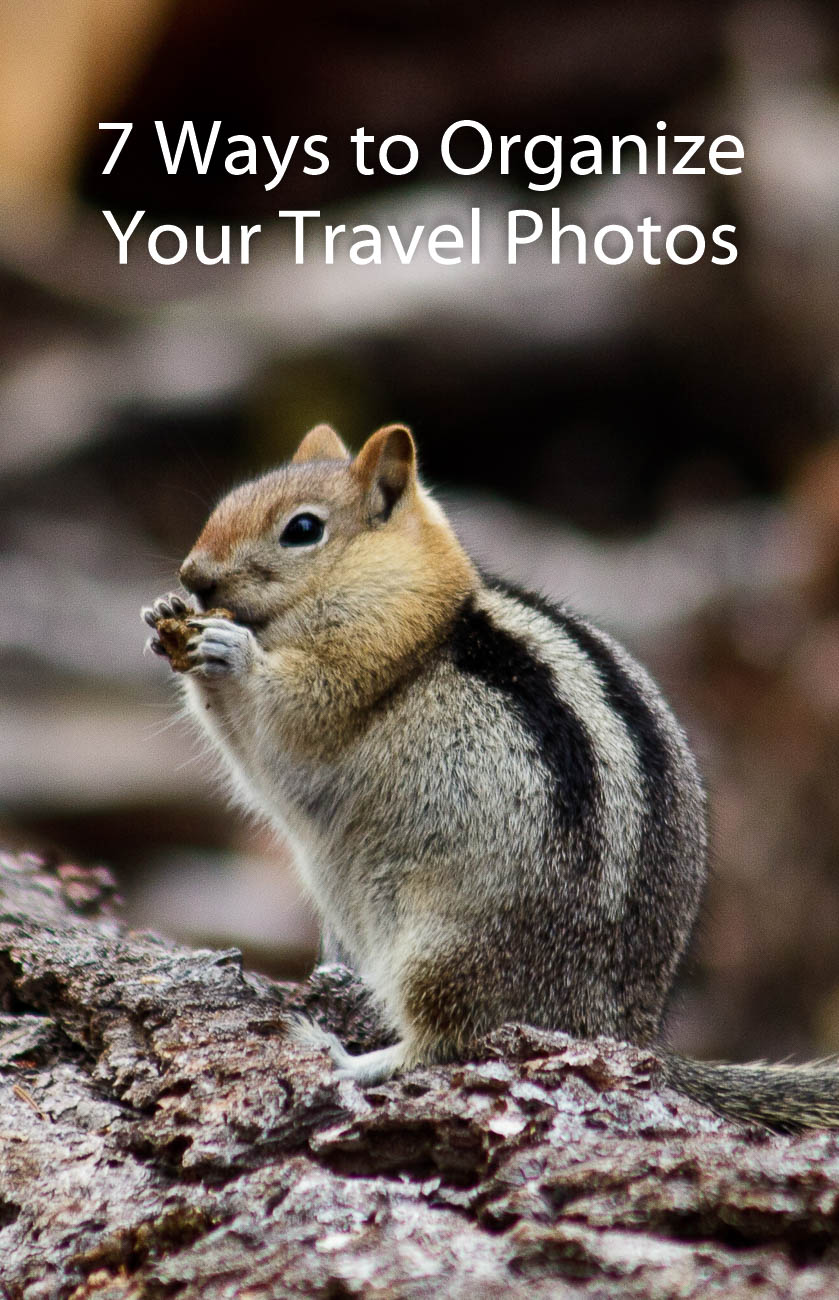
So now you’ve come home with a hard drive full of travel photos. You’ve followed my article 7 Travel Photography Workflow Tips to use on the road. You can’t wait to have a good look at them and show them around. But where do you start? Well, read below to find 7 ways to organise your travel photos.
1 Back up before you get home.
If you have been following my articles or even if you haven’t, you should have backed up everything you took whilst you were away.
Each image should have been renamed and in some sort of order and/or folder and on a hard drive and on a computer. If you haven’t done that then it’s not too late you can do it right now. This is something you should do before you get home and usually as you go. What no back up! You might want to go to How to Back up your Travel Photos.
There are lots of ways to achieve this of course. But the simplest is to use software that will make it easy for you. Adobe Lightroom is one option and I’ll come back to that.
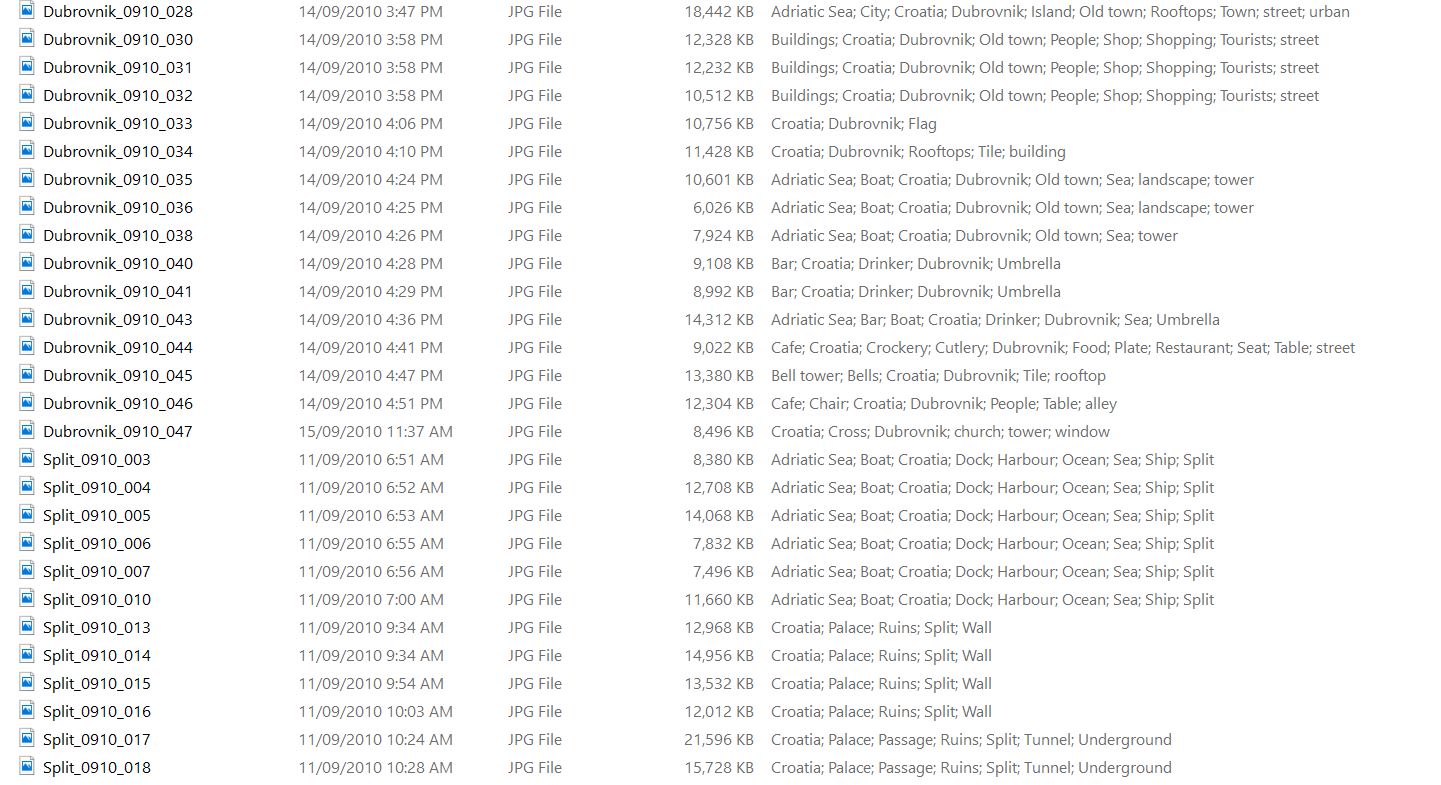
2 Rename
You may think what’s the point. But trust me renaming your photos to something more meaningful will save you a lot of heartache. PB081477.ORF or IMG_6649.CR2 does not even start to give a you clue what it is unless you have dumped it into a suitable named folder.
The first thing to think about is what you will rename it to. There are various options. Some of these can be confusing, others are simple and easy to remember. You can get as simple or as complex as you like. Here are some examples: Date_Number_Place or Shoot Name. Number_Date_Place or Shoot Name. Place or Shoot Name_Date_Number. The date can 2017_08_12 or 12_08_2017. As all photos have a date in the metadata then you only really need the month and year so 08_2017. However, the object should be to keep the length to a minimum so 0817 or 1708 is fine. The number is obviously the image count and you should look to start at 001 or 0001.
3 Optimise
I use Place or Shoot Name_Date_Number. That is name of the place, area or country. Doesn’t sound consistent? You’re right it’s not. But the selection of the hierarchy is dependent on the number of photos. Let’s say I’m in New York and I take 30 photos of the Brooklyn Bridge, then I will probably select “Brooklyn_Bridge”. If on the other hand I take 30 photos in New York of 15-20 different subjects, then I will use “New_York”. To take that up one level. Let’s say I travel around England for a flying visit and took 30 photos in several different areas. In this case I might even use “England”. The latter is less likely for me but you get the point.
Brooklyn Bridge walk way New York
I follow that up with the month and year so 0818 – August 2018 and then the number starting at 001. Putting it together you get England_0818_001. So that would be the first photo I took in England in August 2018. What you do have to be careful of is, that if you return to a place in the same month, you need to make sure that you don’t start at 001 again. Start at one number after wherever the last batch finished, e.g. England_0818_215.
Early morning mist at Winscott farm, nr Bideford, Nth Devon, England
4 Rename Historically
You’ve probably looked at your existing travel photos and have promised yourself that you will get them into some sort of organisation. Part of that job is to rename them in some sort of order. Well fear not, there are some useful ways of renaming multiple files in bulk. If you have Adobe Lightroom you can do that quite easily. Alternatively, if you are a PC user Windows 10 can help you with that. Likewise, Mac users with version Yosemite or better can also get the MAC OS to do it. The links are to a couple of tutorials
Failing all these there is specific software that is either free or inexpensive to buy. As a PC user I have used Bulk Rename Utility which I think is still free. For Mac users A Better Finder Rename comes highly recommended.
5 Use folder hierarchy
The other challenge to organising your travel photos, is the dreaded folder hierarchy. Again, opinion is mixed on this. As with the actual file names you can create folders that have the date or name and various combinations. I usually create a folder when I’m loading through Adobe Lightroom with the Place or shoot name. This folder is a sub folder of the year. So my hierarchy looks something like ImagesRaw ImagesRaw 2017Trip_2017Zambia_17. But you can do it in date order e.g. 2017108_ZambiaRaw Images.
It’s really about how you look for your images. Whether you look for them in batches of dates or subjects. Both Windows and Macs search options will cover either way. But they are not foolproof and nowhere as good as Adobe’s Lightroom.
Whichever way you decide to follow you need to stick with it. Changing it later can be very time-consuming and tedious.
So what sort of keywords do you need? Well again that depends on how you are going to search. If you have some wedding photos and you want to see all the ones with Uncle Joe, then you would use “joe” or “uncle joe”. If you wanted to see all the images you took of the Eiffel Tower, then you would use “eiffel” or “eiffel Tower”. My system is usually country, locality, town, subject, type, anything else. If I took a picture of the Brooklyn bridge, then the keywords I might use would be USA, New York, Brooklyn, Brooklyn Bridge, Bridge, River, East River, Water. If there were people in it, I could add people, street, tourists. Any word that you may at some future date want to use for searching can be used.
7 Use other tags
If the camera you were using has face recognition and/or Geo-Tags, then that’s another form of creating searchability. You will still need to refine it depending on how you want to search. The algorithms for face recognition are good but not infallible.
7 Ways to Organise Your Travel Photos – Summary
It’s important for future searches to make sure that you organise your travel photos.
First things first backup, then look at how you will rename your photos. (Don’t use the camera generated file names – you’ll never find anything!)
Optimise the names so you understand them. Once you have a system of naming and optimising, you may want to consider renaming some of your existing photos to maintain consistency.
Of course, naming them is one thing but you also need to be careful of how you store them. Having a logical folder hierarchy is the best way.
There are other ways of searching for photos using keywords and tags, such as Geo-Tags.
How does that make you feel about travel photography? Do you want some help with your travel photos? Why don’t you pop your email in box below and not only will get content that’s not always posted on this site, but you will get a free guide to get you started
Any questions then please contact me here and/or please say hello at these places:
Death Valley NP California, USA. Click on the image for a larger view
In the last couple of posts the travel photographer destination part I and part II, we discussed what to do when you reach your destination.
But what about your travel photography workflow whilst you are on the road?
Follow me as I give you some tips and tricks on how to handle the photos you are taking whilst you are on the road.
A Recap
You’ve learnt in the last few posts about being prepared and ready to take travel photos. Making sure your camera equipment is always set up correctly, clean, has the correct lens and plenty of memory and battery power.
So now you are out there taking images, how should you go about it.
1. Keeping tabs on what you are taking
Newer cameras have GPS tags and dates.
So you could be thinking that taking down details of the photos you take is a no longer necessary
But, if you actually want to relive the experience of when you took the image, then note taking is essential.
It doesn’t have to be ‘war and peace’. It can be as simple as “Sydney Harbour Bridge taken from the Rocks area”. You could go into more detail like: “Sydney Harbour Bridge taken from the Overseas Passenger Terminal Quay on Circular Quay West. Time 4Pm 27/05. Weather was overcast and the sun was a few minutes from setting.”
Sydney Harbour Bridge taken from the Rocks area
Taking notes can help:
As a backup for the metadata that’s captured in the photos itself. Locations and even times are not always accurate
To add a caption to the photos if you are going to share and/or display it.
As a record of where you took this photo. If you ever return and that could be a few days or years later, you know where you’ve been and whether it’s worth going back to the same spot.
2. Making sure you are secure.
Depending on where you are in the world, security is something to pay attention to.
There will always be someone who is keen to steal from you as a tourist.
There are countless stories of tourists having their bags, cameras and other items ripped from them.
However, whilst there’s never a guarantee that you won’t find yourself in that situation, you can definitely minimise the chances.
If you want to have your camera ready to go, make sure you have it around or across your neck.
Carry your bag across your body or if it’s a backpack carry it as a back pack.
Keep all your bag pockets and openings firmly closed.
And speaking of bags, it’s best to have a non-descript bag that doesn’t shout to the world “CAMERA”!
There will be times when you need to put your bag on the ground. A foot through one of the straps is always a good idea.
Beware of what and who is around you. If you see anyone suspicious move away.
Keep away from the kerb if you are in an area that’s known for motorbike thieves.
3. Subjects
Whilst strictly not part of any travel photography workflow, I’ve included it here. Without thinking about subject matter then you’re not going to create great images.
As you roam the streets of your destination, always look for something interesting and unique.
That can be anything from the usual famous Icons to much smaller obscure subjects like rubbish on a street, or street art, even a close up of the bark on a tree. The list is endless.
Street art in Perth Western Australia
Whatever subject you choose to take, play around with different settings, angles and positions.
The goal is not to copy what everyone else is doing but to be individual.
That’s not to say that you shouldn’t ever take a straight forward image of an icon. After all, you may be able to bring a different style to a subject even if from the same position as everyone else.
Often you will think that these different experimental images didn’t work. Because of that you will be tempted to delete it after looking at it through the camera viewfinder.
Don’t do it.
In fact, don’t look at what you have taken at all until you have moved away and are resting somewhere away from the subject.
4. Reviewing through the viewfinder
There are few times when you should review what you have taken.
The most important being if you want to make sure you captured something that you may never see again.
Even then it’s only worth looking if you have the opportunity to retake it, otherwise what’s the point.
If you missed that multi coloured Aston Martin with a James Bond look alike standing up through the sun roof, then that’s too bad.
The thing is that looking through the viewfinder at what you have taken, can rob you of any other photo taking opportunities.
Things can move quickly, light changes, people and vehicles move, and the weather can change in a instant.
The time to review, as I said is away from the action. You are only doing it for some immediate gratification and to show others anyway.
Of course, in the present-day social media share society, you may want to share some images that you have just taken immediately.
That’s all down to personal choice. Personally, I don’t share anything publicly until I know the image is at it’s best.
5. Back up
The best time to review the day’s images is when you get back to your accommodation.
Before you do anything, you need to back everything up.
If the only copy of your image is on the memory card, then you are playing with fire.
As a rule of thumb, it’s best to have a least 2 other copies in different locations. If you’ve copied all your images to both a hard drive and your laptop then store the hard drive in a different bag to your laptop.
How much you can review is dependent on what other equipment you have with you.
If you have a laptop with processing software, then you can start by picking your keepers or at least allocating stars.
You can even begin post processing if that’s what you want to do.
But there’s no point in starting to post process if your laptop screen is small and/or hasn’t been calibrated
Any adjustments you make are likely to be inaccurate.
You can of course still review and maybe go through and rate them or select the keepers.
I’ll cover that process in another post.
7. Deleting
So, let’s say you have backed up the days’ shooting and have gone through them and rated them.
What do you do with the ones that are no good?
In general – nothing!
Unless you have images that are totally out of focus or you’ve had a few accidental hip shots then don’t delete.
I’ve actually had a couple of good shots that have been accidentally taken from the hip.
My final note on this travel photography workflow is that it’s a personal choice on how much time you spend on your images when you are back at your digs.
But I would again recommend that if you are not travelling alone then do the minimum or be prepared to suffer the consequences of being anti-social.
Travel Photographers Workflow on the road – Summary
The wonders of having dates and even Geo Tags on each file are great. But it’s still essential to keep a written, whether electronically or by hand, record on each image or batch of images.
It’s essential to keep a low profile if you have an expensive (even if it’s not) looking camera.
Pay attention to who and what is around you.
Don’t rely on others but don’t obsess either. You are there to enjoy yourself.
Look for individual shots that speak to the viewer and give you a sense of satisfaction.
Only review through the view finder when you believe you really need to.
The world keeps spinning while you are looking at the viewfinder.
Once you are back at your accommodation back up first, then review and finally start rating.
But make sure you have a big enough screen to give you plenty of detail.
Don’t delete anything unless it’s obvious that you will never see the image again.
Finally remember you can review, rate, delete and post process when you get home.
Nothing like relaxing with a beer at the end of the day at a place you like or have never been before with friends and/or family.
What’s your workflow?
I’ve come clean and told you what I do. What about you? Do you have a travel photography workflow that’s totally different from what I’ve mentioned in this article? Leave your comments below
And while you’re at it why don’t you pop your email in the box below. Not only will you get content that’s not always posted on this site, but you will get my free e-book “9 ways to improve your Travel Photography”.
Any questions then please contact me here and/or please say hello at these places:
So let’s get into The Travel Photographer Destination Guide Part Two
Reconnaissance
As soon as you get there you should familiarise yourself with your destination. You can start this as soon as you start to travel to your accommodation or first stop.
Talk to your driver about where you are and what areas you are passing through.
Ask what the weather is going to be like during the time you are spending there.
And don’t forget to work out where the sun sets and rises.
Of course, a lot of this info is available online or via an app but there’s nothing like getting it from the horse’s mouth.
Other information sources
There are other important sources of information like the hotel reception or concierge.
Then there are libraries and tourist information centres. Tour operators can be a huge resource of information. Even you are not going on a tour they will have flyers that details their itineraries. I’m currently planning a tour of Japan using an ad from a tour operator that has details on all the places on the tour.
A great way of finding out where there are some great places to take photos are newsagents or souvenir shops. They almost always have postcards and calendars of the local areas Browse through them and take a note (it may have to be a mental one) of which places interest you and the photos taken.
Not only are you on the lookout for places to photograph, don’t forget events like festivals, markets, shows, exhibitions etc. Some of these may not be advertised, so you need to ask around wherever you are. Places like coffee shops will have flyers or posters for what’s on.
Some towns and cities have a free newspaper that are for events. For example, in Perth we have the X-Press that comes out once a week and has details of all the music events happening. And speaking of papers, most places still have community and mainstream print newspapers and magazines. Remember just because it’s not online doesn’t mean it doesn’t exist.
Actors in costume in Venice. Click on the above image to view a larger version and for other options
Orientation
Where practical it’s often worth doing a city walk tour or a hop on hop off bus to get you orientated. At the same time, you can take pictures along the way and then come back to specific spots with more time, later that day or at another time. Again, you are looking for opportunities to get some great shots. A tour will help you understand when’s a good time to capture some photos. If that’s too expensive and you’ve haven’t got wheels, then consider using public transport. There are often Bus or Subway routes that cover some of the major attractions.
If money’s not a problem, a taxi or Uber is another option. Hiring a driver and a car can also be an option in some of the cheaper countries.
Lookouts
Another way of getting orientated is to track down vantage points like lookouts or viewpoints. Especially ones that overlook the area you are going to spend your time. Lookouts are usually but not always at the top of a hill. Some places have towers that have views.
Often there are monuments built on high ground that offer some great views as well. You should be able to find out about these from your tourist literature or information office. However, sometimes they are not tourist spots and are for the locals. So, it may be worth asking, yes, you’ve guessed it, a local.
Split, Croatia, from the Cathedral tower . Click on the above image to view a larger version and other options
Copyright
Whilst you should have already done your homework on what icons have copyright restrictions, it’s worth double checking. Not everything on the internet is accurate or up to date. The last thing you want is a security guard or worse still, the police questioning you in public.
Local culture
Everywhere has its own culture. Whilst San Francisco may seem to be like Sydney on the surface, from a cultural point of view they are poles apart.
Some cultures do not want you to take pictures of its citizens or icons. Make sure you know this well before firing away with your camera.
Hanging festival Flags on the main street of San Miguel de Allende, Mexico. Click on the above image to view a larger version and other options
Changing your plans
This has no doubt happened to you as it has to me. You rock up to an iconic building only to find it’s draped in sheets because it’s being painted. Or it’s closed due to some restoration works. Last time we were in Dubai, there were four museums all closed, at the same time, due to renovations.
Other issues can be a new road, rail, subway etc etc blocking off what you want to see. There’s not much you can do it about except be adaptable and flexible enough to change your plans at short notice.
Sometimes these things can end up being a blessing in disguise. An alternative subject could end up being something much more photogenic and exciting.
Having a routine
In my Planning and Preparation for Travel Photos article I mentioned that you will need to take into account your fellow travellers. Whether they are family or friends and especially if they are not so enthusiastic about taking photos you need to involve them in your routine. So, having a routine is especially important with others around and is also a lot harder. There will be times of the day that you want to be out there snapping away. That may be late or early in the day to capture the ‘golden hour’ or to get some street shots. And that may well be the times of the day when your fellow travellers want to do something else.
Before setting off
Once you’ve worked out a routine, you need to ensure that you are always ready to go. Fluffing around trying to remember what you need to take with you when you go out won’t get you very far. It’s worth making a checklist of the items you need to have ready. One like this for instance:
Batteries charged from the day before
Memory cards backed up and replaced
Camera clean
Lens cleaned
Bag ready with all items
At least 16GB of memory ready to go
Cleaning cloth
Tripod
24-100mm Lens
_ _ _ mm Lens
Settings on camera ready to go (more on this later)
Notebook and pen
And that’s the basics. You could add in guide book, map and apps required downloaded.
Setting off
Having the camera ready to take advantage of any opportunity is essential. I will always have the lens on the camera that I think I will use.
Additionally, I will also have the lens hood screwed on and the lens cap off with the camera turned on.
Settings
If you have been taking travel photos for a while you should have some standard settings for the type of photos you think you will take.
As an example, if I were going to be walking around a city I would have my aperture set wide open e.g. F3.5 and the ISO set to auto.
If I was going to take landscapes, then the aperture would be around f18 or above to get that long depth of field. The ISO would be set at 100 or 200 depending on the light conditions and I may even have a polarising filter fitted.
As the Scouts say “be prepared”
Taking care of you and your camera
Your camera is precious but not as precious as you are. Be aware of your surroundings. Don’t step into the road to take photos without precautions. And stepping on people’s feet can often lead them to get pissed off.
Trespassing is also something you need to avoid so that you are not wasting time in a police vehicle.
And don’t forget your fellow travellers. Look out for them. Make sure you are not ignoring them. Get them involved even if they are not taking photos themselves. Everyone loves to see good photos so show them. No harm in showing off and there’s also no harm in asking for their opinion or advice either.
But, yes, certainly take care of your camera. One thing I have learnt over the years is that lens scratch easily, cameras don’t like being dropped and electronics overall don’t seem to function better after getting wet.
Back at the ‘ranch’
So, you’ve had a good day! You reckon you’ve got some little rippers of photos and now it’s time to chill with a beer. Not yet!
Just like the saying the sale isn’t finished until the moneys in the bank, the day’s photography is not finished until you’ve backed all your photos up at least every other day, if not every day. For this I am going to direct you to my article How to Back up your Travel Photos.
Summary – Part two of Travel Photographer Destination Guide
The first thing to do at your destination is a Reconnaissance, followed by getting as much information as possible.
Orientation is also important and the best way to do that is to get up high and do some local tours either by foot or by bus
Beware of local cultural and copyright sensitivities and restrictions
Be prepared to change plans at a drop of a hat and don’t forget to include your fellow travellers, (especially your partner) in your plans
It’s important to have a routine before setting off for the day. Make sure you have your camera equipment ready for use with all your settings back to your default for the type of photos you want to take.
Out on location, be safe and be aware of your surroundings.
Lastly, make sure you back up your photos at least every other night.
Feel free to share this to your social media of choice Do you want to bring home great images from your travels?Want to stick ’em on your wall and share them? Sign up below be the first to get content that helps you with your Travel Photography
An elephant shows us his rear end by the edge of Chobe lake in Botswana
In the days of film, the only form of back up was to guard your film and slides as if you’re life depended on it. Nowadays with digital imaging there are many ways of backing up your photos. I touched on this in Planning and Preparation for Travel Photos.
So, follow me along as I give you some ideas on how to back up your travel photos.
History of Back up
The term back up only really became used when computers began to take over the world.
With paper you could make copies and file them off-site.
As we all switched from paper to digital, Business’s started to have tape, then floppy disks followed by CD’s for backups of the day’s work.
Now you have back up servers some of which are in the cloud.
Photography back up
Before digital, you were able to have extra copies made of photographic prints and file them somewhere else.
Not so with negatives and slides. Well that’s not strictly true, you could get copies, but it was expensive. It was not until digital came along that we began to realise that we had the option to back up all our precious photos. We could even do it retrospectively, if we had plenty of time or money, by scanning film and slides.
In those early days the floppy disk and then later the CD or DVD were the main back up mediums. But as with film and slides we all ended up with boxes of DVD’s. Whilst smaller than boxes of Slides and Negatives they still took up some room.
Let’s take a look at what options we have now.
Direct backup to a Laptop or Computer
The simplest and most convenient way is to connect directly to a Laptop or computer. This is done via the OEM cable that each camera manufacturer supplies to a laptop or computer. Once you have it on the computer you are free to copy it anywhere else. All camera manufacturers give you that option. The main disadvantage is that the cable supplied is not usually off the shelf if you lose it. Additionally, the camera port tends to be non-standard or at best not common.
Memory Cards
When you take an image with a digital camera it sits on the memory card that you have in the camera. With a smartphone that image will generally sit on the phone’s internal drive. However, you can change it to sit on a microSD, if that’s available.
Memory cards can also be used to back up your photos either via a computer or in some camera models.
How does that work?
Well you remove the memory card from the camera and insert into either a computer memory card port or a card reader that plugs into the computer. Likewise, the same applies with a blank memory card. Once both cards are loaded you copy from one to the other.
Backing up in camera is usually confined to some of the more high-end cameras. These now come with two memory card slots that you can use to either extend the memory or use the second slot as back up. When the latter is set, each time you take an image, it not only sits on the first memory card but also on the second.
Another option is to transfer it in camera periodically but that can be dangerous if you forget to do it.
The system of using memory cards as a backup medium is not used that often unless you are looking to immediately back up and that’s your only option.
One recommendation I would make is to use something similar with a smartphone.
Smartphone backup
With a smartphone, the potential to lose it or drop it is much higher than a camera. I would suggest a microSD if that’s easily removable (otherwise you will lose it with the Smartphone!)
Another option is a small flash drive that can be attached, usually through the charging port. Why would we need to do that when we all rely on the cloud to backup our photos on a smartphone?
Services like Google Photos, or iCloud work well when you have connectivity. But what about when you don’t have connectivity?
Last year I stayed a few days in a remote resort called Berkley River Lodge in the Kimberley region of Western Australia.
There was no phone signal at all and WIFI was limited to 50m from the reception hut. We were on a helicopter trip heading back to the resort. One of the other guests was taking pictures of the sunset with an iPhone when he lost it out of the window. I might add that the phone wasn’t his, it was his partners! We had also all been warned not to take your phone too close to the window during the flight as, you’ve guessed it, it could get sucked out. Anyway, apart from looking like a Kangaroo in headlights, he lost the phone. All the photos that they had taken in the last few days were only on that phone.
And as they had no way of backing them up other than using iCloud they were lost with the phone.
Berkley River Lodge from the air
Lesson from that is not to rely on the cloud as back up for smartphones or indeed anything else.
If you have another device like a tablet, then you can set up a hotspot that will enable you to transfer or copy your files to the Tablet. But if you are likely to be without the tablet and have no connectivity, then a Mobile flash drive is a no brainer.
WIFI SD cards
An option to standard Memory Cards are WIFI cards. Even if your camera has Wi-Fi capability this still allows you to back up your images to another device.
If you have a fairly new camera, then chances are it will have WIFI capability anyway, so you can backup via WIFI without a special WIFI Memory Card.
However, in both these instances the issue is space. Most Smartphones or tablets are around 64GB and if you are shooting RAW over a 2-3-week period it doesn’t take long to max out. For example, last year at a African Game Park I shot around 64GB of RAW and JPEG images.
Physical back up devices
There are a lot of devices out there that you can use to back up your photos. Most of them are portable hard drives
There is the basic hard drive that you plug into a laptop or some tablets. You then copy the files to the hard drive via the Laptop or Tablet
Some hard drives have a SD Slot for your memory card. You insert the card and it automatically copies to the drive. So, in theory you don’t need another device. Yet, unless you plug into another device you are not going to know whether it has backed up all your photos correctly.
Another option is the wireless Hard Drive. This is like a hybrid. They have SD slots as well as having the option to wirelessly copy images via the hotspot I mentioned before. This has the same disadvantage of not being able to see what images have been copied across. Although some do allow you to view the contents of the drive from a smartphone or tablet as well as a computer.
Then there are hard drives that have a screen that lets you view the images even if they are RAW.
African Elephant in South Luangwa NP, Zambia.
Hard drive types
Lately hard drives come in two types, HDD mechanical Hard Disk Drives or SSD Solid State Drives. The differences are basically that SSD’s are faster but more expensive. In a computer or laptop then I would go to an SSD every time. With portable hard drives, where there is only data being stored, then it’s really a personal preference.
How many cloud services are there now? There’s Apple’s iCloud, Microsoft OneDrive, Dropbox, Box, Google Drive, Crashplan, Backblaze, Carbonite and there are the Photo Sharing Sites (more on that below).
Of course, all cloud backup services depend on the internet. So if you are travelling, you are relying upon there being an internet connection. That is often beyond your control.
There is much better connectivity than there was 5 years ago and I’m sure that there it will improve even more. But as I mentioned earlier there is always somewhere that the internet is not connected.
Even with an internet connection, the bandwidth or speed can be poor. Meaning that the time taken to upload your photos can be long and arduous, not to mention frustrating.
Using the cloud
Whether you use the cloud or not is dependent on a couple of things:
One is the Camera equipment. For instance, a Smartphone has inbuilt cloud capability and relies heavily on there being an internet connection. That is either by the phone signal e.g. 4G or a wireless connection. On the other hand, unless you have a 1-2-year-old camera, then there is every chance that the camera you have will not have Wi-Fi capability. Even a lot of the new ones only allow you to upload to a phone or tablet from which you then have upload to the cloud.
The other reason is the interface and ease of use. I haven’t tried all these services, but of the ones I’ve used, iCloud and Dropbox seem to me to have the best interface and ease of use.
Cloud cost and security
There is one further reason and that is price. Prices vary so much with specials and add-ons that comparing them is likely to be totally inaccurate by the time you might read this.
The other thing to consider is security. I hesitate to say it but using the likes of the big guns like Microsoft, Apple or Google does give a sense of security, compared with the smaller players. That may well be false. But it’s worth asking a few questions. I.E. where are their servers? What happens to the data if a server goes down or heaven forbid the company disappears?
What do I use? OneDrive. Why because Microsoft gives me 5TB with my Office 365 subscription.
Photo Sharing Sites
The other cloud-based storage systems are Photo Sharing sites. These are likes of Flickr, Smugmug, Google Photos, Pixbuf (a new one), Photobucket, 500PX, My Portfolio, Amazon Prime Photos plus a few others. These add a bit more to the concept of back up. Usually it’s a subscription service that allows you to view and share all your photos. Some even have their own social media interface meaning you can browse other user’s photos and comment or share.
Flickr was the first of these and now has been gobbled up by the expanding Smugmug. As a user of both I have yet to establish what that will mean.
Take a look at my site on Smugmug to get an understanding.
Unlike the straight cloud backup services, some of these sites don’t support all file types. So, if you are looking for a complete solution to house and view your RAW files for example, do your due diligence.
African Elephant in South Luangwa NP, Zambia.
How to back up your travel photos – at home
We’ve covered a broad summary of what there is out there to back up your travel photos whilst you are on the move.
What about when you get home? All of the above apply to your home base as well.
But you can also add in Desktop Drives
Desktop Hard drives
Desktop Drives used to be fixed to one certain location. But with the growth in portable hard drive storage, the fixed and portable are overlapping.
Most of us these days have Laptops instead of desktop computers which gives us freedom to work pretty much anywhere. So, plugging in a portable hard drive as not only an expansion to the laptop storage, but also as a backup is easy.
For the fixed you have three main types.
Standard hard drives that connect via USB or Apple’s Lightning and have their own power supply.
Cloud based drives that connect into a network also called NAS (Network Attached Storage) This is different to the cloud services mentioned earlier. These are hard drives that are physically in your space but can be accessed remotely via an internet connection. They also come with a power plug for an independent power supply
The last type is called a RAID system (redundant array of inexpensive disks) that also have their own cloud. This is a trickier system to manage and install. Basically, it is several hard drives usually in multiples of 2 that back each other up. Where it can be confusing is the many different set up combinations available. It’s a way of ensuring that should one back up drive fail then there is always another one that has identical data, so that you can sleep easy.
What I use
Now I think it’s time for me to give you my system.
On the road
Depending on the duration and the reason for the trip, I will carry either one or two Wireless Hard Drives, my surface pro or iPad Pro. I also now carry, since seeing the guy at Berkeley River lose an iPhone, a portable flash drive that fits my Samsung S8.
How do I use them?
I am fortunate that my Olympus OMD1 MKII has dual memory card slots, so I use one of these memory cards as back up. Additionally, every evening or at least every couple of evenings, I back up one of the memory cards to both wireless hard drives. If I have been diligent enough to clear the hard drive on my surface before travelling, I back up to my surface as well.
I back up my Samsung S8 to my surface if I am confident that I have good internet for the cloud back up to my OneDrive service. If I ‘m unsure of the connectivity, then I will back that up to my portable flash drive and later the surface.
I have used the iPad Pro as back up in the past. But due to the number of apps it has, it only has a small amount of spare storage compared to the surface.
How to back up your travel photos – Summary
Back up is a relatively new concept in the photographic world. It has only been around since the advent of Digital photography
There are many forms of back up for the travel photographer
Memory cards can be used for short term back up
Smartphone Cameras rely on cloud services, which can be unreliable when travelling.
A flash drive or microSD is a more reliable medium
New cameras can upload photos via different WI-FI systems to the cloud but only via another device
There are many different hard drives that can be used as back up devices.
They can be like small computers with their own screens and flexible connectivity.
Speaking of Cloud back up, the number of services available is huge. So, you need to select carefully before using one of these to ensure it meets your needs and security
Photo sharing sites like Flickr and Smugmug can also provide a level of back up for your photos
Then we get into the heavy duty physical hard drives. These use sophisticated software and multiple drives that you can create your own cloud with.
What do you use?
I’ve come clean and told you what I use. What about you? Do you use something or have a system that’s totally different from what I’ve mentioned in this article? Give me your take on how to back up your travel photos Leave your comments below
And while you’re at it why don’t you pop your email in the box below. Not only will you get content that’s not always posted on this site, but you will get my free e-book “9 ways to improve your Travel Photography”.
Any questions then please contact me here and/or please say hello at these places:
Val Veni from Rifugio Elisabetta, Italy on the Tour Du Mont Blanc
Planning and Preparation for Travel Photos
One of the most overlooked items when preparing to go on a holiday or to travel is planning and preparing for taking travel photos. Usually people think about accommodation, eating and transport. But never how they are will visually document their experience.
So read on about Planning and Preparation for Travel Photos
Planning
You are off to an exotic or culturally fascinating destination. You worked out where you are going to stay, where you will eat and how you will get there. But what about what you are going to photograph? After all, you want to come back with memories but also memories that you can share with those who you travelled with and those you’ve left behind.
Before you go
Your itinerary should tell you what your destinations and stops are. Now it’s time to do research on what you should and want to take photos of. The first thing you need to have clear in your mind is what do you like taking pictures of? Have you selected a genre? Go to Different types of Travel Photography for more on this.
Researching the destination
At any new destination there will always be lots of subject matter for taking photos of. And in today’s online world it is easy to do research. Check out sites like the Lonely Planet, or National Geographic. Instagram and the much-aligned Google+ have some great images as well. There is no end of online resources for you to get some inspiration from.
Icons
Start by finding out what the big ticket items are.
These are the icons that make any travel destination famous. You are looking for Icon’s like London’s Tower Bridge, Paris’s Eiffel Tower or Sydney’s Harbour Bridge. Find out what access there is. Are there restrictions on taking photos? Can you use flash or a tripod? Have a look at some of the pictures online and make a note of the angles you like. You will want to find different angles as well, which may not be so easy to see until you are physically there.
The famous tower bridge in East London, England. Click on the image to view a larger version and for other options
Culture
Some of the most emotive photos are of people and culture. Look for photos online of the culture of the place and again make note of how, when and where they were taken
Landscapes and Architecture
Whether you are going on a safari, hiking the Tour Du Mont Blanc or discovering San Francisco for the first time, you will want to take photos of Landscapes and Buildings. They could be anything from Mud Huts to skyscrapers, so again see what photos there are and take notes.
Refuge des Monttes, Vallee des Glaciers, near Les chapieux, France. Click on the image to view a larger version and for other options
Transport
So now you know what travel photos you are likely to take, you must now decide what equipment will travel with you. Now if you are just taking a smartphone, then this really doesn’t apply so I would suggest you skip this section. For the rest, a lot will depend on what equipment you have and how you are travelling. If you are travelling using your own car then you would think you can take almost anything. But if you are hiking or doing a lot of walking whilst away do you really want to carry ‘everything’? And if the answer is no, then where will you leave what you don’t take with you? You don’t want to travel on public transport, and that can be anything from a bus to a plane, with a lot of equipment. Consider reducing what you take to what you think you will need based on what you are likely to be shooting.
Climate
One thing easily forgotten is that there’s a good chance you may be travelling to a different climate. If you are going to the tropics, then there’s a good chance it’s going to rain. If travelling to Australia in summer it’s going to be hot, travelling to Canada in winter then it’s going to be really cold. This topic is big enough to justify an article on its own but let’s just say make sure you take enough protection for your equipment.
Practising
If you have recently purchased a new camera or you haven’t used yours for a month or 2, it’s worth getting out and practising. I would suggest you practice the type of shots you are likely to encounter on your travels. It doesn’t take much to look for opportunities. Wherever you live there’s always landscapes. If you live near or in a city, town or even a village, there will be plenty of street, architectural and people shots to be had.
Getting your equipment ready
The Basics
Whether you are taking a compact or a DSLR, you will still need some basic auxiliary equipment like extra memory cards. Consider taking more than one battery, a lens cloth, filters if you use them and a tripod. I take a couple of Bags – one for travelling and one smaller one for around town. Make sure your bag is clean and ready to use. I always put everything I’m going to take in the bag at least a couple of days before I’m about to leave, so it’s done.
A good idea is to go through your memory cards and make sure that they are empty. You never know how many photos you will take, so you can never have enough memory. Don’t think that you don’t need to worry if you are using a smartphone camera. You need to ensure that the smartphone memory is big enough. If it’s not, then you will need to add space either by a plug-in memory stick and/or a microSD. Batteries need to be charged.
Camera and Lens
If it’s going to be a big trip, it’s worthwhile checking to see if the sensor needs cleaning. You can do this by shooting a white piece of paper with the focus set at infinity and over expose to get it really white. Then look at it on a computer screen and look for marks.
Select the lens you are taking and make sure you clean it with a lens cloth and then ensure it’s packed for travel.
One essential thing to take is your charger. And if going overseas a plug adaptor for your destination. You will be surprised at how many people forget these 2 essential items. You can’t take pictures with a flat battery!
Back Up
If you are anything like me you’ve become obsessive about backing up your travel photos. After all, often you are only there (your destination) once! Look if you are only away for a weekend, then you could take the risk of not backing up. But I wouldn’t recommend it. This is a topic on its own which I will tackle in a future article. But I do recommend that you don’t rely on cloud storage. At least take a hard drive preferably with a tablet or laptop.
Family and Friends
Most of us travel with family and/or friends. If you are travelling alone then move on. For the rest of us though, it’s important that you set expectations. If you are starting to get serious about your travel photography, then you will need to make sure that your fellow travellers are onboard. Ideally speaking it is better to travel alone if you intend spending a lot of time taking photos. Yet, for most of us that’s not usually an option and let’s face it you don’t really want to travel by yourself. One of the great joys of traveling is sharing moments on the road with whoever you are travelling with. And I emphasise that sharing moments is pretty important.
Get out from behind the camera
Don’t let the urge to shoot away at a romantic or special monument blind you to how you should be enjoying the moment with your loved one. If you are at the Taj Mahal for example, make sure you get out from behind the camera. Enjoy being there with your fellow traveller/s, especially if your partner is there with you or be prepared for the consequences! (I’ve learnt that the hard way). The next rule is to negotiate when you take photos. That can be almost any time but there may be some special times that you want to concentrate on getting some good shots. The golden hour (just before sunset or just after sunrise) is one example. So, give some advance warning and you may actually get an assistant as well. Another way of sharing the experience can also be by taking photos together. But lay out what you want to do before you set off and then negotiate along the way.
El Castillo the pyramid, at Chichen Itza the most famous Maya ruin in the Yucatan, Mexico. Click on the image to view a larger version and for other options
Insurance
Most of us get travel insurance to cover medical and cancellation. But it’s just as important if you have some expensive kit, that it is also insured for loss or damage. Nothing worse than having a camera stolen or damaged and realising you weren’t insured. Now don’t get me wrong, the likelihood of that happening is remote, especially if you are careful and take the obvious precautions. But you never know.
Hire
Whilst you are not likely to hire lens on every trip. It’s a good idea to make sure you’ve got that set up when you do. I’ve done it several times, the last time in Canada for taking photos of Polar Bears with a large pro lens. The company had a lens waiting for me at the destination. It was a simple process to send it back from the same place once I had finished with it. That meant I didn’t have to carry it to my next destination where I didn’t need it.
Timing
When we plan travel it’s essential that we maximise the time there. One way to do that is to research what special events or festivals are on. And don’t forget to find out what the weather is going to be like at the time you will be there. Special events and weather conditions can be double-edged swords. Depending on the event you may not want to be there at the same time. For example, with weather, the wet season in Northern Australia can be a challenge. But during most wet seasons you get some great scenes of flooded landscapes and interesting cloud formations and thunderstorms.
Summary – Planning and Preparation for Travel Photos
As you can see whether you are going travelling or just holidaying, with travel photography, there’s a lot to think about before you have even left. Do your research and make sure you know what you are going to take photos of. Find out what Icons, Culture, Landscapes and architecture there are to take. From there you can work out what equipment to take. Protect your equipment from the elements. Practice before you go. Make sure you take the essentials; spare battery, charger and adaptor, memory cards. Clean your equipment and make sure it’s insured. Take some sort of back up for you to back up on the go. It’s vitally important that you have an understanding with your fellow travellers and family about when you will want to take photos. Above all don’t forget to have fun and enjoy yourself!
Need some help with your travel photos?
Why don’t you pop your email in the box below and not only will you get content that’s not always posted on this site but you will get my free e-book “9 ways to improve your Travel Photography” to get you started
Any questions then please contact me here and/or please say hello at these places:
Sand trails near Roebuck bay, Broome, Western Australia
The One Big Creative Travel Photo Idea
In this article I’ll be giving you some tips on the best way to give your travel photography some punch. Let me introduce you to the one big creative travel photo idea that many journalist photographers use. And you can use it for your travel photos too. So, what is this creative travel photo idea – GETTING IN CLOSE
What does getting in close mean?
Depending on your lens and camera, getting in close may be different for different equipment. But it can be anything from zooming in on a landscape to a good strong portrait to a macro picture of a flower.
What equipment?
It doesn’t matter what equipment you have. To take macro images i.e. subjects that are 60 – 70cm away, it’s best you have a macro lens. But more on that below. As I stated in previous posts and in the e-book, that’s available when you subscribe in the form at the bottom, you have to do the best you can with whatever you have.
Types of “getting in close” images
Landscape
Getting in close on a landscape photo seems almost contradictory. After all it’s the big wide-open spaces that you are after. But you can get some great shots by getting in close either with a zoom lens or by, if practical, zooming in with your lens. Let’s say you are taking some pictures of a mountainous landscape. Sometimes getting in close will give you different perspective.
Hills near Wanaka in New Zealands South Island. Click on the above image to view a larger version and for other options
In the above shot I zoomed in to compress the hills. Now they look closer to each other than they would appear if I had taken them with a wide-angle lens. Other ideas would be to zoom into a particular subject, a tree, a farmhouse or even a Glacier. If you are using a zoom lens, then usually you will need to zoom right in depending on your position.
People
There’s also a saying in photography, ‘fill the frame’. Often when we take people shots they can be too far out. I know in travel photography the idea is to get people in the picture, as well as a sense of where they and you are. But you can go too far and try to get everything in. By filling the frame with people, you cut unnecessary distractions that can leap out to the viewer and spoil that whole photo. Often the subjects e.g. people, usually look as if they are from the destination you are in, so you don’t need to have think too much about a sense of place. Taking photos of fellow travellers or family can vary in quality. If you think it’s a good picture then does it matter that your photo doesn’t reflect the place you are visiting? I think not.
Portraits
Undoubtably portraits lend themselves to getting in close. We’ve all seen some of those great photos taken by Nat Geo journalists and other travel photographers. If you have permission from the subject, then get in as close as you dare. Human faces are some of the most interesting subject matter in travel photography. Sometimes it is best to experiment by taking different angles even when you are in close.
Street
Street photography is very much its own genre these days. When travelling, street photography is an essential skill to develop to get some great shots. One way is to get in close. If you are in a famous city like New York or Paris, there are so many opportunities to fill the frame. People are the most obvious, which I mentioned earlier. But by also getting in close to activities like festivals or street entertainment, you can create some great angles that can hold the viewers interest.
Markets
I love taking photos in markets. And zooming in and filling the frame can capture the feel of a market. Whether it be the produce, signs, or people, getting in close is a great way of producing some interesting and varied photos. Some examples are below
Pumpkin. Portland farmers market, Portland, Oregon, USA. Click on the above image to view a larger version and for other options
Pork Pies at one of London’s famous markets Borough Markets that is devoted entirely to food. Click on the above image to view a larger version and for other options
Buildings
How many times do you see a photographer try to capture the outside of a beautiful building with little or no success. Sometimes you have to let go of trying to get that great shot of a building and leave it as a record shot. Concentrate on the small stuff. A sculpture inset into a wall, a sign, an intricate stained-glass window or a sculpted angle on a building. What about shooting the reflection on the building in the one opposite. There are plenty of opportunities for getting in close with buildings of all shapes and sizes
Food and Drink
I mentioned in Different types of Travel Photography that you can really go to town on food. Individual food items, a mouth-watering artistic dish or getting a close-in angle of a wine bottle label are some examples that come to mind.
Technique
So, is there a technique for getting in close? Well sometimes is the answer. It does depend on your equipment, position and the position of the subject. If you don’t have a zoom, then it means you must move closer to the subject. If you do have a zoom, then how far you have to extend your telephoto lens will again depend on its capability and your position relative to the subject. But a good technique can be to get in low or get above the subject. Subjects can look a lot different from low or high angles. Shooting at your height in close doesn’t guarantee you a point of difference. Another technique can be to take a close in shot, side on. A plate of food for instance looks different close up and side on.
Sand trails near Roebuck bay, Broome, Western Australia. Click on the above image to view a larger version and for other options
Summary
So, as you can see the one big creative travel photo idea is taking some great shots by getting in close and filling the frame. There are several different types of subject matter that can lend themselves to close in shooting. Landscapes, People, Portraits, Markets, Buildings and Food and Drink are ones that come to mind. Try to get different angles as well. Getting in low or getting above can produce some satisfying and interesting photos.
Thanks for reading and getting down this far.
I have a free e-book that you may be interested in. There’s a form below that you can fill out and send to me and it’ll arrive in your inbox
Please feel free to make any comment in the comments section below. Or, you can contact me here.