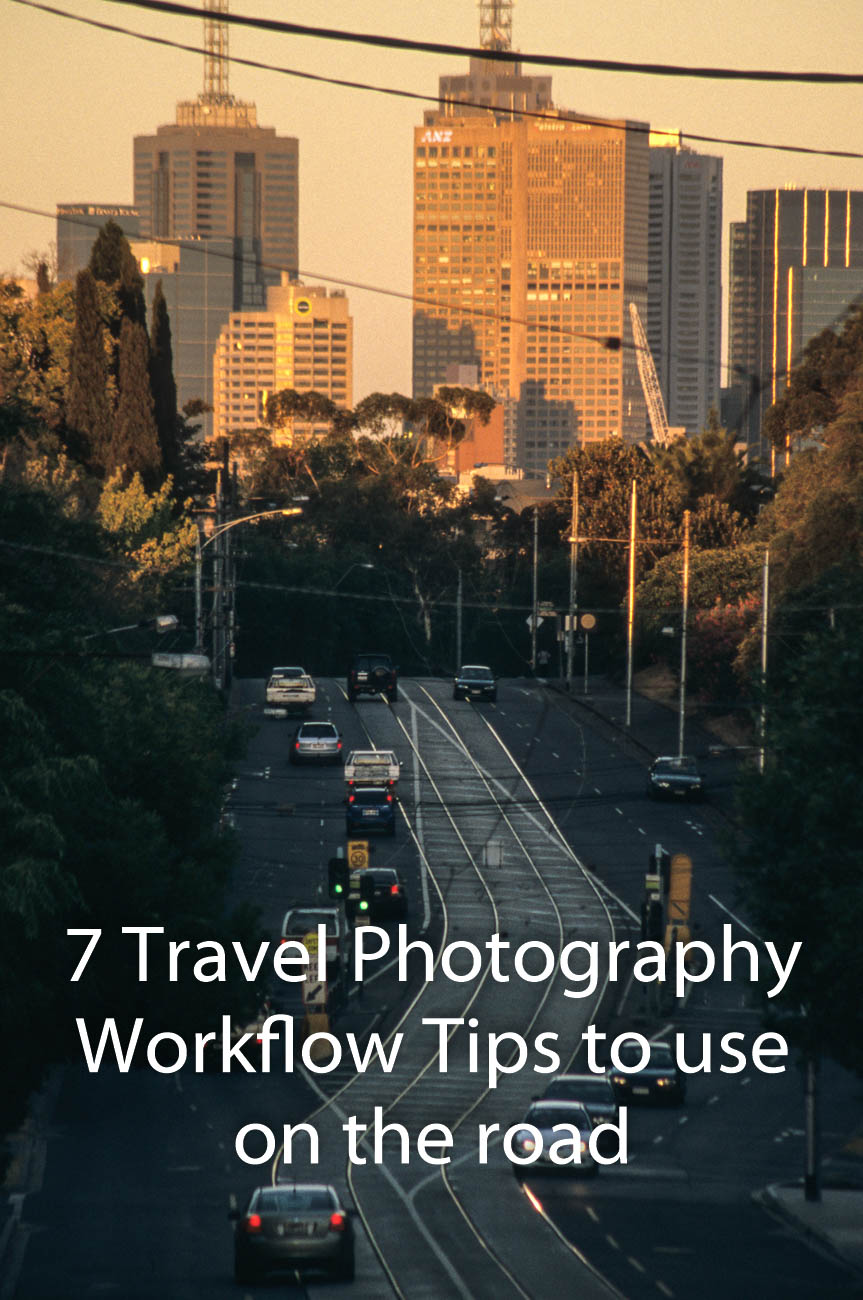
So now you’ve come home with a hard drive full of travel photos. You’ve followed my article 7 Travel Photography Workflow Tips to use on the road. You can’t wait to have a good look at them and show them around. But where do you start? Well, read below to find 7 ways to organise your travel photos.
1 Back up before you get home.
If you have been following my articles or even if you haven’t, you should have backed up everything you took whilst you were away.
Each image should have been renamed and in some sort of order and/or folder and on a hard drive and on a computer. If you haven’t done that then it’s not too late you can do it right now. This is something you should do before you get home and usually as you go. What no back up! You might want to go to How to Back up your Travel Photos.
There are lots of ways to achieve this of course. But the simplest is to use software that will make it easy for you. Adobe Lightroom is one option and I’ll come back to that.
2 Rename
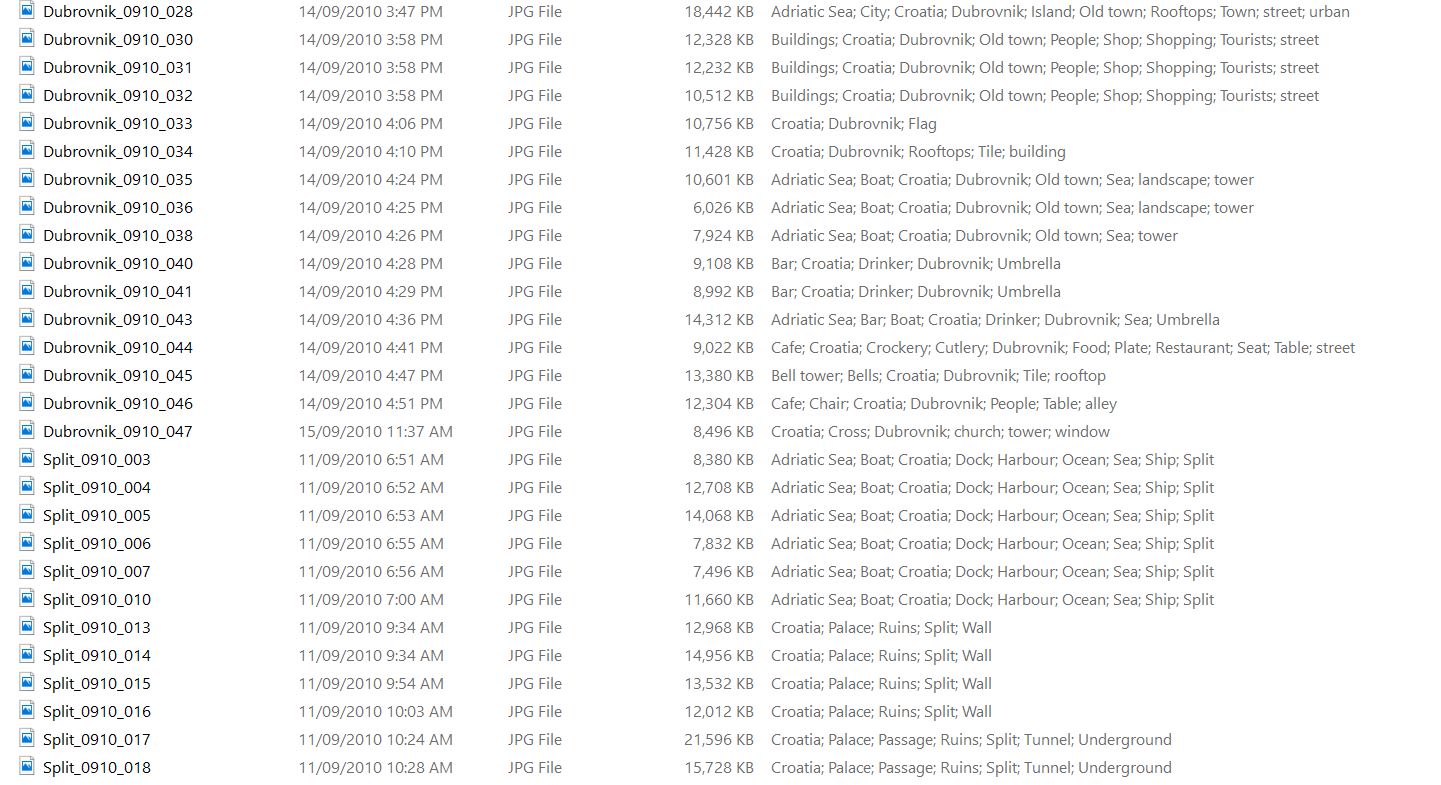
You may think what’s the point. But trust me renaming your photos to something more meaningful will save you a lot of heartache. PB081477.ORF or IMG_6649.CR2 does not even start to give a you clue what it is unless you have dumped it into a suitable named folder.
The first thing to think about is what you will rename it to. There are various options. Some of these can be confusing, others are simple and easy to remember. You can get as simple or as complex as you like. Here are some examples: Date_Number_Place or Shoot Name. Number_Date_Place or Shoot Name. Place or Shoot Name_Date_Number. The date can 2017_08_12 or 12_08_2017. As all photos have a date in the metadata then you only really need the month and year so 08_2017. However, the object should be to keep the length to a minimum so 0817 or 1708 is fine. The number is obviously the image count and you should look to start at 001 or 0001.
3 Optimise
I use Place or Shoot Name_Date_Number. That is name of the place, area or country. Doesn’t sound consistent? You’re right it’s not. But the selection of the hierarchy is dependent on the number of photos. Let’s say I’m in New York and I take 30 photos of the Brooklyn Bridge, then I will probably select “Brooklyn_Bridge”. If on the other hand I take 30 photos in New York of 15-20 different subjects, then I will use “New_York”. To take that up one level. Let’s say I travel around England for a flying visit and took 30 photos in several different areas. In this case I might even use “England”. The latter is less likely for me but you get the point.
Brooklyn Bridge walk way New York
I follow that up with the month and year so 0818 – August 2018 and then the number starting at 001. Putting it together you get England_0818_001. So that would be the first photo I took in England in August 2018. What you do have to be careful of is, that if you return to a place in the same month, you need to make sure that you don’t start at 001 again. Start at one number after wherever the last batch finished, e.g. England_0818_215.
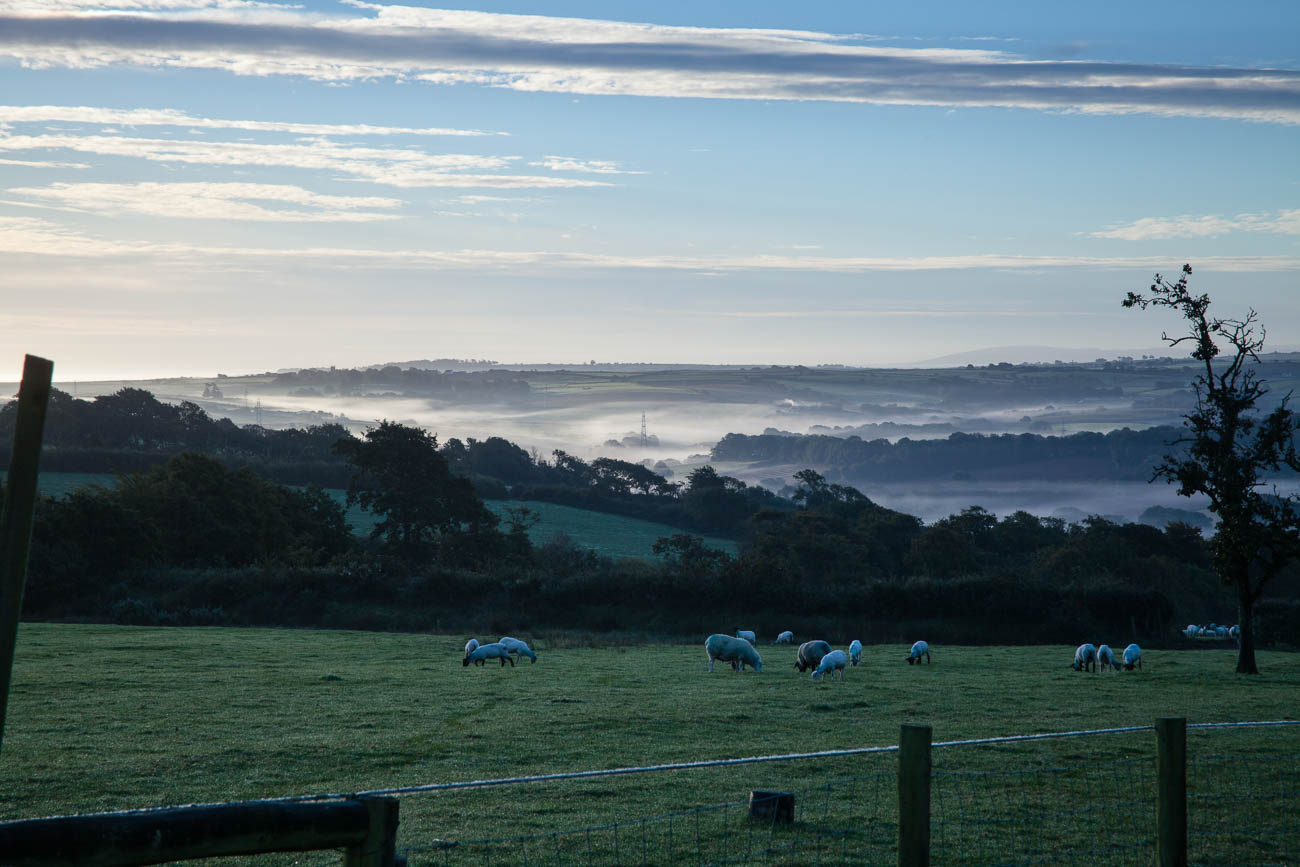
Early morning mist at Winscott farm, nr Bideford, Nth Devon, England
4 Rename Historically
You’ve probably looked at your existing travel photos and have promised yourself that you will get them into some sort of organisation. Part of that job is to rename them in some sort of order. Well fear not, there are some useful ways of renaming multiple files in bulk. If you have Adobe Lightroom you can do that quite easily. Alternatively, if you are a PC user Windows 10 can help you with that. Likewise, Mac users with version Yosemite or better can also get the MAC OS to do it. The links are to a couple of tutorials
Failing all these there is specific software that is either free or inexpensive to buy. As a PC user I have used Bulk Rename Utility which I think is still free. For Mac users A Better Finder Rename comes highly recommended.
5 Use folder hierarchy
The other challenge to organising your travel photos, is the dreaded folder hierarchy. Again, opinion is mixed on this. As with the actual file names you can create folders that have the date or name and various combinations. I usually create a folder when I’m loading through Adobe Lightroom with the Place or shoot name. This folder is a sub folder of the year. So my hierarchy looks something like ImagesRaw ImagesRaw 2017Trip_2017Zambia_17. But you can do it in date order e.g. 2017108_ZambiaRaw Images.
It’s really about how you look for your images. Whether you look for them in batches of dates or subjects. Both Windows and Macs search options will cover either way. But they are not foolproof and nowhere as good as Adobe’s Lightroom.
Whichever way you decide to follow you need to stick with it. Changing it later can be very time-consuming and tedious.
So what sort of keywords do you need? Well again that depends on how you are going to search. If you have some wedding photos and you want to see all the ones with Uncle Joe, then you would use “joe” or “uncle joe”. If you wanted to see all the images you took of the Eiffel Tower, then you would use “eiffel” or “eiffel Tower”. My system is usually country, locality, town, subject, type, anything else. If I took a picture of the Brooklyn bridge, then the keywords I might use would be USA, New York, Brooklyn, Brooklyn Bridge, Bridge, River, East River, Water. If there were people in it, I could add people, street, tourists. Any word that you may at some future date want to use for searching can be used.
7 Use other tags
If the camera you were using has face recognition and/or Geo-Tags, then that’s another form of creating searchability. You will still need to refine it depending on how you want to search. The algorithms for face recognition are good but not infallible.
7 Ways to Organise Your Travel Photos – Summary
It’s important for future searches to make sure that you organise your travel photos.
First things first backup, then look at how you will rename your photos. (Don’t use the camera generated file names – you’ll never find anything!)
Optimise the names so you understand them. Once you have a system of naming and optimising, you may want to consider renaming some of your existing photos to maintain consistency.
Of course, naming them is one thing but you also need to be careful of how you store them. Having a logical folder hierarchy is the best way.
There are other ways of searching for photos using keywords and tags, such as Geo-Tags.
How does that make you feel about travel photography? Do you want some help with your travel photos? Why don’t you pop your email in box below and not only will get content that’s not always posted on this site, but you will get a free guide to get you started
Any questions then please contact me here and/or please say hello at these places:
Death Valley NP California, USA. Click on the image for a larger view
In the last couple of posts the travel photographer destination part I and part II, we discussed what to do when you reach your destination.
But what about your travel photography workflow whilst you are on the road?
Follow me as I give you some tips and tricks on how to handle the photos you are taking whilst you are on the road.
A Recap
You’ve learnt in the last few posts about being prepared and ready to take travel photos. Making sure your camera equipment is always set up correctly, clean, has the correct lens and plenty of memory and battery power.
So now you are out there taking images, how should you go about it.
1. Keeping tabs on what you are taking
Newer cameras have GPS tags and dates.
So you could be thinking that taking down details of the photos you take is a no longer necessary
But, if you actually want to relive the experience of when you took the image, then note taking is essential.
It doesn’t have to be ‘war and peace’. It can be as simple as “Sydney Harbour Bridge taken from the Rocks area”. You could go into more detail like: “Sydney Harbour Bridge taken from the Overseas Passenger Terminal Quay on Circular Quay West. Time 4Pm 27/05. Weather was overcast and the sun was a few minutes from setting.”
Sydney Harbour Bridge taken from the Rocks area
Taking notes can help:
As a backup for the metadata that’s captured in the photos itself. Locations and even times are not always accurate
To add a caption to the photos if you are going to share and/or display it.
As a record of where you took this photo. If you ever return and that could be a few days or years later, you know where you’ve been and whether it’s worth going back to the same spot.
2. Making sure you are secure.
Depending on where you are in the world, security is something to pay attention to.
There will always be someone who is keen to steal from you as a tourist.
There are countless stories of tourists having their bags, cameras and other items ripped from them.
However, whilst there’s never a guarantee that you won’t find yourself in that situation, you can definitely minimise the chances.
If you want to have your camera ready to go, make sure you have it around or across your neck.
Carry your bag across your body or if it’s a backpack carry it as a back pack.
Keep all your bag pockets and openings firmly closed.
And speaking of bags, it’s best to have a non-descript bag that doesn’t shout to the world “CAMERA”!
There will be times when you need to put your bag on the ground. A foot through one of the straps is always a good idea.
Beware of what and who is around you. If you see anyone suspicious move away.
Keep away from the kerb if you are in an area that’s known for motorbike thieves.
3. Subjects
Whilst strictly not part of any travel photography workflow, I’ve included it here. Without thinking about subject matter then you’re not going to create great images.
As you roam the streets of your destination, always look for something interesting and unique.
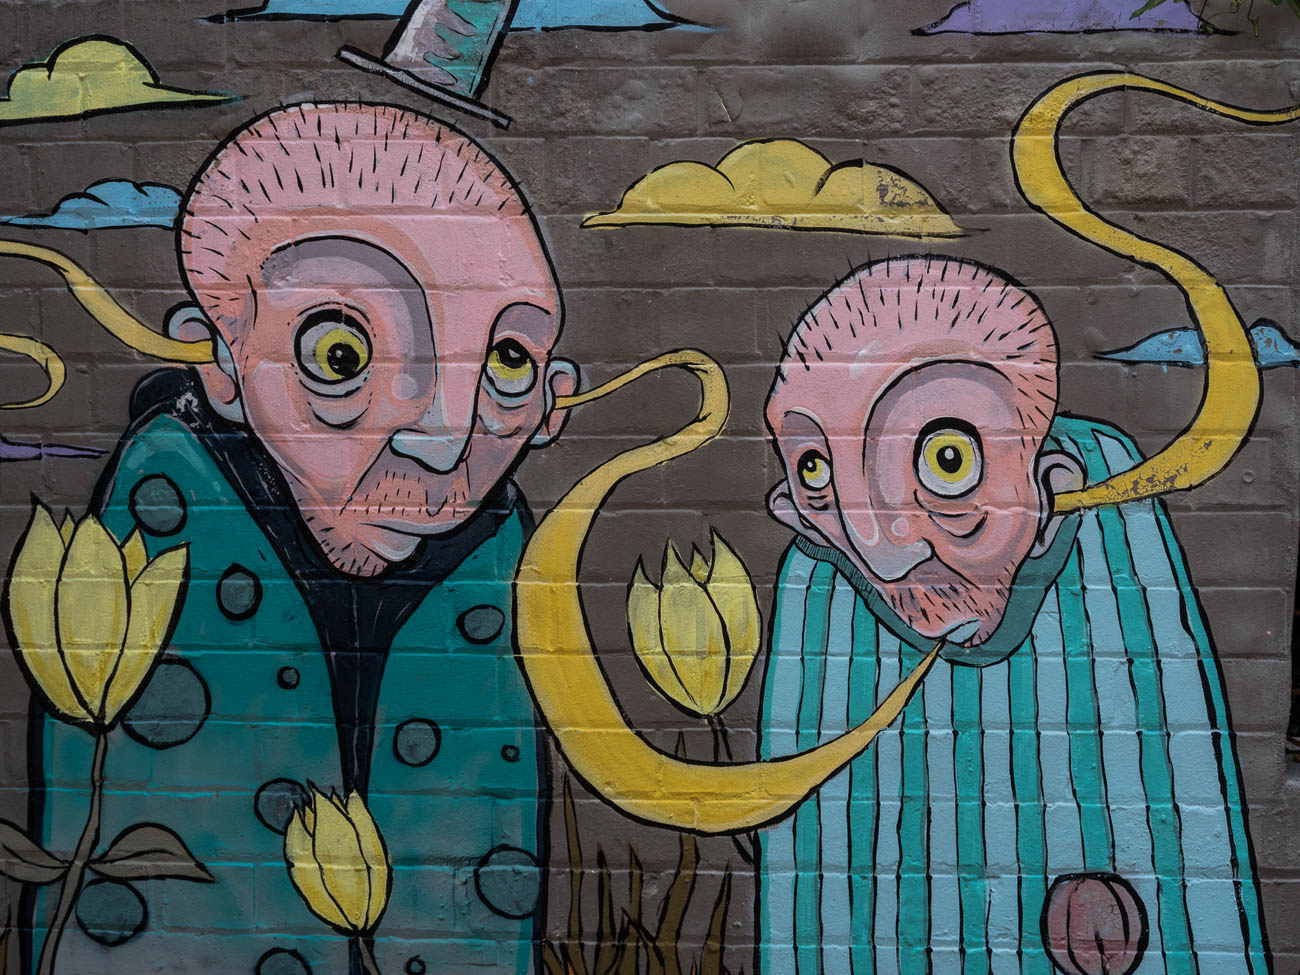
That can be anything from the usual famous Icons to much smaller obscure subjects like rubbish on a street, or street art, even a close up of the bark on a tree. The list is endless.
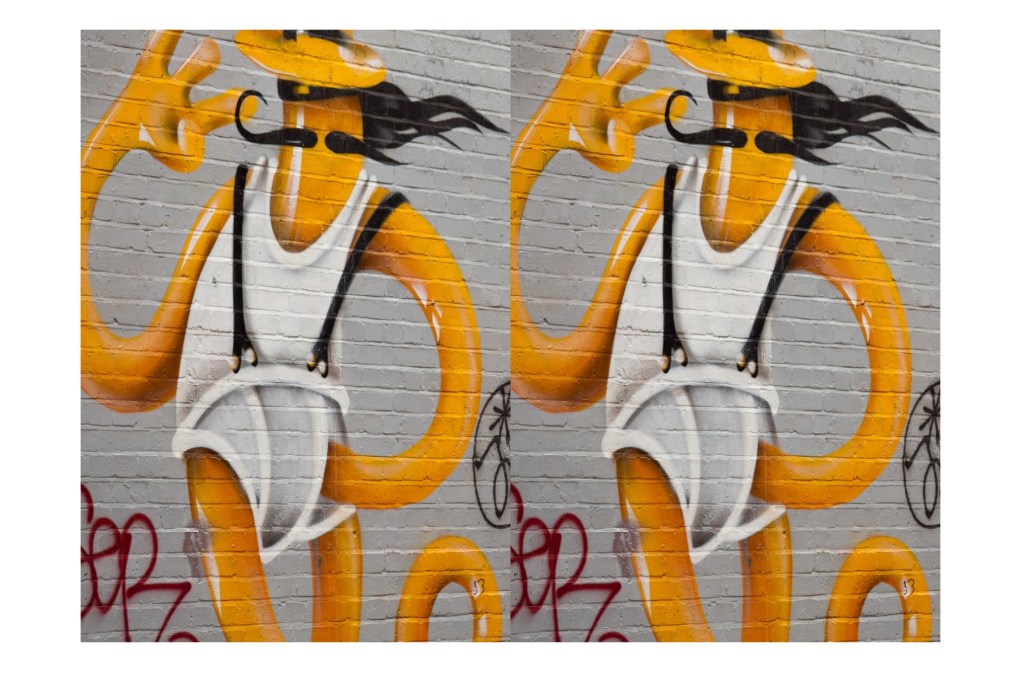
Street art in Perth Western Australia
Whatever subject you choose to take, play around with different settings, angles and positions.
The goal is not to copy what everyone else is doing but to be individual.
That’s not to say that you shouldn’t ever take a straight forward image of an icon. After all, you may be able to bring a different style to a subject even if from the same position as everyone else.
Often you will think that these different experimental images didn’t work. Because of that you will be tempted to delete it after looking at it through the camera viewfinder.
Don’t do it.
In fact, don’t look at what you have taken at all until you have moved away and are resting somewhere away from the subject.
4. Reviewing through the viewfinder
There are few times when you should review what you have taken.
The most important being if you want to make sure you captured something that you may never see again.
Even then it’s only worth looking if you have the opportunity to retake it, otherwise what’s the point.
If you missed that multi coloured Aston Martin with a James Bond look alike standing up through the sun roof, then that’s too bad.
The thing is that looking through the viewfinder at what you have taken, can rob you of any other photo taking opportunities.
Things can move quickly, light changes, people and vehicles move, and the weather can change in a instant.
The time to review, as I said is away from the action. You are only doing it for some immediate gratification and to show others anyway.
Of course, in the present-day social media share society, you may want to share some images that you have just taken immediately.
That’s all down to personal choice. Personally, I don’t share anything publicly until I know the image is at it’s best.
5. Back up
The best time to review the day’s images is when you get back to your accommodation.
Before you do anything, you need to back everything up.
If the only copy of your image is on the memory card, then you are playing with fire.
As a rule of thumb, it’s best to have a least 2 other copies in different locations. If you’ve copied all your images to both a hard drive and your laptop then store the hard drive in a different bag to your laptop.
How much you can review is dependent on what other equipment you have with you.
If you have a laptop with processing software, then you can start by picking your keepers or at least allocating stars.
You can even begin post processing if that’s what you want to do.
But there’s no point in starting to post process if your laptop screen is small and/or hasn’t been calibrated
Any adjustments you make are likely to be inaccurate.
You can of course still review and maybe go through and rate them or select the keepers.
I’ll cover that process in another post.
7. Deleting
So, let’s say you have backed up the days’ shooting and have gone through them and rated them.
What do you do with the ones that are no good?
In general – nothing!
Unless you have images that are totally out of focus or you’ve had a few accidental hip shots then don’t delete.
I’ve actually had a couple of good shots that have been accidentally taken from the hip.
My final note on this travel photography workflow is that it’s a personal choice on how much time you spend on your images when you are back at your digs.
But I would again recommend that if you are not travelling alone then do the minimum or be prepared to suffer the consequences of being anti-social.
Travel Photographers Workflow on the road – Summary
The wonders of having dates and even Geo Tags on each file are great. But it’s still essential to keep a written, whether electronically or by hand, record on each image or batch of images.
It’s essential to keep a low profile if you have an expensive (even if it’s not) looking camera.
Pay attention to who and what is around you.
Don’t rely on others but don’t obsess either. You are there to enjoy yourself.
Look for individual shots that speak to the viewer and give you a sense of satisfaction.
Only review through the view finder when you believe you really need to.
The world keeps spinning while you are looking at the viewfinder.
Once you are back at your accommodation back up first, then review and finally start rating.
But make sure you have a big enough screen to give you plenty of detail.
Don’t delete anything unless it’s obvious that you will never see the image again.
Finally remember you can review, rate, delete and post process when you get home.
Nothing like relaxing with a beer at the end of the day at a place you like or have never been before with friends and/or family.
What’s your workflow?
I’ve come clean and told you what I do. What about you? Do you have a travel photography workflow that’s totally different from what I’ve mentioned in this article? Leave your comments below
And while you’re at it why don’t you pop your email in the box below. Not only will you get content that’s not always posted on this site, but you will get my free e-book “9 ways to improve your Travel Photography”.
Any questions then please contact me here and/or please say hello at these places:
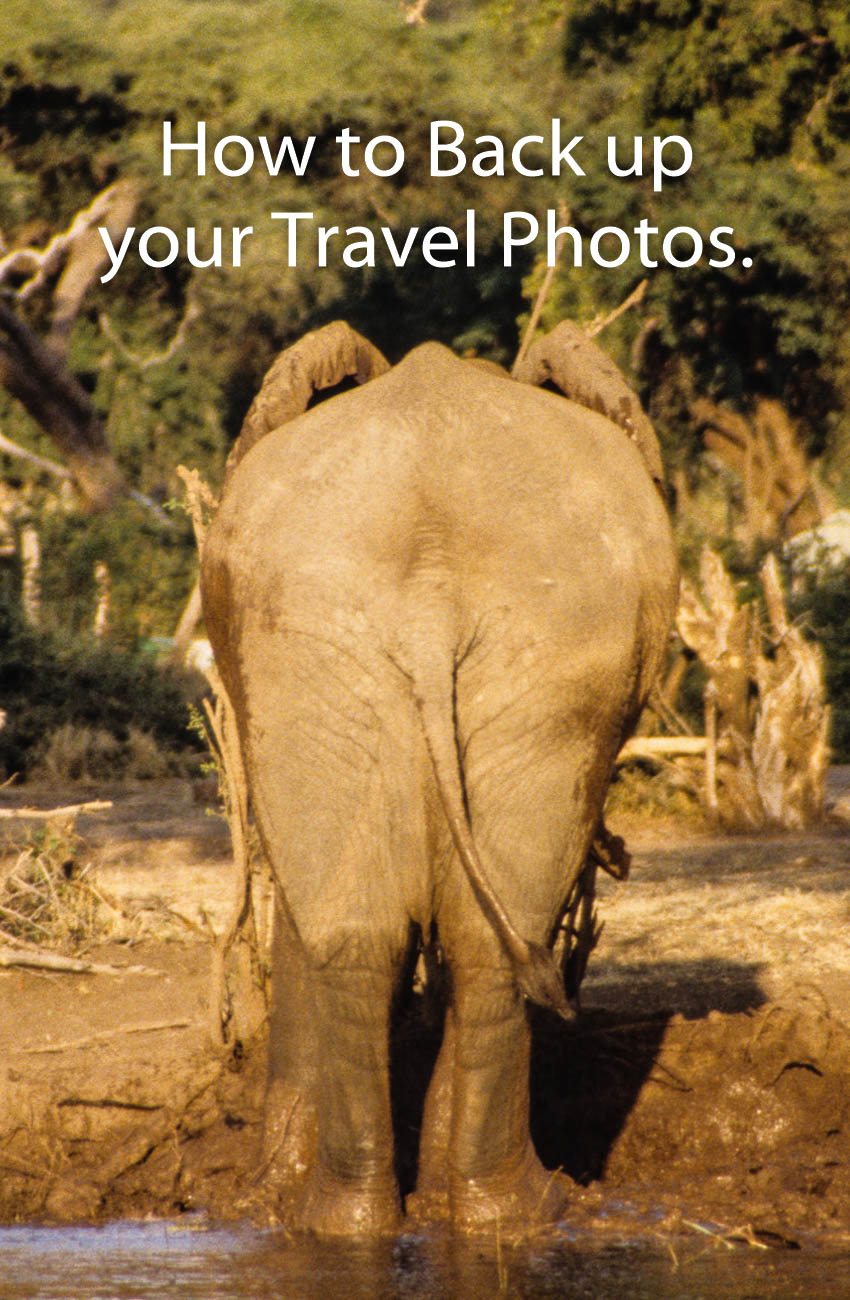
An elephant shows us his rear end by the edge of Chobe lake in Botswana
In the days of film, the only form of back up was to guard your film and slides as if you’re life depended on it. Nowadays with digital imaging there are many ways of backing up your photos. I touched on this in Planning and Preparation for Travel Photos.
So, follow me along as I give you some ideas on how to back up your travel photos.
History of Back up
The term back up only really became used when computers began to take over the world.
With paper you could make copies and file them off-site.
As we all switched from paper to digital, Business’s started to have tape, then floppy disks followed by CD’s for backups of the day’s work.
Now you have back up servers some of which are in the cloud.
Photography back up
Before digital, you were able to have extra copies made of photographic prints and file them somewhere else.
Not so with negatives and slides. Well that’s not strictly true, you could get copies, but it was expensive. It was not until digital came along that we began to realise that we had the option to back up all our precious photos. We could even do it retrospectively, if we had plenty of time or money, by scanning film and slides.
In those early days the floppy disk and then later the CD or DVD were the main back up mediums. But as with film and slides we all ended up with boxes of DVD’s. Whilst smaller than boxes of Slides and Negatives they still took up some room.
Let’s take a look at what options we have now.
Direct backup to a Laptop or Computer
The simplest and most convenient way is to connect directly to a Laptop or computer. This is done via the OEM cable that each camera manufacturer supplies to a laptop or computer. Once you have it on the computer you are free to copy it anywhere else. All camera manufacturers give you that option. The main disadvantage is that the cable supplied is not usually off the shelf if you lose it. Additionally, the camera port tends to be non-standard or at best not common.
Memory Cards
When you take an image with a digital camera it sits on the memory card that you have in the camera. With a smartphone that image will generally sit on the phone’s internal drive. However, you can change it to sit on a microSD, if that’s available.
Memory cards can also be used to back up your photos either via a computer or in some camera models.
How does that work?
Well you remove the memory card from the camera and insert into either a computer memory card port or a card reader that plugs into the computer. Likewise, the same applies with a blank memory card. Once both cards are loaded you copy from one to the other.
Backing up in camera is usually confined to some of the more high-end cameras. These now come with two memory card slots that you can use to either extend the memory or use the second slot as back up. When the latter is set, each time you take an image, it not only sits on the first memory card but also on the second.
Another option is to transfer it in camera periodically but that can be dangerous if you forget to do it.
The system of using memory cards as a backup medium is not used that often unless you are looking to immediately back up and that’s your only option.
One recommendation I would make is to use something similar with a smartphone.
Smartphone backup
With a smartphone, the potential to lose it or drop it is much higher than a camera. I would suggest a microSD if that’s easily removable (otherwise you will lose it with the Smartphone!)
Another option is a small flash drive that can be attached, usually through the charging port. Why would we need to do that when we all rely on the cloud to backup our photos on a smartphone?
Services like Google Photos, or iCloud work well when you have connectivity. But what about when you don’t have connectivity?
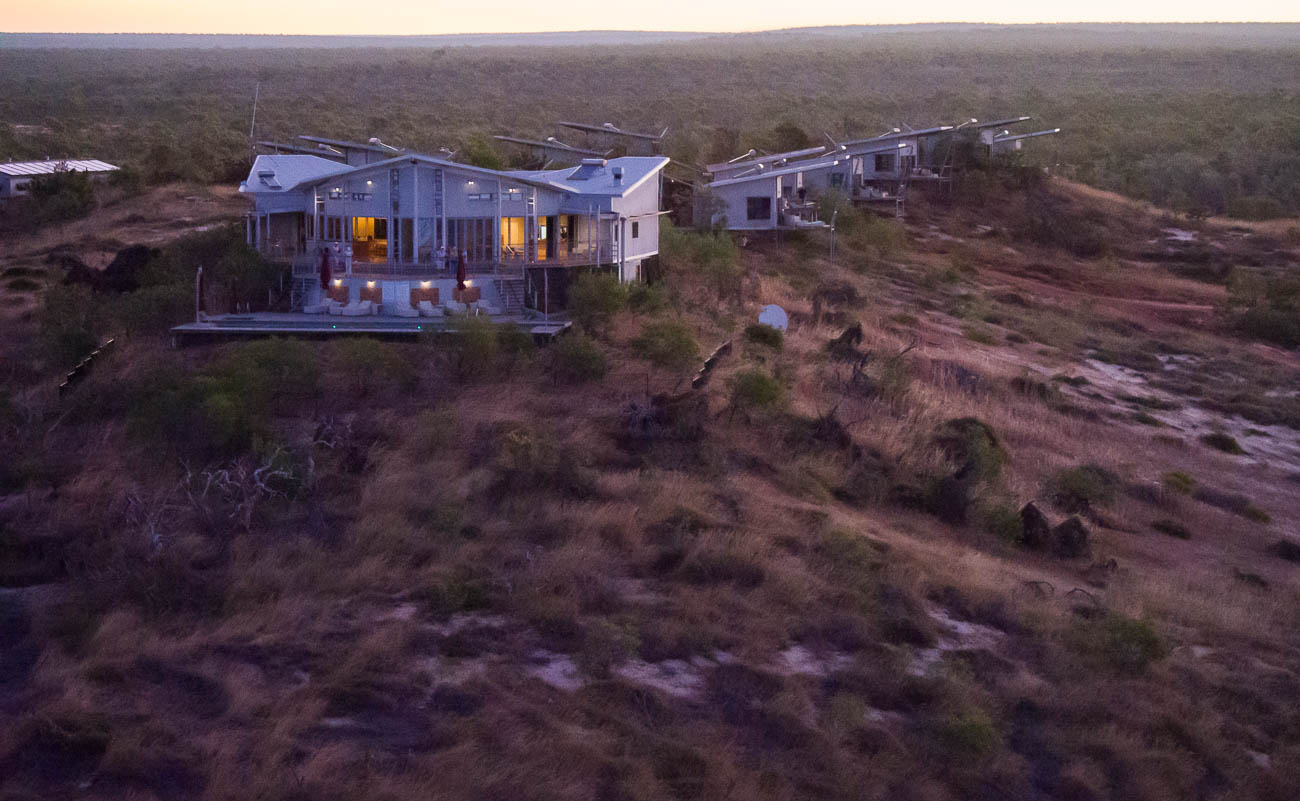
Last year I stayed a few days in a remote resort called Berkley River Lodge in the Kimberley region of Western Australia.
There was no phone signal at all and WIFI was limited to 50m from the reception hut. We were on a helicopter trip heading back to the resort. One of the other guests was taking pictures of the sunset with an iPhone when he lost it out of the window. I might add that the phone wasn’t his, it was his partners! We had also all been warned not to take your phone too close to the window during the flight as, you’ve guessed it, it could get sucked out. Anyway, apart from looking like a Kangaroo in headlights, he lost the phone. All the photos that they had taken in the last few days were only on that phone.
And as they had no way of backing them up other than using iCloud they were lost with the phone.
Berkley River Lodge from the air
Lesson from that is not to rely on the cloud as back up for smartphones or indeed anything else.
If you have another device like a tablet, then you can set up a hotspot that will enable you to transfer or copy your files to the Tablet. But if you are likely to be without the tablet and have no connectivity, then a Mobile flash drive is a no brainer.
WIFI SD cards
An option to standard Memory Cards are WIFI cards. Even if your camera has Wi-Fi capability this still allows you to back up your images to another device.
If you have a fairly new camera, then chances are it will have WIFI capability anyway, so you can backup via WIFI without a special WIFI Memory Card.
However, in both these instances the issue is space. Most Smartphones or tablets are around 64GB and if you are shooting RAW over a 2-3-week period it doesn’t take long to max out. For example, last year at a African Game Park I shot around 64GB of RAW and JPEG images.
Physical back up devices
There are a lot of devices out there that you can use to back up your photos. Most of them are portable hard drives
There is the basic hard drive that you plug into a laptop or some tablets. You then copy the files to the hard drive via the Laptop or Tablet
Some hard drives have a SD Slot for your memory card. You insert the card and it automatically copies to the drive. So, in theory you don’t need another device. Yet, unless you plug into another device you are not going to know whether it has backed up all your photos correctly.
Another option is the wireless Hard Drive. This is like a hybrid. They have SD slots as well as having the option to wirelessly copy images via the hotspot I mentioned before. This has the same disadvantage of not being able to see what images have been copied across. Although some do allow you to view the contents of the drive from a smartphone or tablet as well as a computer.
Then there are hard drives that have a screen that lets you view the images even if they are RAW.
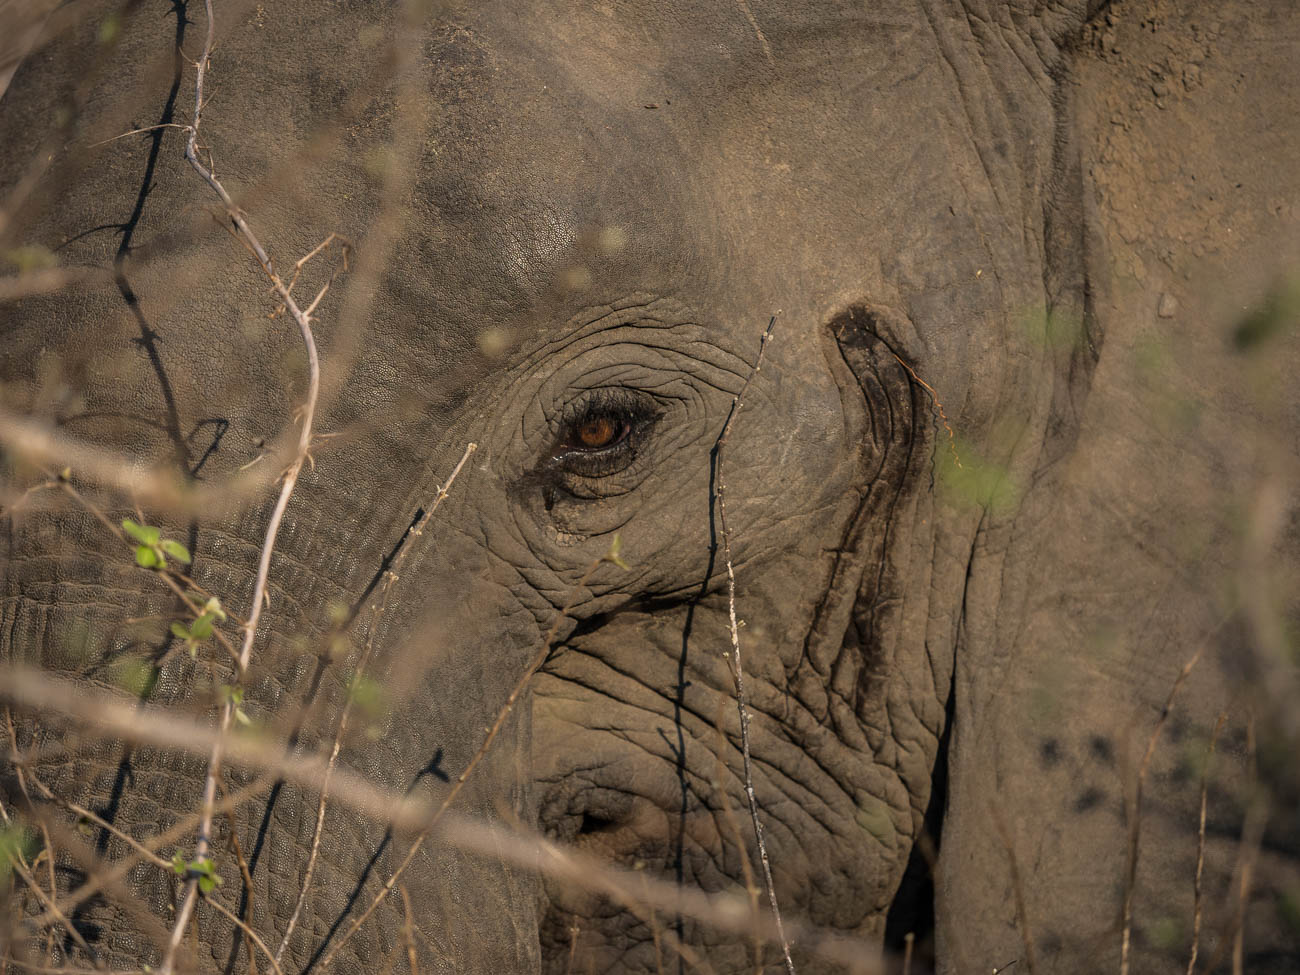
African Elephant in South Luangwa NP, Zambia.
Hard drive types
Lately hard drives come in two types, HDD mechanical Hard Disk Drives or SSD Solid State Drives. The differences are basically that SSD’s are faster but more expensive. In a computer or laptop then I would go to an SSD every time. With portable hard drives, where there is only data being stored, then it’s really a personal preference.
How many cloud services are there now? There’s Apple’s iCloud, Microsoft OneDrive, Dropbox, Box, Google Drive, Crashplan, Backblaze, Carbonite and there are the Photo Sharing Sites (more on that below).
Of course, all cloud backup services depend on the internet. So if you are travelling, you are relying upon there being an internet connection. That is often beyond your control.
There is much better connectivity than there was 5 years ago and I’m sure that there it will improve even more. But as I mentioned earlier there is always somewhere that the internet is not connected.
Even with an internet connection, the bandwidth or speed can be poor. Meaning that the time taken to upload your photos can be long and arduous, not to mention frustrating.
Using the cloud
Whether you use the cloud or not is dependent on a couple of things:
One is the Camera equipment. For instance, a Smartphone has inbuilt cloud capability and relies heavily on there being an internet connection. That is either by the phone signal e.g. 4G or a wireless connection. On the other hand, unless you have a 1-2-year-old camera, then there is every chance that the camera you have will not have Wi-Fi capability. Even a lot of the new ones only allow you to upload to a phone or tablet from which you then have upload to the cloud.
The other reason is the interface and ease of use. I haven’t tried all these services, but of the ones I’ve used, iCloud and Dropbox seem to me to have the best interface and ease of use.
Cloud cost and security
There is one further reason and that is price. Prices vary so much with specials and add-ons that comparing them is likely to be totally inaccurate by the time you might read this.
The other thing to consider is security. I hesitate to say it but using the likes of the big guns like Microsoft, Apple or Google does give a sense of security, compared with the smaller players. That may well be false. But it’s worth asking a few questions. I.E. where are their servers? What happens to the data if a server goes down or heaven forbid the company disappears?
What do I use? OneDrive. Why because Microsoft gives me 5TB with my Office 365 subscription.
Photo Sharing Sites
The other cloud-based storage systems are Photo Sharing sites. These are likes of Flickr, Smugmug, Google Photos, Pixbuf (a new one), Photobucket, 500PX, My Portfolio, Amazon Prime Photos plus a few others. These add a bit more to the concept of back up. Usually it’s a subscription service that allows you to view and share all your photos. Some even have their own social media interface meaning you can browse other user’s photos and comment or share.
Flickr was the first of these and now has been gobbled up by the expanding Smugmug. As a user of both I have yet to establish what that will mean.
Take a look at my site on Smugmug to get an understanding.
Unlike the straight cloud backup services, some of these sites don’t support all file types. So, if you are looking for a complete solution to house and view your RAW files for example, do your due diligence.
African Elephant in South Luangwa NP, Zambia.
How to back up your travel photos – at home
We’ve covered a broad summary of what there is out there to back up your travel photos whilst you are on the move.
What about when you get home? All of the above apply to your home base as well.
But you can also add in Desktop Drives
Desktop Hard drives
Desktop Drives used to be fixed to one certain location. But with the growth in portable hard drive storage, the fixed and portable are overlapping.
Most of us these days have Laptops instead of desktop computers which gives us freedom to work pretty much anywhere. So, plugging in a portable hard drive as not only an expansion to the laptop storage, but also as a backup is easy.
For the fixed you have three main types.
Standard hard drives that connect via USB or Apple’s Lightning and have their own power supply.
Cloud based drives that connect into a network also called NAS (Network Attached Storage) This is different to the cloud services mentioned earlier. These are hard drives that are physically in your space but can be accessed remotely via an internet connection. They also come with a power plug for an independent power supply
The last type is called a RAID system (redundant array of inexpensive disks) that also have their own cloud. This is a trickier system to manage and install. Basically, it is several hard drives usually in multiples of 2 that back each other up. Where it can be confusing is the many different set up combinations available. It’s a way of ensuring that should one back up drive fail then there is always another one that has identical data, so that you can sleep easy.
What I use
Now I think it’s time for me to give you my system.
On the road
Depending on the duration and the reason for the trip, I will carry either one or two Wireless Hard Drives, my surface pro or iPad Pro. I also now carry, since seeing the guy at Berkeley River lose an iPhone, a portable flash drive that fits my Samsung S8.
How do I use them?
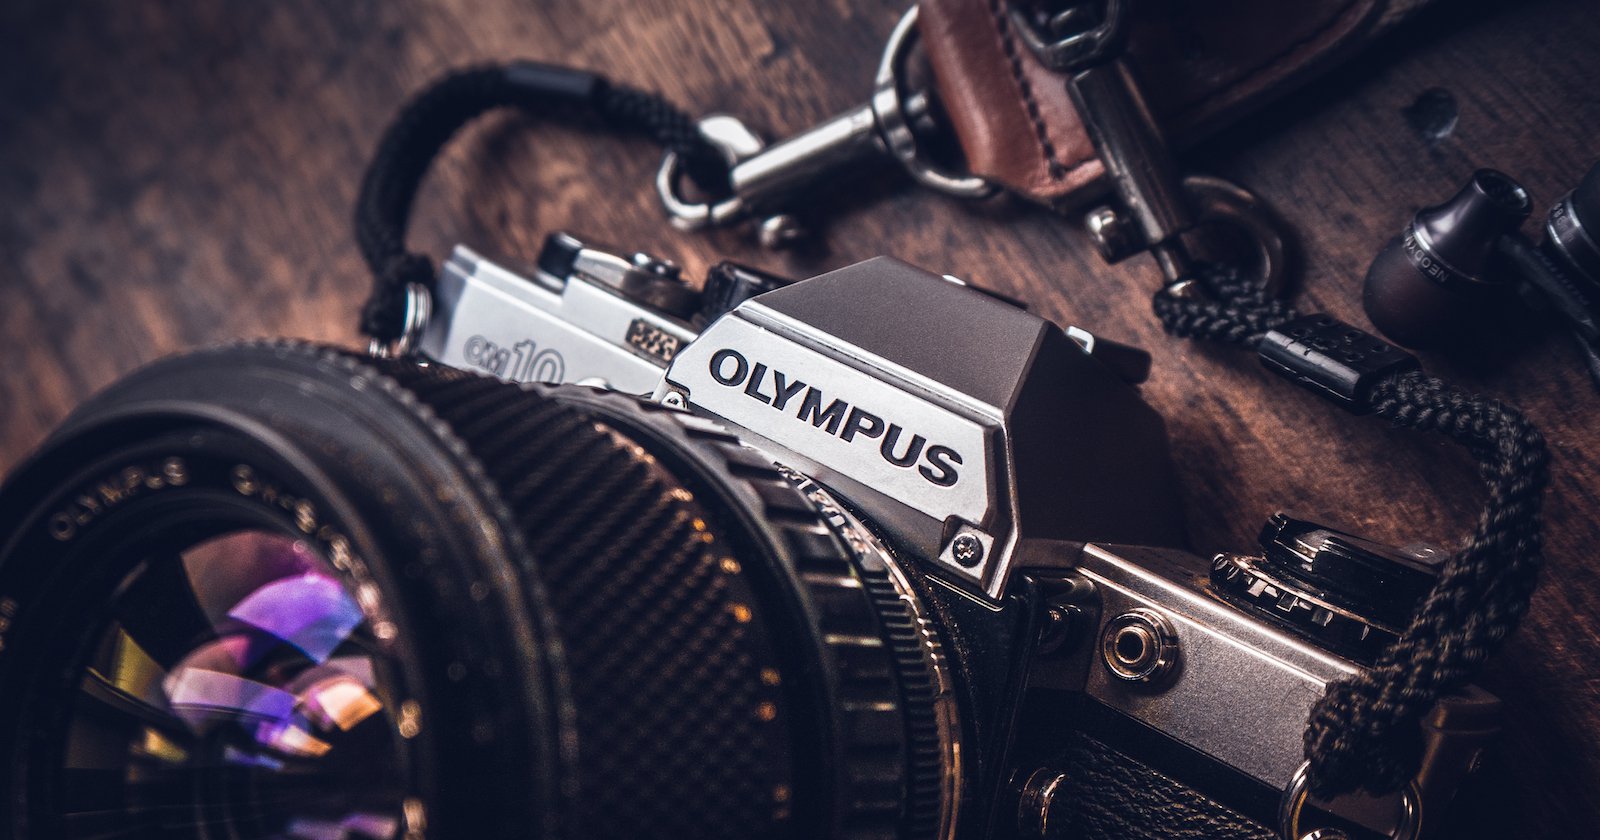
I am fortunate that my Olympus OMD1 MKII has dual memory card slots, so I use one of these memory cards as back up. Additionally, every evening or at least every couple of evenings, I back up one of the memory cards to both wireless hard drives. If I have been diligent enough to clear the hard drive on my surface before travelling, I back up to my surface as well.
I back up my Samsung S8 to my surface if I am confident that I have good internet for the cloud back up to my OneDrive service. If I ‘m unsure of the connectivity, then I will back that up to my portable flash drive and later the surface.
I have used the iPad Pro as back up in the past. But due to the number of apps it has, it only has a small amount of spare storage compared to the surface.
How to back up your travel photos – Summary
Back up is a relatively new concept in the photographic world. It has only been around since the advent of Digital photography
There are many forms of back up for the travel photographer
Memory cards can be used for short term back up
Smartphone Cameras rely on cloud services, which can be unreliable when travelling.
A flash drive or microSD is a more reliable medium
New cameras can upload photos via different WI-FI systems to the cloud but only via another device
There are many different hard drives that can be used as back up devices.
They can be like small computers with their own screens and flexible connectivity.
Speaking of Cloud back up, the number of services available is huge. So, you need to select carefully before using one of these to ensure it meets your needs and security
Photo sharing sites like Flickr and Smugmug can also provide a level of back up for your photos
Then we get into the heavy duty physical hard drives. These use sophisticated software and multiple drives that you can create your own cloud with.
What do you use?
I’ve come clean and told you what I use. What about you? Do you use something or have a system that’s totally different from what I’ve mentioned in this article? Give me your take on how to back up your travel photos Leave your comments below
And while you’re at it why don’t you pop your email in the box below. Not only will you get content that’s not always posted on this site, but you will get my free e-book “9 ways to improve your Travel Photography”.
Any questions then please contact me here and/or please say hello at these places:
In my last post I talked about the best camera to use for travel photography. If you missed it you can find it here. This time I want to talk about the best camera lens for travel photography.
In that article I inferred that the best camera to have is a mirrorless. That doesn’t mean that in this article I’ve assumed that you will have one. As in Ice Cream, there are many different flavours. There are lots of different lenses that do the same thing. There are lots of different lenses that do specific things.
Types of lenses
To ensure consistency I’ve quoted the 35mm equivalent when quoting a focal length. Why? Well most, if not all, camera manufacturers usually quote that in their literature. To cover all the different size focal lengths from each manufacturer would be confusing. E.G. a full frame camera body lens of 50mm is exactly that, 50mm. A DSLR crop sensor camera is usually around 1.6 which means 50mm is 32mm. To confuse you even more, some mirrorless cameras have crop sensors of around 2, which means a 50mm lens is 25mm. AAGH!!! More on that in a future post.
Now we’ve cleared that up, let’s go to the best camera lens for travel photography.
Built in Lenses
There are some top end compact and low end mirrorless cameras that have a built in lens. An example of both would be the Sony Cyber-shot DSC-RX10 III and Fujifilm X100F Most of the lenses that come with these cameras tend to be telephoto lenses and that’s when you need to be careful. Some of them use both Optical and Digital zooms. If you recall from the Best camera equipment for travel photography, a digital zoom is the same as having an image on your computer screen and cropping it. That means you end up with a smaller picture size, e.g. 1000 x 1000 becomes 500 x 500 Pixels.
If you zoom in optically the size remains the same and so does the resolution, allowing for bigger prints or digital sizes at better quality
So, if you are looking at a lens on a camera, ensure that you know whether it’s using optical or digital to zoom. Just because it uses digital doesn’t mean you should disregard it. If it also has an optical zoom as well, then you can choose to use the digital zoom sparingly.
Built in Telephoto lenses tend to range from around a minimum of 28mm to sometimes around 250mm. When it’s longer than that, then it’s usually at the long end that the digital zoom comes into play.
If you are going for an all-rounder, which you would be if you are considering a compact camera, then 28-150mm is the sweet spot. If you can get wider than 28mm, say 24mm, than all the better. Remember you can always, where practical, zoom in with your feet.
Great Langdale in the Langdale ranges ,Lake District, England
Click on the above image to view a larger version and for other options
Interchangeable lenses
Now we are talking about a separate lens. That is, a lens that can be removed from the camera.
With interchangeable lenses, you need to establish what you can afford and whether you want more than one lens.
The first camera I had (which was a film camera, but the principle is the same) had a 28-200mm lens. I also had a 1.5 Teleconverter with it, which meant that I could get a maximum zoom of 300mm.
So, there are other ways of having flexibility with only having one lens.
But if you are thinking about going for a camera with Interchangeable lenses, then it’s worth the price to invest in glass. The thing is that the lens is a more important and longer-term investment than the camera body. If you get a good lens, then you will keep it far longer than the camera body.
Telephoto Lenses
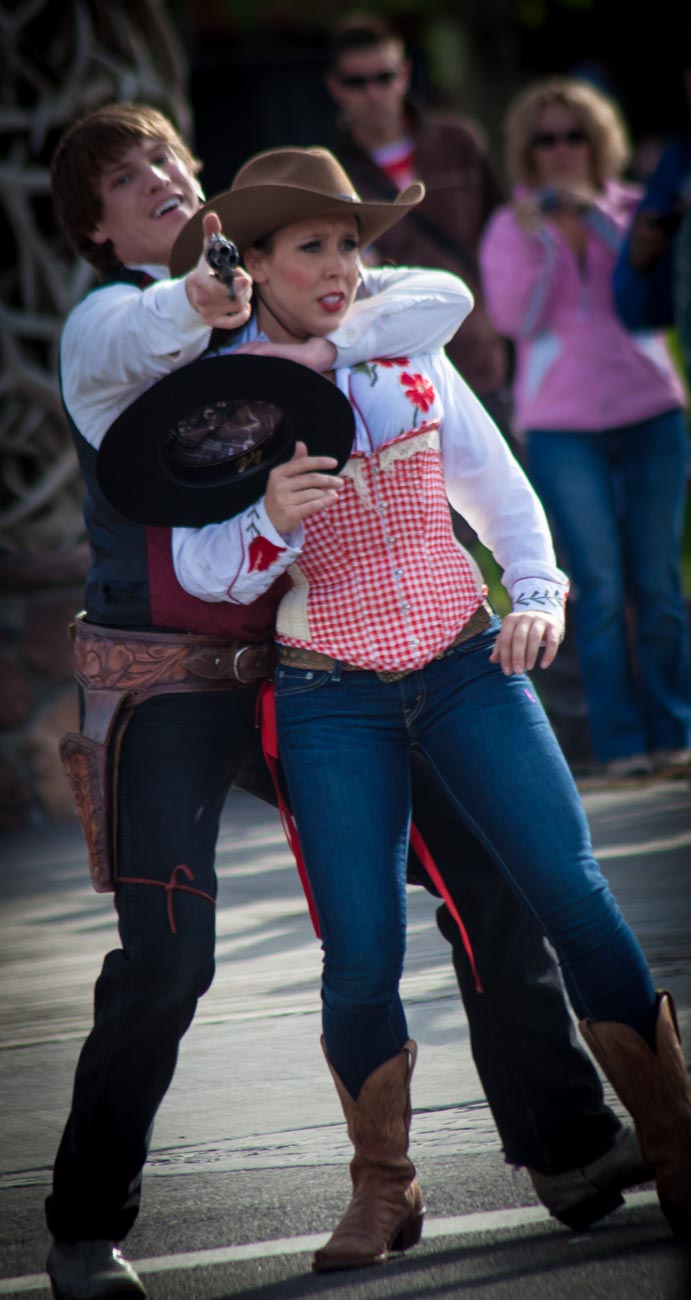
With a telephoto lens you have options with what you want to carry. And there are some genre’s that need telephoto lens. Wildlife and entertainment are hard to do without having a Zoom. Street, Architectural and even Landscapes can give you different viewpoints that you wouldn’t get if you have a fixed focal or prime lens.
As I mentioned in the Built in Lenses section above, the usual sweet spot for a generalist is 28-150mm.
So, you’ve decided on the length of zoom you have. Now you need to decide on how ‘fast’ you want it to be. What’s Fast? Well that relates to the maximum aperture size.
Most consumer lenses are around F4.5 and as you zoom out, so the maximum will be higher. A range of 4.5- 6.5 is common. They are fine for the majority of Travel Photography subjects.
However, if you want to get serious, then the next level up are pro lenses. They tend to have a fixed aperture i.e. don’t change as you zoom. But not only are they a lot more expensive they are also heavier and bigger. So you have not only have to consider your budget you have to consider your back as well!
Prime or Fixed Focal lenses
What’s a prime lens? Well basically it’s a fixed length. The most popular Prime Lens length is 80mm, as it’s a bit of an all-rounder and matches what you see with your eyes.
A prime lens is more restrictive but usually offer you better quality. Unlike the Telephoto lens, they have fixed apertures like a pro telephoto.
If you buy one with a large aperture of f1.2 or 2.4 you have a lot more flexibility when it comes to getting different areas of your photo in focus.
But they are probably not so good for Wildlife but depending on the size you can use it for pretty much anything. As I said before you can still zoom with your feet.
Wide-Angle Lenses
They are normally around 20-24mm and offer you, as the name suggests, a wide-angle view which can be also used for an artistic interpretation of a subject.
Some street photographers and Photo-Journalists use them a fair bit. However it’s landscape photographers that use them the most. Getting a full wide landscape can be very satisfying.
Speciality Lenses
There are many types of speciality lenses.
Tilt and shift lenses are mainly used to correct that narrowing of a building that you get when taking some architectural shots.
Macro lenses are great for small objects such as insects and flowers. A macro setting is often built into some camera bodies. But more often or not you usually need to have a prime lens that has that facility as well.
Then there are super telephotos for wildlife and sports. You see them around the boundary in sports stadium. As there are not many, if any, consumer level super telephoto lens, they are big and expensive.
Then there are the distortion type lenses, such as those that manufacturers like Lens Baby makes. Most popular of these are the Fish Eye lenses, a wide angle that makes everything look like it was in a fishbowl.
Again, whether you have these or not depends on what type of Travel photography you are going to specialise in
Let’s map those genres to a specific lens and wrap up this article on the best camera lens for travel photography.
General – Telephoto Lens plus a 80mm Prime Lens
People and Street – 50 or 80MM Prime Lens plus a 28-150mm Telephoto
Journalistic or lifestyle – 80 or 100mm Prime Lens plus a Telephoto Lens of 28-150mm
Landscape – 24mm Wide-Angle plus a Telephoto with a minimum focal length of 100mm
Architectural – 24-100mm Telephoto and a 35 or 50mm ‘Fast’ Lens i.e. F1.2 or 2.4.
Wildlife and Nature – Big Telephoto as long as you can afford (*See below) plus a Macro if you are intending to shoot flowers or insects or the smaller world.
*There is always the option to hire a lens, depending on your location. A couple of years ago, I hired a 100-400mm Canon Lens for a trip I did to Northern Canada to see the Polar Bears. Often you may not use some of the more specialist lenses all the time, so It’s a good idea to hire them. More on this in another post.
Food and Drink – Food and Drink is a tricky genre to suggest the best lens for.
If you are looking to take low light plated food, e.g. in a restaurant, then you would need a wide angle or 50mm lens with a large maximum aperture of F1.2 or 2.4.
However, if you are taking images of food in its raw state e.g. farming or even a farmers’ market, then a telephoto may be the best way to go. Same applies to drink. Vineyards, Wineries and breweries are semi landscape. And you can be really creative using a macro lens to shoot bottles of Wine or Spirits or even fluid in a glass.
Entertainment – Like Street Photography with the exception that you many need a fast lens if you are inside a concert hall and flash is not allowed
As you can see there are lots of different ways of looking at the lens you may require. If you are not sure then the best way to start is, as I’ve indicated in the general genre, to purchase a telephoto and if possible a 80mm lens.
Summary
Finding the best camera lens for travel photography can be a challenge.
Two things to remember:
1. The quality and build of a lens is more important to the quality of your images than the camera body.
2. You are likely to keep your lens for a lot longer than the camera body.
So, ensure you spend as much as you can afford on your lens.
There are many types of lenses but the most useful tend to be telephotos of around 28-150mm and 50 or 80mm prime lens.
Unless you are specialising in some tight niche, then purchasing a speciality lens like a fish eye or tilt and shift lens is not advisable, as you won’t get the use out of it.
Remember you have the option, most of the time to hire some speciality lenses.
Need some help with your travel photos? Get a free guide by filling in the form below plus you will also get content that’s only available to subscribers
Any questions then please contact me here and/or please say hello at these places:
In the historic copper mining town of Jerome, Arizona, USA
This is the second of a series of articles that uses travel photography to show how you can get a particular type of shot. Some of the examples won’t be stock, product or marketing photos, although any image can be used to market anything. Nearly all of them will be travel photography images
But this is a good starting point for taking similar photos for any reason whether it’s travel photography or for your business.
And I hope that this inspires you to go and emulate and even improve on the method I give you here.
So, let me clarify that this article is not some much about technique but opportunism.
Let’s set the scene
I was travelling through the South West of the USA and stopped off at a little town of Jerome. Smack bang in the middle of Arizona and north of Phoenix, its claim to fame is that it was a copper mining town. Nowadays it’s a tourist hot-spot. Being at a higher altitude, Jerome is attractive to residents of Phoenix, the big smoke, during their ugly summer months of high temperatures. And so, I discovered how attractive it was as I roamed the streets of Jerome taking shots of the interesting sights as well as the landscape beyond.
Human Interest
However, what I really became interested in was the locals. There’s only around 450 of them and they all seemed to be happy, friendly and smiling. Whilst I have done some portrait photography, I’m not a big lover of it. I find that taking impromptu spontaneous images tend to bring out much more of the subject’s character.
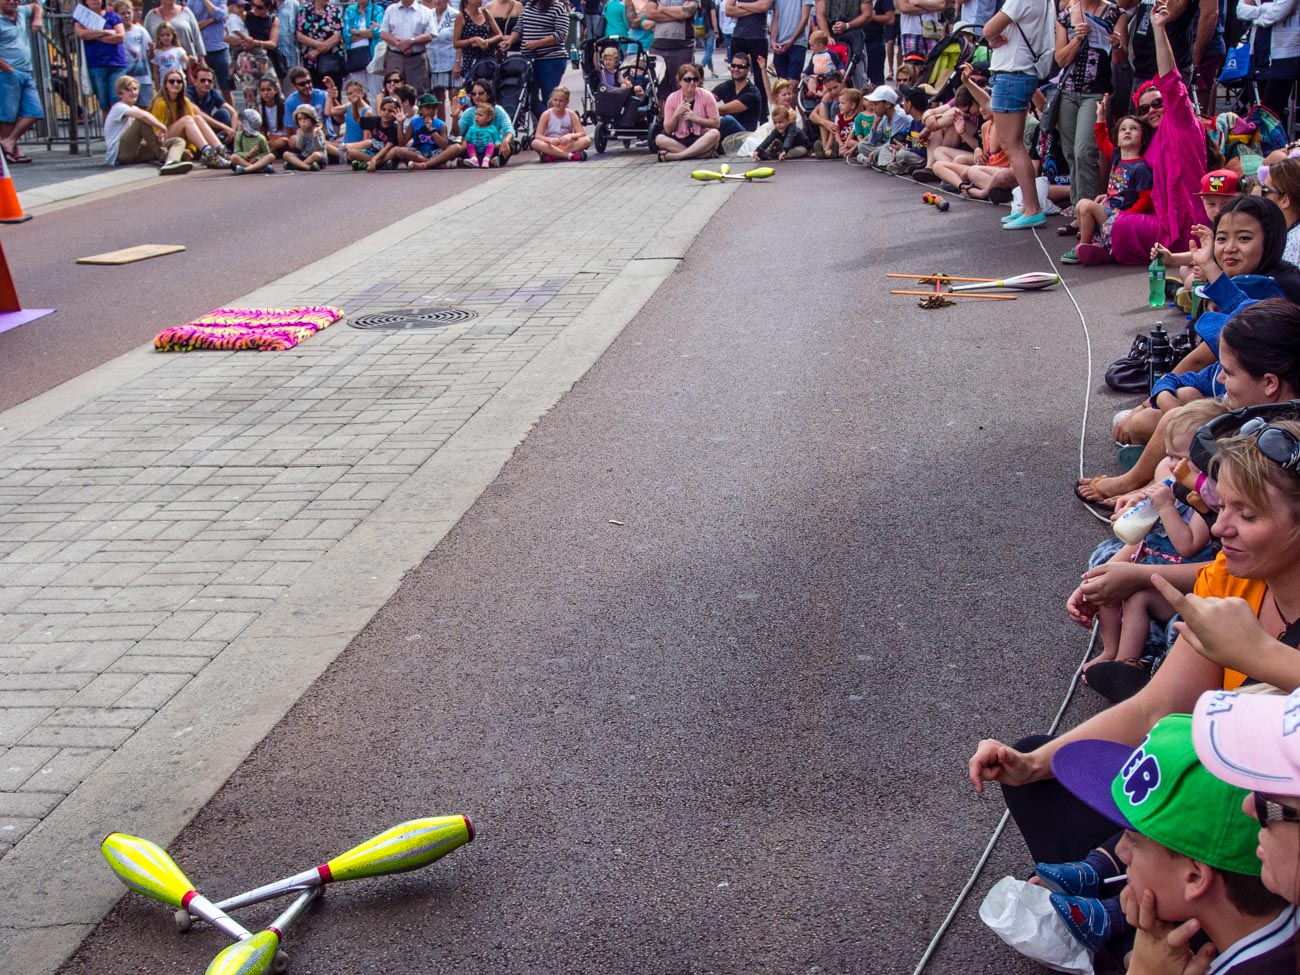
Positioning for Street Photography
When you take any street scene sometimes you get lucky and fire off a few shots straight away. Other times you have to kind of go with the flow and watch and see how the street life unfolds. That day was one of the latter. I wondered around until I found a spot diagonally opposite a bar, a hotel and a winery cellar door, yes, they do have wine in Arizona and good wine it is too. The spot I found was a corner or rather a T-junction. Normally I would find a café to sit and watch but there wasn’t one where I wanted to be. But there was, at that time, enough people around to make me feel inconspicuous.
The Wait
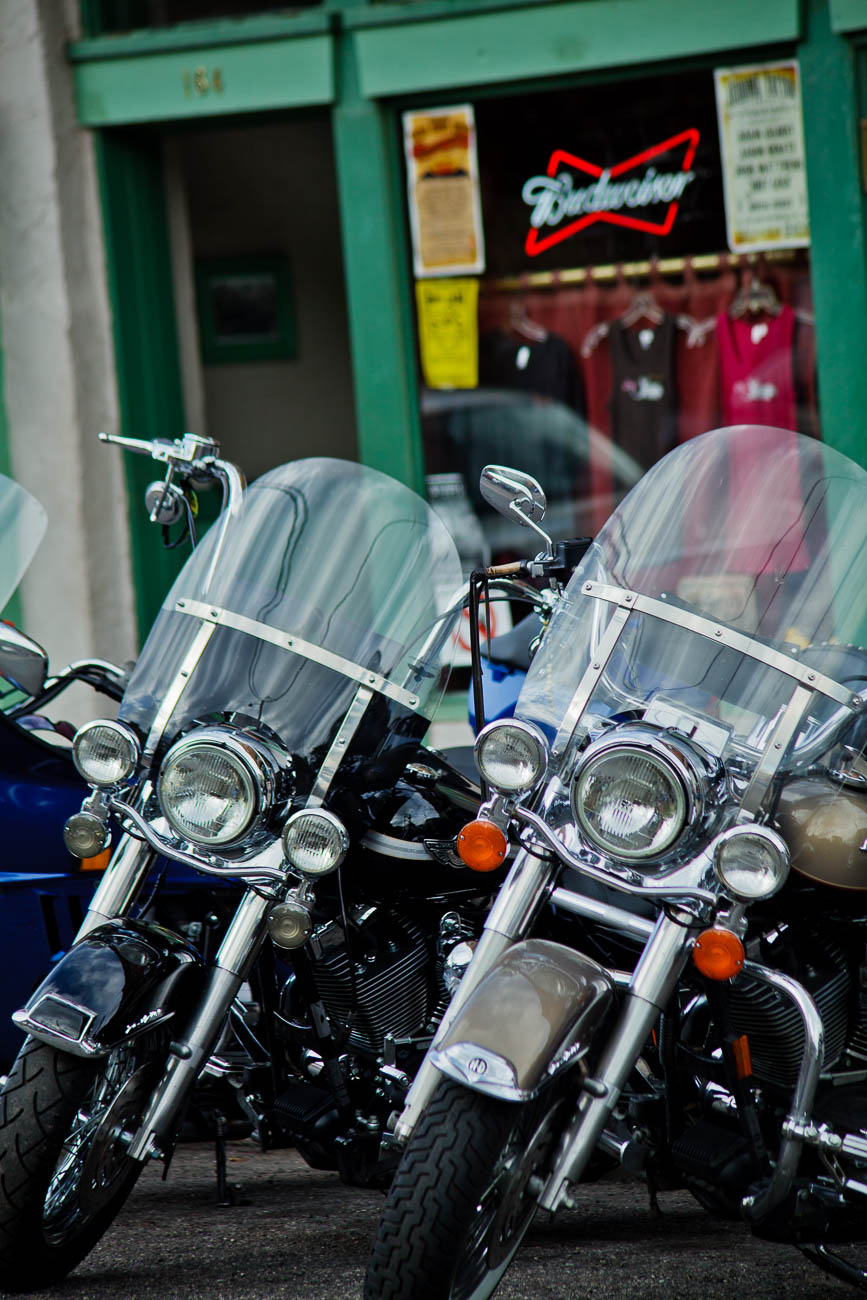
So, I waited. As it was mid-afternoon and wasn’t a Sunday I figured that there would be a bit of coming and going from the bar. There was but not as much as I wanted. But I did shoot a few images as I hung around. After about 10 minutes some motorbike riders turned up and went into the bar. I shot off a few shots of them. But being mindful that I didn’t know these guys I was fairly conservative and kept a low profile.
Harleys in the street in Jerome, Arizona, USA
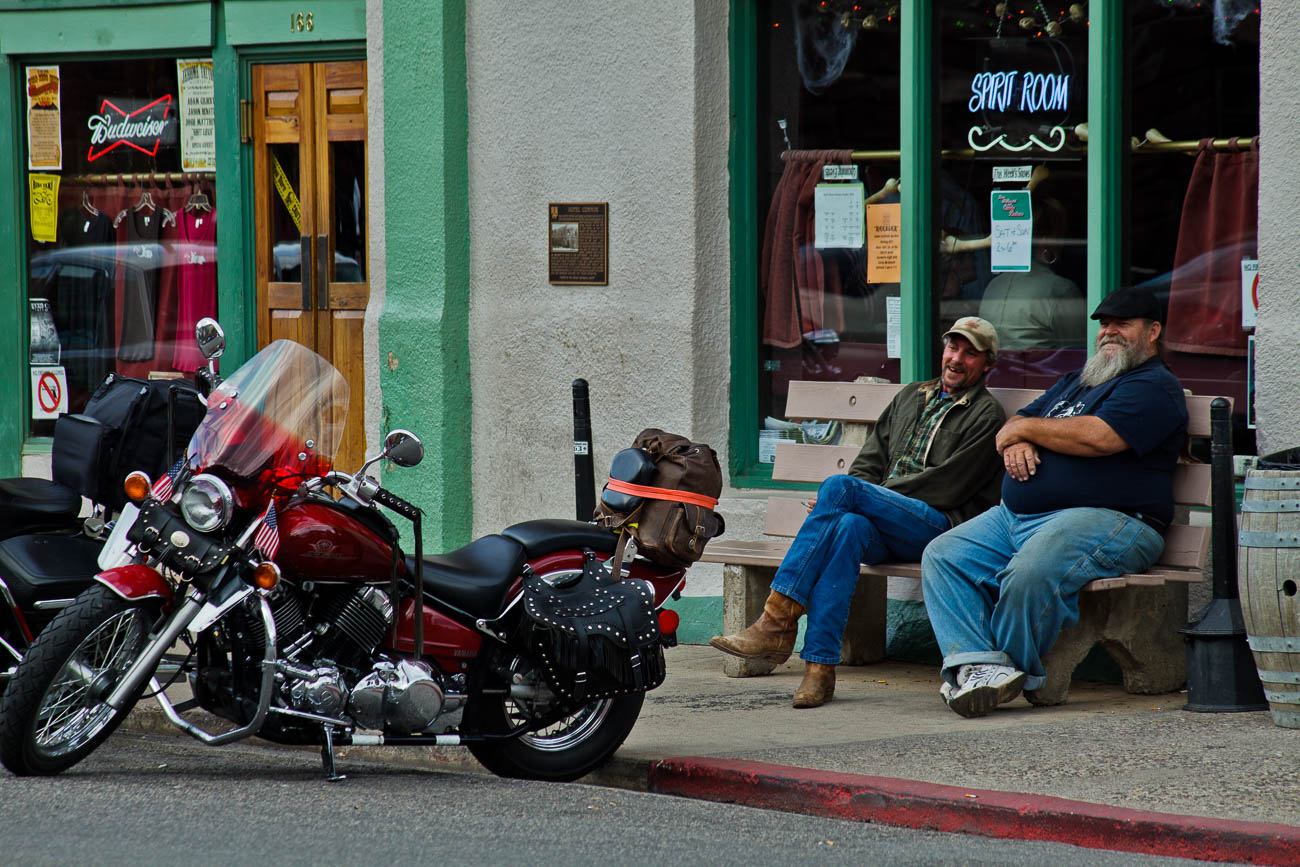
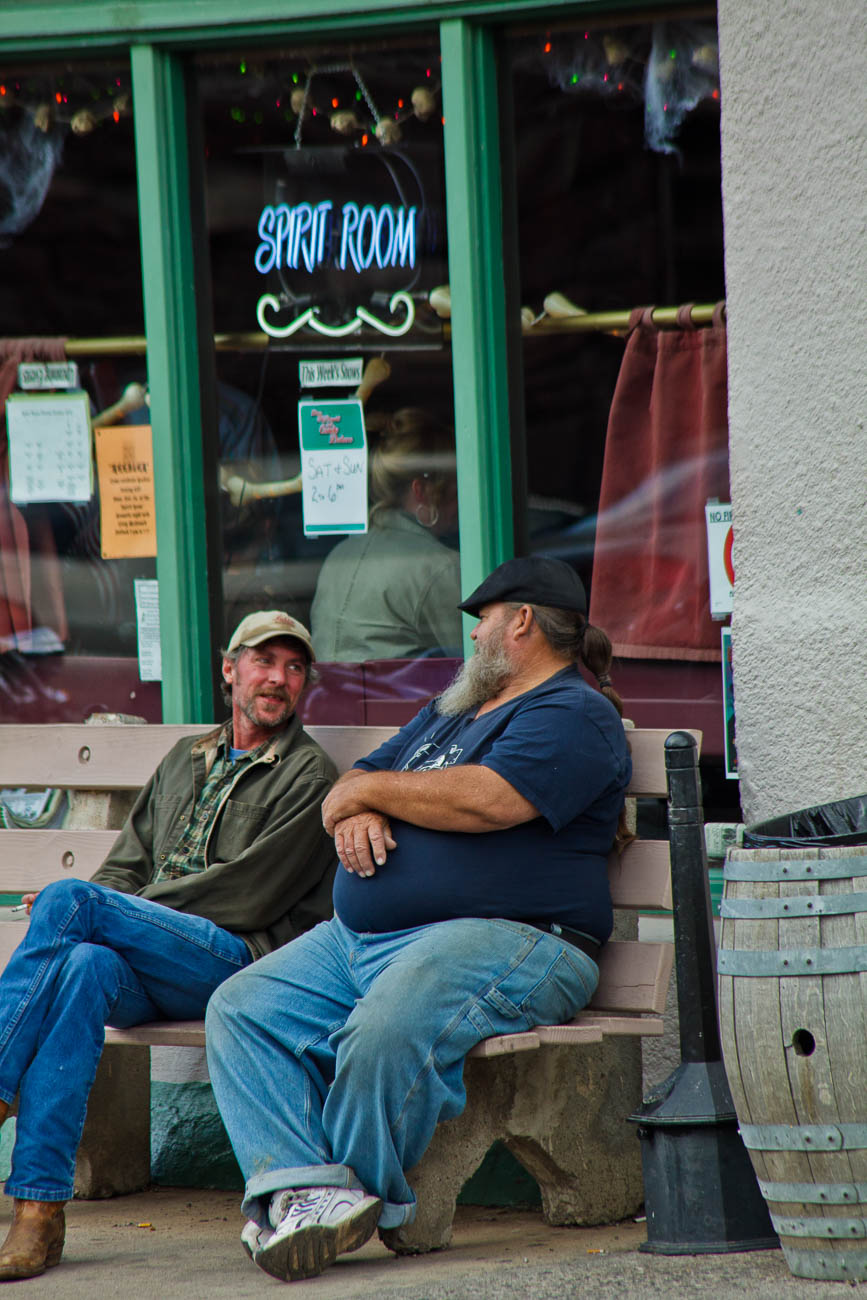
The Subject
After about 5 minutes these couple of guys came out and sat outside chatting and looking at the bikes.
Two men talking in the historic copper mining town of Jerome, Arizona, USA
Now neither of these guys are oil paintings but they were perfect for me. So, I was off a running – not literally, of course. This one is the best of the shots I took.
Two men and motorbikes
One is smiling and the other is laughing and both are looking at the bikes. I have no idea whether they were laughing at the bikes or something completely different.
Technical
So, let’s get technical. My gear was a Canon 5D MKII with a 75-300mm telescopic lens, which is a full frame DSLR I usually use aperture priority and had that set at F/8. F/8 is the sweet spot for this and most other cameras for subjects that are a short to medium distance away. Ideal if shooting travel photography. You should get everything in focus regardless of the focal length you use, which in this case was 180mm. It also means that unless the light is low, you should get a fast-enough shutter speed which at 1/200 sec, I did.
Even though the light was quite good, it was overcast. Having said that, I had the ISO set to auto and it selected 320 ISO, so the light was not as bright as you may think for somewhere like Arizona. In this camera you have to get up to about 1000 ISO before there is any noticeable difference to the picture quality i.e. noise or grain. I could have set the ISO even lower as I had a lens that had IS, Image Stabilisation but I didn’t feel that I needed to use it.
Conclusion
To get a good photo of anything, you need a bit of luck but at the same time you can make your own luck. If you used this example for instance, you would do that by:
1 Scouting the location 2 Working out the best position 3 Being patient 4 Ensuring you have the correct equipment, which can be the best you have with you. But be realistic. For example, using a smartphone is not the best camera to use for all situations. 5 Setting your camera correctly.
6 Make sure if you are taking street photos, you are in a location that will allow you to quickly move into a better position.
One last tip: If you are holidaying make sure you actually make time to enjoy the location. Forget Travel Photography occasionally and move in front of the camera and have a good time!
Need some help with your photos? Why don’t you pop your email in the box below and not only will get content that not always posted on this site but you will get a free guide to get you started
Any questions then please contact me here and please say hello at these places:
“If I could tell a story in words, I wouldn’t need to lug a camera” Lewis Hines
Lewis’s quote is relevant to most of us these days. It’s far easier to document something visually than to describe it in words. But to do it well and consistently you do need a ‘decent’ camera.
Despite those who say its’s not about the gear, you need a camera that will suit your style and objectives.
So, if you’ve read my last 2 posts: An Introduction to Travel Photography and Different types of Travel Photography, you are probably wondering what is best camera equipment for travel photography. Or maybe you are not. Either way, when you are travelling or going on holiday, you want to come back with photos that you are proud of. So it’s worth the 5 minutes of your time to read this.
Smartphone Cameras
These days everyone gravitates to their smartphone for most pictures.
Originally, they were mostly used to document items, like a sign or an extract from a newspaper or even a product you were looking to buy.
Only occasionally were they used for happy snappies or selfies.
Fast forward to today and most smartphones are used for selfies first and then general photos of all types second. On my travels, I see lots of people using their smartphones to take travel photos. But are they the best camera equipment for travel photography?
Smartphone Capabilities
Today’s smartphone cameras are better than some of the compact cameras that have been or are available.
But, and you were waiting for the but, weren’t you? They are limited.
Think about it. Physics dictates that, whilst lots of things are becoming smaller and retaining quality, optics are still a way behind.
A smartphone camera has a small lens and that means you are restricted on what it will do well. Especially compared to mirrorless or a DSLR camera.
Even with the new software and multiple lens of the latest offerings you still have limitations.
If you are happy with that, then that’s absolutely fine.
But if you want more flexibility, then consider either a mirrorless or a DSLR.
What a smartphone camera can’t do well.
Well the first thing is it doesn’t perform well in low light. Let’s say you are taking photos with a Smartphone Camera inside a Basilica somewhere in Europe. Unless you are using a tripod, which is often banned in some public places, you will find your images will appear blurred. That’s camera shake.
Even if you are using a tripod, Smartphone Cameras find it hard to replicate the details in low light.
Now I know that will improve and I understand that the Samsung S9 is a lot better in low light than previous models.
But unless you are on a plan that allows you to get the latest model, you will have to find at least $1000.00 to get that in your hot little hands.
Half of that will buy a camera that will perform much better.
Of course, it won’t have a phone or the rest of your life in apps like email, internet, health and fitness etc. etc.
But it will mean you have options.
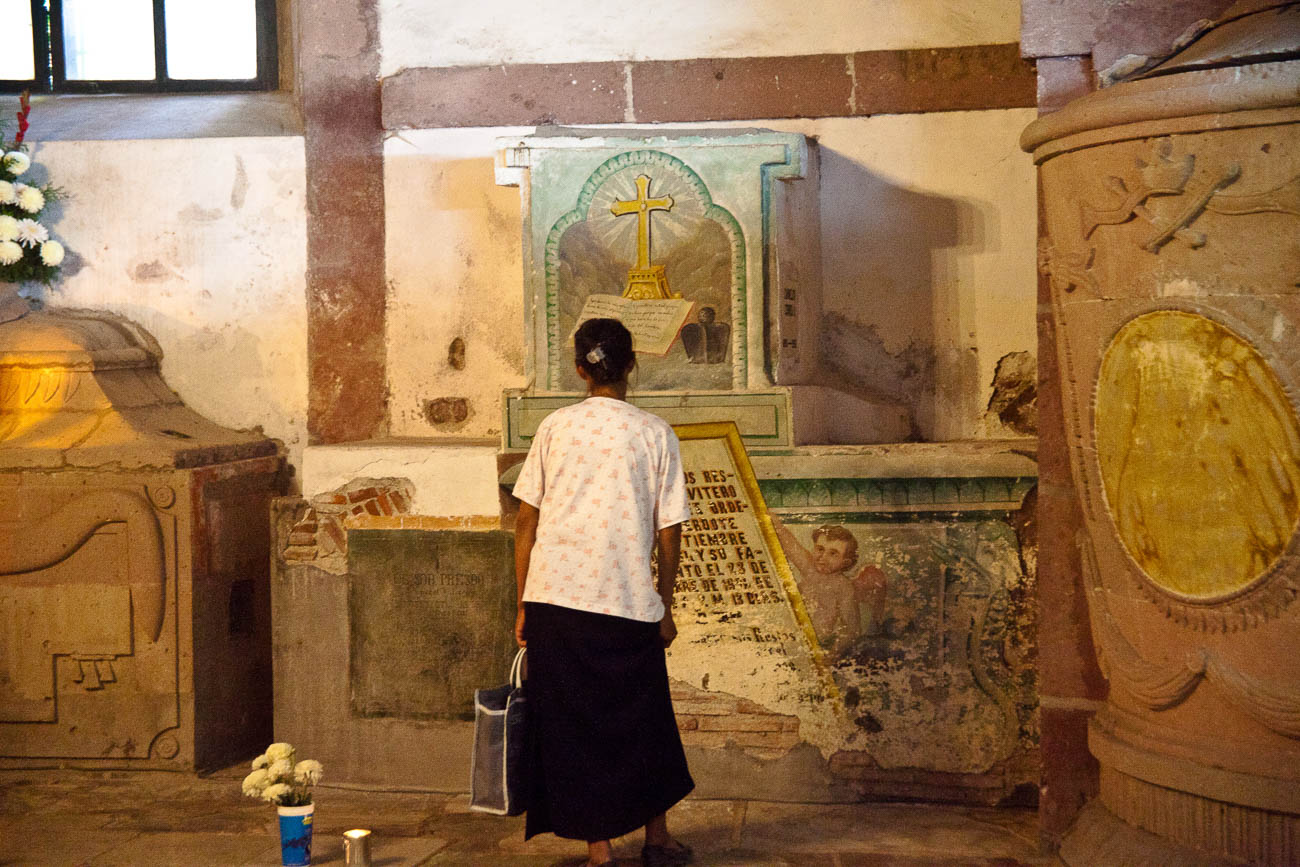
Women grieving in San Miguel de Allende’s parroquia crypt
Optical and Digital Zooms
A smartphone struggles when zooming in, losing not only quality but also resolution.
That’s because it is a digital zoom not an optical one.
The difference?
Well, a technical explanation is not what I want to give you. But I will give you an analogy.
It’s the difference between cropping an image on your computer screen to a smaller picture size. For example, a photo that measures 1000 x 1000 becomes 500 x 500 Pixels. Zooming in optically retains the size and therefore the resolution. Why should you care? Well cropping digital images means to see it at a good size or to print it you must blow it up and that’s when you see the faults.
As the technology of these cameras improves there won’t be such a differential between larger cameras and smartphone cameras.
Having said all that if you want to just take a smartphone camera with your and nothing else then knock yourself out.
Just be aware that you are restricting yourself. So my advice would be to concentrate on taking photos of subjects that a smartphone cameras do best.
Compact Cameras
Ok so now I’ve dismissed your idea of only having a smartphone, what is the best camera equipment for travel photography?
Well if we start at the bottom. Compact cameras are generally the same these days as smartphone cameras. So there’s no point in you taking one of those. Unless of course you don’t have a smartphone.
However, having said that, there are a few high end compact cameras that have great optics and sensors. Ones like the Sony Cyber-shot DSC-RX10 III and Fujifilm X100F come highly recommended but will set you back $1100.00 plus. See DP Review’s take on it.
Mirrorless Cameras
After those we are looking at Mirrorless or Micro Four Thirds cameras.
What is a mirrorless camera?
Well DSLR’s have a mirror protecting the sensor.
When you are looking through the viewfinder you are actually seeing the mirror which is reflecting your subject to your eye. When the shutter button is pushed the mirror lifts up and exposes the sensor to light and the subject.
Having a mirror takes up space and so nearly all DSLR’s are quite big, chunky and relatively heavy.
The mirrorless cameras don’t have a mirror – hence the name “mirrorless”.
Not having a mirror reduces the size and weight of the camera body.
Now I could go into lenses etc now, but I’ll cover that in another post.
Different types of Mirrorless Cameras
Not all mirrorless cameras are equal though.
Some have larger sensors than others.
That doesn’t mean that the larger the sensor the better the quality. But it does mean that it correlates to the size of the lens.
So, the larger the sensor the more likely the lens will be larger and heavy.
Mirrorless cameras do give you a lot more flexibility than compact or smartphones. Because they all have removable lens you can vary your lens according to the subjects you want to photo.
And as I’ve mentioned they are much smaller and lighter than most DSLR’s, which makes them more ideal for Travel.
DSLR Cameras
So, what about DSLR’s? Well in most people’s eyes DSLRs are synonymous with quality. When I take out my DSLR, I get lots of people comment on how I have such a good camera, so “I must take good photos”. The only comments I get on my mirrorless is that they look “cool” as they have a sort of ‘retro’ look.
These days with, the exception of the very high-end models, differences in quality between both types are negligible.
Personal choice.
I do like the feel of my Canon 5D MKII and I often use it for local shoots.
But when it comes to travel that’s when I reach out for my Olympus OMD1 MKII.
It’s so much lighter and even with the pro lens I have, it takes up so little space in comparison.
Of course, if money is no object then the Leica models are lightweight and small and come with fantastic quality. Or if you don’t mind lugging around a big DSLR then the high-end Canon or Nikon cameras will also give you great quality.
But with both you will need to use the same wheelbarrow that you carried the money to pay for them, to carry them around.
Tour de Mont Blanc Path near Les Contamines, France
Conclusion
It’s often quoted that the best camera equipment for travel photography is “the one you have with you”.
But I would challenge that. Unless you are travelling to the same destination over and over again, it’s quite likely that where you travel to next will be a once in a lifetime trip.
Do you want to trust your photo creation equipment to a restricted device when there are so many better options on the market today?
For more about buying a new camera check out these posts:
You’ve got the new beaut camera or maybe you dusted off an old one that you’ve had for a couple of years and instead of using your smartphone, you thought you would use this for your marketing images. After all you have had enough of searching for stock photos that just aren’t what you need.
After looking at this camera you realise there’s a dial on it that says A, P, S and M and maybe a couple of other items like the picture of a video camera, auto or some other sign that gives you choices to select a genre. But you’ve heard that one of the best ways to shoot is to use “S’. But what is S?
Well it’s Shutter priority. Now to refresh your memory on what the shutter is I’ll send you off to have a quick read of these 2 articles.
So now you’ve done that or at least scanned it. Lets’ go forward
S stands for Shutter – yes, you’ve worked that out. Great!
But unlike Aperture which is a dimension of the hole that allows light in and is measured in f-numbers, it’s actually a speed. So, you are effectively measuring the time it takes to open and close the shutter in front of the sensor.
As with Aperture usually the numbers relate to a stop. However unlike Aperture the range of Shutter speeds is usually much greater so it doesn’t follow that each stop represents twice the preceding value and half the next higher value.
In shutter speeds the measurements look like this:
60”, 30”, 2”, 1”, 1/2.5, 1/5, 1/10, up to 1/4000. Each of these values relate to seconds or fractions of a second. 60” is actually 60 seconds whilst 1/4000 is actually 0.00025 of a second. That is the time that that the shutter is open and allowing light to reach the sensor. In film days it used to be the film strip that the shutter was exposing to light.
It is arguable that changing the Shutter Speed setting is the best or at least one of the best ways to be creatively in control with the final image that you want.
So why would you want that? Well from a creative control point of view it gives you options.
But the most important effect of shutter speed is its effect on camera shake. Camera Shake is probably the single most noticeable effect on an image. Having the correct minimum shutter speed is vital to prevent Camera Shake. Notice I said “minimum”. That’s because it’s better to have a faster shutter speed than a slow one.
Have you looked at a what you thought was a good photo close up only to realise that it’s slightly blurred? Well that’s camera shake and in the industry it’s called “soft”.
Here’s an extreme example:
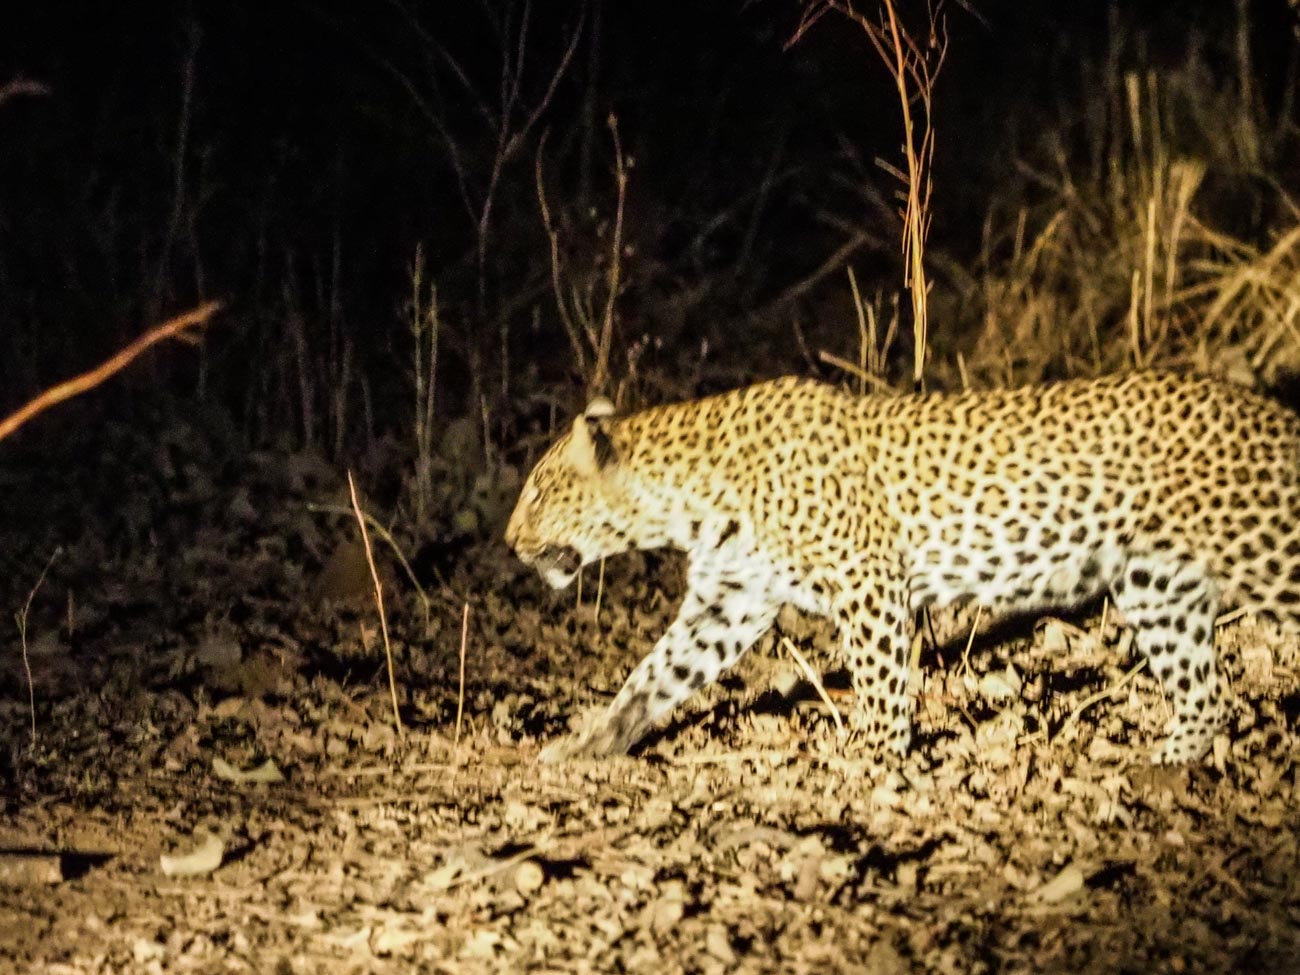
Fuzzy Leopard
The first one is noticeably soft. The photographer (that’s me) didn’t have a lot going for him. Not much light, using s telephoto lens and as the subject (the leopard) was moving had no time to compose or even think about the shot.
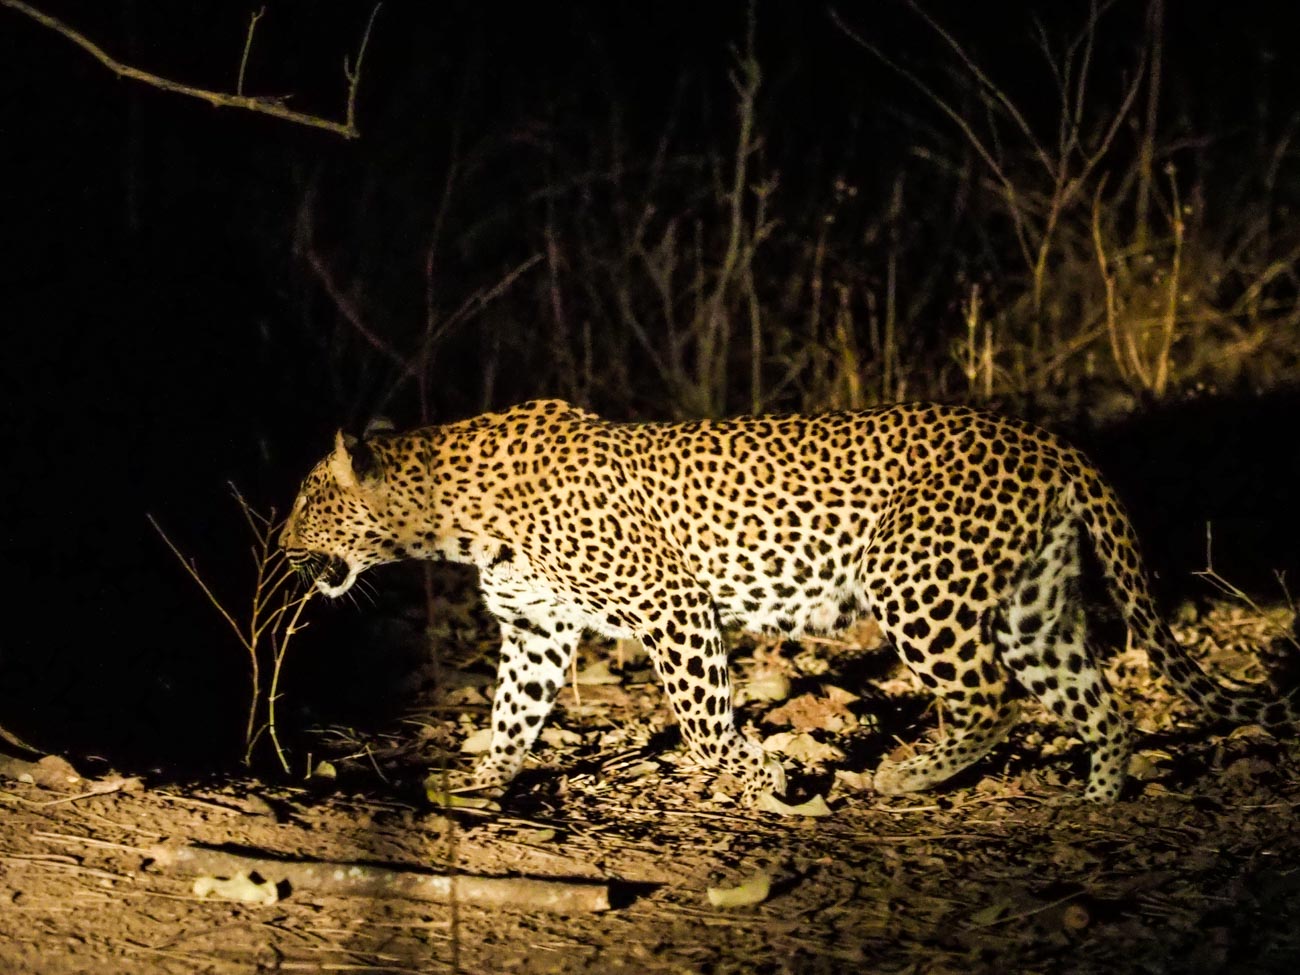
Sharp Leopard
However, in the above shot I had just enough time to jack up the ISO so that I could get a shutter speed that would freeze the action. Probably still not the best photo of a Leopard but not bad.
So apart from reducing or eliminating Camera Shake what else do we use the shutter speed for?
Well there are 3 main ways to use it:
1 Freezing That is you freeze action with a fast shutter speed. That could be anything from sports action to facial expressions to droplets of water
2 Blurring Blurring on the other hand is using a slow shutter speed to blur movement. The most well know “blur” is the cascading of water through rocks or a waterfall. But there are lots of other uses as well such as rain or snowfall, slowing down action found in cycling or surfing. Another example would be transport like trains or cars
3 Panning To pan or track means you are moving the camera to follow someone or something as they move leaving the background blurred and the subject relatively sharp. This gives the impression that the subject is speeding past the viewer (photographer)
Here’s some exercises to experiment with based on the three main ways mentioned above. I’ve made the basic assumption that you have access to an outside tap with a hose. If not then use an indoor tap but make sure the area is well lit preferably with natural light.
1 Grab that camera, turn it on and take off the lens cap!
2 Now go outside
3 Use an outside tap that’s easy to access. If you don’t have one (that’s easy to access) then mount the end of a garden hose (with or without a nozzle) on something like a washing line that’s no higher than head height.
4 Before turning on the tap set your shutter speed to around 1/500 by finding that dial that has the “S” adjustment
5 If you have a zoom lens make sure it’s between 50mm and 100mm (35mm equivalent) and have it ready to go (so you don’t waste too much water.
6 Turn on the tap
7 Now take at least one shot. This is your freezing exercise
8 Repeat steps 1-7 except you now adjust the shutter speed to 1/15 to blur the water as it comes out of the tap. At that speed it’s preferable to mount the camera on a tripod with a remote shutter release. If you don’t have a remote shutter release, then use your timer. And if you don’t have a tripod use a wall or chair – in other words use your imagination!
9 Finally to get a panning effect you need to:
1 Repeat steps 1 and 2
2 Go outside to the (or any) road. Stay on the footpath or verge.
3 Adjust the shutter speed to around 1/30.
4 If you have a zoom lens make sure it’s between 50mm and 100mm (35mm equivalent)
5 Pick a moving vehicle and press the shutter button as you track it
This last one is a bit tricky so you may need a few goes at it.
After your shoot, if possible, compare images on a monitor or at least a tablet.
Voila, you should now have an understanding of how to use the S or Shutter Speed setting.
All in all, that should have taken you around 15 minutes (not counting any travelling time).
As an aid to this I have a simple checklist for you to download.
Just pop your name and email in the box below and it will magically appear in your inbox.
Compare the shots to see the differences and then play around with different focal lengths and shutter speeds.
You’ve got the new beaut camera or maybe you dusted off an old one that you’ve had for a couple of years and instead of using your smartphone, you thought you would use this for your marketing images. After all you have enough of searching for stock photos that just aren’t what you need.
After looking at this camera you realise there’s a dial on it that says A, P, S and P and maybe a couple of other items like the picture of a video camera, auto or some other sign that gives you choices to select a genre. But you’ve heard that the best way to shoot is to use “A’. But what is A?
Well it’s Aperture priority. Now to refresh your memory on what aperture is I’ll send you off to have a quick read of these 2 articles.
So now you’ve done that or at least scanned it. Lets’ go forward
A stands for Aperture – yes, you’ve worked that out. Great!
Aperture is measured in f-numbers. An f-no. or f-stop is the size of the aperture and by moving that dial you control it.
Usually the numbers relate to a stop and each stop represents twice the preceding value and half the next higher value. So, if the number was 1 then the next number would be 2 and then the next number would be 4 and so on.
In f-nos they look like this:
f/2.8, f/4, f/5.6, f8, f11, f16, f/22 which is slightly different from what I just told you and that’s because it works in the amount of light it lets in. f/4 lets in half as much light as f/2.8, f/5.6 lets in half as much light as f4, f/8 lets in half as much light as f5.6 and so on.
It is arguable that changing the Aperture setting is the best or at least one of the best ways to be creatively in control with the final image that you want.
So why would you want that? Well from a creative control point of view it gives you options.
Options like how much you have in focus;
Basically, as you look at a subject or scene you can set the F-no. so that you can decide what you want in focus. That could be just the subject or everything you can see within the frame.
How does it do that? Well I won’t go into the physics too much as you’re here to learn quickly and I don’t want you to get bogged down in detail.
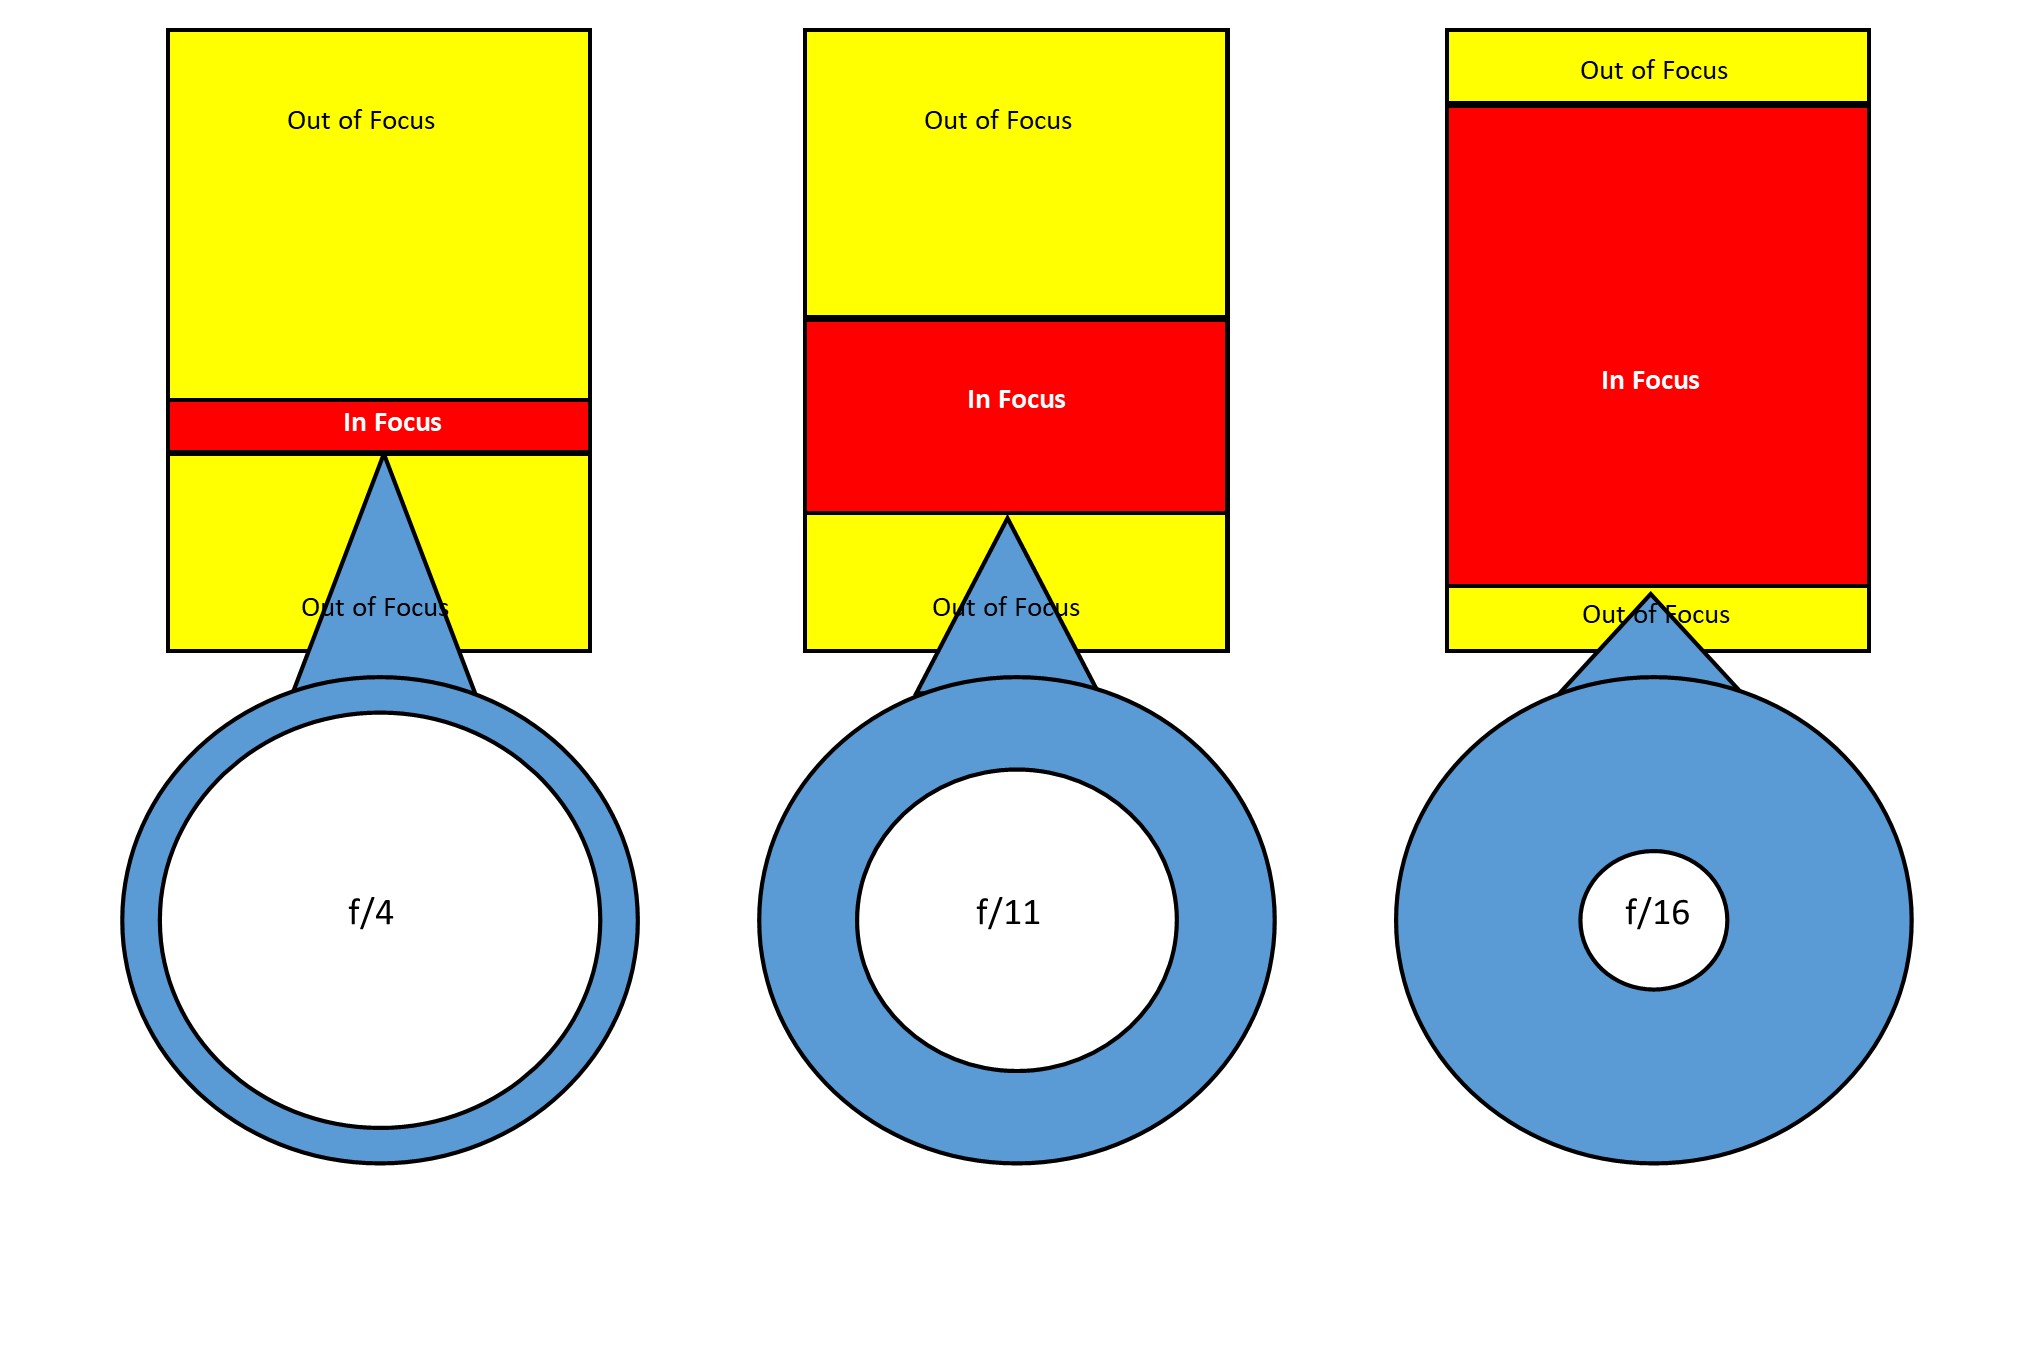
In simple terms, the bigger the hole or aperture the less of the scene in front of the camera from front to back is in focus.
And that is called the Depth of Field (DOF).
Let’s look at this infographic that shows the differences in f-no in a plan or overhead view:
The left-hand side shows a shallow DOF due to a small f-no or a large aperture. The amount in focus is quite narrow. Whilst if we go to the right-hand side the amount in focus is significantly greater. If I added another diagram to the far right showing an even smaller aperture then the amount in focus would extend out to infinity. I didn’t want to confuse you though.
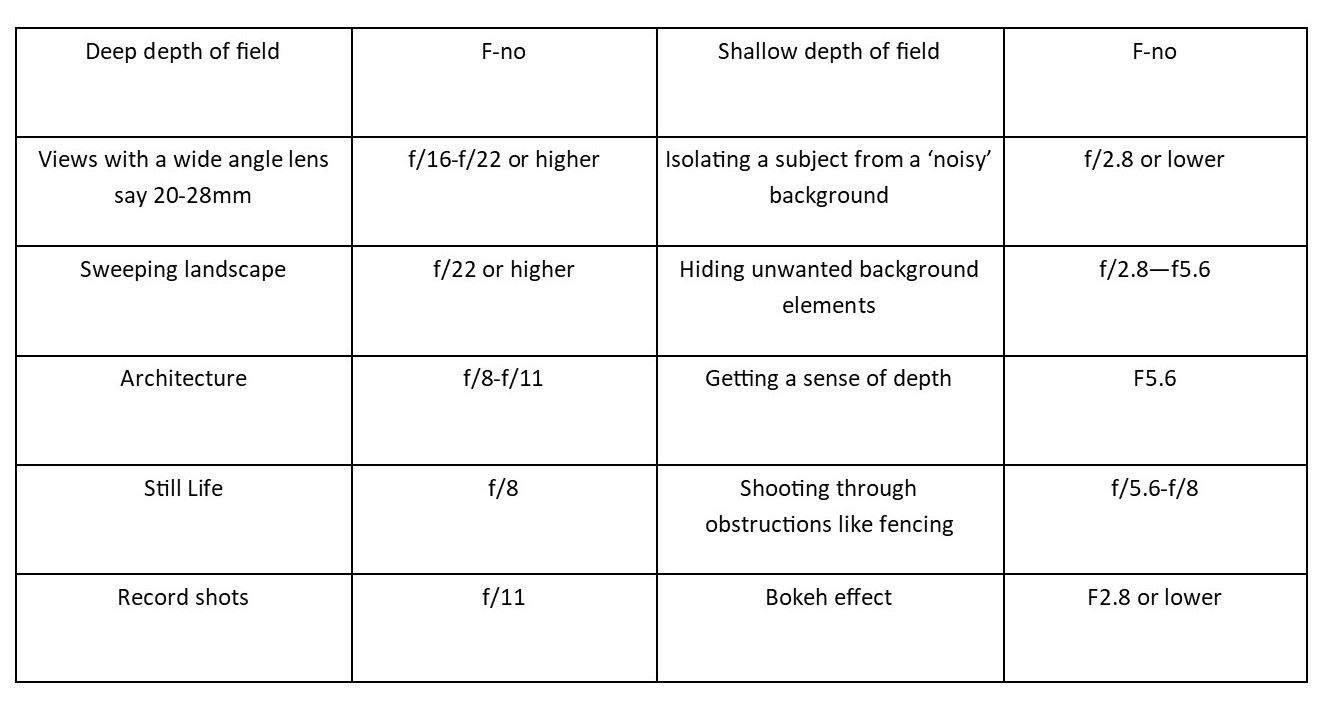
So, let’s look at when you would use this with this little chart:
OK enough from me, now it’s down to you.
1 Grab that camera, turn it on and take off the lens cap!
2 Get a bottle or a can or vase (the subject)
3 Now go outside
4 Mount ‘the subject’ on a table or some support
5 Find that dial that has “A” on it and find the dial that you use to adjust it.
6 If you have a zoom lens make sure it’s between 50mm and 100mm (35mm equivalent).
7 Now take three shots:
1 At Ff2.8 or lower if your camera goes that low. You may find that you can’t go as low as that due to the lens you have. So, in that case just go with the lowest setting.
2 At f/11
3 At f/22. If possible, this shot should have a long background.
Because ideally you want the same background, having a big garden or living in an apartment with a view are the ideal locations. But you could just go to the nearest park and take all three there.
Compare the shots to see the differences and then play around with different focal lengths as that can make also change the DOF.
See these examples:
f/5.6
f2.8
It’s best, if possible, to compare images on a monitor or at least a tablet.
Voila, you should now have an understanding of how to use the A or Aperture setting.
All in all, that should have taken you around 15 minutes (not counting any travelling time).
As an aid to this I have a simple checklist for you to download.
Just pop your name and email in the box below and it will magically appear in your inbox.
When taking any photo, it’s the done thing to have rules.
Now I don’t go along with rules all the time after all, aren’t they made to be broken?
But this one is an essential rule for anyone starting out or even still learning (not that you ever finish learning but you get my drift)
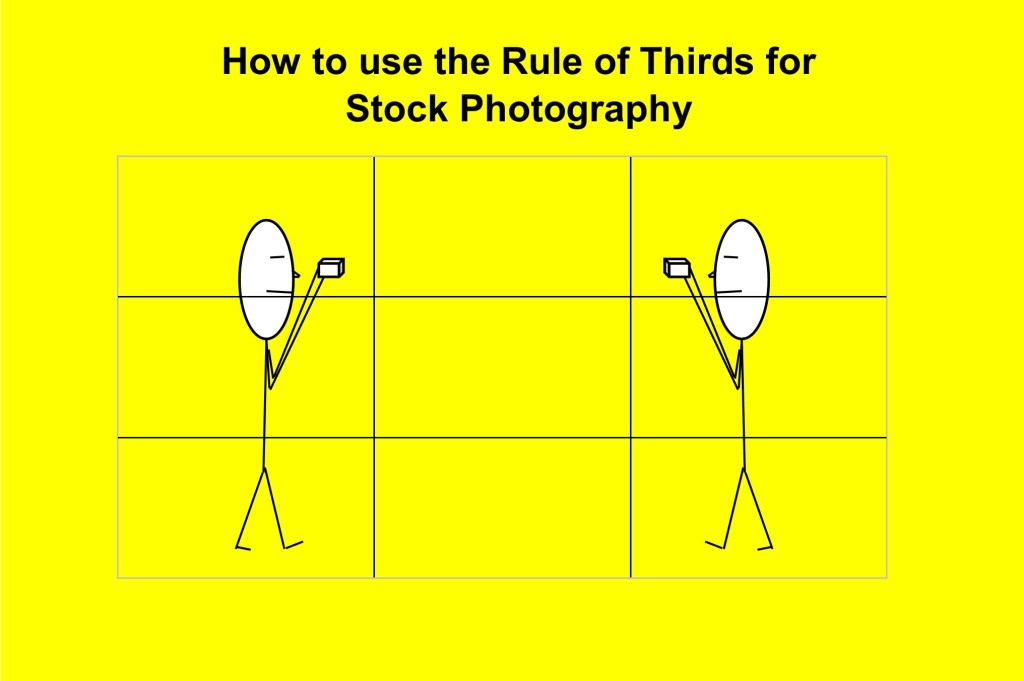
So, what is the rule of thirds?
It’s way of ensuring that the photo has some sort of balance.
Basically, you divide the photo frame into thirds.
You have a top third, middle third and a bottom third, plus you then have 2 vertical lines that divide the frame into 3 going from one side to the other.
It’s like an imaginary empty noughts and crosses box overlayed on your photo
The idea is that you position your subject along one of these lines.
For example, generally speaking, a horizon shouldn’t be right in the middle, it could be on the lower third or upper third line depending on what’s interesting in, usually, the sky or the foreground.
Basically, the rule of thirds promotes that the main elements of a composition in any photo should be placed one third away from the edges of the frame.
The idea behind it is that our eyes are naturally drawn to the intersecting points, how we are drawn to the balance of an image. This is all theory of course.
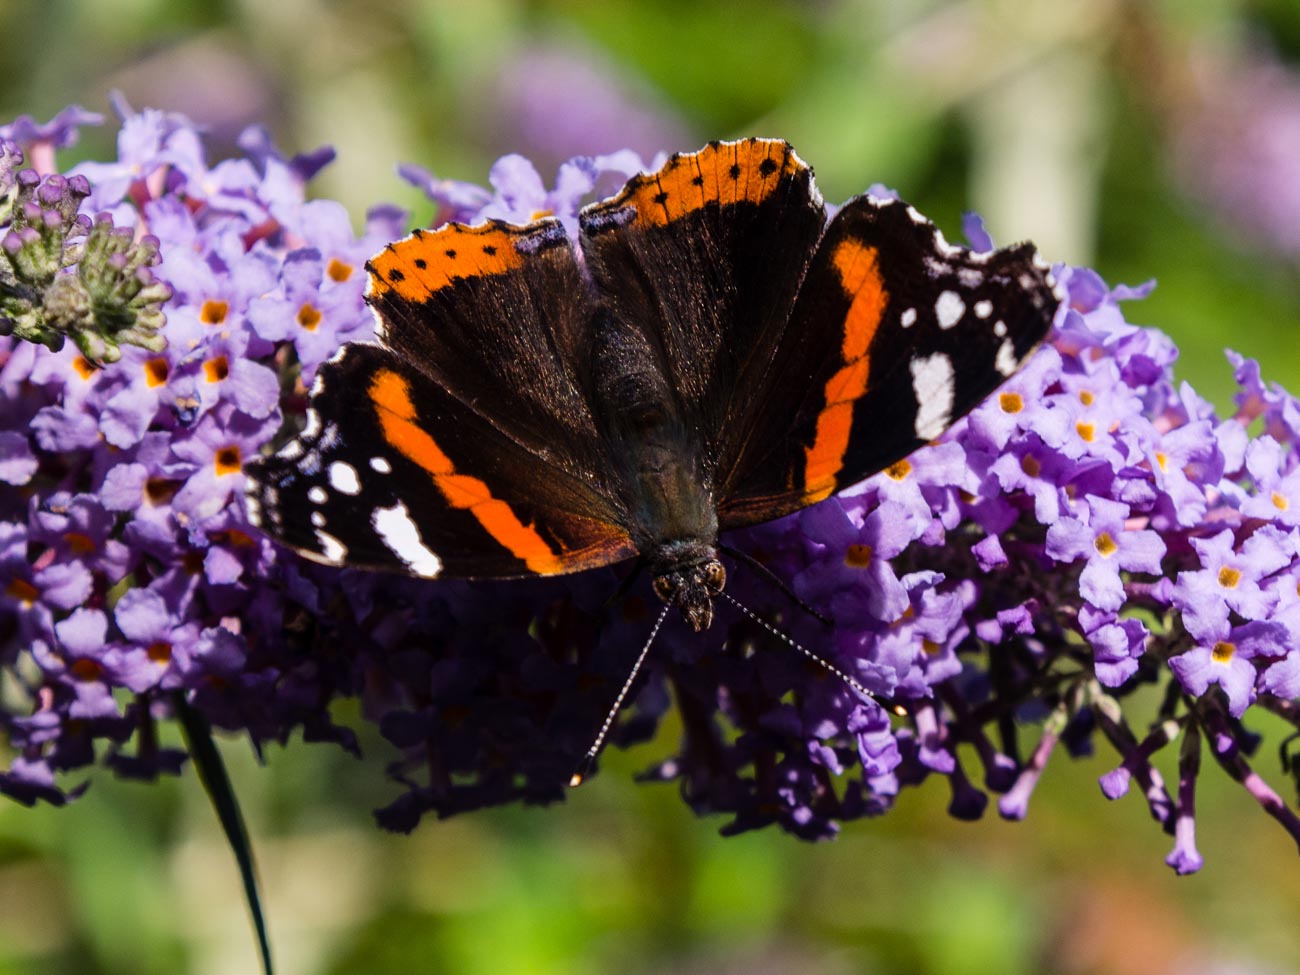
People relaxing enjoying the view after a swim at Perth’s Cottesloe’s beach
But it is a good start. The example of avoiding putting the horizon smack bang in the middle is probably the most obvious.
Other examples could be having a model over to one side along, let’s say, the right-hand line, the moon in the right-hand corner or a lone tree to one side.
Here’s three more examples:
Taxis outside Flinders st station Melbourne
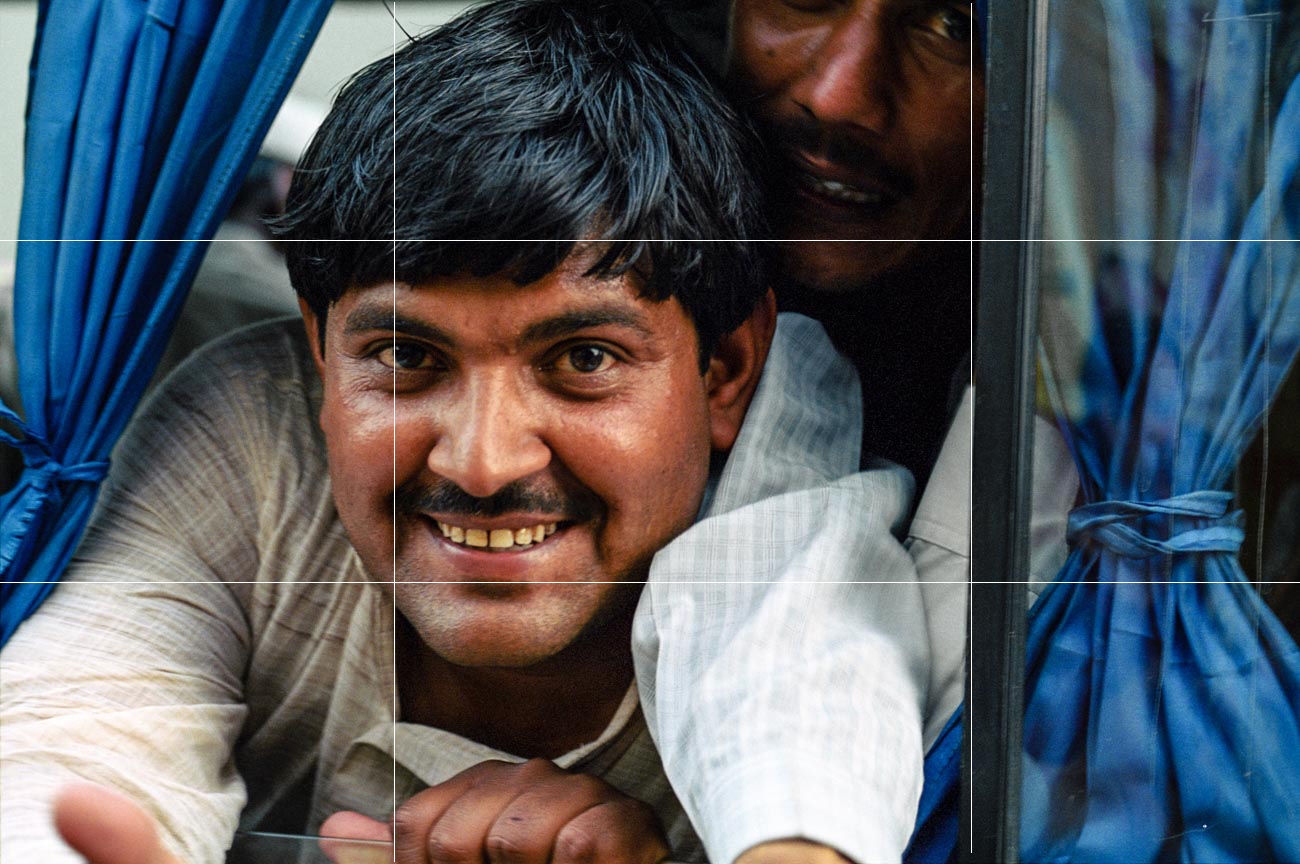
Young man in a crowded car in Bikaner, Rajastan, India
You can see by these examples it’s really all about keeping the main elements to one side and not smack bang in the middle.
So how to use it?
Well from a purely technical point of view the easiest way if you want to see when composing an image is to use the focus points.
On every camera and even some smartphones there is now the ability to display multiple focus points and/or a grid similar to the thirds grid which can see through the viewfinder or rear LCD screen.
And that’s fine when you are trying to get the hang of it but once you get into the habit of where to put the imaginary lines roughly I suggest you go back to using the points more naturally.
For stock or marketing photos your composition you may have to take into account any captions you want to overlay over the photo.
No point putting it across a vital part of the image as you will lose the impact of both the image and caption or message.
Of course, as I stated at the beginning it’s a rule that doesn’t have to rule every photo you take (excuse the pun).
It should really be called a guide to creating composition using thirds or something like that as not every situation lends itself to this rule.
Of course, you can go overboard as well.
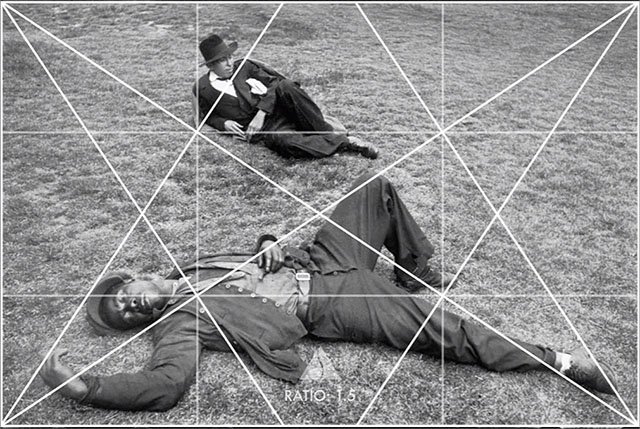
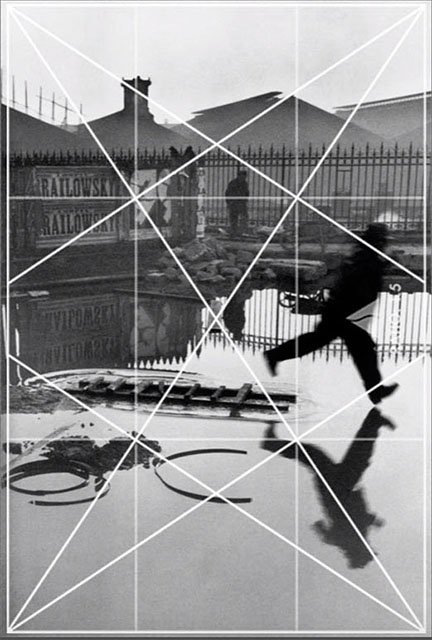
The image lines below, that have been drawn anonymously, are an analysis of the how supposedly of one of the greats, Henri Cartier-Bresson, framed his images.
That I’m not convinced about.
He was a natural talent and I’m sure in his mind’s eye he composed around the frame but I don’t think it was to as detailed.
So to summarise
The rule of thirds is a is a way of making sure the viewer focuses on what you want them to by dividing a photo frame width and height into thirds.
Thanks for reading
Post any comments below. I’d love to hear them.
And do us a favour! Please share any way which works for you.
If you want more like this then please subscribe below and you will get a
free guide on how to improve your stock photography.
In 10 Vital Facts about Camera Aperture I wrote that “The aperture of a camera is the centre of the photographic universe – well maybe – the other centre, as some would argue, is the shutter.”
Let’s go to the other centre of the photographic universe, the Shutter and specifically Shutter Speed.
In all honesty, I must admit that shutter speed is just as important as your aperture setting. In another post Understanding the 3 points of the exposure triangle I make it clear (I hope) that ISO, Aperture and shutter speed all influence each other. Adjust one and the other changes.
So, you can see how important it is to get the right setting.
BTW make sure you scroll to the bottom of the page for an Infographic summary
Moving on let’s get straight to the 10 Vital Facts about Camera Shutter Speed.
1 The Shutter Speed is the speed that it takes to open and close the flap that sits in front of the aperture.
2 It’s measured in seconds and fractions of seconds e.g. 1/500 of a Second
3 To freeze action you need a fast (or quick) Shutter Speed
4 To show movement you need a slow Shutter Speed
5 It’s a big contributor to Camera shake or lack of
6 To calculate the minimum speed you need to prevent camera shake, use this rule of thumb. At 100 ISO- the Shutter Speed = the focal lens setting of a lens. More on this below
7 Shutter Speed becomes less important, in most situations, the better or brighter the light you have
8 When taking hand held photos in poor light i.e. indoors without a flash you need to use the fastest speed you can get.
9 The faster the shutter speed the lower the F Stop number which can in turn, can influence how much you can get in focus.
10 Taking photos with a lower F stop gives you much more freedom with your shutter speed in good light but reduces as stated in 9, how much you can get in focus.
11 The slower the shutter speed the higher the f stop number
12 Only use Shutter speed priority when you are trying to achieve something specific.
I’ve just realised I’ve given you 12 vital facts about camera shutter speed! Oh well you’ve got a bonus 2!
So why do you need to worry about it?
Well the most important reason overall is point 5; It’s a big contributor to Camera shake.
Camera shake is pretty much irreversible and whilst shutter speed is not the only contributing factor, it can be the deciding one. Unless you are wobbling around with camera in hand snapping away.
As I said in 6, a rule of thumb to get the slowest minimum shutter speed is to match the shutter speed to the focal length of the lens you are using.
As an example, if you are using a 200mm lens then the closest shutter speed will be 1/200.
But, there are complications.
If the lens or camera has mage stabilisation then you can reduce the shutter speed by a couple of settings e.g 1/50.
The size of the sensor in a camera can also affect the shutter speed. An Olympus OMD _M5 for instance has a crop factor of 2 which means you need to double the focal length to get the minimum shutter speed.
So if it was 100mm it would now be 1/200.
Now I don’t want to confuse things but it works out the same.
The reason is that a 100mm lens on a 2 x crop factor sensor camera is actually 200mm on a full frame so the minimum shutter speed is 1/200
Here are some other reasons for adjusting the shutter speed:
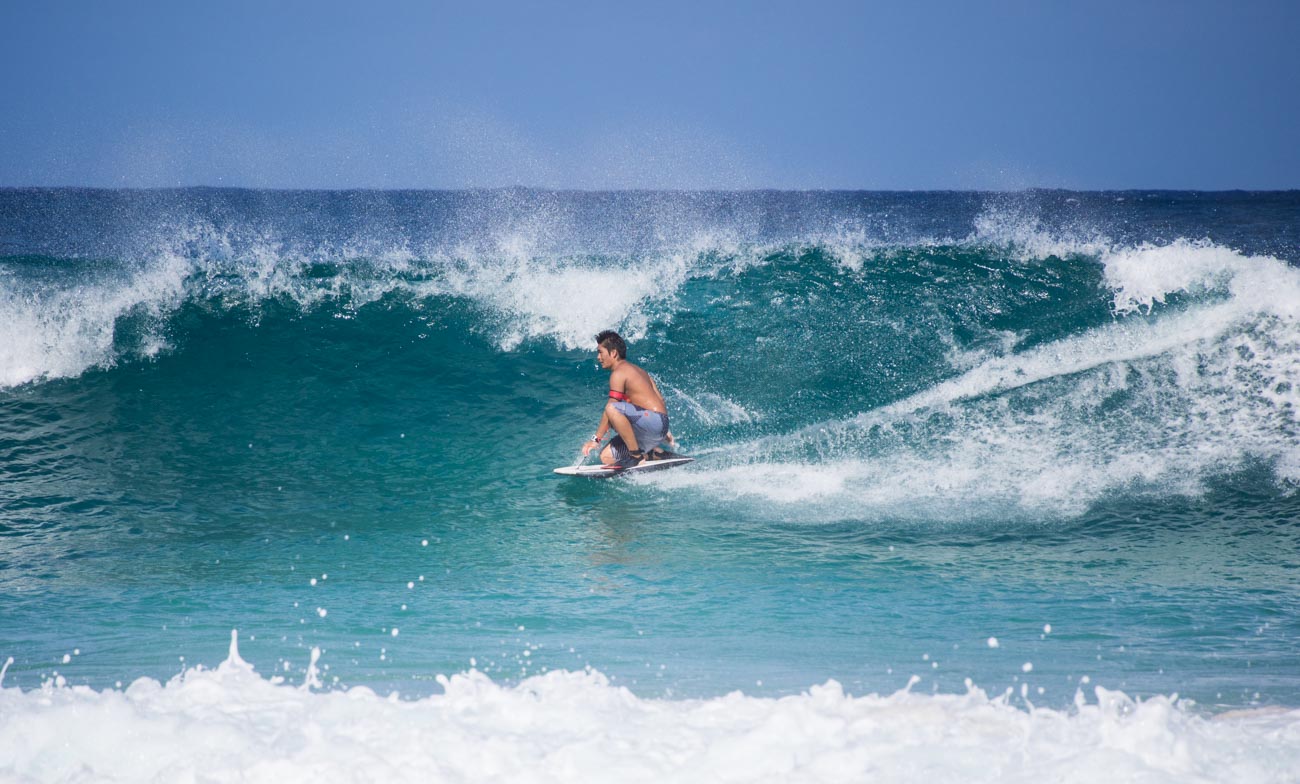
Freezing action
Let’s say you want a picture like this one of a surfer to freeze the moment. You want it to be crisp and clear so the shutter speed needs to be on the high side.
This one was taken at 1/1600 Sec at an aperture of f5.6 ISO 200. Whilst the foreground spray is little bit soft that’s due to the point of focus not the shutter speed.
Slowing action
On the other hand, with the waterfall below we’re looking for that fluid almost viscous look of the water flowing down the rocks.
At the Medenhall Glacier reserve. 13 miles from the city centre this is one of Juneau’s main tourist attractions in Alaska
This one was taken at much lower speed 1.6sec at an aperture of f32 ISO 100 which is roughly 10 times lower than the surfing picture
Interior light
If you don’t have a flash or don’t’ want to use it then having a fast shutter speed can help.
Conclusion
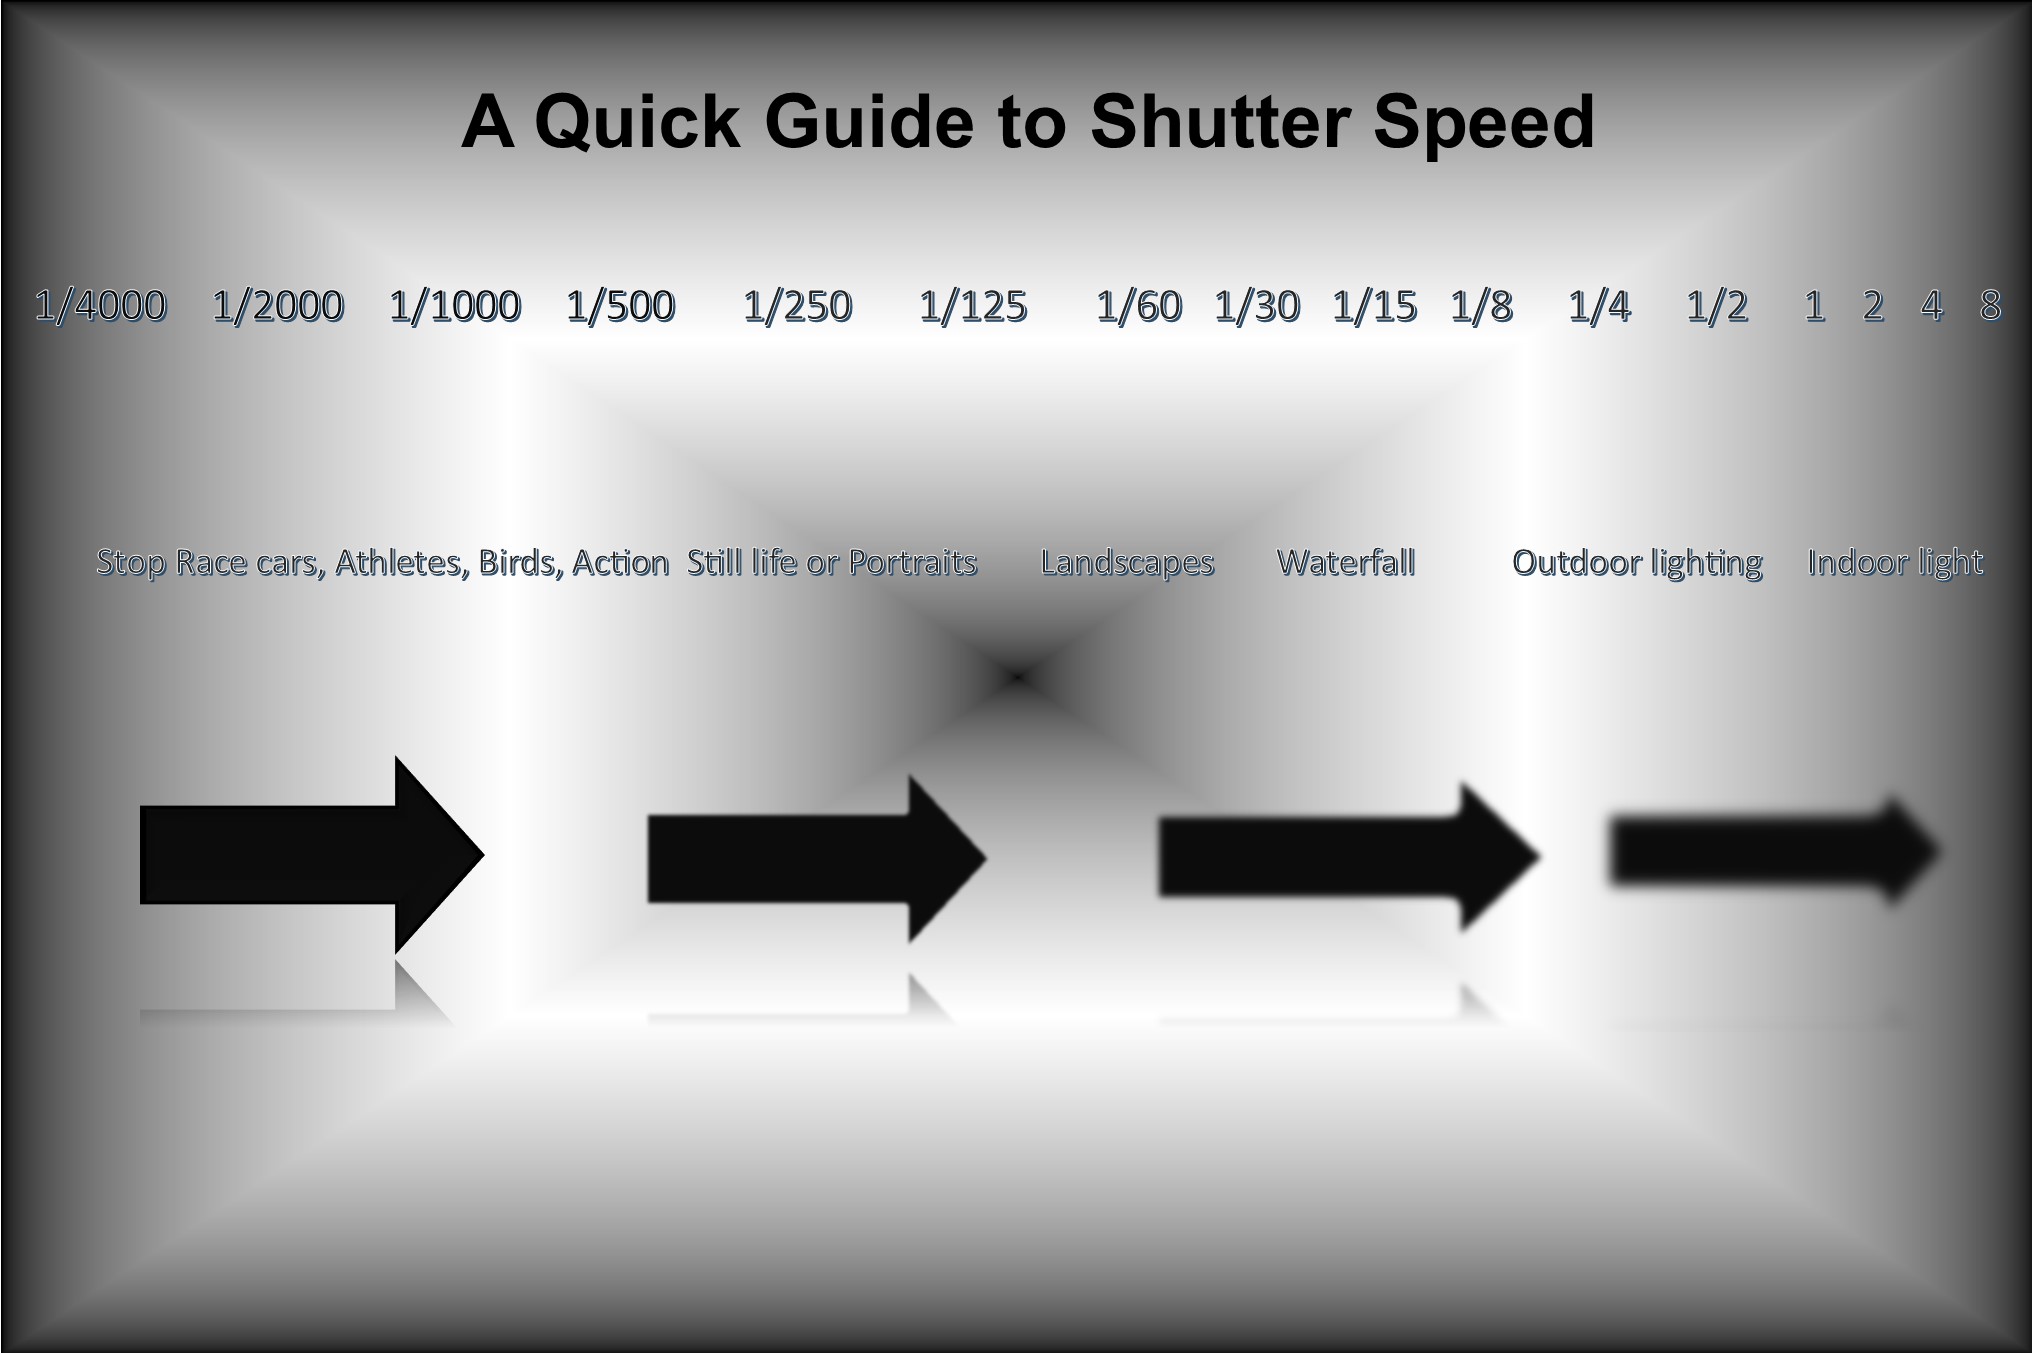
So to summarise these last points, as promised here’s an infographic.
Did you understand all that? I’m happy to clarify anything you’re not sure of.
Just post in the comments section below. Don’t be shy.
While you are at it why not subscribe for future updates below.
You’ll get my free guide “Eleven easy ways to help you take your own stock photography”.
I’ve eaten at lots of good or great restaurants (I’ve eaten at some pretty ordinary ones too but that is a story for another day).
And not once has it occurred to me to think that the equipment in the Chef’s kitchen must be fantastic!
I appreciate the fact that it’s the chef or chefs that created this meal that I found so enjoyable.
From the start of the dish to sourcing and delivery of raw materials to preparation, the cooking and assembling the meal, dishing the meal onto a plate and finally the delivery to your table, it just happens.
But nowhere on this path do we even consider what equipment they are using.
We trust that their systems in place will deliver to us their creation.
They may well have used the latest pan or cooker or have a great point of sale tablet.
They might well have great knives, to die for ovens or the latest work stations.
We, as the consumer, don’t care as long as the food has got to us in the time expected and is good or even great.
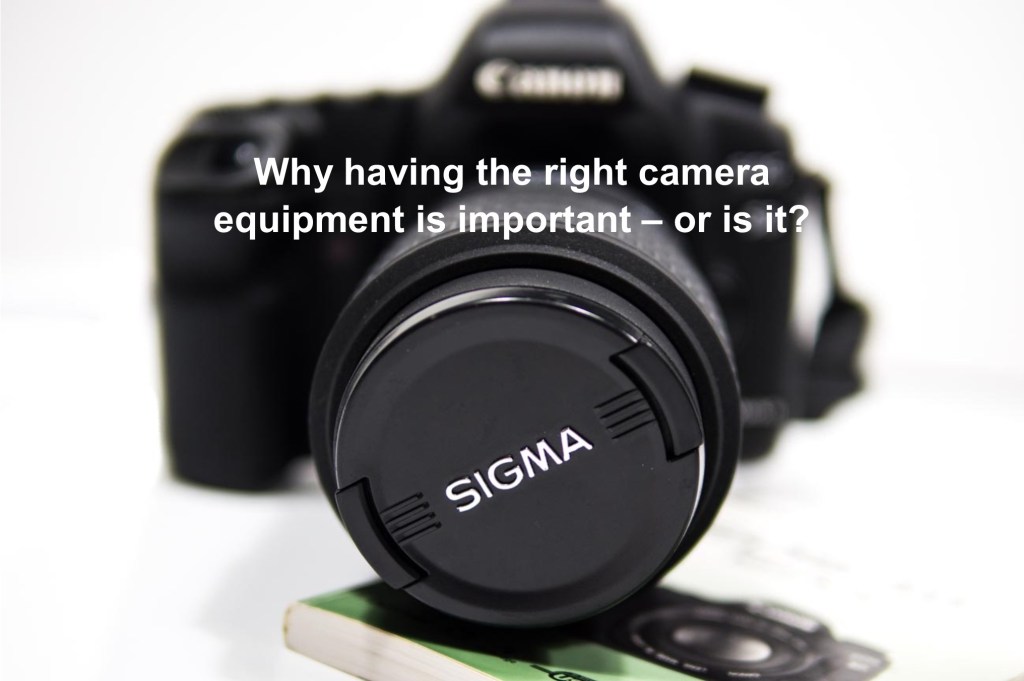
Why then as a photographer, Do I often have people say “WOW! You must have a great (or expensive) camera” when they look at my work.
As if it was the equipment that made the images that are they impressed by.
The best camera is the one you have with you.
If you’ve only got one device with you that can take photos whether it’s a phone or a DSLR – then that’s what you’ve got – period.
You can take great images with pretty much anything provided you know how.
Having an expensive camera is not directly proportional to the quality of the image.
I’ve heard it said amongst winemakers that you can make bad wine from great fruit but you can’t make a great wine from poor fruit regardless of the shiny expensive equipment you might have in the winery.
But, you can make great wine from great fruit without having the latest, greatest and most expensive equipment.
Well the same applies to a camera if you have good technique, a good eye and skill then you can make great images with any camera.
Even Stock agencies now accept images taken by mobile phones such as the iPhone or Samsung S series.
The reality is that the vast majority of ‘photographers’, who don’t rely on their cameras for use in specific genres, a simple, usable and light camera is more than enough when you know how to use it.
You see, even with all the right kit it’s easy to take an average photo.
Here’s an example of 2 images I took on a polar bear trip.
The fuzzy out of focus badly composed image on the right was taken with a Canon 5D Mk 11 with a pro 100-400mm telephoto lens.
The one on the left was taken with a soon to be traded in HTC one XL smartphone.
On both I was in the right place at the right time and for the first one I had all the time in the world but still managed to stuff it up.
You can take great photos with anything you just need to know the limitations of the camera you have.
Let’s take smartphone cameras.
Smartphone cameras struggle to take images that will blur or freeze motion.
They are hopeless in low light unless you have a tripod (and even then, it depends on the brand). Despite smartphone manufacturers best efforts phone they still can’t get the same bokeh that a camera with a interchangeable lens can.
It’s physics after all. But eventually smartphones will be able to provide the flexibility and quality of larger cameras.
But a DSLR or Mirrorless camera , can do all these things but you can’t carry it in a pocket or small bag
So, you play to its strengths not it’s weakness.
Use a smartphone for still shots in good light that don’t need that bokeh effect and you’ll have as good as image as you can get based on your ability.
So, there you have it.
Hopefully that helps you realise that you don’t need the latest and greatest camera to take some really good images for your marketing
They are some of the benefits you can get with right equipment. But to reiterate the image is only as good as the person with who has their finger on the shutter button.
To use another analogy, are drivers of Mercedes, Rolls Royce or Porsche cars any better drivers than you or me (assuming you are not one of them)? I think not.
I would be interested in your opinion.
Do you agree?
Did this help you gain some confidence in what camera you have?
To bring you the content that you enjoy on this blog, I read extensively, some it from physical and digital books (I have 100’s) and some from different places from around the net.
After all I may be a photographer that’s been in sales and marketing for many years (too many some would say) but I certainly don’t know it all. And it’s good to keep abreast of new and different ways of achieving the end goal.
So, without further ado here’s a few stories and tips worth reading:
For all you Android lovers (me included – love my Samsung S7 shortly to be an S8 maybe).
This is quite a long and detailed post. The one app I would add is Lightroom which is quite good as a standalone but is really designed to be used with the desktop/laptop version.
Not forgetting the other major player that also begins with A – Apple. They’ve released a few videos on how to use the iPhone camera.
I’ve linked to Fortune’s article for a different take on it rather than Apple’s own site but you can click through.
Phil Schiller, Senior Vice President of Worldwide Marketing at Apple Inc, discusses the camera on the iPhone7 during an Apple media event in San Francisco, California, U.S. September 7, 2016. REUTERS/Beck Diefenbach –
Portrait photography is an important part of stock photography and if this is something you want to know more about then you can do know worse than watch one of Ed Gregory’s videos. This one has been promoted by Fstoppers:
BT (British Telecom) are, as the name suggests, a telecommunications company. They have very conveniently provided a few simple tips on taking photos indoors. Wonder how competitive they are?
Nearer to home, my home that is, Sydney has just kicked off its Vivid Festival, an annual event of light and music. I was there a couple of years ago and it’s pretty spectacular. Sydney’s Daily Telegraph has helpfully put together some tips on how and where to photograph some of the displays. Even if you are not going to attend, there’s still plenty of useful info for you if you are likely to go to similar events or be exposed to some of the lighting effects that are on offer:
Now this is where you will learn how to show involvement in your stock photography.
So, what does “involvement” mean?
Well, there are many definitions but most mean being involved with or participating in something.
In the example of a product, this gives you the opportunity to show your subject being used by someone who is really involved.
They should be showing some emotion maybe enjoyment or surprise.
Some images can work better if there is more than one person.
A reenactment at the Town square in Jackson Hole, Wyoming, USA
Remember it’s not a portrait you are after.
Even if you have a piece of clothing or Jewellery, much better to show people wearing it being active, even if it’s only reading a book.
There are 6 points that you may need to convey involvement.
These points are not necessary for every photo.
But if you have people in your stock photos it is best to use a least one or two of these to get your message across
Decide what story you really want to tell.
Answering this can mean answering these questions:
What am I trying to sell?
What will be the props?
Who are the characters?
What do I want them to do?
Gestures
Looking at the camera is a gesture that can bring authenticity
Gesture is all about body language.
After all with still photos the message can’t be verbal.
Sure, it can be text in the caption or on the image itself but that still needs to be supported by what’s
happening or not happening in the image itself.
So, you need to ask; does the gesture look authentic? Is it appropriate for your message?
Let’s say you want an image of someone who conveys power.
If you grab just anyone who has never been in a position of some power then unless they are a good actor and/or model then it may not appear authentic or real.
Likewise, if the message you want to convey is not about power then it’s not a good idea to have someone who looks like a powerful authority.
Interaction
Often you may want to show a couple or multiple models interacting.
Lets say you have a kitchen product, one model could be using it and interacting with someone else, who looks amazed at the results or could be helping or also using the product.
A couple walking in Saltwell Park in Gateshead near Newcastle in England
Passive involvement
Sometimes it’s not necessary to have models in action.
Maybe they are just looking on.
A view maybe of a scenic and beautiful tourist resort could have someone viewing it from a lookout is one example.
The street art act, Dream State Circus at the Street arts festival in Fremantle, Western Australia. the festival attracts over 100,000 spectators over the Easter long weekend.
Anticipate behaviour.
Ideally, you’ll know the model/s, so directing them into position shouldn’t be too much of a challenge.
However, if they are not professional models then they will not necessarily follow orders exactly.
But that can be an advantage. If you watch them closely, sometimes it can lead to better poses than you initially wanted. So, watch carefully and see how things unfurl.
Get close.
Some of the best stock photographers get in close. That’s called “filling the frame”.
Filling the frame takes out distractions and makes a better emotional connection with the viewer.
Conclusion
In conclusion, these are the factors that need to be considered to show involvement in your stock photos:
1 Decide what story you want to tell.
What story are you trying to tell to get your future customers attention?
2 Gestures
Gestures by real people go a long way to helping you get your message across
3 Interaction
It’s best to show real interaction between your models and your main subject
4 Passive involvement
Not all involvement needs to be active. A model can be an onlooker
5 Anticipate behaviour
Sometimes you can ‘go with the flow’ and try to anticipate how your models will behave
6 Get close.
Fill the frame. Get in close to show expressions and movement.
Thanks for reading this. It means a lot to me. It would mean even more if you would like to post any comments below.
Feel free to share this on via any of the platform buttons to the left or at the bottom.
And while you are at it, keep scrolling down to subscribe to my newsletter.
You will get exclusive info and my guide “Eleven easy ways to help you take your own stock photography”
Now this where you will learn how to use people in your stock photography.
First up – the Model
There are many innovative ways to use models you may not have thought of.
You’ve got your background ready or least you have an idea what background you are going to use.
The next step is to choose the model/s you are going to use.
Now if you have a big budget you can elect to use actual professional models but I’m going to assume that you are not on a big budget.
So, who do you choose?
Well that depends on what you are going to represent in your image.
Models can be anyone and from any walk of life. They could be neighbours, relatives, celebrities (if you know any well), schoolteachers, lifeguards, police officers, children, (be careful of this one, there are some paranoid parents out there) or just strangers in the street.
So let’s say you have an DIY product, then have a think of who you your audience is.
After all if it’s no good selecting someone they can’t relate to. Especially if they look like the sort of person who wouldn’t know how to spell DIY let alone do it .
We have a hardware chain, Bunnings, that always has its store staff on TV spruiking their general principles.
They are all middle aged or older because that’s the demographic that’s more likely to be involved in DIY.
But the other demographic they aim for is the younger crowd who may feel much better getting advice from someone with experience.
One thing you should ensure, is that whoever you select is interesting looking and appealing.
By all means if you can get a beautiful looking model go for it but that’s not necessary.
Position
Positioning under an ad as well as showing activity
Once you have your model you need to manoeuvre them in such a way that they are doing what you want.
You do not want posed portraits.
Generally speaking, you want to depict a snapshot in the life of someone using your product or service or representing your company.
Most of us find watching people doing something is more entertaining (hence all those the fitness videos on YouTube)
Background
Now is the time to think about where they are in relation to the background.
Are they in the way of something you want depicted? Do they have something ‘growing out of thier head’?
Try different angles before clicking that shutter button.
Or take a few snapshots with your phone and see if any of them work for you.
Lighting
Lighting is the next element to be aware of. Watch out for shadows across the face or over a part of the body that’s showing the product.
If you are using natural light and the sun is overhead, watch out for blown out highlights or very dark, almost black shadows.
Don’t get me wrong, you can use both blown out highlights and blacks quite effectively sometimes but more often than not you don’t want them.
If you are using artificial light then watch for shiny skin.
If you are using a flash try to tone it down a bit.
There are so many images out there that give the impression that of a deer in headlights because the flash is too powerful.
A better way is to use fixed lighting.
That can be from the lights you already have in the room or space through to specialist lighting products.
Activity
At one of London’s famous markets, Borough Markets where this girl seems to be enjoying handing out samples.
Now the important bit activity.
There is nothing more boring than having an image that shows someone doing nothing.
We, as humans like seeing what people are doing.
I once heard a quote from unknown source “Watching other humans was probably the first form of entertainment for early man”
And as a business you want the viewer to see what your models are doing.
The trick is to show it in a way that stands out.
One way is to show that they are engrossed in the activity or product for example.
As an example, take a look at car advertising.
Sure, a lot of their images are of cars but look closely and they nearly all have people in them.
They might be driving, or looking longingly at the car.
Some images have people walking past the car (or the car driving past them).
They have a couple on vacation with the car in the frame.
They might be at the beach or at a café.
They do that so that you can relate in some way.
And it works.
Does it make people want to rush out and buy a car?
Probably not, but it does cement the brand in the sub conscious and when they are ready to buy a car that business can be front of mind.
Or, when they are buying and they see these images the contact that they have made could pull them in that direction.
Model releases
Now for the fine print!
Model releases.
Do you need them?
If you are advertising, yes.
If you are using the model to depict an idea such as an editorial piece on your blog. Maybe not.
But my advice get one anyway and you’re covered.
So, what is a model release?
A basic definition is that it’s a written and signed agreement between you and the person you are photographing.
This agreement gives you as the photographer the right to photograph the model and use the subsequent image for the purpose you have stipulated.
I’ll go into this in more detail in a future post so subscribe below and get notified when it gets published.
So, to finish off let’s take a moment to revise the main points again:
We talked about 6 basic principle in using people for your stock photography
1 Choosing people
Models don’t need to be “models’ they can come from any walk of life
2 Positioning people
Avoid taking photos that are obviously staged
3 Background
Tweak your background, assuming that you have already chosen it, to suit the model
4 Lighting
Be careful about lighting. Ensure that there are no ‘blown out’ highlights or very dark shadows
5 Activity
Remember humans are much more interested in other humans being active.
6 Model release
Make it simple, get a model release for all your models.
I’ll leave it to you to decide if you sexy aunt or uncle need to fill one out.
Assuming you have read the whole article as you have got down this far I’d like to thank you for reading it.
And now that you have got this far, keep going and subscribe to my newsletter where you will get info not necessarily found elsewhere. I’ll even give a guide for your trouble.
You can share your portraits and questions in the comments below. Just leave your ego at the keyboard.
In this post, I listed Four Basic Elements of Stock photography and gave a brief description of each one.
Well in the next few weeks I’m gonna expand on each one. Then you, as a business owner can learn to take your own stock photos. Whilst it’s not easy initially, it is doable for almost anyone.
Even if you have no intention of taking your own, this is still a good guide to how good – nay great – stock images should be:
The first of these basic elements of stock is one that most will not even think about but is arguably the most important for a great image.
And that is – drumroll –
Background
In general, most backgrounds should be clear of any distractions and that means being ‘clean’ and simple.
Good backgrounds can vary in form but their prime importance is to highlight the main subject and purpose of an image.
A lot of backgrounds are bland, often either black or white. Some are blurred or out of focus.
But, if you look at this image below you can see that the background is full of distractions. That’s because the subject matter is not just the shop seller but the stuff and trinkets all over the shop.
Taking the same scene with an out of focus background just wouldn’t be the same.
Genres
There are 100’s of genres of stock photos:
There’s Abstract, Aerial, Architectural, Conceptual, Conservation, Cloudscape, Documentary, Ethnographic, Fashion, Fine-art, Fire, Glamour, High-speed, Landscape, Nature, Photojournalism, Portrait, Selfie, Social documentary, Sports, Still life, Street, Underwater, Wedding and Wildlife to name but a few.
But rather than go through each one, we’ll pick out the most common types of background that a business owner will most likely need regardless of genres.
Let’s jot down some examples;
Staged backgrounds
Most product shots use a white or black background. There are lots of ways of creating either.
The simplest being the use of board like a matt board.
Of course if you are a master of photoshop you can take an image of your product on any background that contrasts with the product itself. Then do a quick select and create layer to put onto another background.
Another way is to position the product on a piece of glass with a black background so that it appears to be floating.
Bokhe backgrounds
The out of focus (it’s called bokhe) look is best with people shots so that the whole image looks more authentic. Why is that? Well if you look at another person your eyes will focus on them and something most of us don’t notice, make the background slightly out of focus. Slightly out of focus on an image doesn’t seem to have the same effect on the viewer as totally out of focus.
So, the photographer is trying get, to quote Wikepedia’s definition of Bokeh, “an aesthetic quality of the blur produced in the out-of-focus parts of an image produced by a lens”.
Other types of stock photos that use Bokhe are Abstract and Macro (e.g. flowers or small items like jewellry). A more left field genre that uses Bokhe is conceptual which is a type of photography that illustrates an idea.
Busy backgrounds
Most business photos usually have a slightly busy background to typify activity in the workplace and often include people as part of the scene.
If you are looking to show an activity e.g. making coffee in a cafe then you can get away with a fairly busy background. That can work well, so long as it doesn’t have distracting elements like bright colours or some other activities that take the eyes away from the main subject.
No background
In my years of learning photography, and I’m still learning by the way, the phrase of fill the frame was used in stock photography.
Filling the frame or zooming in, either by foot or by telescopic lens, to your subject matter is a great way of not having to worry too much about the background.
Stock agencies have tons of pictures that have filled that frame, with categories such as textures and abstract.
The benefits of these pictures is that sometimes you can also use them as a background which does mean a touch of post processing is required.
In the coming weeks I will create a basic background checklist which will help remind you of some of the items that we have just covered.
I cannot stress how important a good background is for a stunning image that will help you make more sales.
So as I said at the beginning, even if you are not going to take your own it’s vital you pay careful attention to the background of any image you are looking to use.
If you have any questions or comments about this post, please leave them in the comments section below.
Or feel free to contact me directly via my contact page
Sharing is caring as they say (although not sure who “they” are).
If there’s some people you know who may enjoy this or any other post on this site, please share with them.