

You’ve got the new beaut camera or maybe you dusted off an old one that you’ve had for a couple of years and instead of using your smartphone, you thought you would use this for your marketing images. After all you have enough of searching for stock photos that just aren’t what you need.
After looking at this camera you realise there’s a dial on it that says A, P, S and P and maybe a couple of other items like the picture of a video camera, auto or some other sign that gives you choices to select a genre. But you’ve heard that the best way to shoot is to use “A’. But what is A?
Well it’s Aperture priority. Now to refresh your memory on what aperture is I’ll send you off to have a quick read of these 2 articles.
10 Vital Facts about Camera Aperture
Understanding the 3 points of the exposure triangle
So now you’ve done that or at least scanned it. Lets’ go forward
A stands for Aperture – yes, you’ve worked that out. Great!
Aperture is measured in f-numbers. An f-no. or f-stop is the size of the aperture and by moving that dial you control it.
Usually the numbers relate to a stop and each stop represents twice the preceding value and half the next higher value. So, if the number was 1 then the next number would be 2 and then the next number would be 4 and so on.
In f-nos they look like this:
f/2.8, f/4, f/5.6, f8, f11, f16, f/22 which is slightly different from what I just told you and that’s because it works in the amount of light it lets in. f/4 lets in half as much light as f/2.8, f/5.6 lets in half as much light as f4, f/8 lets in half as much light as f5.6 and so on.
It is arguable that changing the Aperture setting is the best or at least one of the best ways to be creatively in control with the final image that you want.
So why would you want that? Well from a creative control point of view it gives you options.
Options like how much you have in focus;
Basically, as you look at a subject or scene you can set the F-no. so that you can decide what you want in focus. That could be just the subject or everything you can see within the frame.
How does it do that? Well I won’t go into the physics too much as you’re here to learn quickly and I don’t want you to get bogged down in detail.
In simple terms, the bigger the hole or aperture the less of the scene in front of the camera from front to back is in focus.
And that is called the Depth of Field (DOF).
Let’s look at this infographic that shows the differences in f-no in a plan or overhead view:
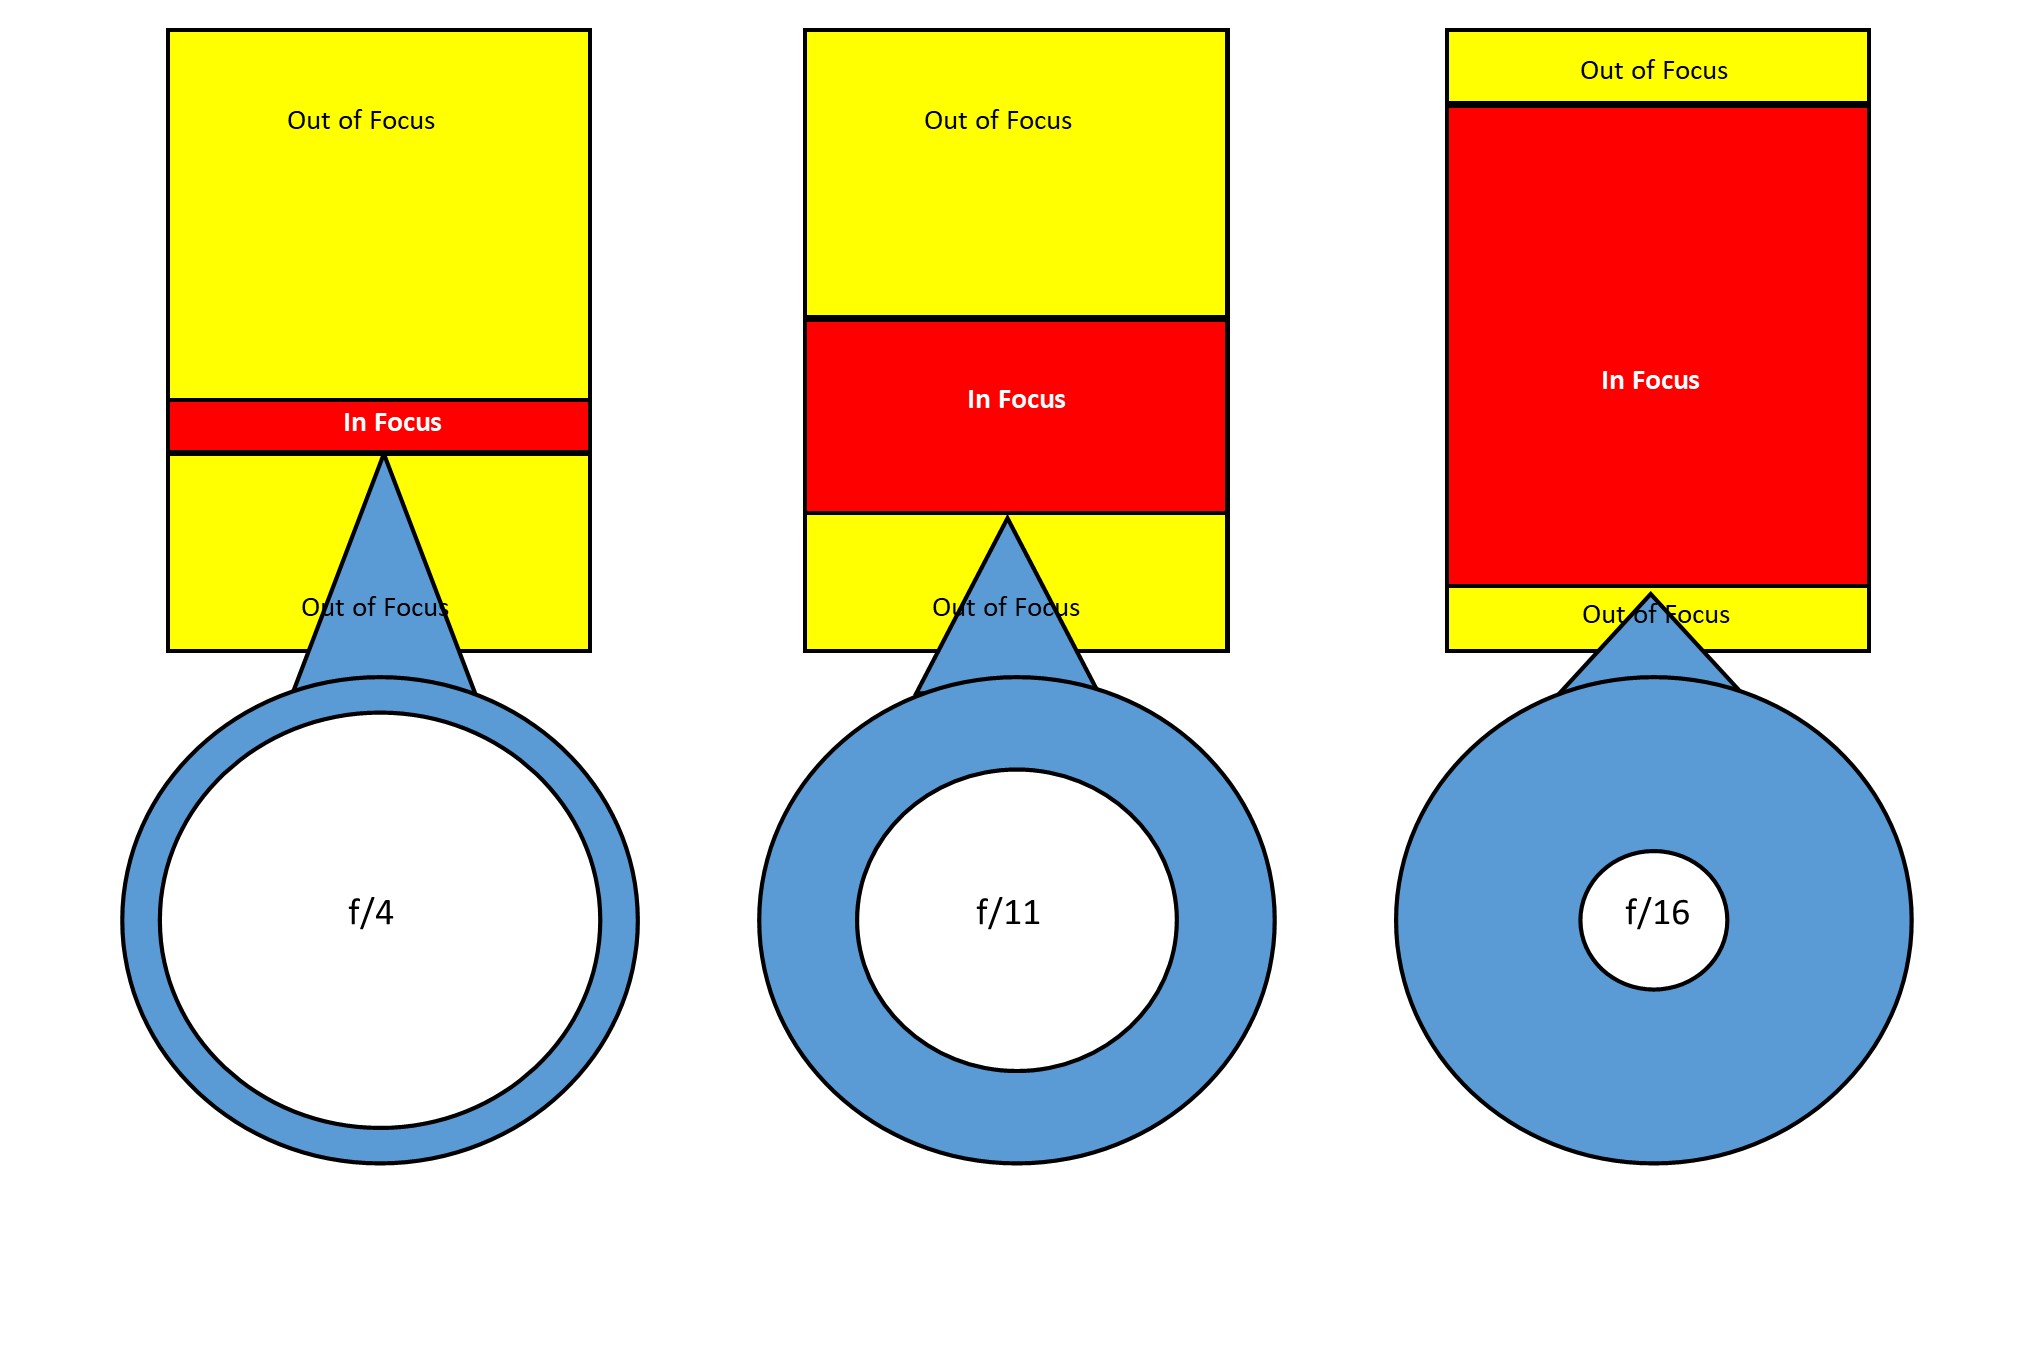
The left-hand side shows a shallow DOF due to a small f-no or a large aperture. The amount in focus is quite narrow. Whilst if we go to the right-hand side the amount in focus is significantly greater.
If I added another diagram to the far right showing an even smaller aperture then the amount in focus would extend out to infinity. I didn’t want to confuse you though.
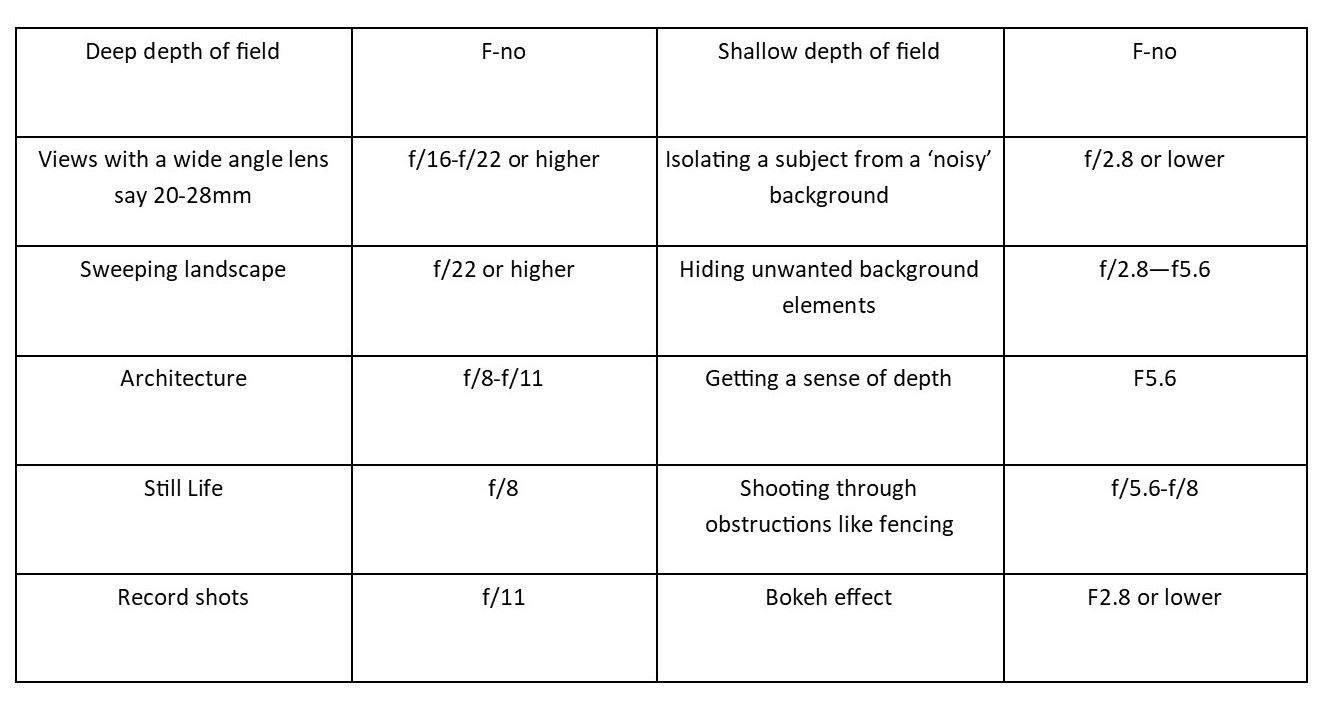
So, let’s look at when you would use this with this little chart:
OK enough from me, now it’s down to you.
1 Grab that camera, turn it on and take off the lens cap!
2 Get a bottle or a can or vase (the subject)
3 Now go outside
4 Mount ‘the subject’ on a table or some support
5 Find that dial that has “A” on it and find the dial that you use to adjust it.
6 If you have a zoom lens make sure it’s between 50mm and 100mm (35mm equivalent).
7 Now take three shots:
1 At Ff2.8 or lower if your camera goes that low. You may find that you can’t go as low as that due to the lens you have. So, in that case just go with the lowest setting.
2 At f/11
3 At f/22. If possible, this shot should have a long background.
Because ideally you want the same background, having a big garden or living in an apartment with a view are the ideal locations.
But you could just go to the nearest park and take all three there.
Compare the shots to see the differences and then play around with different focal lengths as that can make also change the DOF.
See these examples:
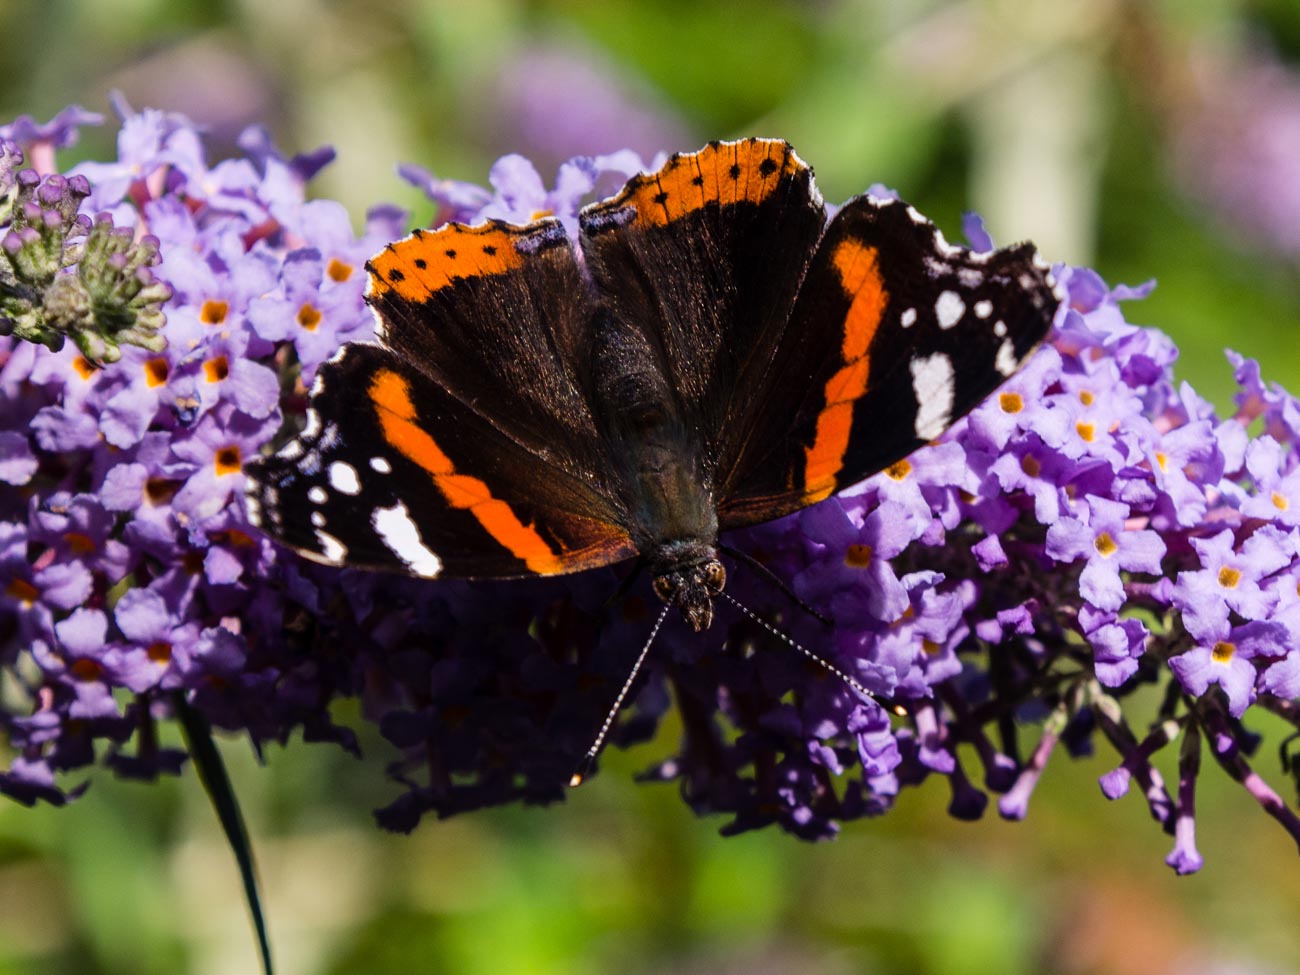

It’s best, if possible, to compare images on a monitor or at least a tablet.
Voila, you should now have an understanding of how to use the A or Aperture setting.
All in all, that should have taken you around 15 minutes (not counting any travelling time).
As an aid to this I have a simple checklist for you to download.
Just pop your name and email in the box below and it will magically appear in your inbox.


Leave a comment