I posted an article to this site “How to Back up your Travel Photos.” about 2 years ago. The info in this post is still accurate and relevant except I’ve also discovered a way of backing up on the go without using a laptop. Now I am talking about backing up memory cards not images taking on a smartphone. The smartphone images should be automatically backed up to the cloud if you have the settings correct. But even with the latest DSLR”s and Mirrorless Cameras being able to send images to the cloud, their systems are still clunky. So let’s get into it. This video takes you through it:
For those who like pictures and words you need the following: A Smartphone. I use an android so I’m not sure about iPhones. But I believe this system works with the latest models. So, if you’re in the Apple ecosphere you’ll need to do your own research.
A hub that has a USB-C cable and USB-A (and/or USB-C) connections.
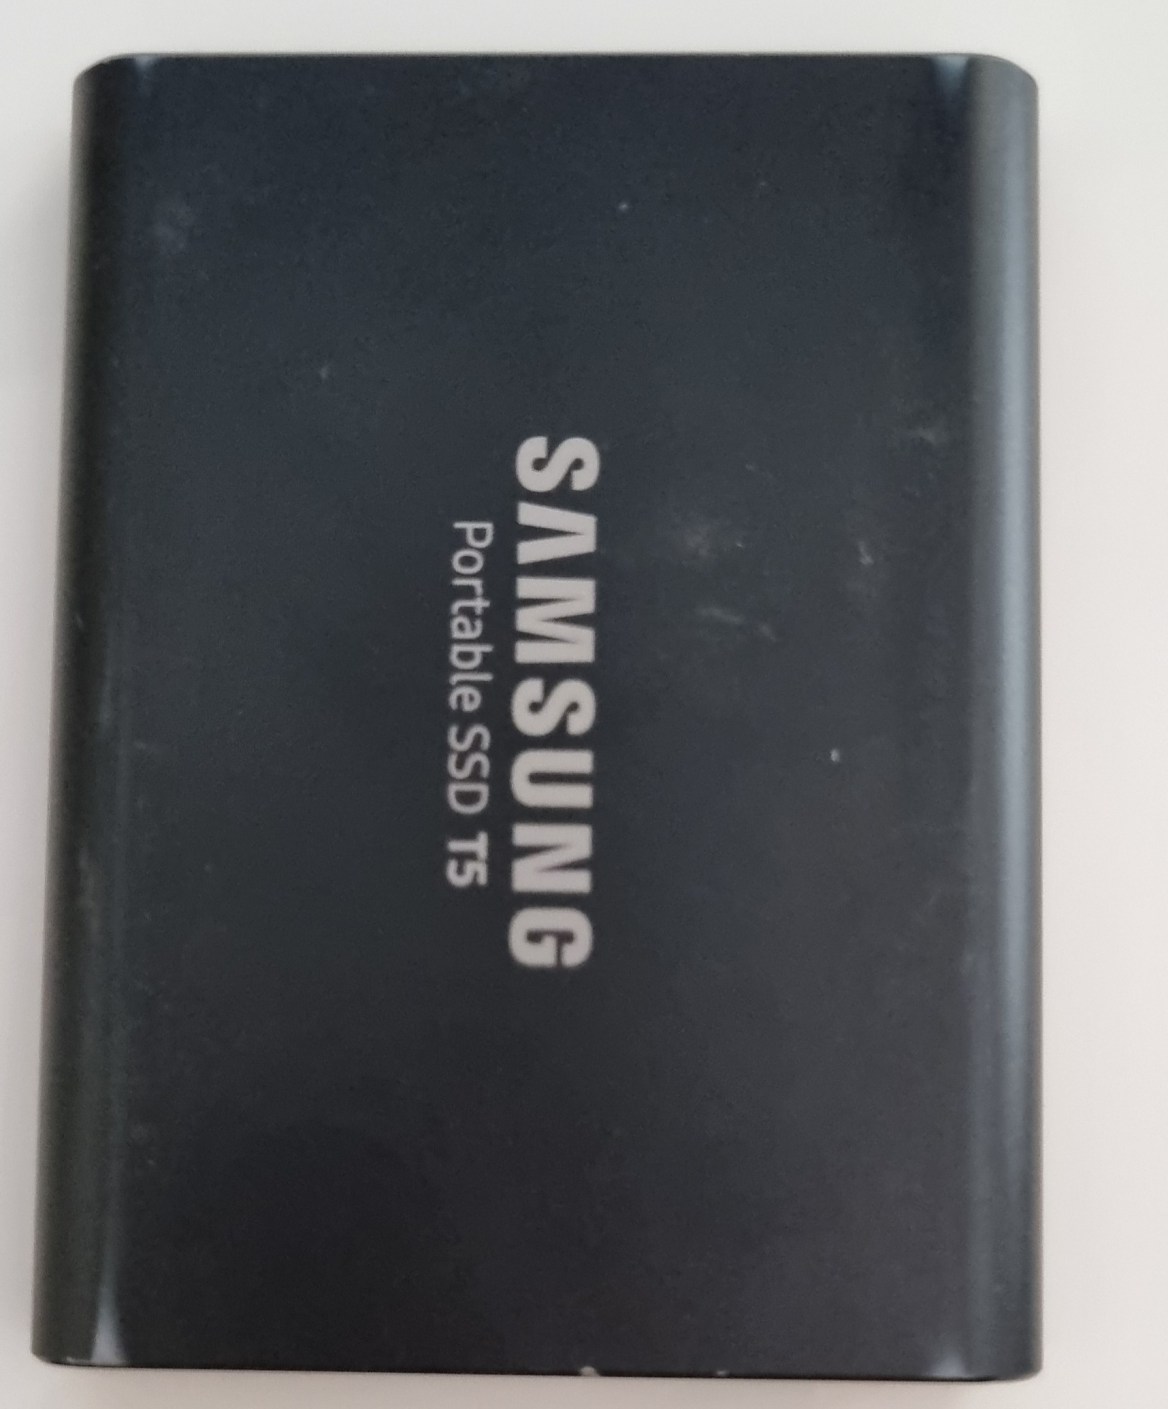
A hard drive.
A memory card reader
Put it altogether and plug into the smartphone and then open “My Files” and you’ll see “USB Storage 1” and “USB Storage 2” plus “USB Storage 3” if you’ve plugged in 2 hard drives.
Go to the memory card storage, which is usually the one with the smallest storage, and find your way to the images.
On the settings button (in this case 3 vertical dots) and select edit and then select all. Tap “copy” and then go back and select the hard drive. Find where you want the images copied to and tap “copy here” and you’ll get a progress pop up.
The operation is complete once the pop up disappears.
Rinse and repeat if you’ve got another hard drive to back up to (recommended).
In the days of film, the only form of back up was to guard your film and slides as if you’re life depended on it. Nowadays with digital imaging there are many ways of backing up your photos.
So, follow me along as I give you some ideas on how to back up your travel photos.
History of Back up
The term back up only really became used when computers began to take over the world.
With paper you could make copies and file them off-site.
As we all switched from paper to digital, Business’s started to have tape, then floppy disks followed by CD’s for backups of the day’s work.
Now you have back up servers some of which are in the cloud.
Photography back up
Before digital, you were able to have extra copies made of photographic prints and file them somewhere else.
Not so with negatives and slides. Well that’s not strictly true, you could get copies, but it was expensive. It was not until digital came along that we began to realise that we had the option to back up all our precious photos. We could even do it retrospectively, if we had plenty of time or money, by scanning film and slides.
In those early days the floppy disk and then later the CD or DVD were the main back up mediums. But as with film and slides we all ended up with boxes of DVD’s. Whilst smaller than boxes of Slides and Negatives they still took up some room.
Let’s take a look at what options we have now.
Direct backup to a Laptop or Computer
The simplest and most convenient way is to connect directly to a Laptop or computer. This is done via the cable, now mostly a USB-C, that each camera manufacturer supplies to a laptop or computer. Once you have it on the computer you are free to copy it anywhere else. All camera manufacturers give you that option. The main disadvantage is that some of the cables supplied are not usually off the shelf if you lose them. Additionally, some of the older camera ports tend to be non-standard or at best not common.
Memory Cards
When you take an image with a digital camera it sits on the memory card that you have in the camera. With a smartphone that image will generally sit on the phone’s internal drive. However, you can change it to sit on a microSD, if that’s available.
Memory cards can also be used to back up your photos either via a computer or in some camera models.
How does that work?
Well you remove the memory card from the camera and insert into either a computer memory card port or a card reader that plugs into the computer. Likewise, the same applies with a blank memory card. Once both cards are loaded you copy from one to the other.
Backing up in camera is usually confined to some of the more high-end cameras. These now come with two memory card slots that you can use to either extend the memory or use the second slot as back up. When the latter is set, each time you take an image, it not only sits on the first memory card but also on the second.
Another option is to transfer it in camera periodically but that can be dangerous if you forget to do it.
The system of using memory cards as a backup medium is not used that often unless you are looking to immediately back up and that’s your only option.
One recommendation I would make is to use something similar with a smartphone.
Smartphone backup
With a smartphone, the potential to lose it or drop it is much higher than a camera. I would suggest a microSD if that’s easily removable (otherwise you will lose it with the Smartphone!)
Another option is a small flash drive that can be attached, usually through the charging port. Why would we need to do that when we all rely on the cloud to backup our photos on a smartphone? Services like Google Photos, or iCloud work well when you have connectivity. But what about when you don’t have connectivity?
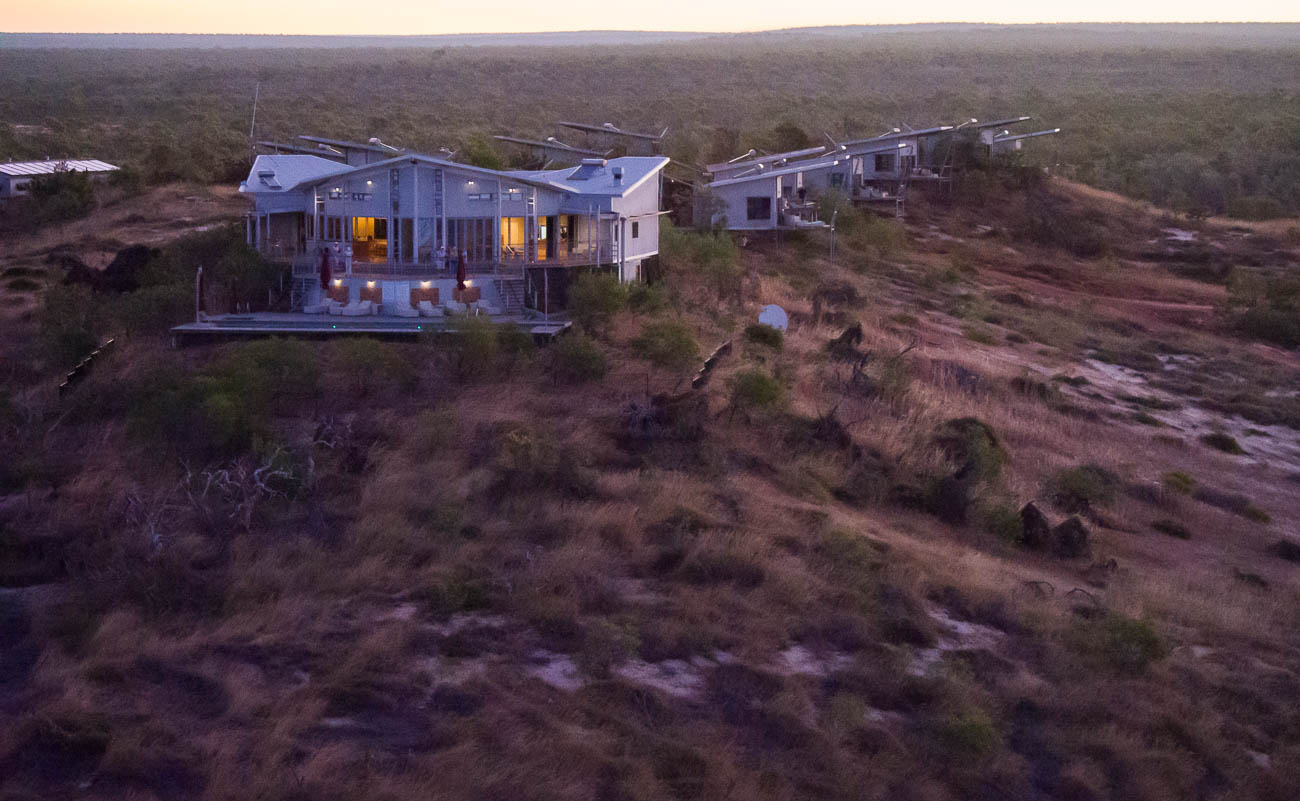
A few years ago I stayed a few days in a remote resort called Berkley River Lodge in the Kimberley region of Western Australia.
There was no phone signal at all and WIFI was limited to 50m from the reception hut. We were on a helicopter trip heading back to the resort. One of the other guests was taking pictures of the sunset with an iPhone when he lost it out of the window. I might add that the phone wasn’t his, it was his partners! We had also all been warned not to take your phone too close to the window during the flight as, you’ve guessed it, it could get sucked out. Anyway, apart from looking like a Kangaroo in headlights, he lost the phone. All the photos that they had taken in the last few days were only on that phone. And as they had no way of backing them up other than using iCloud they were lost with the phone.
Berkley River Lodge from the air
Lesson from that is not to rely on the cloud as back up for smartphones or indeed anything else.
If you have another device like a tablet, then you can set up a hotspot that will enable you to transfer or copy your files to the Tablet. But if you are likely to be without the tablet and have no connectivity, then a Mobile flash drive is a no brainer.
WIFI SD cards
An option to standard Memory Cards are WIFI cards. Even if your camera has Wi-Fi capability this still allows you to back up your images to another device.
If you have a fairly new camera, then chances are it will have WIFI capability anyway, so you can backup via WIFI without a special WIFI Memory Card.
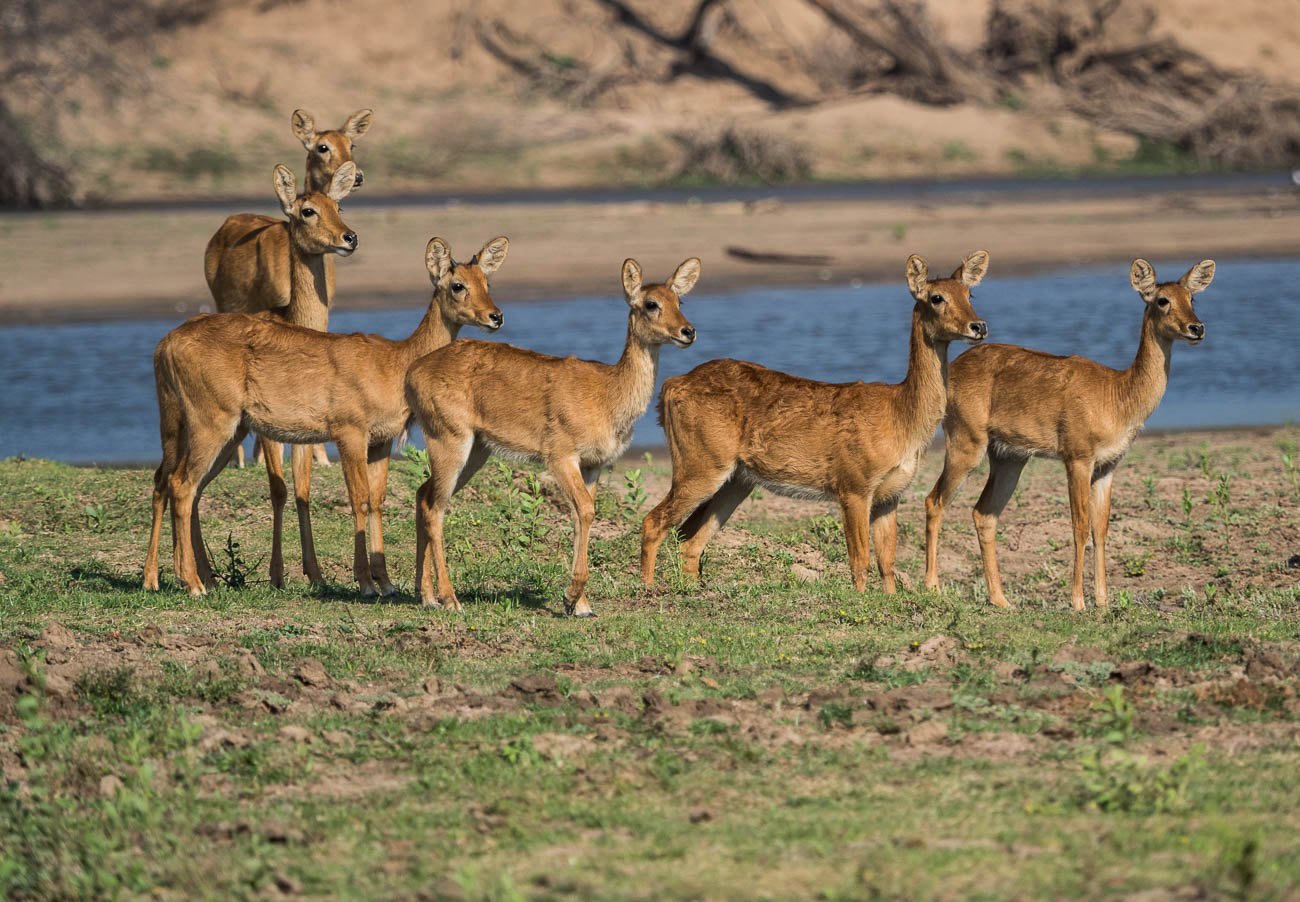
However, in both these instances the issue is space. Most Smartphones or tablets are around 128GB and if you are shooting RAW over a 2-3-week period it doesn’t take long to max out. For example, last year at a African Game Park I shot around 64GB of RAW and JPEG images.
Physical back up devices
There are a lot of devices out there that you can use to back up your photos. Most of them are portable hard drives
There is the basic hard drive that you plug into a laptop or some tablets. You then copy the files to the hard drive via the Laptop or Tablet
Some hard drives have a SD Slot for your memory card. You insert the card and it automatically copies to the drive. So, in theory you don’t need another device. Yet, unless you plug into another device you are not going to know whether it has backed up all your photos correctly.
Another option is the wireless Hard Drive. This is like a hybrid. They have SD slots as well as having the option to wirelessly copy images via the hotspot I mentioned before. This has the same disadvantage of not being able to see what images have been copied across. Although some do allow you to view the contents of the drive from a smartphone or tablet as well as a computer.
Then there are hard drives that have a screen that lets you view the images even if they are RAW.
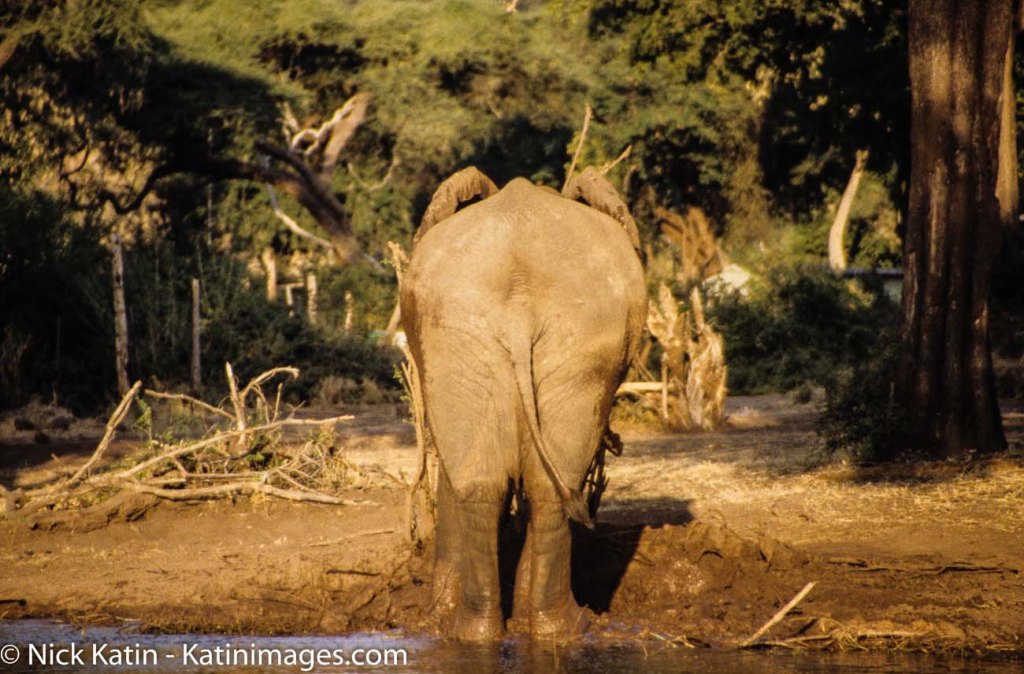
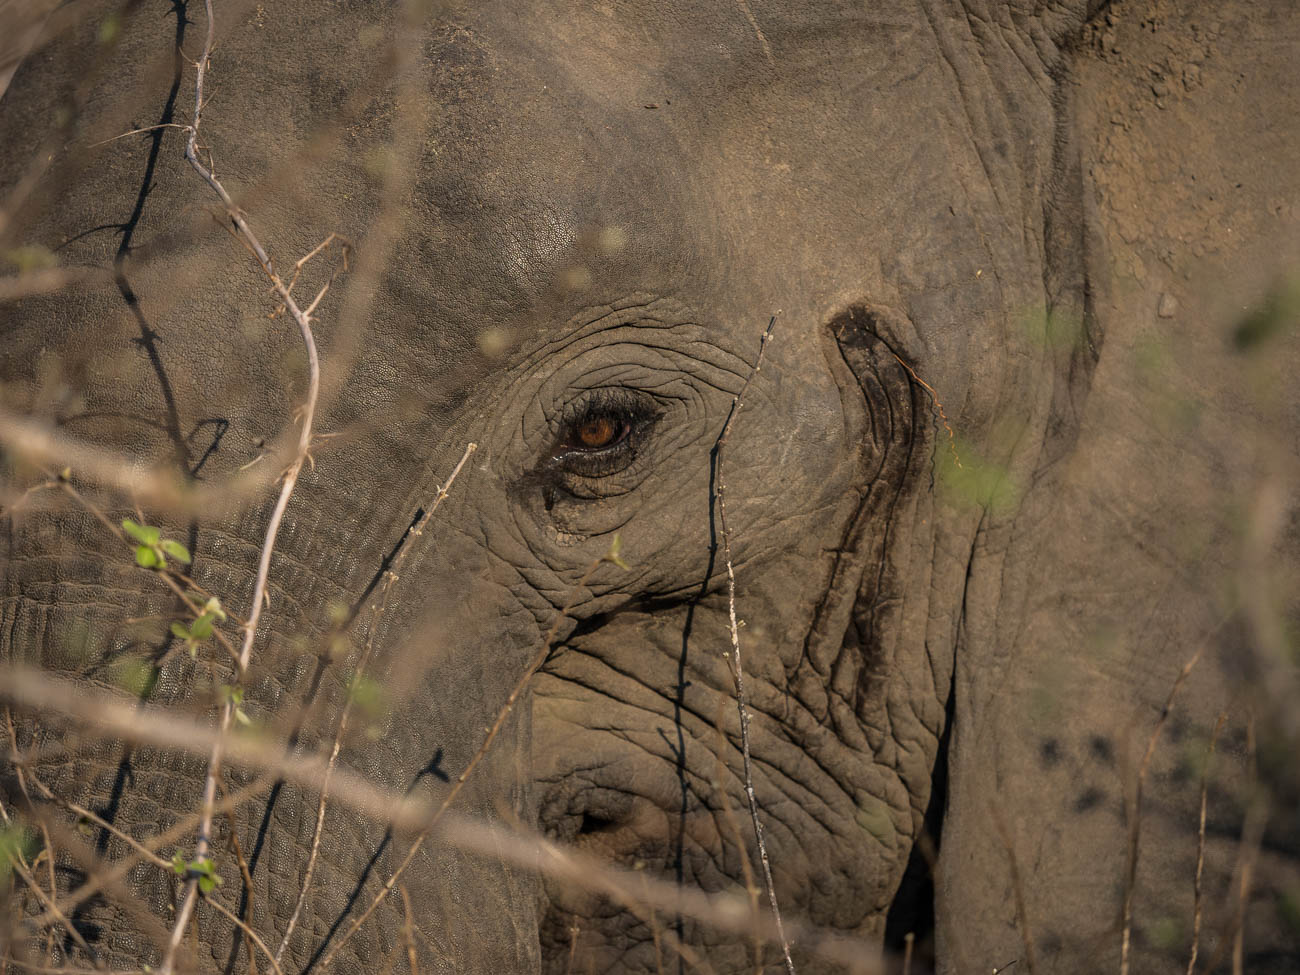
African Elephant in South Luangwa NP, Zambia. Click on the image to view a larger version and for other options
Hard drive types
Lately hard drives come in two types, HDD mechanical Hard Disk Drives or SSD Solid State Drives. The differences are basically that SSD’s are faster but more expensive. In a computer or laptop then I would go to an SSD every time. With portable hard drives, where there is only data being stored, then it’s really a personal preference.
How many cloud services are there now? There’s Apple’s iCloud, Microsoft OneDrive, Dropbox, Box, Google Drive, Crashplan, Backblaze, Carbonite and there are the Photo Sharing Sites (more on that below).
Of course, all cloud backup services depend on the internet. So if you are travelling, you are relying upon there being an internet connection. That is often beyond your control.
There is much better connectivity than there was 5 years ago and I’m sure that there it will improve even more. But as I mentioned earlier there is always somewhere that the internet is not connected.
Even with an internet connection, the bandwidth or speed can be poor. Meaning that the time taken to upload your photos can be long and arduous, and therefore frustrating.
Using the cloud
Whether you use the cloud or not is dependent on a couple of things:
One is the Camera equipment. For instance, a Smartphone has inbuilt cloud capability and relies heavily on there being an internet connection. That is either by the phone signal e.g. 5/4G or a wireless connection. On the other hand, unless you have a 2-3-year-old camera, then there is every chance that the camera you have will not have Wi-Fi capability. Even a lot of the new ones only allow you to upload to a phone or tablet from which you then have upload to the cloud.
The other reason is the interface and ease of use. I haven’t tried all these services, but of the ones I’ve used, iCloud and Dropbox seem to me to have the best interface and ease of use.
Cloud cost and security
There is one further reason and that is price. Prices vary so much with specials and add-ons that comparing them is likely to be totally inaccurate by the time you might read this.
The other thing to consider is security. I hesitate to say it but using the likes of the big guns like Microsoft, Apple or Google does give a sense of security, compared with the smaller players. That may well be false. But it’s worth asking a few questions. I.E. where are their servers? What happens to the data if a server goes down or heaven forbid the company disappears?
What do I use? OneDrive. Why because Microsoft gives me 5TB with my Office 365 subscription.
Photo Sharing Sites
The other cloud-based storage systems are Photo Sharing sites. These are likes of Flickr, Smugmug, Google Photos, Pixbuf , Photobucket, 500PX, My Portfolio, Amazon Prime Photos plus a few others. These add a bit more to the concept of back up. Usually it’s a subscription service that allows you to view and share all your photos. Some even have their own social media interface meaning you can browse other user’s photos and comment or share.
Flickr was the first of these and now has been gobbled up by the expanding Smugmug.
Take a look at my site on Smugmug to get an understanding.
Unlike the straight cloud backup services, some of these sites don’t support all file types. So, if you are looking for a complete solution to house and view your RAW files for example, do your due diligence.
African Elephant in South Luangwa NP, Zambia. Click on the image to view a larger version and for other options
How to back up your travel photos – at home
We’ve covered a broad summary of what there is out there to back up your travel photos whilst you are on the move.
What about when you get home? All of the above apply to your home base as well.
But you can also add in Desktop Drives
Desktop Hard drives
Desktop Drives used to be fixed to one certain location. But with the growth in portable hard drive storage, the fixed and portable are overlapping.
Most of us these days have Laptops instead of desktop computers which gives us freedom to work pretty much anywhere. So, plugging in a portable hard drive as not only an expansion to the laptop storage, but also as a backup is easy.
For the fixed you have three main types.
Standard hard drives that connect via USB or Apple’s Lightning and have their own power supply.
Cloud based drives that connect into a network also called NAS (Network Attached Storage) This is different to the cloud services mentioned earlier. These are hard drives that are physically in your space but can be accessed remotely via an internet connection. They also come with a power plug for an independent power supply
The last type is called a RAID system (redundant array of inexpensive disks) that also have their own cloud. This is a trickier system to manage and install. Basically, it is several hard drives usually in multiples of 2 that back each other up. Where it can be confusing is the many different set up combinations available. It’s a way of ensuring that should one back up drive fail then there is always another one that has identical data, so that you can sleep easy.
What I use
Now I think it’s time for me to give you my system.
On the road
Depending on the duration and the reason for the trip, I will carry either one or two SSD Drives, my surface pro and a memory card reader. I also now carry, since seeing the guy at Berkeley River lose an iPhone, a portable flash drive that fits my Samsung S10.
How do I use them?
I am fortunate that my Olympus OMD1 MKII has dual memory card slots, so I use one of these memory cards as back up. Additionally, every evening or at least every couple of evenings, I back up one of the memory cards to both SSD’s. If I have been diligent enough to clear the hard drive on my surface before travelling, I back up to my surface as well.
I back up my Samsung S10 to my surface if I am confident that I have good internet for the cloud back up to my OneDrive service. If I ‘m unsure of the connectivity, then I will back that up to my portable flash drive and later the surface.
I have used the iPad Pro as back up in the past. But due to the number of apps it has, it only has a small amount of spare storage compared to the surface.
How to back up your travel photos – Summary
Back up is a relatively new concept in the photographic world. It has only been around since the advent of Digital photography
There are many forms of back up for the travel photographer
Memory cards can be used for short term back up
Smartphone Cameras rely on cloud services, which can be unreliable when travelling.
A flash drive or microSD is a more reliable medium
New cameras can upload photos via different WI-FI systems to the cloud but only via another device
There are many different hard drives that can be used as back up devices.
They can be like small computers with their own screens and flexible connectivity.
Speaking of Cloud back up, the number of services available is huge. So, you need to select carefully before using one of these to ensure it meets your needs and security
Photo sharing sites like Flickr and Smugmug can also provide a level of back up for your photos
Then we get into the heavy duty physical hard drives. These use sophisticated software and multiple drives that you can create your own cloud with.
In the previous post, “Introduction to Travel Photography,” I touched on the fact that there are several different types of travel photography. In this article we cover the different types and genres and how they apply to your future travels
So, let’s go into more detail.
The best way I find, is to break it down into destinations. By doing that you are preplanning what skills you need to learn or refresh for your upcoming or future trip.
Let’s take an easy one. Europe
What do we travel to Europe for?
These are a few reasons:
History Food Landmarks Landscapes Activities Sporting Activities Language Drink
So each of these reasons will correlate to a different type of travel photography.
Let’s take history:
Interior shots of museums, Churches, Palaces and galleries are a few examples. To get some good shots you would need to get comfortable shooting in low light. By learning how to do this and how your equipment will perform will enhance your photography.
Another genre for History would be architectural. Shooting some of the worlds’ most impressive buildings like Saint Peter’s at the Vatican are a must if you are travelling to Rome.
Then of course there are battlefields from different wars over the ages. From Gallipoli to the Battle of Hastings to the trenches of World War I in Belgium. Most of these would be landscapes.
We now have the theory behind using destinations to think about different types of travel photography.
Destinations and different types of Travel Photography:
Europe
Landscapes, Architectural, Interior, Festivals, Lifestyle, Food and Drink, Street
North America
Landscapes, Architectural, Lifestyle, Nature, Wildlife, Street, Food and Drink, Wilderness
Cowboy on bench In Santa Fe’s plaza, New Mexico, USA
Asia
Street, Food and Drink, History, Landscapes
South America
Landscapes, Architectural, Lifestyle, Nature, Wildlife, Street, Food and Drink, Wilderness
Antarctica
Wilderness, Landscapes
Africa
Wildlife, Landscapes, Street, Food and Drink, Wilderness
Australia and New Zealand
Nature, Landscapes, Street, Food and Drink, Lifestyle, Wilderness. Wilderness could be considered a part of Landscape. Yet there are some specific challenges that need to be considered when you are out in the remote areas.
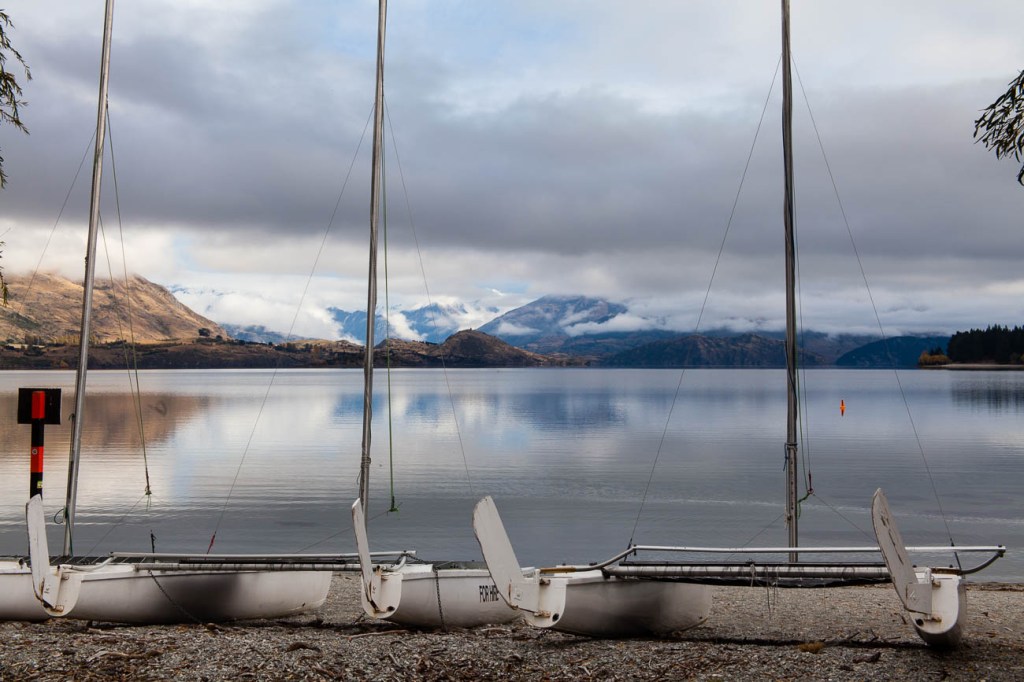
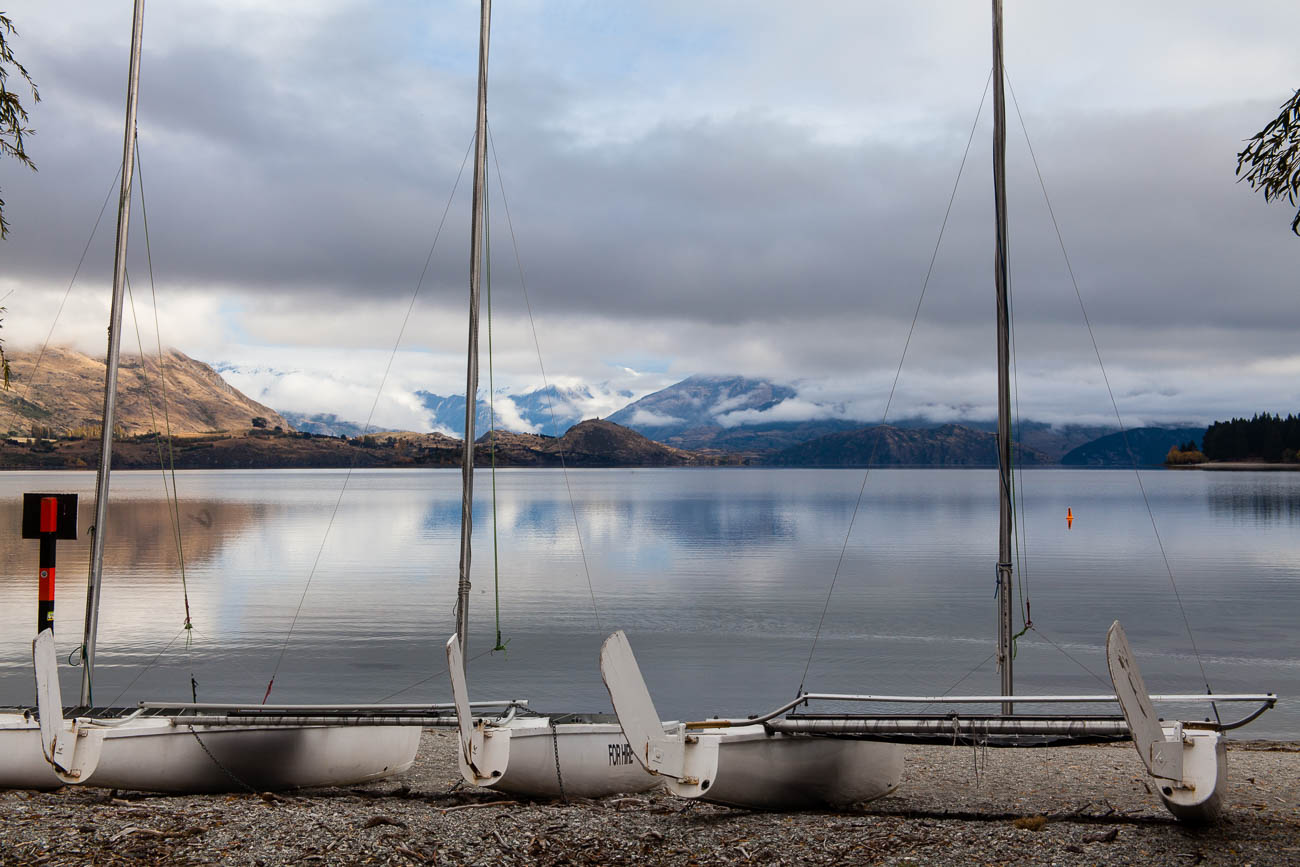
Lake Wanaka New Zealand
I’ll go into more detail in future posts.
But the trick is to look at the destination and then decide what sort of images are available and what you would like to take.
For instance, if you were travelling to France, you may decide that you don’t want to take photos of the landscape as you are only going to be in a couple of cities like Paris and Lyon. But even in cities there can be opportunities to take landscape photos e.g. Jardin des plantes des Paris – the Botanical Gardens of Paris
Choosing what to shoot
As you can see there are many different types of travel photography. But what if you want to choose a few main ones? Which ones should you choose?
Well if you go back to the list you can see a few that reoccur. Landscape, Architectural and Street are three that would set up any budding travel photographer with the building blocks to improve and learn new skills.
It also depends on interests. If you are an outdoors sort of person and you intend spending time at travel destinations with wild open spaces then you may wish to concentrate on Landscape, Wildlife and Wilderness.
Genres
Breaking down these different types of travel photography into subjects is also useful:
Landscape Mountains, Snow, Ice and Glaciers, Deserts, Coastal, Forests, Water,
Wilderness Similar subjects to Landscapes. As I mentioned before, it’s not so much about the subjects but more about the logistics and specific challenges i.e. Extreme temperatures, Remoteness etc.
Street Portraits, Daily Life, Streetscapes, Local Interactions, Traffic and Transport, Street Art
Architectural Interiors, Building detail, Urban Landmarks, Skylines
Nature Flowers, Forests, Lakes, Rivers, Weather, Sun and Moon
I could break down these genres and destinations even more but I don’t want your eyes glazing over. Just as you would plan your travel or holiday experience you also need to plan your photography beforehand. Working out what photos you will have the opportunity to take and which ones you want to take, will not only help you enjoy your experience but also bring home some ‘awesome’ photos.
Summary
So you can see that there are lots of different types of travel photography. These can be classified as genres but also working out what types of photos you will be taking at your destination plays a big part. Some of these genres e.g. Wilderness also have other challenges not necessarily related to the act of taking a photo.
Research and Planning is essential
But remember, if this feels too overpowering you can always just select some or one area to specialise in to begin with.
According to Wikipedia the definition of Travel Photography “is a genre of photography that may involve the documentation of an area’s landscape, people, cultures, customs and history. The Photographic Society of America defines a travel photo as an image that expresses the feeling of a time and place, portrays a land, its people, or a culture in its natural state, and has no geographical limitations. There are other definitions but those two pretty much nail it.
History
Travel Photography, unlike most other genres is a later addition to Photography. When Photography was first invented in the early 1800’s few people travelled and for the next few generations any who did were only the wealthy ones. The major pioneers in travel photography were explorers who wanted to visually document their experiences whilst exploring. But you had to be keen as they had to carry the bulky equipment. Not only was the camera equipment itself heavy but, as the frames needed to be developed almost immediately, the photographer needed to have a darkroom and enough chemicals for a small laboratory. Of course that all changed when Kodak invented a camera that used a roll of film and then introduced the Kodak Brownie. Almost immediately photography was a lot more accessible and therefore popular with explorers and traveller alike. But it wasn’t until colour film was introduced that travel Photography became a mass media. Even then not everyone had a camera or if they did they didn’t use it whilst travelling. Digital photography changed all that. And then Smartphones come along. Now anyone who steps outside their door takes pictures.
We have millions of images of exotic and not so exotic locations being circulated by social media and other forms of communication.
The Travel Experience.
It wasn’t until I went travelling that I took an interest in Photography. It was to be a 7-month trip around the world and I felt that we needed to document, as well as we could, our experiences. So it was I had 2 very different skills to learn, how to travel and how to take photos of my experiences. It was a challenge, but it was one that I learnt so much from. That’s the beauty of Travel Photography. Yet, there are times when you must forget all the techniques and the technical stuff and be in the moment of the experience. Knowing when to take that shot or not is a skill in itself.
That too me is what Travel photography is all about.
Genres
Of course, when you travel there are lots of subjects that you will want to take photos of:
Landscapes, People, Festivals, Entertainment, Urban, Food and Drink and Wildlife are the most popular.
Landscape
Landscape Photography is taking images of usually the area in front of you. That can be a mountain range, a field of flowers, the desert, pretty much anything that is of a natural beauty. Some manmade objects e.g. a lakeside house or a sailing boat can help with context.
Reservoir close to Yosemite NP, California, USA in an area of lakes and reservoirs.
People
Always a difficult one to get right. People move, blink, frown and often, whether posed or not, can assume unflattering positions. Taking portraits in different cultures are a great way to get to know locals and customs. We are all fascinated by the daily life of those in other countries. Travel Photography gives you the option to capture that.
Festivals
The Colour and movement of some of the world’s most famous and not so famous festivals can make great photos. Even the local fete can offer some interesting character or scene shots
Entertainment
Shopping in the market, Music and Theatre performances are two events that come to mind when taking photos in the field of entertainment. But there is also sporting events like a game of footy or nightlife. The latter being particular challenging due to the lack of light.
Urban
What is urban? Good question! I guess it’s Street Scenes, Street Art, Sky Lines, Architecture, both inside and outside and even Light Shows.
Food and Drink
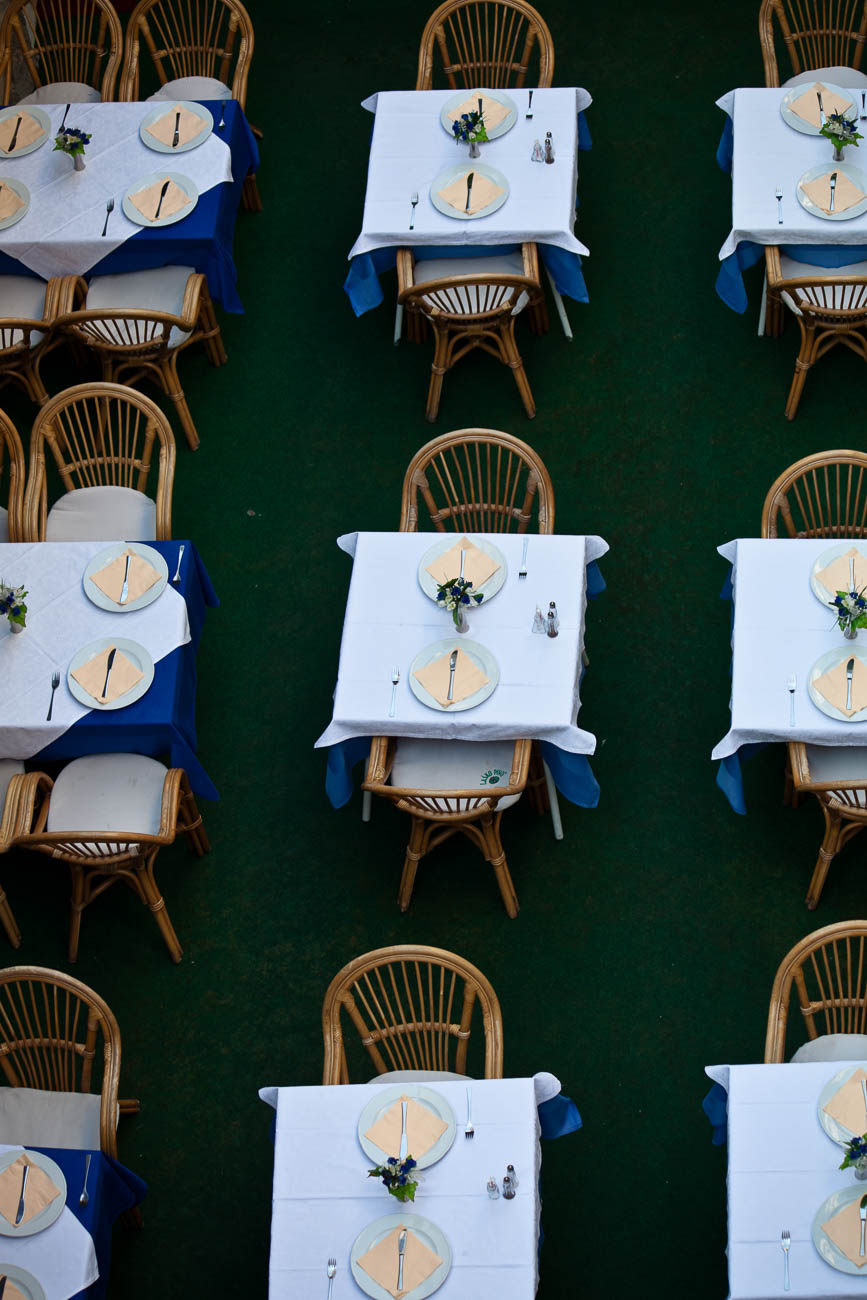
There are many food and drink situations. You may want to take some photos of where you are, what you are doing, eating or drinking. In a restaurant, a winery, in a field or at the market. Food and Drink is quite a diverse genre. But it can also be the most creative and satisfying, especially if you are having a great experience at the same time.
Table on the beach. Kefalonia. Greece
Wildlife
Who doesn’t want to capture that great shot of a Lion or Leopard in the wild somewhere in Africa. But there is more to it than the big 5 (the big 5 is Lion, Leopards, Rhino, Hippo and Elephant). Even going to a Zoo or Sanctuary can provide some great photographic opportunities. There are various types of environment for grabbing a shot or 2 of wildlife. Marine, Forests, National Parks even the Urban Environment can have wildlife. But be wary of two things, firstly your safety is paramount, don’t be that person who steps outside the car in a Lion park. Secondly, wildlife photography is challenging. There are photographers who have devoted their lives to taking great wildlife shots. They will spend days even weeks waiting for that ‘one’ shot.
Mother Nature
Travelling over time means you will experience all types of weather which can make it difficult to use your camera equipment. Rain, Heat, Cold, Snow, Dust they are a few extreme weather extremes that we all will experience in our travels. But even though taking photos in such conditions will take you out of your comfort conditions, often it will be well worth it. So, don’t run for cover (unless of course your life is in danger) embrace the challenge.
Copyright
By copyright I don’t mean your copyright. More and more their famous landmarks (and People) want to control their image. For example, under French law it is illegal to take photos of the Eiffel Tower’s light show at night. Of course, we’re not all going to check on every possible landmark but it’s worth a quick google on a big-ticket item.
Photography Techniques
So you now you know the sort of experiences that you will want to document visually, how do you do it successfully? Well firstly, you will never stop learning! I’ve been shooting for 22 years and I’m still learning. That’s not to say you can’t learn to take good even great pictures straight away on your travels. It takes time to know what to do in certain situations and as you have seen there are many genres that make up Travel Photography. I hope that this will motivate you to read more from this site and support some of the manufacturers or service providers that I recommend to help you.
Additional skills
Of course, it’s not all about techniques and composition. If you want to take Travel Photography seriously you need to also be prepared some of the time to: Plan but be flexible Be reasonable fit, so that you have the energy to walk for hours at a time Be Patient enough to wait for the right moment to get that shot. Develop good social skills so that you can converse with many people, often in a language which you can’t speak Be creative Be open to sharing. After all it’s no good taking photos if no one is going to see them!
In Summary
This introduction to Travel Photography should give you a taste of what’s involved in improving your travel or holiday experiences. You can see that gaining the skills that allow you to take good or, indeed, great photos will help expand your travels and give other people pleasure. Travel Photography is about the gear, the composition and being creative But it’s also about being in a place that’s not your home, adding depth to your experience and bringing home great photos that will live with your memories for a very long time!
Just click on any of the above images to view a larger version and for other options
Cruise boats in Ketchikan, Alaska. Click on the above image to view a larger version and for other options
In my recent post I discussed the Planning and Preparation for Travel Photos. Now we need to work out what we are going to do when we get there, hence part one of this travel photographer destination guide
Departure
Before we get there, we need to leave.
By now you would have worked out what equipment you are taking.
However, you are still not in the clear yet. Each mode of transport has different challenges.
Let’s look at the most common:
By Air
The days when we all had to remove our film from the camera and plead with the security staff to hand inspect it are almost gone.
There are of course still photographers out there that use film. And film, as in the past, can still get damaged by the X Ray security machine.
Asking for a hand inspection is still the best way to avoid the X Ray machine.
It’s a matter of numbers. One pass through the X Ray machine is not going to cause an issue. It’s cumulative, so the more times that a roll of film passes through an X Ray machine, the more likely damage will occur.
I worked on the 80/20 principle.
If the film only goes through one or two machines and avoids 8 then it should be good.
I will most likely be at home by the last one and it’s unlikely I will take the same roll of film away with me again.
Anyway, back to more commonplace challenges:
Weight
Weight is one thing to consider, especially if you are packing one or two DSLR’s and some decent lenses to go with it. Some airlines are hot on carry-on baggage weight so do your homework.
Personally, I don’t travel with my DSLR.
I have an OMD 1 MKII Mirrorless camera, which with the couple of pro lenses is still fairly heavy. But it’s nowhere near as heavy as my Canon 5D MKII and the lenses that go with that.
I’ve never had a problem with weight since I went with Mirrorless cameras.
If you think weight might be an issue, research the airline to find out how strict they are.
If they are strict, consider leaving something behind and hiring equipment at your destination.
Check in Baggage
But don’t put lenses or cameras in your check in baggage.
Why not? Well there is the faint chance of theft, but damage is much more common.
The last thing you want is to get there ready to take some great photos and find that your favourite lens is in bits.
Replacing a lens can be a challenge in some destinations.
If you must put something in your checked in baggage, put in your laptop with your data backed up.
If it’s broken you can buy any old one to get you by until you claim on your insurance.
Additionally, computer equipment is available almost anywhere in the world, not so, good camera gear.
By Car
On a long road trip there are only 2 challenges. What to do with your gear if you stop somewhere. And how much to take.
The answer to the first question is simple, don’t leave anything in the car.
In answer to the second question, don’t take so much, that you can’t take it with you when you do stop.
By Sea or other forms of public transport
Burano, Venice
Keep your gear with you and don’t have so much that you can’t carry it around with you.
Arriving
If your destination is in another time zone, I bet you changed your watch and if not automatic, your smartphone.
Most (including me) forget to change the time on cameras.
Sure, you can change it during post processing but like everything it’s much better to do it in camera. That way when you are post processing and you’re not sure why the light is so orange, you can check the time and see whether it was late or early in the day.
Don’t forget to reset back when you get home.
Customs
If you are going through customs you really shouldn’t have any issues as far as camera equipment goes.
Sometimes they might ask how many cameras you have or whether you have video camera.
But if you are honest and say that you need many cameras for the different tourist attractions, you should be OK.
Accommodation
You should have already organized your accommodation.
If you have followed my Planning and Preparation article, you will already have an idea of the ideal place to stay for you to get photos that you want.
Ideally, it’s best to stay as close as you can to your potential subjects.
That way you don’t have to carry everything and can easily drop back to your hotel if need be.
Of course, the other thing to be mindful of is transportation costs.
The further away from where you will spend most of your time the more time and money it’s going to cost you.
Something I like to do is ask for a room on the highest floor that my budget will allow me.
That way I can survey the surroundings and get orientation, plus maybe even get some great view shots. If that’s not possible, often hotels have roof top bars, swimming pools or Gyms that will give you a view.
Venice
Summary – Part one of Travel Photographer Destination Guide
Each mode of travel to your destination has its own challenges.
Remember don’t take too much equipment if you can’t have it with you all the time.
Or you don’t have access to a secure place to leave it.
Make sure you change the time in your camera if appropriate.
Select your accommodation carefully. Remember to take in to account how close it will be in relation to where you will spend your most time.
You don’t want to waste time and money going backwards and forwards to your hotel.
So this the end of part one of the Travel Photographer Destination Guide
Watch out for part two next week!
Do you want to bring home great images from your travels?Want to stick ’em on your wall and share them? Sign up below and get my travel photography tips newsletter
Any questions then please contact me here and/or please say hello at these places:
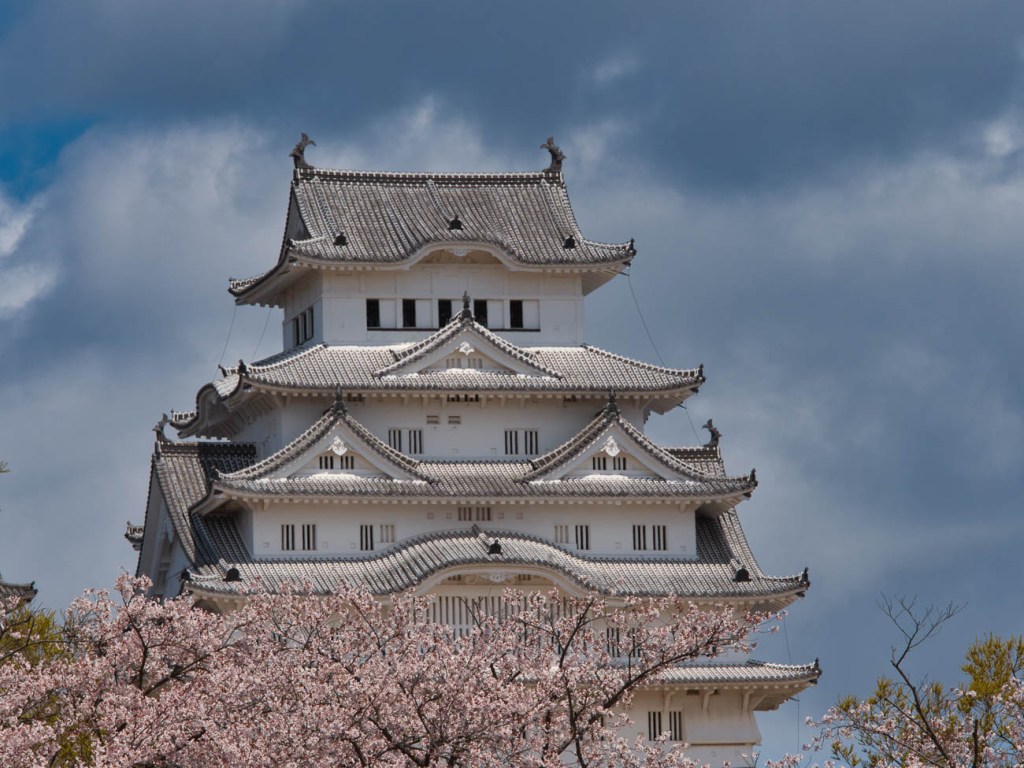
Himeji Castle and Cherry Blossoms, Himeji, Japan. Click on the image for a larger view
Travel Photography guide to Japan Part Two Kyoto and Hiroshima
In part two of this travel photography guide to Japan we go to Kyoto, Hiroshima and a couple of points in between as well as some general items to photograph. As I mentioned in Travel Photography guide to Japan Part one you need to make sure you are prepared. If you haven’t read that article, I suggest you, at the very least, go and read the first section.
What will you see that you might want to photograph?
I travelled from Tokyo south to Mountains,
Hiroshima and a few points in between before getting back to Tokyo.
The area I covered has a wide variety of
different subjects.
This area, I’m led to understand is similar, with exceptions, to the rest of the country. The following is by no means exhaustive. It’s the subjects that I found interesting from a photographic point of view. Others may have a different opinion.
I’ve only selected three items from each
area that have some degree of photographic interest.
Kyoto
Kyoto is probably Japan’s jewel in the
crown. It’s Paris or New York but on a much smaller scale.
Because of this you most certainly won’t be alone in wanting to capture all it has to offer. The tourists are many and the crowds are big but don’t let that put you off.
Kyoto is awesome!
Before I start on my suggestions on what to photograph. Let me suggest to you something not to photograph. Geisha Girls! Around the corner from Miyako Odori one of the theatres used for Geisha Dances we saw tourists at their worse. The girls had finished their show and were walking out to either other shows or to live their own lives. Still in full dress they had cameras shoved into their faces and some were obviously distressed by this aggressive behavior.
I didn’t get any photos of them because of that and the fact that these aggressors were in the way! So leave them be when there are lots of tourist around. You will just be compounding the problems for all of us.
Onto my suggestions of what to photograph.
Ponto-Cho area
Ponto-Cho is a small pedestrian street alongside the main canal and whilst it’s pretty during the day when the cherry Blossoms are out, it comes alive a night. The whole area is a fairyland of atypical Japanese buildings and narrow streets, especially across the canal in Gion. The best time to take images is at dusk or after dark. So you will need to make some compromises on whether you risk ‘soft’ images due to camera shake or have a bit of graininess in there, some of which can be removed later. It’s really all about architecture, people and culture.
Fushimi Inari-Taisha
South of the city itself is a little gem of a vast shrine complex. There around 10000 shrine gates (torii) that straddle the paths that lead up the mountain to different shrines. All are painted in Vermillion Red and you can spend hours here photographing different angles of the architecture of the gates, shrines, graveyards and other buildings. You may also get lucky and see priests conducting ceremonies at the actual shrines.
Torii shrine gates at the Fushimi Inari-Taisha complex in Kyoto. Click on the image for a larger view.
Arashiyama Monkey Park Iwatayama
I’ve put this in to give some variety. Architecture, people and culture are great but sometimes you need a break from photographing these subjects. And what better way than to photograph Snow Monkeys. It’s a steep climb up to where most of them are but you also get the bonus of some great views across Kyoto when you get there..
So, it’s wildlife and landscapes form the Monkey Park.
Additionally there is also the famous Golden Temple but you won’t have much time to photograph that as they move you through pretty quickly so I’ve left it out. But it’s still worth a visit.
Himeji
A day trip from Kyoto or a stopover on the way to somewhere else, Himiji is all about the castle. The outside of the Castle is extremely photogenic and if you catch it on a clear day it’s a sight for sore eyes. The interior is not so photogenic, so you are better off zooming in to capture small points of interest.
Next door is Koko-En, reconstruction of a Samurai quarters. Well worth a visit as it’s all about gardens and culture.
Nara
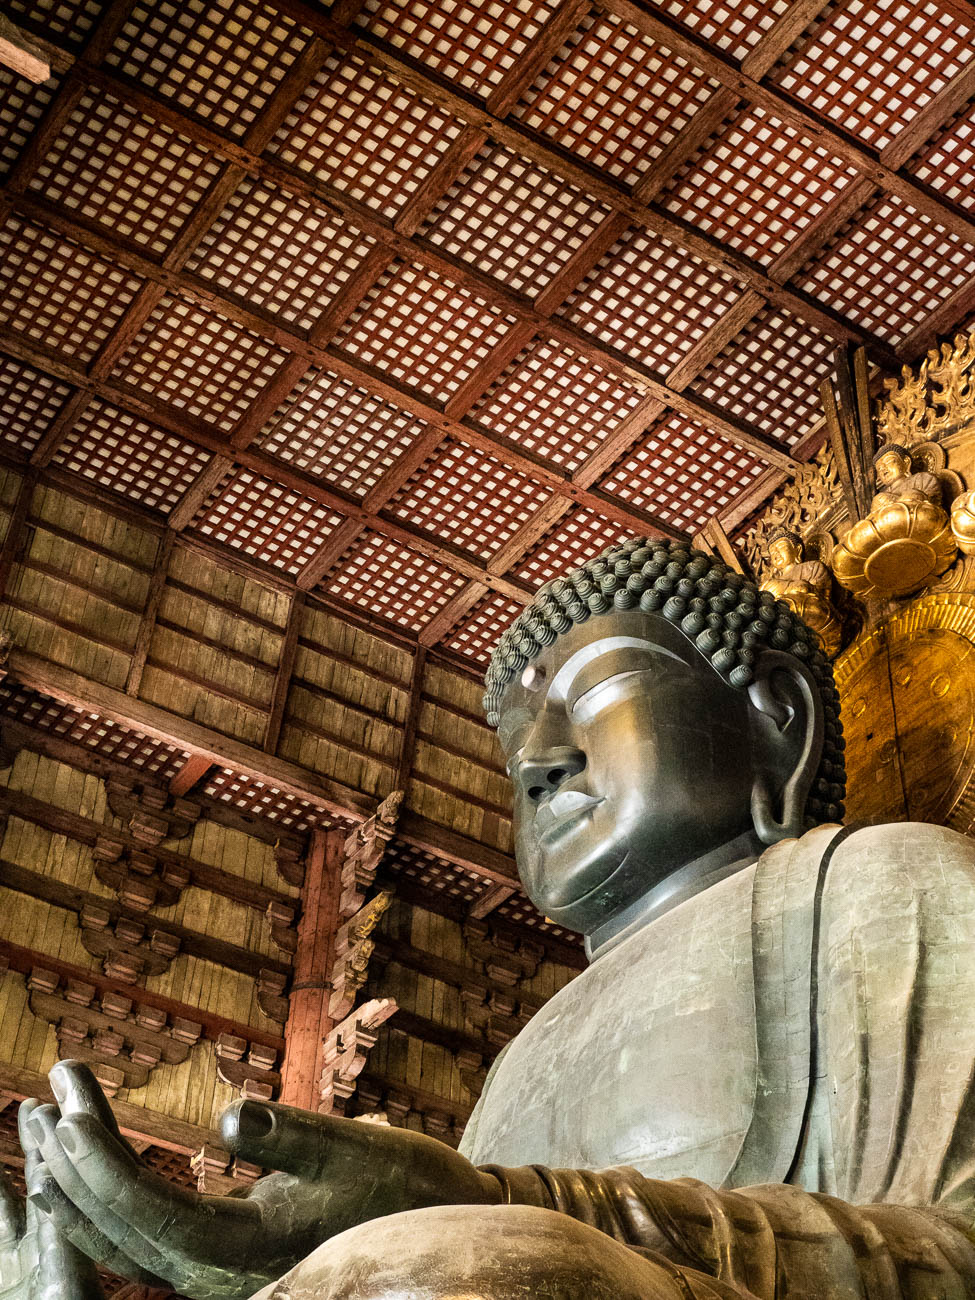
Again, a day trip from Kyoto. Its main attraction is Todai-ji a temple which houses the great Buddha. There are other sights and there is around 1200 deer there as well. So it’s really all about architecture, culture and little bit of wildlife if can’t help yourself and want to take pictures of bambi.
The great Buddha stature in the Todai-ji Temple at Nara. Click on the image for a larger view
Hiroshima
There is lots to see and do in Hiroshima.
But I’ve concentrated on 2 sights
Peace memorial Park and surrounds
Photography aside this is a sobering and confronting area. There are a few memorials in the park and a museum. There is also what’s left of a building called Atomic Bomb Dome. Light is important here as the area lends itself to dawn and dusk light. That’s not to say you can’t take pictures during the rest of the day as there is plenty of shade from the trees in the park.
Miyajima
A lengthy ferry ride from Hiroshima is the island of Miyajima one of Japan’s most popular tourist spots. There are lot activities available there but from a photography subject point of view, there are two main attractions.
The Torii (shine gate) that sits in the water. Depending on what time of day you get there, you may well have to queue to take the popular front on view. Take that one but also look for side views and reflections.
Misen at 530M is the Mijajima’s highest spot and you can get there via ropeway and a bit of a hike. Terrific views of the ocean and mountain ranges beyond are worth the trouble.
After you finished go find the Miyajima Brewery. Great beer with water views and nice food.
Summary for Travel Photography Guide to
Japan Part Two Kyoto and Hiroshima
Kyoto is Japan’s tourist equivalent to Paris, New York or London with some much diversity
Himeji and Nara make for great photographic stopovers.
Hiroshima is a thought provoking and promotes a different type of photography. Don’t forget to get to Miyajima
Do you see yourself taking some great travel photos that you can share or display? Or can you see yourself reliving your travel experience by bringing home some emotive travel photos? Maybe you aspire to getting your travel photos published.
If one or all of these is YOUR goal, I can help. Sign up in the box below to subscribe to my exclusive Travel Photo Tips Newsletter. Remember if you want to take great travel photos
that you can share and display.
that help you relive your travel experience
that give you a chance to have your travel photos published then sign up below and subscribe to my exclusive Travel Photo Tips Newsletter.
but I will
highlight some of the things I recommended there as they are important.
Depending on where you are travelling, I would recommend you take the following:
Everywhere:
Camera Body or Compact Camera with Optical Zoom Lens
Lots of empty memory cards.
It’s one of the most photogenic countries in the world regardless of what time of year you go. Take lots of 32GB Memory cards you’ll need them.
More than one charged battery for the same reason as having lots of memory cards. Have one in the camera and 2 charged spares
A lens cloth
Filters, if you use them, particularly Polarisers and Neutral Density,
If you intend using only a smartphone you will need lots of storage. See How to Back up your Travel Photos. to see the best ways to back up a Smartphone.
You also
need to be aware that, with only a smartphone, you won’t have the flexibility
to get shots of a lot of what Japan has to offer.
Cities
There’s lots of subject matter in Japanese cities. So depending on your interests you need the following, if you have them. If you don’t, put them on your wish list if you have plenty of time:
People and Street – 50 or 80MM Prime Lens plus a 28-150mm Telephoto
Journalistic or lifestyle – 80 or 100mm Prime Lens plus a Telephoto Lens of 28-150mm
Architectural – 24-100mm Telephoto and a 35 or 50mm ‘Fast’ Lens i.e. F1.2 or 2.4.
Restaurants, Bars etc. – For low light plated food, a wide angle or 50mm lens with a large maximum aperture of F1.2 or 2.4.
Outside of cities
Landscapes – Tripod and a 24mm Wide-Angle plus a Telephoto with a minimum focal length of 100mm
Culture – 80 or 100mm Prime Lens plus a Telephoto Lens of 28-150mm
Again, this is a wish list. If you only have a telephoto because you have a compact camera, or you can’t afford a prime lens then you can get by. A Telephoto Lens plus an 80mm Prime Lens ticks the 80/20 rule.
What will you see that you might want to photograph?
I travelled from Tokyo south to Mountains, Hiroshima and a few points in between before getting back to Tokyo. The area I covered has a wide variety of different subjects. This area, I’m led to understand is similar, with exceptions, to the rest of the country.
The following is by no means exhaustive. It’s the subjects that I found interesting from a photographic point of view. Others may have a different opinion.
I’ve only selected three items from each area that have some degree of photographic interest.
Tokyo
Tokyo is everything you expect and more. It would take a lifetime to discover everything it has to offer
Shinjuku Station
The World’s busiest transport hub where nearly 4 Million plus passes through every day. Here it’s worth watching and waiting to get some good people shots.
Shibuyu Junction
It’s humanity at its most compressed as literally thousands of people cross the junction every day. At its busiest nearly a thousand people cross at one time. Again, it’s people but don’t expect to get portraits it’s way too crowded for that.
Tsukiji Market
Like food?
Like to take food close ups and people involved with serving it and cooking?
Then Tsukiji is the place. Food is also pretty good if you want to put down and
rest your overworked camera.
A boat of Tuna and Otoro served up in Tokyo’s Tsukiji Market. Click on the image for a larger view and other options
Mount Fuji
Away from
the madness that is Tokyo, Mount Fuji is usually viewed from 2 sides:
Kawaguchi-Ko
The centre of the area called Fuji Five Lakes, Kawaguchi-Ko is a very busy place and the town itself is ok. What it’s famous for is the views of Mount Fuji. There are 2 well know photos locations of Mt Fuji and both are near Kawaguchi-Ko.
Fuji-Sengen-jinja
is known for the photos of the shrine with the backdrop of Mt Fuji.
Mt Fuji from the famous shrine of Fuji-Sengen-jinja Click on the image for a larger view and other options
On the north side of Lake Kawaguchi-Ko is another famous spot to capture Mt
Fuji and its reflection on the lake. Sadly, it was too windy when I was there,
so I couldn’t replicate that shot.
Hakone
Whilst the view of Mt Fuji from Hakone is not so well known. It’s much smaller (and quieter) than Kuwaguchi-Ko and the views are much more varied.
Take the Hakone circuit which is a combination of different transport modes such as cable car, ship, narrow-gauge rail, gondola and bus. On this circuit you will see lots of different scenery and some small towns all of which provide ample reward for the travel photographer. More info can be found here
Watch out for the next article on Japan: The Travel Photography guide to Japan Part two Kyoto and Surrounds
Summary for Travel Photography Guide to Japan Part One Intro, Tokyo and Mt Fuji
Japan has that WOW factor that you want to make sure you capture with your travel photos
You need plenty of Battery Power and Storage
To give you the best opportunity to take some great photos you need more than just a smartphone.
A removable lens camera will do that for you
Tokyo has many, many interesting a diverse attractions but you can’t see them all
Mt Fuji is as spectacle in the flesh as it looks. Take lots of shots from different locations and angles.
Do you see yourself taking some great travel photos that you can share or display? Or can you see yourself reliving your travel experience by bringing home some emotive travel photos? Maybe you aspire to getting your travel photos published.
If one or all of these is YOUR goal, I can help. Sign up in the box below to subscribe to my exclusive Travel Photo Tips Newsletter.
Remember if you want to take great travel photos
that you can share and display.
that help you relive your travel experience
that give you a chance to have your travel photos published
then sign up below and subscribe to my exclusive Travel Photo Tips Newsletter.
Finding the best Camera for your Travels Part 3 DSLR
In The basics of camera equipment – Best camera equipment for travel photography, I mentioned That “despite those who say its’s not about the gear, you need a camera that will suit your style and objectives.” This is especially true when you are off travelling. Having a camera that you are comfortable with and that can help you take photos that you will proud to bring home with you is essential.
Maybe you aspire to getting your travel photos published. If one or all of these is YOUR goal, I can help. Sign up in the box below to subscribe to my exclusive Travel Photo Tips Newsletter.
Remember if you want to take great travel photos
that you can share and display.
that help you relive your travel experience
that give you a chance to have your travel photos published
then sign up below and subscribe to my exclusive Travel Photo Tips Newsletter.
Finding the best Camera for your Travels Part 2 Mirrorless
In The basics of camera equipment – Best camera equipment for travel photography, I mentioned That “despite those who say its’s not about the gear, you need a camera that will suit your style and objectives.” This is especially true when you are off travelling. Having a camera that you are comfortable with and that can help you take photos that you will proud to bring home with you is essential.
In the second of this series I will defer to some reputable camera reviewers who can help guide you. Only two this time as DP Review don’t distinguish between SLR’s and Mirrorless
So, without further ado please read this one from Camera Labs below
Do you see yourself taking some great travel photos that you can share or display? Or can you see yourself reliving your travel experience by bringing home some emotive travel photos? Maybe you aspire to getting your travel photos published. If one or all of these is YOUR goal, I can help. Sign up in the box below to subscribe to my exclusive Travel Photo Tips Newsletter.
Remember if you want to take great travel photos
that you can share and display.
that help you relive your travel experience
that give you a chance to have your travel photos published
then sign up below and subscribe to my exclusive Travel Photo Tips Newsletter.
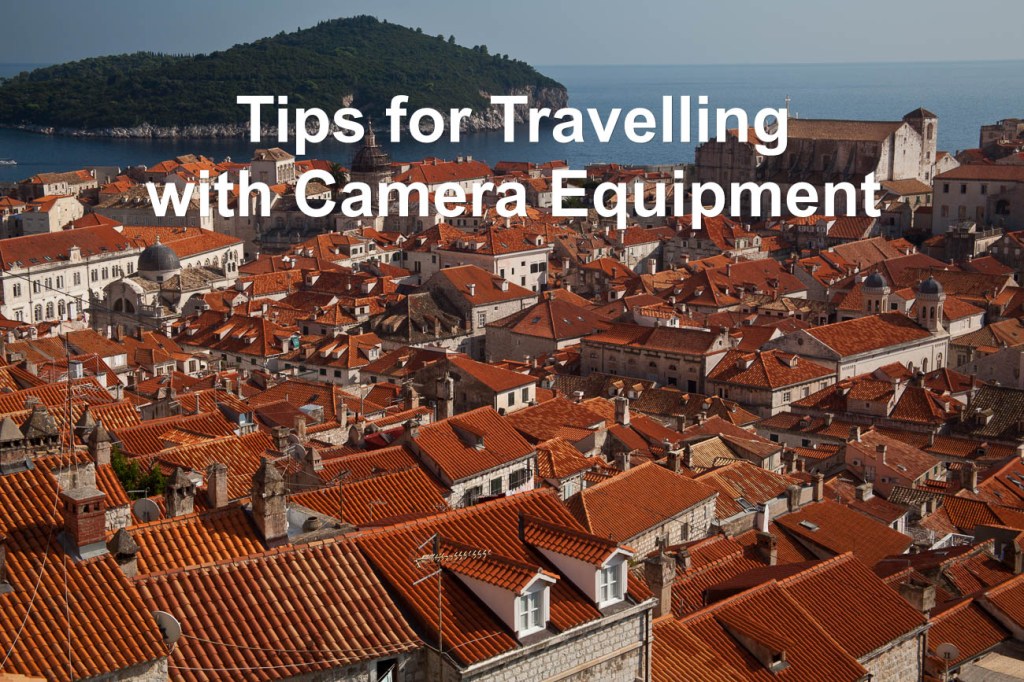
Rooftops of Dubrovnik’s old town. click on the image for other views
If you are off on some travels soon and you want to ensure that you make best use of photographic opportunities you will discover, it’s worth having a plan. Especially about the Camera Equipment you are going to take with you.
However, it’s always worth getting other perspectives.
Rooftops of Dubrovnik’s old town. Used extensively in the Game of Thrones TV series. Click on the image for a larger view
This episode of the podcast TWIP (This Week in Photo) is called “Why you be trippin”. In it Frederick the host, is joined by 2 travel photographers, frequent-flyer Jeff Cable and globe-trotting photographer Giulio Sciorio. They discuss what camera equipment to take with you, and what to leave at home. They also reveal some secret packing tips that may just change the way you think about luggage!
Do you see yourself taking some great travel photos that you
can share or display?
Or can see yourself reliving your travel experience by
bringing home some emotive travel photos?
Maybe you want to get your travel photos published.
An aerial view of a cafe and it’s tables settings in Dubrovnik, Croatia. Click on the image for a larger view
If one or all of these is YOUR goal, I can help.
If you go to the form below you can sign up and get my free eBook “9 ways to improve your Travel Photography”.
At the same time, you will also subscribe to my Travel Photo
Tips Newsletter which is exclusive to those who have signed up.
Remember if you want to take great travel photos
that you can share and display.
that help you relive your travel experience
give you a chance to have your travel photos
published
Then subscribe to my Travel Photo Tips Newsletter and for your trouble get my eBook “9 ways to improve your Travel Photography”
Any questions then please write your comments below or contact me here
Now that you’ve got down this far can I ask a favour?
Please share this with anyone who is going on a trip and
wants to take and bring back some great travel photos.
You’ll not only be doing both them and me a favour.
In The basics of camera equipment – Best camera equipment for travel photography, I mentioned That “despite those who say its’s not about the gear, you need a camera that will suit your style and objectives.” This is especially true when you are off travelling. Having a camera that you are comfortable with and that can help you take photos that you will proud to bring home with you is essential.
In the first of this series I will defer to some reputable camera reviewers who can help guide you.
Do you see yourself taking some great travel photos that you can share
or display?
Or can you see yourself reliving your travel experience by bringing home some
emotive travel photos?
Maybe you aspire to getting your travel photos published.
If one or all of these is YOUR goal, I can help. Sign up in the box below to
subscribe to my exclusive Travel Photo Tips Newsletter.
You’ll also get my free eBook “9 ways to improve your Travel Photography”.
Remember if you want to take great travel photos
that you can share and display.
that help you relive your travel experience
that give you a chance to have your travel photos published
then sign up below and subscribe to my exclusive Travel Photo Tips
Newsletter and for your trouble get my eBook “9 ways to improve your Travel
Photography”.
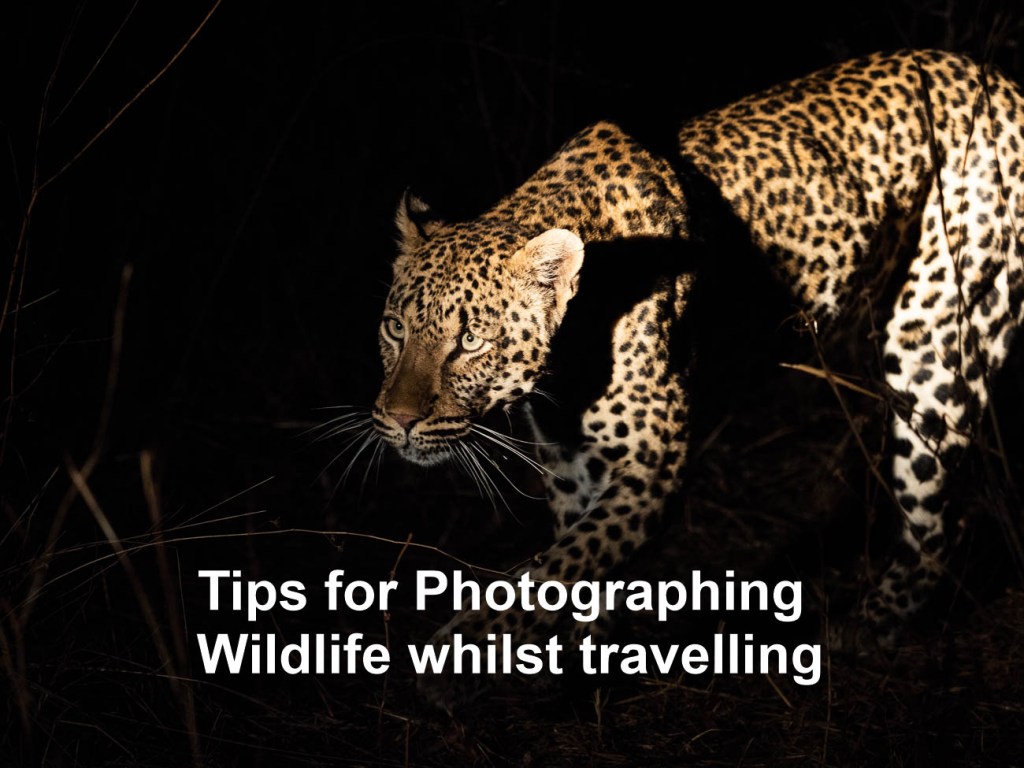
Leopard stalking his prey in South Luangwa NP in Zambia
In Tips to Prepare for Photographing Wildlife while Travelling I gave you some handy tips on preparing for photographing wildlife while travelling. Now it’s time to give you some tips on actually photographing wildlife whilst travelling.
As I stated in the previous article travellers like us will never reach the level of expertise of a wildlife photographer. Of course, if you aspire to be a wildlife photographer that’s different. But in general, there are photographers out there who specialise in photographing wildlife. They are meticulous in their preparation. They leave almost nothing to chance, have lots of patience and spend a huge amount of time trying to get that “shot”.
So now to the tips
Puku near a riverbed in south Luangwa NP Zambia
Basic equipment.
1. Zoom or Telephoto lenses. This is non-negotiable. Sure you can take
pictures without a zoom if you have a long fixed or prime lens. But that’s
restrictive as you can only be a set distance away. Having a long zoom of at least
300mm (in 35mm) gives you flexibility.
2. Either a DSLR or Mirrorless camera so you can swap out lenses. You
also get better control of the exposure and focus with an interchangeable lens
camera.
3. Smartphone? Well unless you going to get really close, which in most
cases is not recommended, leave it for the happy snaps.
4. If you want to get serious get a fast write speed memory card.
Nothing worse than shooting away only to find the camera is buffering.
5. Weather protector like a hood or a Rain
and Dust Cover for your camera. Going on safari or wildlife spotting can
often be dry and dusty or wet and raining. Don’t forget to protect the rest of
your gear as well. Most backpacks come with rain covers that offer a reasonable
amount of protection against both the rain and dust.
Settings:
1. Aperture Set to wide open (lowest F-Stop). And on Aperture priority
(A). Why?
A couple of reasons: You want to make sure that you eliminate any background distractions as much as possible. You also want to allow plenty of light in. See also no 2.
2. ISO
Set to auto Even in the tropics or sub tropics, light can vary from bright sunshine to dark shadows. More often than not, animals tend to be in the shadows. Where it’s quite dark you may need to override the auto and set the ISO to an even higher setting.
3. Shutter
As you should have the camera set on Aperture priority the shutter will
take care of itself. Unless of course you are looking to try some advanced
motion techniques which is outside the scope of this article.
4. Focus
Think you can take wildlife photos with your camera set to manual focus? Think again! You need your focus set to auto. Animals are always on the move. Even if they are lying down, they can jump up quickly leaving you struggling to maintain focus on auto, let alone manual
Lilac breasted roller in South Luangwa NP Zambia
5. Frame Speed
Set your frame speed to continuous or sequential or whatever your camera’s equivalent is. You’ll need to do some controlled spray and pray in some instances. Note: Check the camera default setting for continuous. I didn’t check the number of frames per second on a new camera. I ended up with 100 shots of an elephant hardly moving, as the default setting was 60FPS.
Last tip: GET UP CLOSE
There are some basic rules in getting up close to wildlife:
1. Be very careful in choosing what wildlife to get close to. They are
WILDlife which means they can be unpredictable. So stay safe
2. Where possible use a telephoto lens to get a close up shot.
3. Be quick. Wildlife is always on the move. If you are close you will
need to have your wits about you. It’s easy to get distracted when you are
behind the camera.
4. Consider using a shutter speed of 1/250 to reduce the chance of blur
5. As I mentioned in point 5 of the previous section, it’s worth
setting your frame speed on continuous or sequential.
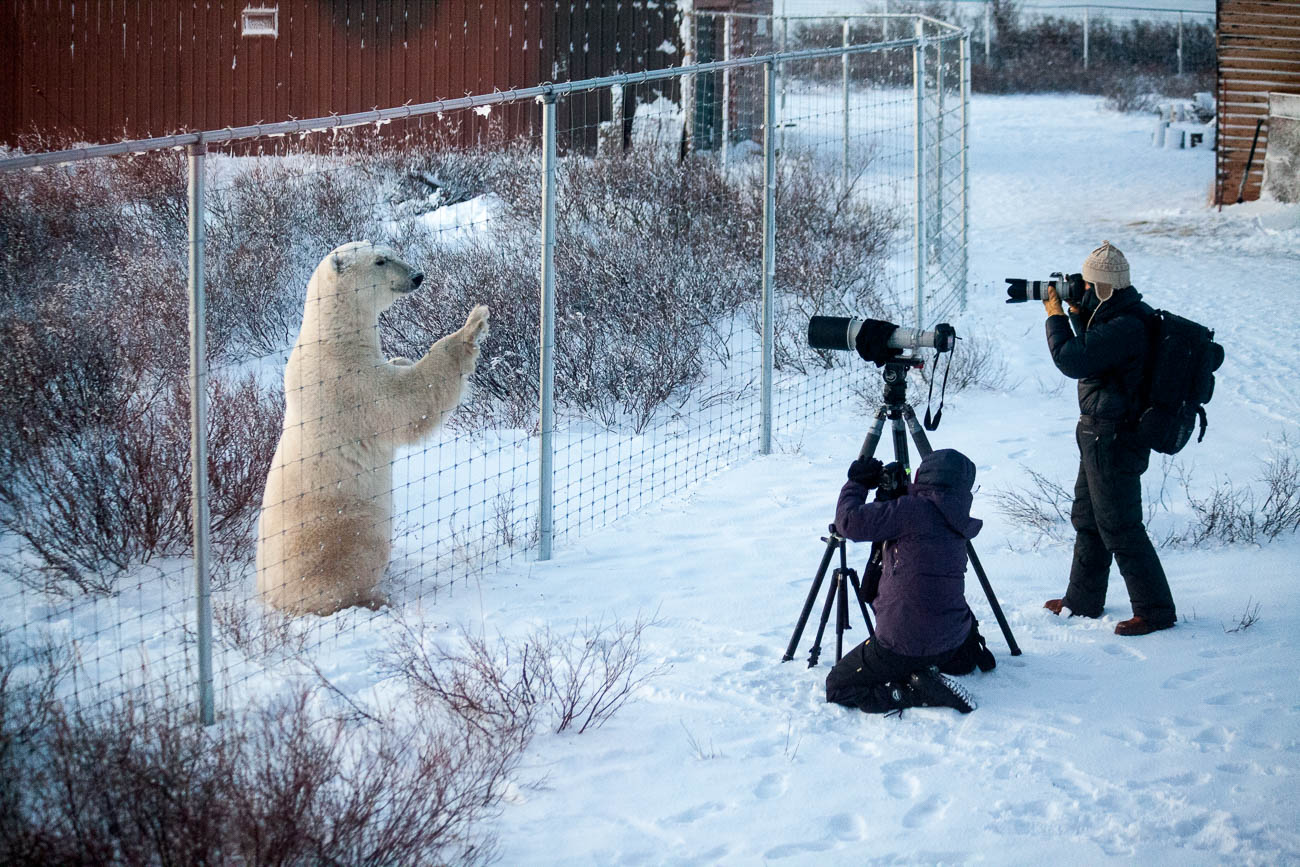
6. Sometimes the wildlife is behind a fence or in a cage, or you are
the one in a cage or compound, as I’ve experienced. In these cases, it is
possible to reduce or totally eliminate the wire of a fence or cage in a photo,
by going up close. Same applies to any glass enclosures found mostly in Zoos.
Get up close and have your lens, or lens hood, touching the glass to reduce
reflections.
Hyaena in South Luangwa NP in Zambia
Extra tip on this one is that you can also use a polariser filter to reduce
reflections
Summary of 16 Tips for Photographing Wildlife whilst travelling
· Unless you are prepared to invest in a lot of time and patience it is
extremely unlikely that you will consistently take ‘National Geo” quality
photos
· For best results use an interchangeable lens camera with a Zoom
lenses
· In most cases it’s best to have a wide-open aperture (small F-Stop),
ISO set to auto, Focus on Auto and Frame speed should be set to continuous
· Get in close, if not physically then with your telephoto zoom lens
Thanks for reading this article
Do you see yourself taking some great travel photos that you can share
or display?
Or can you see yourself reliving your travel experience by bringing home some
emotive travel photos?
Maybe you aspire to getting your travel photos published.
If one or all of these is YOUR goal, I can help. Sign up in the box below to
subscribe to my exclusive Travel Photo Tips Newsletter.
You’ll also get my free eBook “9 ways to improve your Travel Photography”.
Remember if you want to take great travel photos
that you can share and display.
that help you relive your travel experience
that give you a chance to have your travel photos published
then sign up below and subscribe to my exclusive Travel Photo Tips
Newsletter and for your trouble get my eBook “9 ways to improve your Travel
Photography”.
Whilst we tend to think of photographic
equipment as items that closely assist in taking travel photos. One piece of
equipment is rarely mentioned.
What is that?
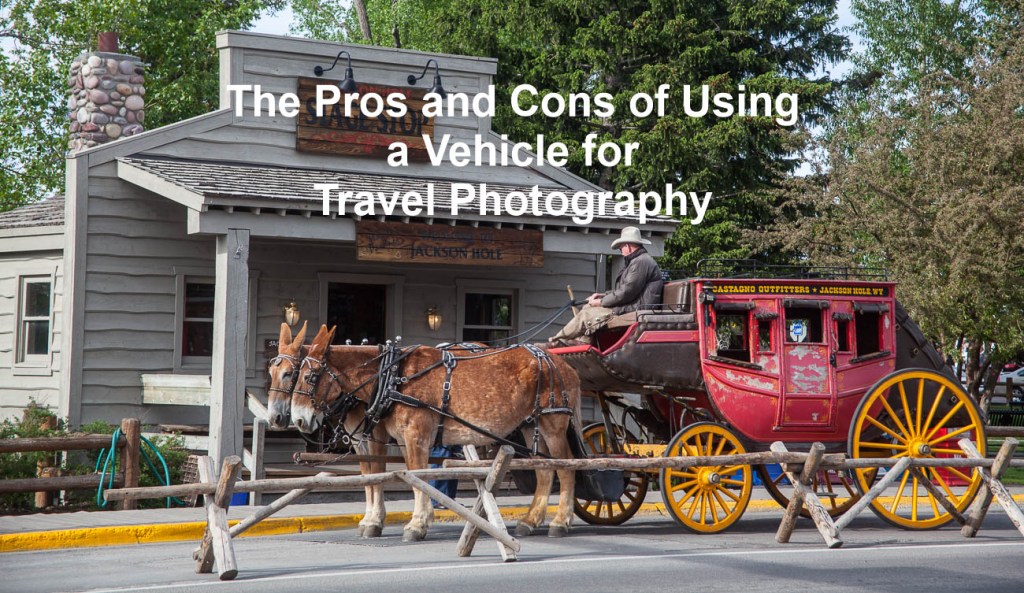
Well one that should be the most expensive,
a motorized vehicle.
In the video below from Mitchell
Kanashkevich (website) he does
a great job of explaining the pros and cons of having wheels whilst travelling
and taking travel photos.
There are some countries where driving
yourself can be dangerous and others easy.
But a lot depends on your own comfort
level.
I’ve met people who won’t drive a vehicle
in any country that doesn’t drive on the same side as their home.
And then I’ve met others who would drive
anything anywhere with no concerns at all.
I tend to think that it’s horses for
courses.
I’ve hired and bought vehicles in several
different countries but also used public transport.
I adopted the latter approach by using nothing but public transport for 3 weeks in Japan last year.
Those bullet trains are unbelievable!
The Shinkansen Bullet Train in Japan
Enjoy!
Do you see yourself taking some great travel photos that you can share or display?
Or can see yourself
reliving your travel experience by bringing home some emotive travel photos?
Maybe you want to get
your travel photos published.
If one or all of these
is YOUR goal, I can help.
If you go to the form below you can sign up and get my free eBook “9 ways to improve your Travel Photography”.
At the same time, you
will also subscribe to my Travel Photo Tips Newsletter which is exclusive to
those who have signed up.
Remember if you want
to take great travel photos
• that you can share and display.
• that help you relive your travel
experience
• give you a chance to have your
travel photos published
Then subscribe below to my Travel Photo Tips Newsletter and for your trouble get my eBook “9 ways to improve your Travel Photography”
Any questions then please write your comments below or contact me here
Now that you’ve got down this far can I ask a favour?
Please share this with
anyone who is going on a trip and wants to take and bring back some great
travel photos.
Seals and Icebergs, near Sawyer glacier in Tracy Arm Fjord, Alaska. Click on the image for other viewing options.
One of the most
exciting and challenging genres is Wildlife.
When we travel, we often find ourselves in a situation where there is an opportunity to take wildlife pictures. This is the first article of two about this subject. Part two is Tips for Photographing wildlife whilst travelling. This article offers some tips on the preparation for photographing wildlife while travelling.
First things first
Before we begin.
It’s important to understand that there are photographers out there who specialise in photographing wildlife. They are meticulous in their preparation and leave almost nothing to chance. Unless you aspire to be a wildlife photographer you will never reach their level of expertise. Sure, you might get lucky and get a great shot by being at the right place at the right time. But in the main you will find wildlife photography disappointing if you think you can get a winner every time.It’s a bit like golf. Unless you practice continuously then most of your golf shots will anything from poor to just OK. What keeps you coming back is that one great shot you hit every 5th or 6th round.
So it is with Wildlife Photography.
Wildlife photography
takes a lot of patience, time and it has to be said, luck, to come home with
some great shots. Animals are elusive and do not behave as you would like them
to.
Having said all that,
being on safari or a wildlife tour with a camera is an exciting experience. One
that cannot be measured by the number of great photos you get.
Puffin in the Alaska SeaLife Center in Seaward, Alaska. Click on the image for a larger view and other images
Some Basic Preparations
You should know beforehand, whether your destination will offer you the chance to take some wildlife photos.
Of course, if you are
on the road without any thought on when and where you are going to travel to
then that may not be the case.
So, here’s a few things to think about.
Equipment
Most of the wildlife
is outside Europe and usually in a developing country or in areas that are
remote and away from major population centres.
That means that often the only support for your camera equipment is what you take with you. No good trying to buy a spare battery or memory card when you are in the Masai Mara photographing Lions. That’s not to say that consumables like memory cards aren’t available. They are, but they may have been sitting on a shelf in the heat for some time. There’s also every chance that you will pay a lot more for them than at home. Most photographic electronics are made to a high standard set by companies in developed countries. That can make them expensive elsewhere. It pays to take the items with you I’ve listed in “Before setting off” section of The Travel Photographer Destination Guide Part Two.
Destination
If you are going somewhere where there’s a good chance that you will be photographing wildlife, you need to do the research to find out the following:
How far away will the wildlife be?
On my visit to Yellowstone NP in Montana USA, I wanted to take photos of Wolves. Whilst I did research and found out that they can be extremely elusive, I wasn’t prepared for how elusive. The only ones I saw were that far away, that you needed a strong telescope to see them. There was no way even with the 200-400mm telescopic lens I had, that I would be able to take any photos of wolves that day.
What’s the frequency
of spotting wildlife?
Depending on your
timing and budget it may be too difficult to see wildlife.
At certain times of the year in the African Plains the grass can be too long to see anything. Some of the Northern American Parks are closed in winter. If not closed, restricted due to winter weather. No good being in Churchill, Canada to see Polar Bears in summer. They won’t be there!
Will I be travelling
around the wildlife Parks in a group or can I use my own wheels?
There are two trains of thought on this. I’ve done both. Sometimes you have no choice but to go on a group tour.
In Denali National Park in Alaska the only way to get into the Park is by a bus. You don’t have the choice of using your own transportation. In some of the Southern African parks, like Kruger and Etosha, driving around in your ‘own’ vehicle is easy.
How close to the
wildlife will you get?
Using the Yellowstone
example again. I had been used to photographing wildlife in Southern and
Eastern Africa. There you can get up close due to the number of roads (tracks)
that took you into areas where the wildlife was likely to be.
Not so in Yellowstone, there are only a few roads and places to stop. Trying to get up close was not the same. You had to stop and wait for the Wildlife to come to you.
What wildlife am I
likely to see?
This is a big question
as often this will dictate what equipment you will take.
Obviously, Africa has
all the large animals.
But if you are going
whale watching then that cranks it up a notch.
At the opposite end, Australia has some of the most diverse wildlife on the planet, but the majority is small and quite hard to see. If you are into Birds and what to get some close-up shots, then you will need to plan accordingly.
Elephant in South Luangwa National Park in Zambia. Click on the image for a larger view and other images
Summary for Tips to prepare for photographing wildlife while travelling
Understand
that being a casual Wildlife photographer does not mean you will get great
shots
Be patient
and allow time to give yourself every chance to get good shots
Take as
much equipment that you think you will need with you
Research
your destination/s for Wildlife Photographic opportunities.
Thanks for reading this article
There must have been
something that piqued your interest.
Is it that you see yourself taking some great travel photos that you can share or display? Or is it you can see yourself reliving your travel experience by bringing home some emotive travel photos? Maybe you aspire to getting your travel photos published.
If one or all of these is YOUR goal, I can help. If you sign up in the
box below, you’ll get my free eBook “9 ways to improve your Travel
Photography”. At the same time, you will also subscribe to my exclusive Travel
Photo Tips Newsletter.
Remember if you want
to take great travel photos
that you can share and display.
that help you relive your travel experience
that give you a chance to have your travel photos published
then sign up below and subscribe to my exclusive Travel Photo Tips Newsletter and for your trouble get my eBook “9 ways to improve your Travel Photography”
Next up: Tips for Photographing Wildlife whilst travelling
Any questions? Please write your comments below or contact me here and please say hello at these places:
Elliot Bay, Seattle Washington USA. Click on image for a larger view and other options
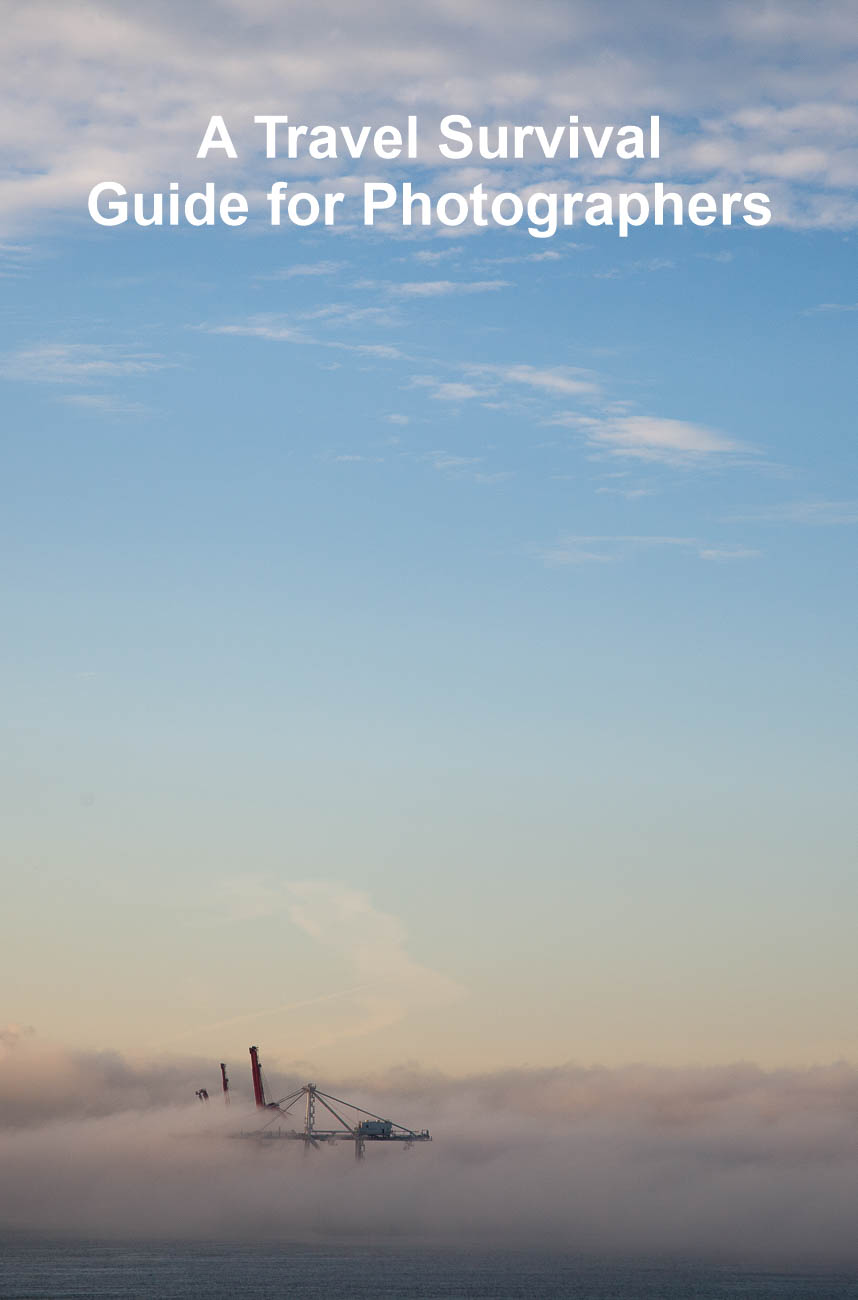
When we travel there are lots of challenges on the road. And the longer you travel the more challenges you face. In this travel survival guide for photographers, I cover most of the common challenges. I also cover a few of the least know but equally as important challenges as well
Weather
We have no control over the weather whilst travelling. But we do have control on how we manage it. There are various situations that need us, as potential photographers to have our wits about us. So, we need to adopt some special precautions.
Cold
A few years back I went on a Polar Bear safari near Churchill in North East Canada. It was November and the first day or so was at 5°C which was reasonably mild. The cold came quickly! It reached around -20°C for the next 3 days.
What I learnt is that whilst we could be warm inside the lodge, we couldn’t afford to have our cameras warm. It was OK to bring them in overnight, although even then they had to be in the coldest part of the lodge. But when we had much shorter breaks, like lunch time, we had to leave them hanging up outside. Why? If you wear glasses, then you will know that when you walk into a warm building from a cold outside area, your glasses steam up. The same happens to your camera except it will need a lot more time for the moisture to dry. If you took your camera back out after only half an hour or so and the temperature is low enough, the moisture will freeze. What can happen then is that it can damage not only your lens but your sensor as well, not to mention other working parts.
Polar Bear outside Diamond Creek Lodge near Churchill Canada
So, be very careful with your camera equipment and I mean a smartphone as well, in very cold weather. Give your camera plenty of time to acclimatise in both the heat of your digs and the outside cold.
Humidity
Leading on from cold challenges, humidity can also be a danger to
cameras.
Again, to use the same analogy of glasses but now in reverse. If you go outside
from an airconditioned space into high humidity, chances are that they too will
fog up.
When I was in Darwin in the North of Australia I was out walking early in the
morning.
I went to take a shot and guess what?
You guessed it.
What I saw through the lens was just fog! I had forgotten that that whilst it
didn’t seem too humid, there was enough moisture in the air to condense onto
the cold lens.
It took around 10 minutes for it to clear.
I also had my smartphone with me which also had fogged up.
But a small lens clears a lot quicker, so I didn’t end up missing the shot!
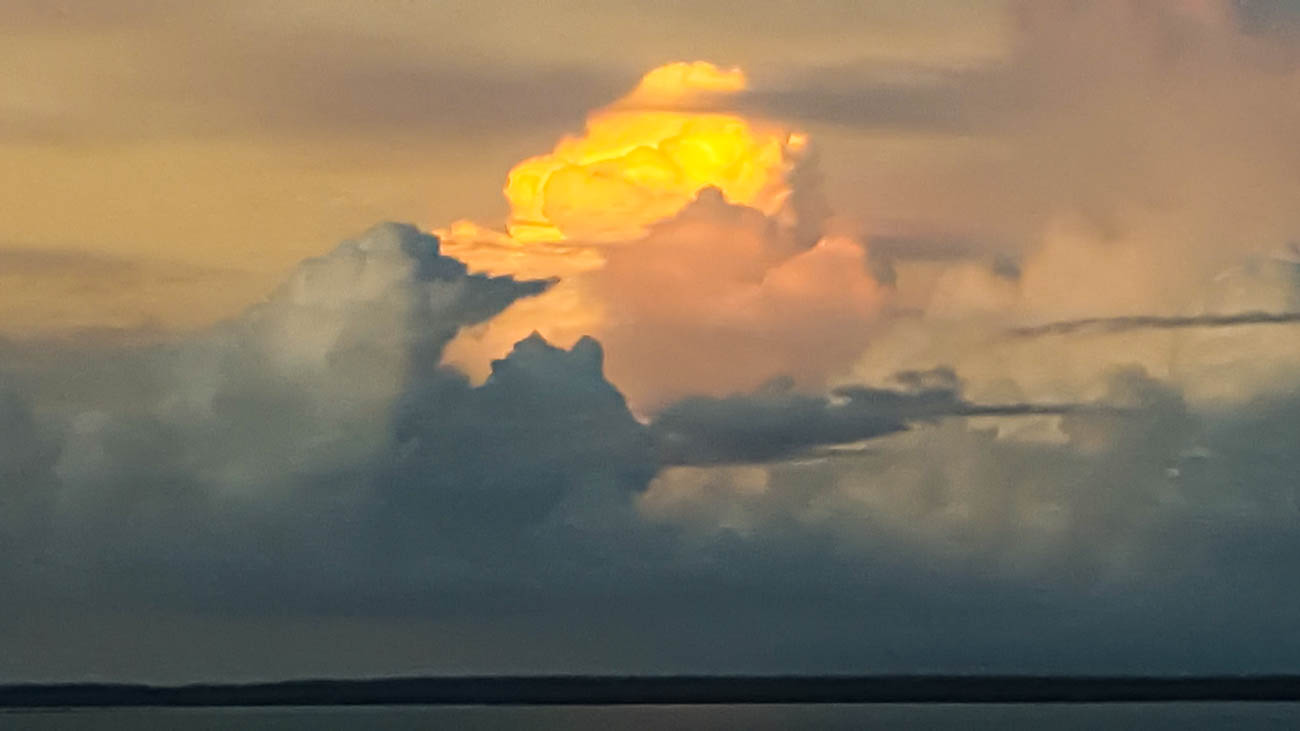
Sky above Darwin, Australia, during the the wet season
So how do you prevent this from happening? Get organised! If you know you are going to go outside into the humidity with your camera, put it out there at least an hour before you intend using it. You can do this by taking it outside for coffee or breakfast or putting it out onto your balcony.
Heat
In the heat and by the heat I mean anything above 30°C, everything gets hot. Whilst it won’t necessarily affect its picture making capability, Cameras don’t like heat. Most cameras are black which means they absorb the heat and can then be too hot to handle. Not only that but the electronic circuitry in a camera or smartphone is not made to withstand high temperatures. Whilst most cameras have an operating range of 0°C – 40°C, the recommended temperature for using a camera is a mere 25°C!
Dust
Dust is the enemy of all cameras. There are some high-end cameras that
are meant to be sealed to prevent dust ingress, but I doubt very much if that
is 100%.
As we all know from our personal interactions with dust, it comes in many forms
and can get into everything.
However the sort of dust I’m talking about is the particles you find on a beach
or in the desert. Sometimes the fine dust can be found in old properties where
it has been disturbed.
It’s essential that dust doesn’t get into the camera or smartphone.
Yes, smartphones are not immune.
Katelious beach in Kefalonia. Click on image for a larger view and other options
If I’m taking pictures on the beach or on sand dunes, I always have a
Ziplock plastic bag that I can quickly put the camera into. It’s not just wind
or sandstorms you need to be careful of. Vehicles, people and animals can all
churn up enough dust to make a big nuisance.
Wet
As I mentioned before there are some Cameras that are sealed against
Dust. Well the same cameras are also ‘water resistant’. Again, that’s not
foolproof. Common sense tells us that we should keep any electronic gear away
from water. So be careful around bodies of water like swimming pools, rivers,
lakes etc.
Be especially careful around the ocean, as sea breezes have minute
water particles as well.
Rain, on the other hand, is little bit harder to protect gear from. Not
to mention that it may not be the right time to take photos when it’s raining.
Mind you I have got some good shots during rain showers. There are covers that
you can buy like the Ruggard
RC Rain Cover that will protect your camera and allow you to keep shooting.
You can also make your own with a plastic bag or Ziplock bag.
Batteries
Batteries don’t like extremes of temperature, water or humidity, so
make sure you protect them from the elements as best as possible. They tend to
discharge much quicker and can charge a lot more slowly in temperature
extremes.
Theft
I covered this briefly in 7
Travel Photography Workflow Tips to use on the road.
I firmly believe that the majority of the Earth’s population is honest. But,
especially in developing countries, it pays to be careful.
Here’s a few tips:
Don’t check your camera gear in on public transport like air planes, trains or buses
If your camera strap has the camera logo and model on it, change for one that’s blank. Not only will that make your camera less noticeable, you’ll get a better strap anyway.
Carry your camera across your shoulder i.e. not around your neck. It makes it less conspicuous and is actually more comfortable
If you have a safe in your hotel room, use it! Lock up your gear when you are out without your camera and even when you go to bed. If there’s no safe use your suitcase and lock it up.
Whilst we all want to get that earthy, gritty shot, don’t take your gear (or yourself for that matter) into a known dangerous area. You are asking for trouble.
Don’t leave your gear sitting around without being secure
Remember that $500-$1000 worth of camera gear can feed a family for 3 or 4 months in some countries.
Damage control
Of course, it’s not only the elements or other people who can damage
your equipment.
Stats prove that more accidents happen at home than in the workplace.
They also show that the camera user is the most likely to damage photographic
equipment.
That’s you!
In the main most cameras are fairly hardy but don’t assume that they are bullet
proof!
Any piece of electronic equipment doesn’t like being dropped, thrown around or
slid around with movement. There’s a reason that camera bags have padding.
The best thing you can do is keep with you and don’t sling the bag around. Be
careful how you load onto transport and that includes planes.
Here’s some more tips:
Keep your equipment in a bag that has some sort of padding.
Don’t carry it one handed with the strap doing nothing. There’s every chance that you could get knocked and the camera ends up in the dirt.
Keep the lens and body clean.
Extra tip on this one, don’t use the same cloth to clean your spectacles if you wear them. You could end up scratching one or the other because you’ve picked up grit from either one.
Don’t leave your gear hanging around without being secure, even in your hotel room. Things get knocked around unintentionally.
Summary for a survival guide for photographers whilst travelling
Be mindful of the potential for freezing moisture damaging camera equipment in very cold climates
Allow your camera to acclimatise to humidity before you need it, so that any ‘fog’ has dried first.
Keep your camera out of the heat and especially the sun, in warm to hot climates. Excessive heat can damage the electronic componentry
Use protection e.g. plastic bags or purpose made products to protect your camera equipment from Dust and Rain
Make sure you guard and protect your camera equipment from theft by avoiding situations where that may be possible.
Treat your gear well and it will look after you. Even the most ‘bullet” proof camera can get damaged if you are not careful with it.
Thanks for reading this article
There must have been something that piqued your interest.
Is it that you see yourself taking some great travel photos that you can share or display? Or is it you can see yourself reliving your travel experience by bringing home some emotive travel photos? Maybe you aspire to getting your travel photos published.
If one or all of these is YOUR goal, I can help.
If you sign up in the box below, you’ll get my free eBook “9 ways
to improve your Travel Photography”. At the same time, you will also subscribe
to my Travel Photo Tips Newsletter.
Remember if you want to take great travel photos
that you can share and display.
that help you relive your travel experience
that give you a chance to have your travel photos published
then sign up below and subscribe to my Travel Photo Tips Newsletter and
for your trouble get my eBook “9 ways to improve your Travel
Photography”
Any questions? Please write your comments below or contact me here and please say hello at these places: