Katin Images Travel Photography

Travel Photos, Travel Photography Tips and Software

Tag: photography

  • 7 Ways Good Photography Equipment Can Help You Create Great Marketing Images

    7 Ways Good Photography Equipment Can Help You Create Great Marketing Images

    I’ve said in a Why selecting a new camera is like selecting a new date (or TV) that it’s not the camera but the person with their finger on the shutter button that makes or breaks a great photo.

    Well just to contradict myself, sometimes it is the gear.

    Having certain equipment can give you shots that you may not be able to get without it.

    A sports action photographer won’t get some of the shots he would like if the auto focus in his camera is slow.

    Fashion photography requires excellent lighting.

    Top quality landscape photographers usually use a tripod and high resolution cameras.

    Cameras with more settings will generally have more flexibility and therefore give the photographer choices.

    Let’s look at what equipment can give you:


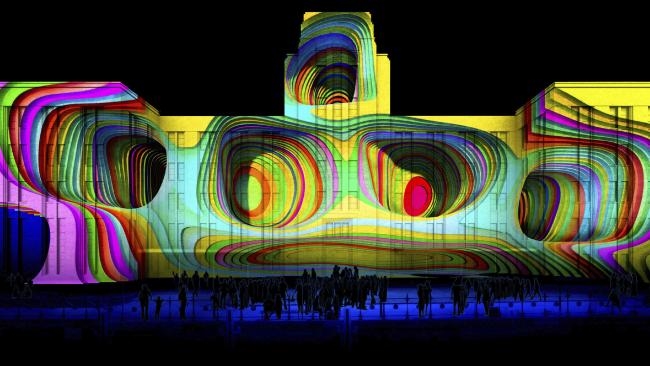
    1 Artistic opportunities.

    It gives opportunities to create something imaginative.

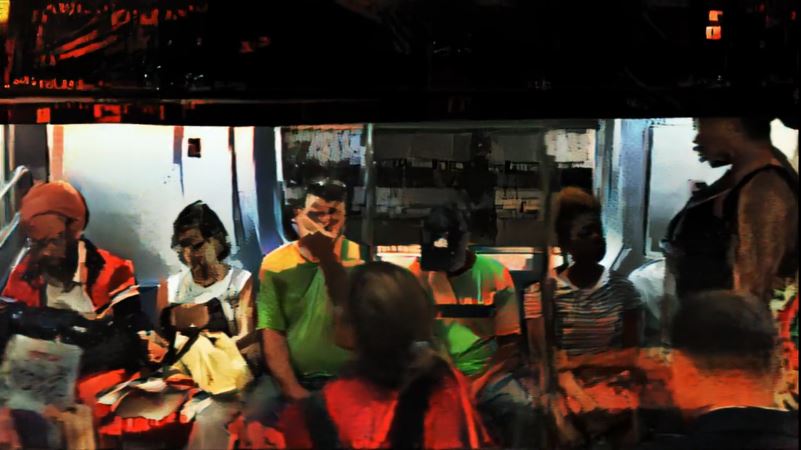
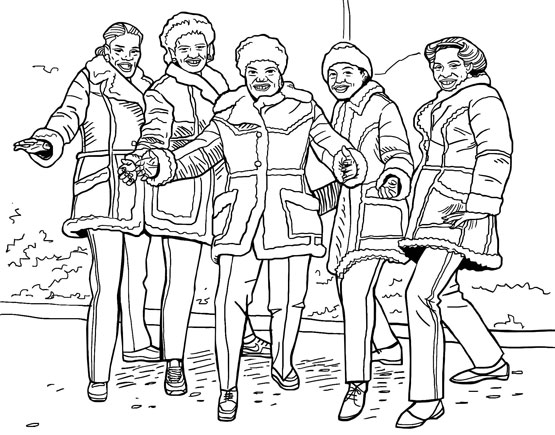
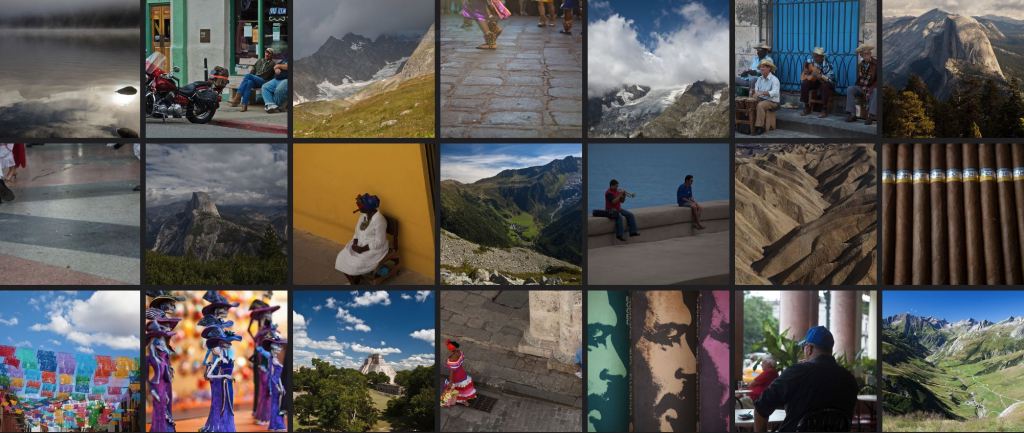
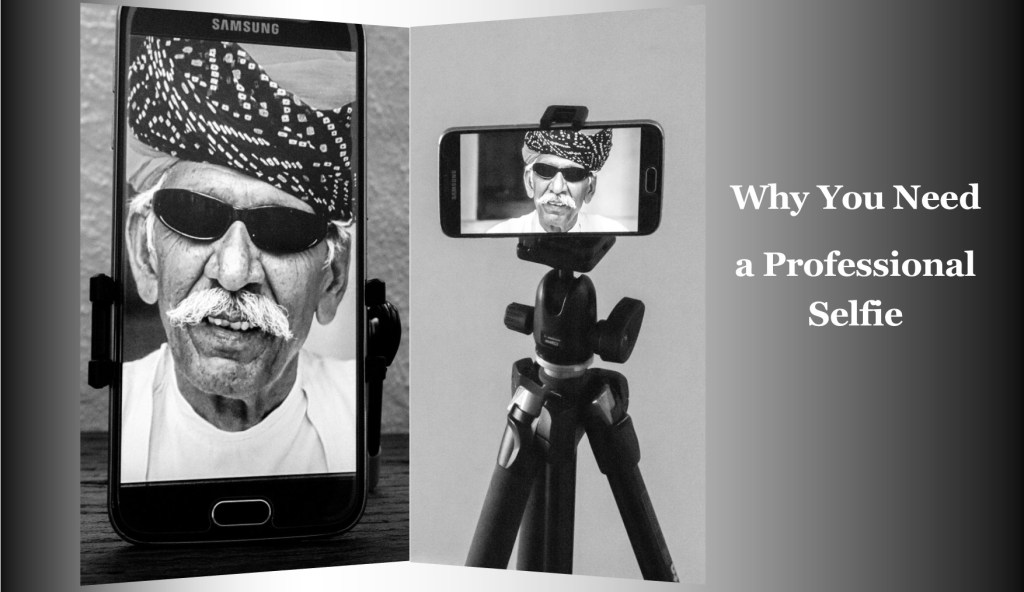
    For instance, with some of the filters that are part of almost every camera today, including smartphones, you have options to give your image a Grainy Film, Pop Art or Sepia old worlde tone look.

    The image below is a combination of a couple of filters.

    7 ways good photography equipment can help you create great marketing images


    2 Freeze motion

    When you are taking images of an event that has motion you generally need a high number of frames per second (FPS) to capture several images at a time.

    Some cameras have high FPS and some lower and that can make a big difference.


    3 Blurring motion

    Conversely if you wish to blur motion then you need a camera that will allow a slow enough shutter speed.

    That may not always be possible especially in bright light. So, a ND (neutral density) filter can be added so that the amount of light entering the camera is reduced.


    4 The ability to take images in low light part 1

    There’s no doubt that modern cameras can almost see in the dark.

    However not all cameras are created equal. Even though there are cameras that have ISO rating in the 100’s of thousands they may not give the crisp clear images you want.

    Why is ISO that important? Well to give you a personal example; when I was first learning photography, back in the film days, I was on a gorilla safari in Uganda.

    The forest we were in was dark and as we got a view of the gorillas I snapped away not understanding that I should have had a film with a much higher ISO.

    The images were developed some time later and were so disappointing.

    7 ways good photography equipment can help you create great marketing images

    Blurred because the camera had a slow shutter speed due to the lack of light.

    A priceless experience that was never properly recorded!

    Before digital, the ISO rating you had on the film meant that you were locked in for however many frames there were e.g. 36. Now you can change the setting per frame.

    Film also only went up to around 1600 and even then, you got a grainy image which is OK if you want to depict a moody grainy photo but not so good if you wanted something crisp and clean.

    So, yes, some cameras will give you some great images and high ISO negating the need for tripods or other ways of holding the camera still but not all.

    My wife’s camera (granted it’s a few years old now) is ok up to 1600 after that the grain is quite noticeable.

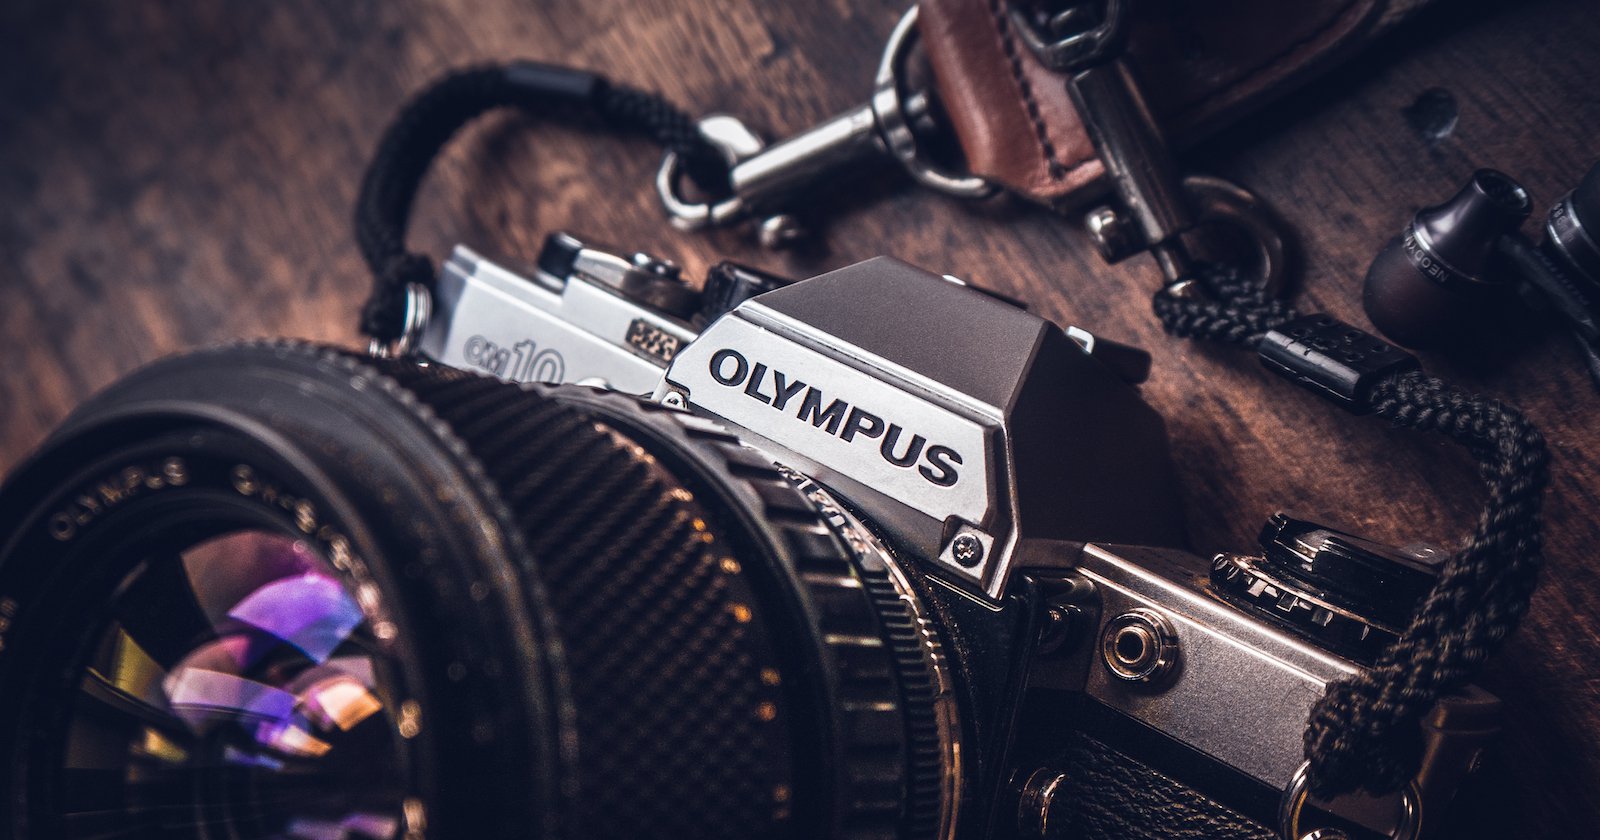
    On the other hand, the Olympus OMD5 I have is great up to about 6400.


    5 The ability to take images in low light part 2

    Image stabilisation can really help if you need to take images in low light or with slow shutter speeds. In some cases, that can eliminate the need for a tripod.

    I first saw image stabilisation in Namibia on safari. A photographer had a lens with image stabilisation and he could take images without the need for a tripod in fairly low light. This was 20 years ago when I was first learning photography and that blew my mind!


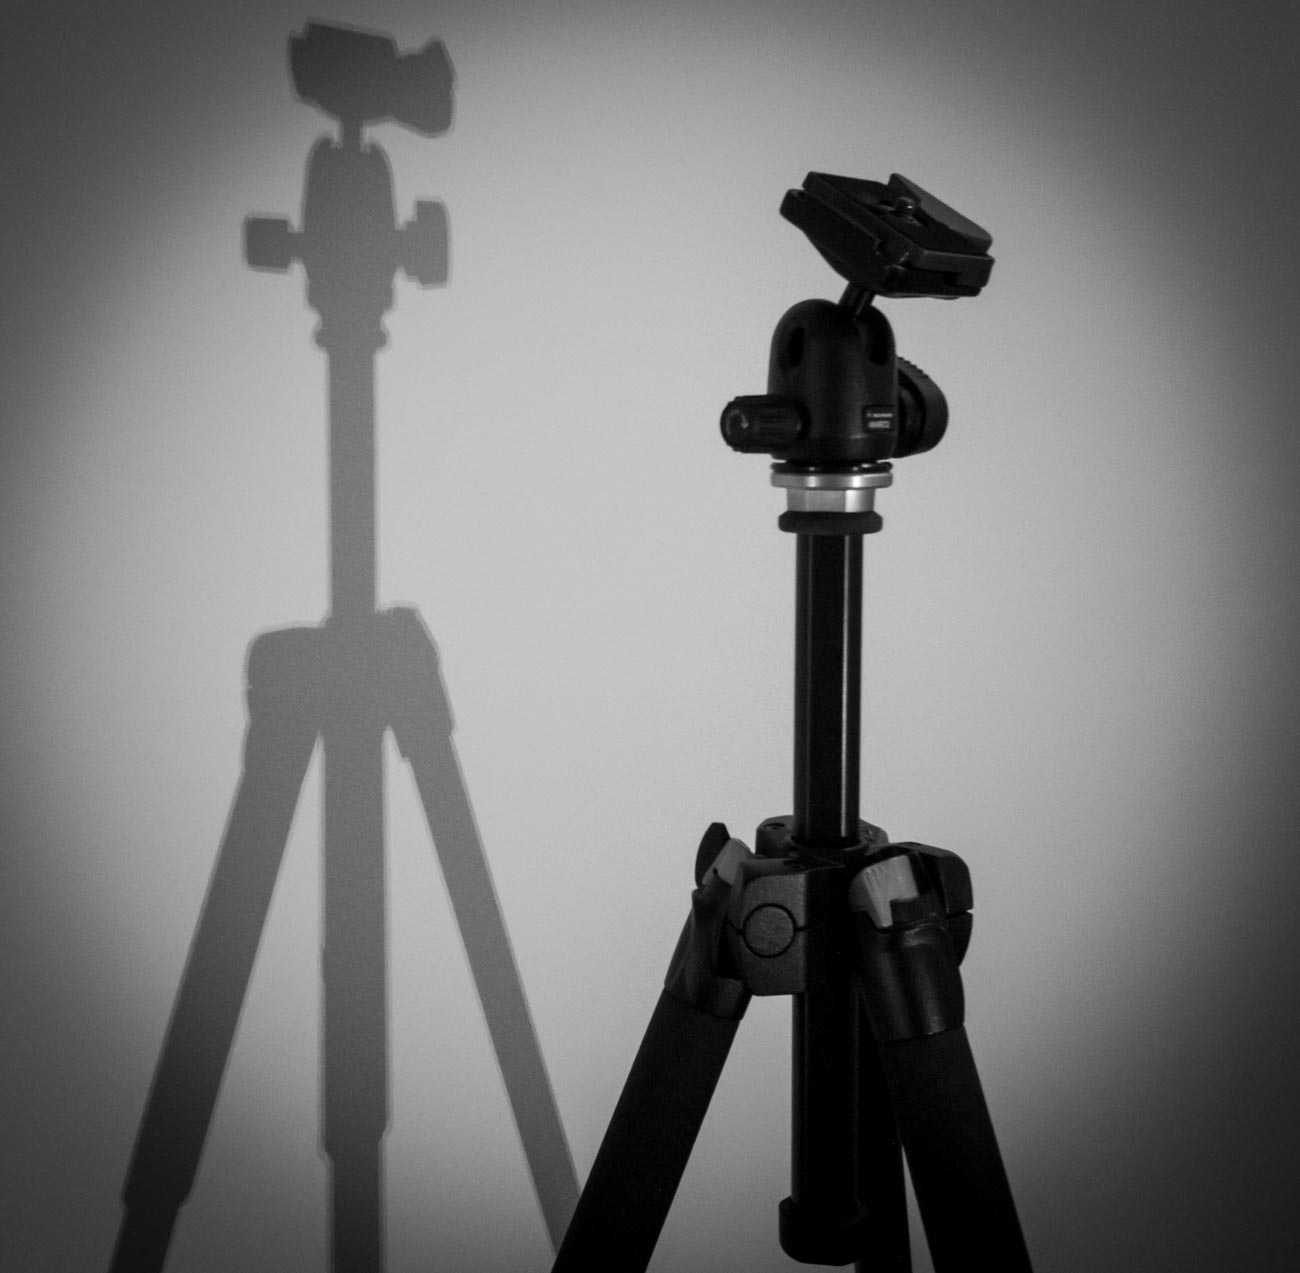
    6 The ability to take images in low light part 3

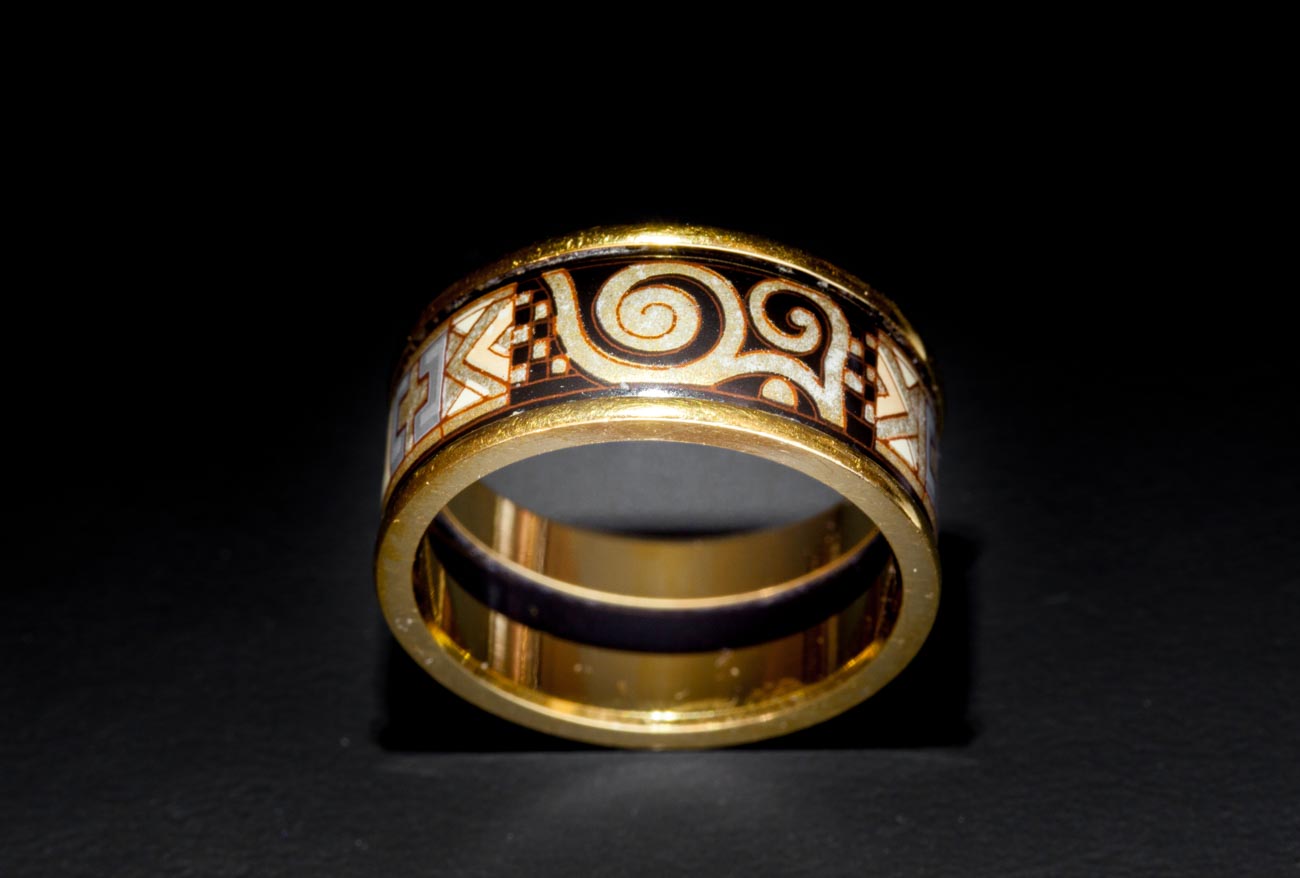
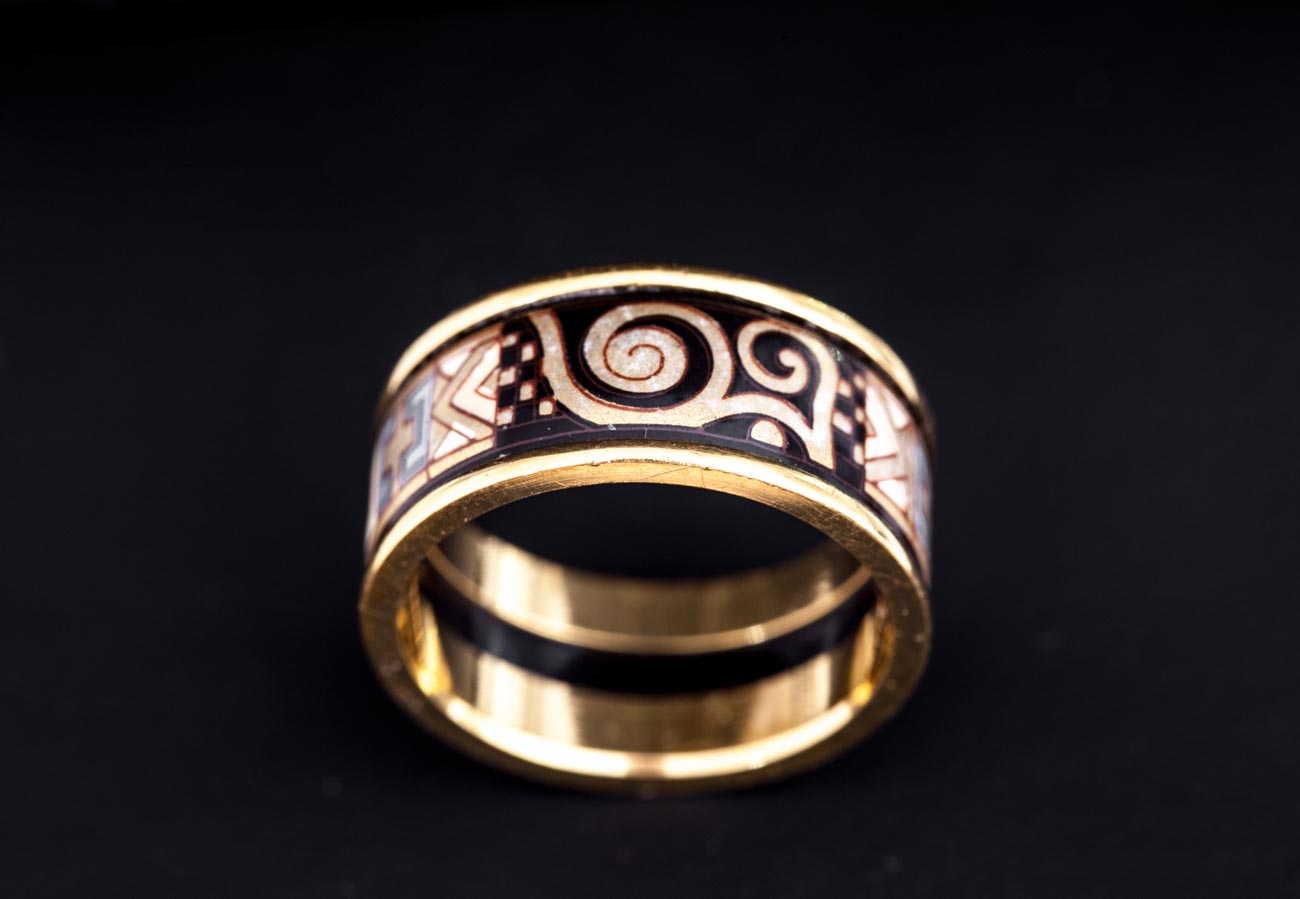
    I’ve always hated carrying and using a tripod but now with these lightweight models and the fact that the cameras are now a lot smaller and weigh less it’s not so much of a burden to carry one. Using it – well that’s still another matter but I will say if you are taking images of products especially in low or artificial light then it’s a valuable tool.

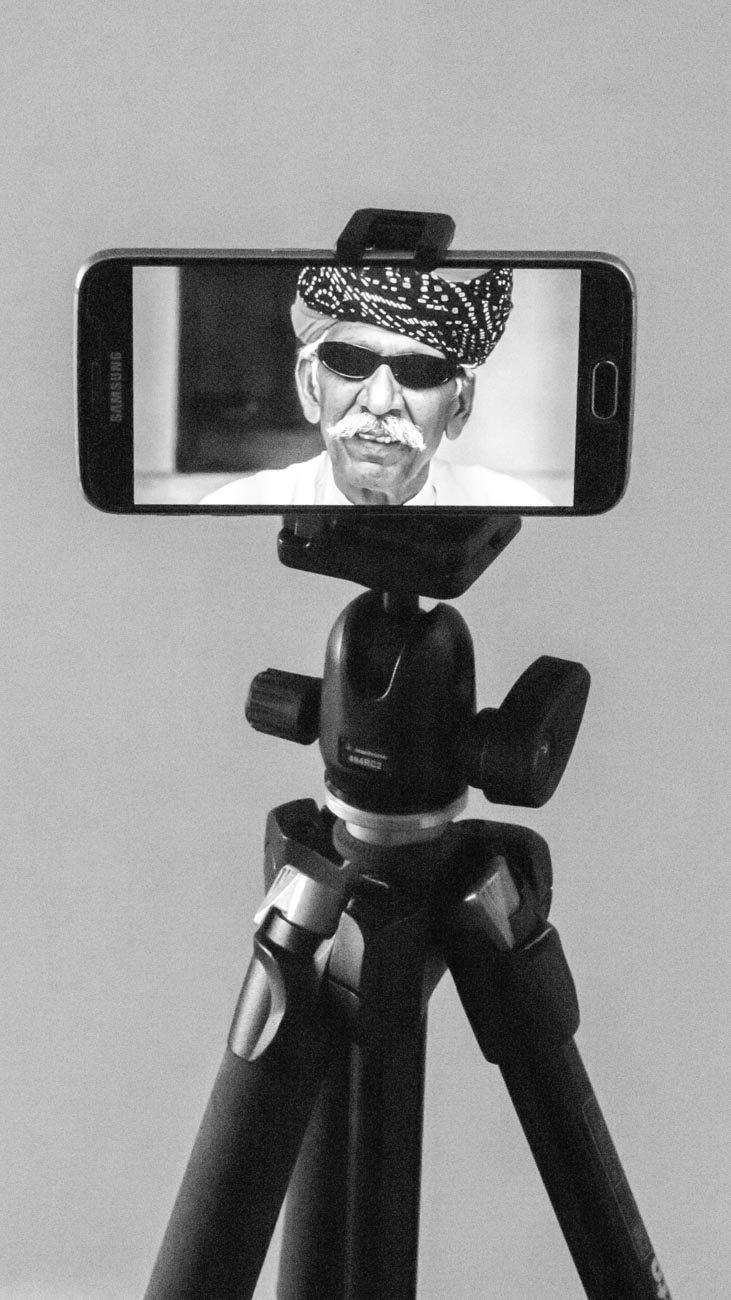
    With a tripod, you can take yourself out of the equation and with a wireless (or wired) remote you can take images of subjects reasonably stress free and creatively.
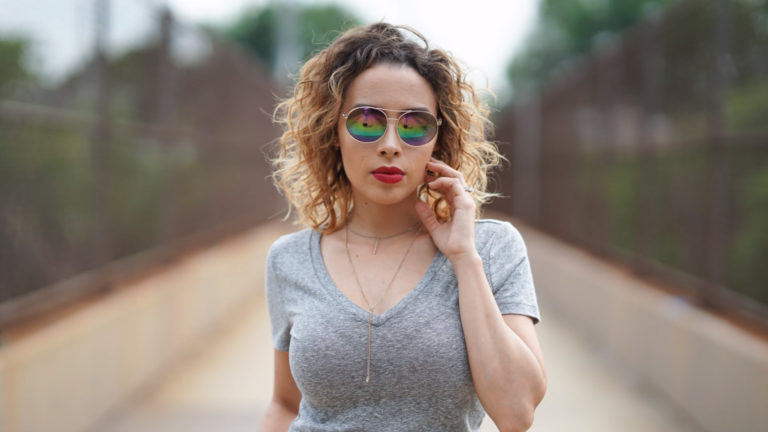
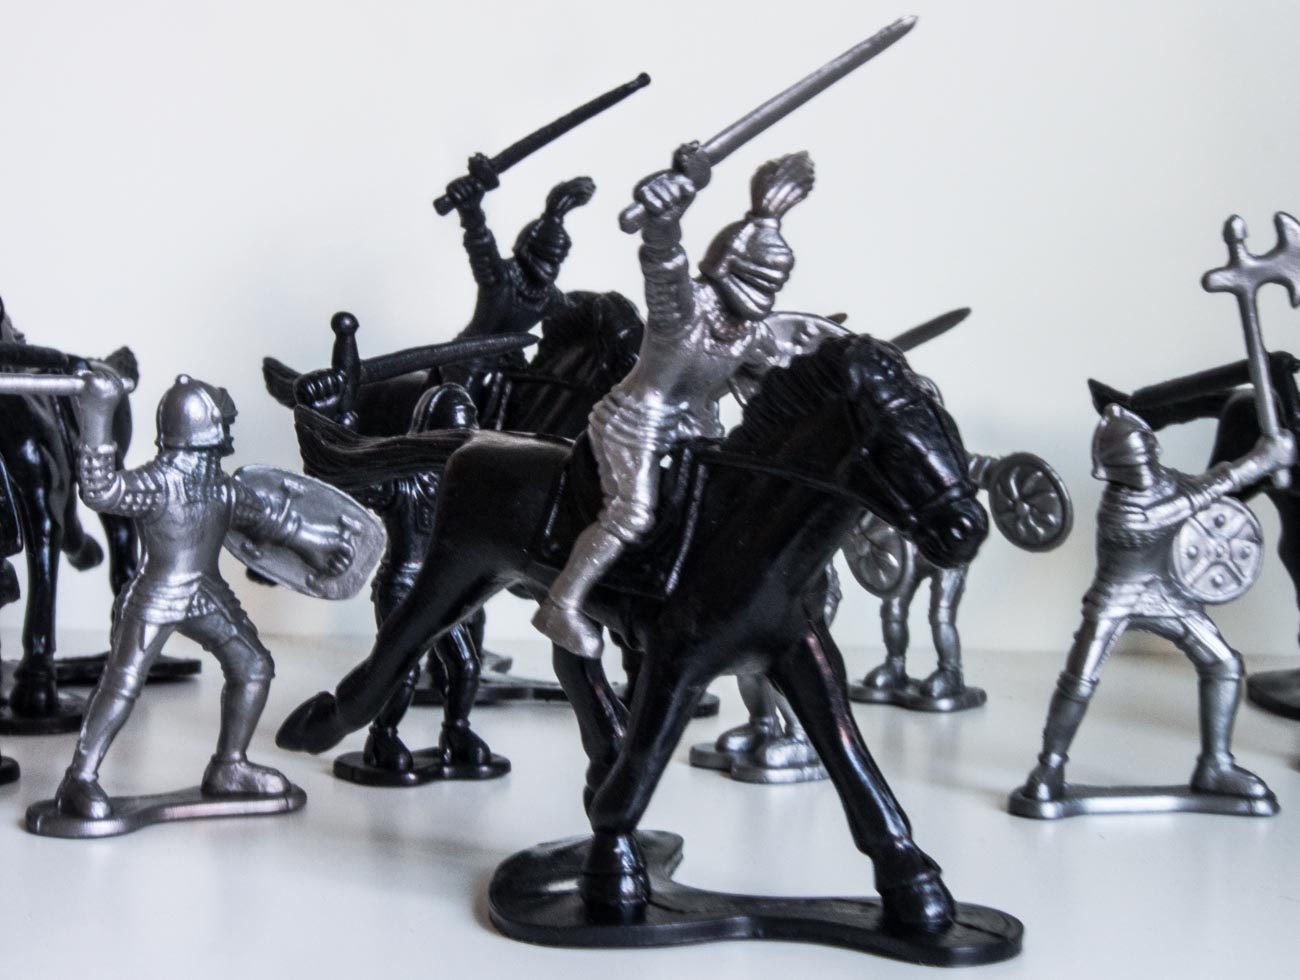
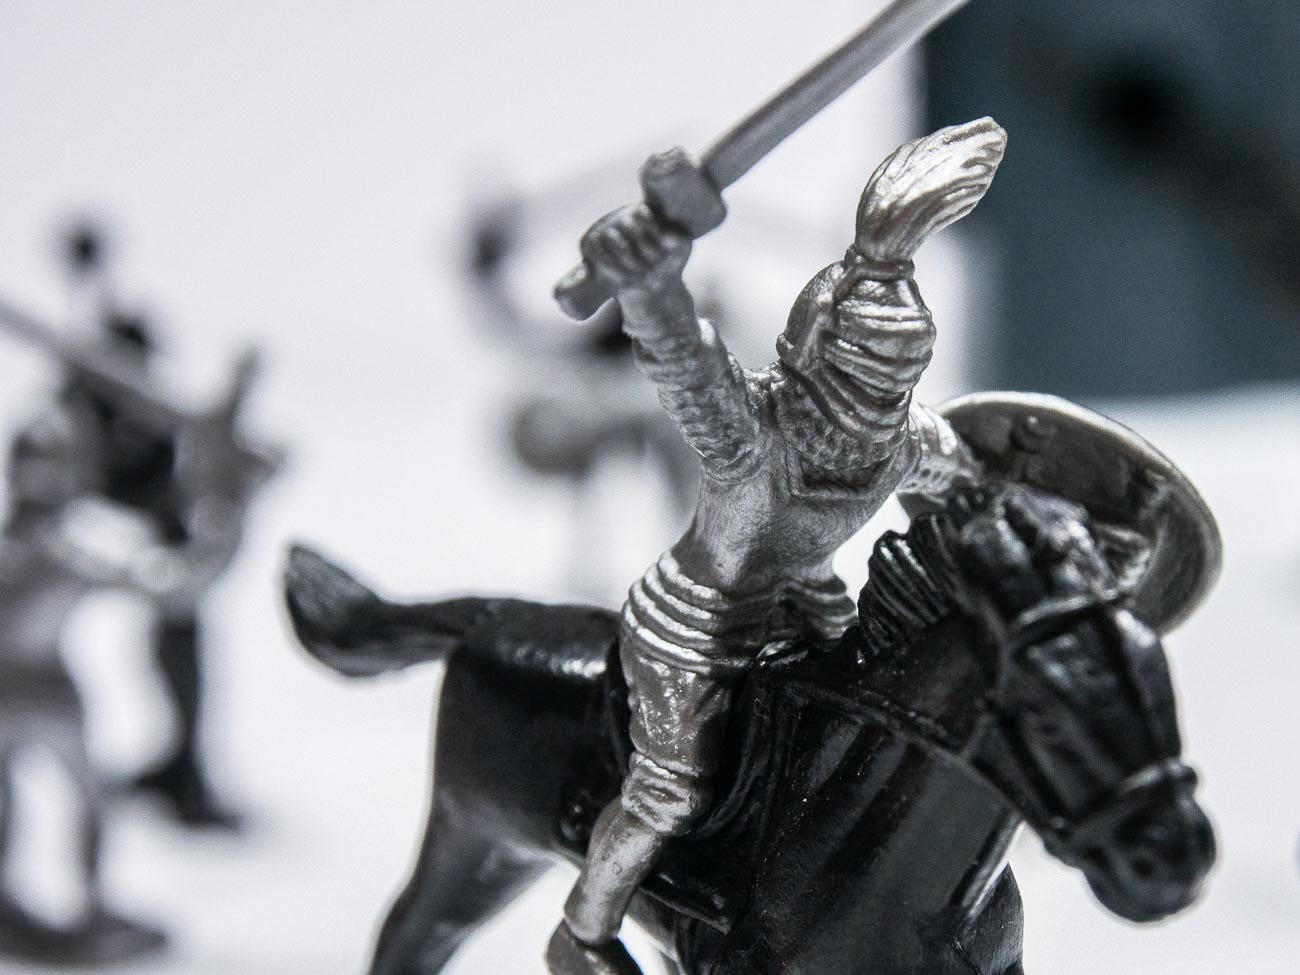
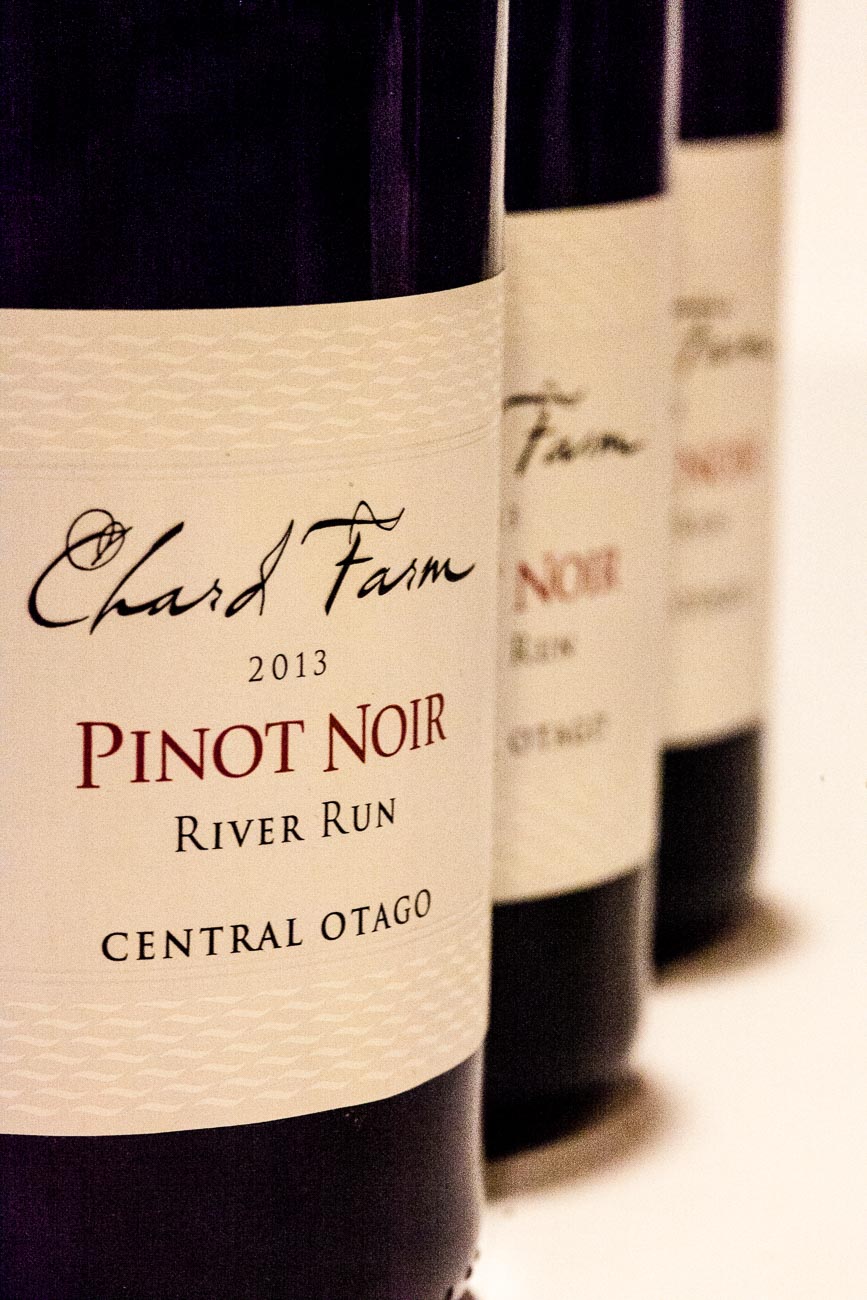
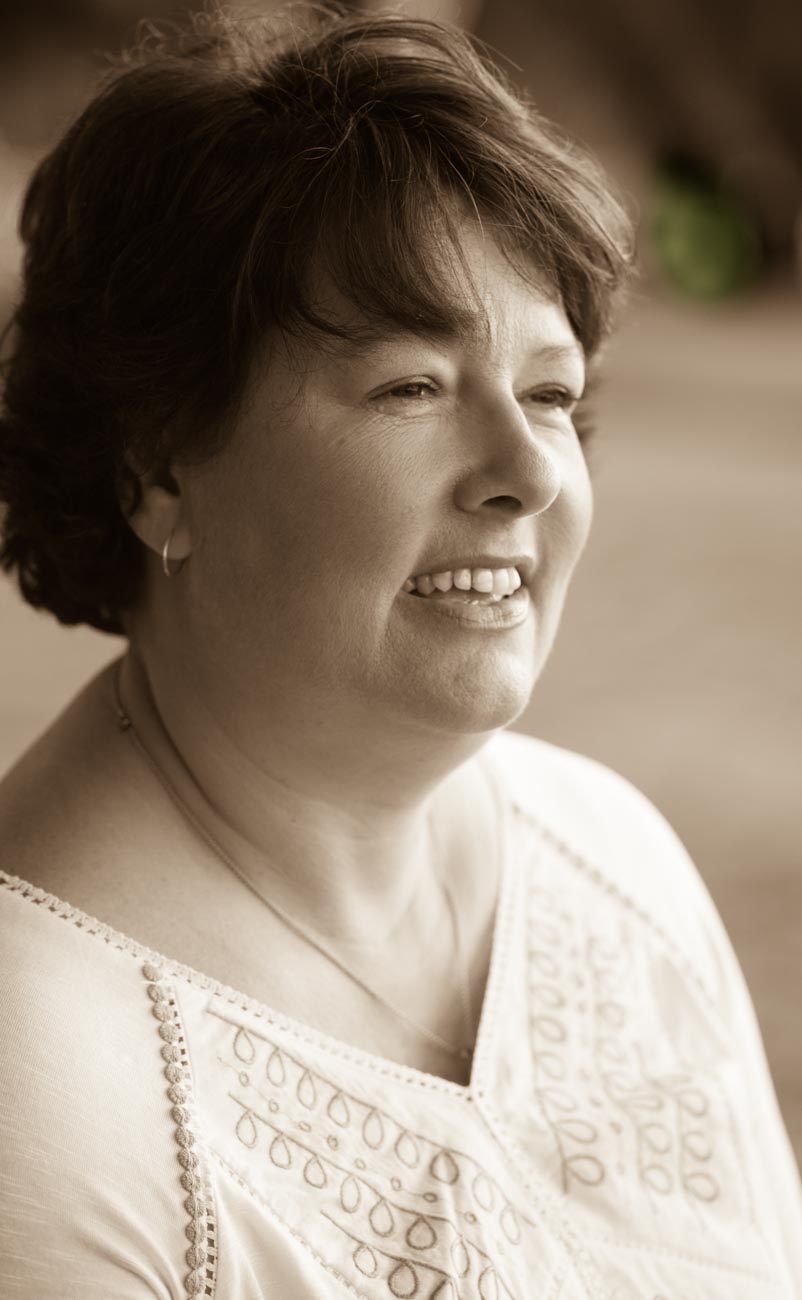
     

    7 Bokeh

    Bokeh is the term used for making the subject stand out from its background by ensuring that the subject is in sharp focus and that the back ground is blurred.

    The right equipment can allow you to create an image with great Bokeh.

    The equipment for this is a little more complex. If you have a full frame camera, then it’s relatively easy with even the package lens to get a reasonable bokeh.

    Where it gets tricky is with mirrorless (there is the odd full frame mirrorless but for this purpose, we’ll cater to the majority).

    Any none full frame camera is very much dependent on the lens and couple of other factors like distance and zoom.

    So, that was my alternative view on the importance of equipment.

    Do you agree?

    Let me know in the comments section below.

    As you’ve got this far why not sign up HERE now to get a free guide on how to start improving your stock and marketing photos.
    You’ll also have exclusive content delivered to your inbox.


  • Photography Tips from the Internet worth Reading

    Photography Tips from the Internet worth Reading

    To bring you the content that you enjoy on this blog, I read extensively, some it from physical and digital books (I have 100’s) and some from different places from around the net.

    After all I may be a photographer that’s been in sales and marketing for many years (too many some would say) but I certainly don’t know it all.
    And it’s good to keep abreast of new and different ways of achieving the end goal.

    So, without further ado here’s a few stories and tips worth reading:


    For all you Android lovers (me included – love my Samsung S7 shortly to be an S8 maybe).

    This is quite a long and detailed post. The one app I would add is Lightroom which is quite good as a standalone but is really designed to be used with the desktop/laptop version.


    Photography Tips from the Internet worth Reading

    How to take the best photos with Android – the best photo editor apps and camera apps


    Not forgetting the other major player that also begins with A – Apple. They’ve released a few videos on how to use the iPhone camera.

    I’ve linked to Fortune’s article for a different take on it rather than Apple’s own site but you can click through.


    Photography Tips from the Internet worth Reading
    Phil Schiller, Senior Vice President of Worldwide Marketing at Apple Inc, discusses the camera on the iPhone7 during an Apple media event in San Francisco, California, U.S. September 7, 2016. REUTERS/Beck Diefenbach –

    How to Be a Better iPhone Photographer—According to Apple


    Portrait photography is an important part of stock photography and if this is something you want to know more about then you can do know worse than watch one of Ed Gregory’s videos. This one has been promoted by Fstoppers:


    Photography Tips from the Internet worth Reading
    ©In Color Studios

    Portrait Photography Tips You Can Use Today


    BT (British Telecom) are, as the name suggests, a telecommunications company. They have very conveniently provided a few simple tips on taking photos indoors. Wonder how competitive they are?


    Photography Tips from the Internet worth Reading

    9 tips for brilliant indoor photos


    Nearer to home, my home that is, Sydney has just kicked off its Vivid Festival, an annual event of light and music. I was there a couple of years ago and it’s pretty spectacular.
    Sydney’s Daily Telegraph has helpfully put together some tips on how and where to photograph some of the displays.
    Even if you are not going to attend, there’s still plenty of useful info for you if you are likely to go to similar events or be exposed to some of the lighting effects that are on offer:


    Photography Tips from the Internet worth Reading

    Vivid Sydney’s top photography tips for capturing the festival’s lights including borrowing a camera


    For something a bit light hearted:


    Photography Tips from the Internet worth Reading

    Olympus UK Support Rep Replies to Customer with Cheeky History Lesson


    If you liked this, please let me know in the comments section below.

    Or if you want to contact me directly, you can sign up to be notified of any updates or new articles in

    the sign-up section below.

    You’ll get a handy free guide on how you can improve your stock photos.


  • A Basic Stock Photography Equipment List

    A Basic Stock Photography Equipment List

    Introduction


    So, you’ve had enough. You’ve spent hours trolling stock photography sites, looking around the web for any royalty free or creative commons images that will fit your business and your message.


    Finally, you’ve said, stuff it! Let’s create our own, after all how hard can it be.


    It’s a brave decision because it’s actually not that easy but, it can give you the image you’ve spent hours looking for.


    So how do you go about it?


    Well let’s forget the creative side for a moment, I’ll cover that in future posts. Let’s look at the second most important item and that’s equipment. Below is a basic stock photography list 


    A Basic Stock Photography equipment list
    “Talk Here” can be used as stock photo for communication

    Equipment


    Whilst equipment is not everything. It’s a bit like wanting to drive a car you have to have one or at least access to one and then you start to learn.


    Now I wouldn’t recommend you borrow the equipment, at least not all of it.


    Where the car analogy differs is that it usually will take you a few minutes to adapt to the basics of a different car. Unless of course it’s a car from a different country that drives on the opposite side of the road, in which case that’s going to take a lot longer.


    With a camera, there are similarities and different cameras of the same brand often have strong similarities.


    But to speed up the learning process and then the shooting process, it’s best to stick with the same equipment if possible.


    So, without further ado, here’s’ a list of what you need to get started:


    Camera:


    Yes, I know, that’s obvious.


    There is a whole range of cameras out there.

    To help guide you in choosing, I have written a series of posts called “A Guide to Camera Features” which you can download as a free pdf here.

    My suggestion is to have either a DSLR or a Mirrorless, i.e. a camera that has interchangeable lens.


    Small camera:


    A few years ago, I would have said a compact camera but nowadays a good smartphone camera more than does the job.


    Why do you need this as well? To take reference pictures to help stimulate creativity. To quickly record some visual ideas about your business that you can come back to.


    A Basic Stock Photography equipment list
    Architectural images are always good as stock photos


    Lighting:


    As with cameras there are countless lighting systems available. Your camera may have a flash but I would recommend that you have off camera lighting or flash.


    A lot will depend on whether you intend taking images that will need artificial lighting.


    Even you intend to use natural lighting there will be a situation where artificial lighting will be necessary, even if only for a special effect.


    Tripod:


    Keeping a camera still will be essential on some shots especially in the light is low.


    Lens:


    As I mentioned earlier if you have a camera that has interchangeable lens then you need a couple of lens at the least. Allrounders are the best way to go. In 35mm speak, 24-70mm and a 50-120mm or close to are good examples.


    If you can stretch your budget to a prime lens, then a 50 or 100mm will give you nice crisp images.


    Computer or Laptop:


    Most people and businesses have at least one desktop or Laptop or something in between.


    How much RAM and Processing Speed you need it will depend on the amount of post processing you want to do and what programs you will use.


    I’ve found that having a SSD drive rather than a standard moving parts drive is worth the extra cost.


    It’s like choosing between a motor bike or a pedal bicycle for speed! You’ll get there slowly on a bicycle but nowhere as quick as a motor bike will take.


    Storage is cheap so make sure you have plenty of it.


    Portable hard drives or NAS type storage always works well.


    Monitor:


    If you are using a laptop it’s worth investing in a good easy to calibrate monitor, so you can view and see your images as you want them to look.


    Best size is around 22-26”. Bigger if you can afford it.


    Accessories:


    Some basic but necessary accessories would be SD or memory cards, spare camera batteries, camera bag, cleaning cloths and back up hard drives.


    A Basic Stock Photography equipment list
    Good lighting can help spotlight products


    Conclusion


    Of course, buying photographic equipment can be a bit like a black hole.


    But don’t let that scare you, what’ve I’ve listed above is the basics and even that could be cut back a bit.


    It’s not the equipment that takes the photo it’s you and you can take excellent photos with even a basic smartphone camera.


    Whilst the better camera equipment will give you increased quality in some circumstances, better equipment is more about having additional flexibility and options.


    I hope I haven’t put you off because this is an investment in yourself and your business.


    Taking some great and powerful images that compliment your brand can provide a huge return on investment, especially if you use them for marketing on the right platforms.


    If you have any questions or comments about this post, please leave them in the comments section below.


    Or feel free to contact me directly via my contact page


    Sharing is caring as they say (although not sure who “they” is).


    If there’s some people you know who may enjoy this or any other post on this site, please share with them.


  • Looking for stock photos? Here’s how to take your own.

    Looking for stock photos? Here’s how to take your own.

    Ever wondered how there are so many good stock photos out there? And how they got taken?


    Have you also downloaded one and had to settle “for almost but not quite right”?


    Maybe you’ve got fed up looking for the right one and just settled for something free and second rate.


    Well, ‘you’ can take your own.


    If you know your way around a camera or even a smartphone you can take the image
    you need to display for your business.


    Don’t get me wrong I’m not against stock photos. They have their place.


    But most small businesses often can’t afford to use the good ones.
    So, they end up looking for free ones, which has a big cost in time, and then use them, more often
    than not, for their online presence and a lot of these free ones are just not good enough.


    In this article by Paul Suggett of the Balance. He uses the analogy of stock photography being
    the “off the shelf clothing” and either your own or your photographer’s photos being the made to
    measure that “fits you like it fits no one else”


    Of course any Stock photo you use is not exclusive to you which can create other issues.


    For more on that read Why stock images are bad for business!


    But you can take a leaf out of the stock photography industry and follow these rules to take
    your own purpose taken image.


    Looking for stock photos?


    Most *stock photographers use these following elements when taking stock photography.


    Four Basic Elements of Stock photography


    1. Background


    2. People (Model/S)


    3. Subject


    4. Involvement


    Let’s break this down:


    1. Background


    Almost as important as the subject matter. Simplicity and Clarity are the keys here.

    You want to ensure that the background doesn’t have distractions.


    Choose a background that’s uncluttered and depicts the story that you want to tell.

    For example, say you have a kitchen product, then use an actual kitchen or at least
    have a background that looks like a kitchen.


    The Kitchen needs to be a fairly bland kitchen with no other brands or appliances obvious.

    Using contrast between the people, your subject and the background can give the image a
    3-dimensional feel (without photo-shopping)


    2. People (Model/S)


    A vast majority of stock photos have people. People evoke emotion and interest.


    In the Kitchen product example, ideally you would have someone using it.


    Make sure they are posing naturally not as if this a family photo or portrait.


    You want to convey the feel that you as the photographer are a fly on the wall and
    not make it look staged.


    If you are going to use the image for commercial or marketing use, ensure you get the model,
    even if it’s your Aunt Amy, to fill out a model release. Just in case you fall out with the old girl
    and she wants you to pay her in money instead of tea and scones later.


    I will cover this issue in a later post. But it’s worth being flagged here.


    Looking for stock photos?

    3. Main subject


    This is the main focal point of a stock image. You want it to shine out. Most products, and services are
    meant to be used, worn or consumed. Like the Kitchen product show it in use.


    But be careful! Don’t go overboard with the subject after all the story you are telling is what
    benefit it will bring to your potential customer’s life.


    If as another example, you are wine producer just taking images of your label or bottle is not
    going to get you sales.

    You could depict when is a good time to drink it. A Rose on a warm summers
    afternoon, a Riesling matched with Thai food.


    4. Involvement


    This is gives the opportunity to show your subject being used by someone who is really involved.
    They should be showing some emotion maybe enjoyment or surprise.


    Some images can work better if there is more than one person.

    In the kitchen product example, they could be using it and interacting with someone else,
    who looks amazed at the results or else could be helping or also using the product.


    Remember it’s not a portrait you are after. Even if you have a piece of clothing or Jewellery,
    much better to show how people wearing it being active even if it’s only reading a book.


    *By the way I have defined a stock photographers as a photographer that takes images for
    certain markets. They are not taking images on behalf of a specific client


    If you have a product that you are considering taking your own images of then you may be
    interested in this article Make sure your Product Image speaks for itself with this Photography Checklist.

    At the bottom of that post is a link to download a checklist which will help.


    Thanks for reading


    Post any comments below. I’d love to hear them.


    And do us a favour! Please share any way which works for you.


    If you want more like this then please subscribe below and you will get a
    free guide on how to improve your photography.


  • Great stories from the world of Commercial Photography

    Great stories from the world of Commercial Photography

    This is the first of an occasional series of interesting Photography stories from around the web. 


    My hope is that they will inspire, interest, educate or at the least amuse.


    Of course, we are all different but I’ve grouped these stories into how they got my attention:

    Educate


    DIY Photography have a great short explanation on the full frame v crop sensor comparison. 


    They use portrait photography as an example but you could easily apply this to other genres
    such as product photography.


    Great stories from the world of Commercial Photography


    Full Frame Sony a7ii Vs. Crop Sony A6000, Which Is Better for Portraits?


    Ever looked at your holiday snaps and wondered how you could make them better?
    The suggestions in this article this could be your answer.


    How to make a boring vacation photo something AMAZING!


    Inspire

    This article on Digital Rev caught my eye. It shows what’s possible with some imagination and
    I think, lots of time!


    Great stories from the world of Commercial Photography


    Watch as New York City is Transformed into a Moving Picasso Painting


    While most of us will never use a photo editor, this article on Peta Pixel explains the value of
    using one if you have the money.


    The Olympics Prove the Value of a Photo Editor


    Never got into Hip-Hop much but I don’t need to with this inspirational idea of how you can
    utilise your images and get an edge.


    Great stories from the world of Commercial Photography


    Your Favorite Hip Hop Photo Book is Now a Coloring Book


    If you need any ideas on marketing yourself or your business, then Clint Nolan has an amazing prom mailer


    Photographer’s Handmade Promo Mailer is Beyond Impressive


    Interest Frighten


    These 2 are more than interesting, they are downright scary.


    The first is one selfies on the go. 


    I wish I could say that as an Aussie it doesn’t happen in Australia but I have no doubt the numbers
    per capita would be the same here.


    #Driving Danger: Instagram Posts Shed Light on a Distracted Driving Trend 


    Not quite so scary but quite revealing is the care taken by some of Amazon’s delivery contractors. 


    Let’s be fair though, this issue is not unique to Amazon.


    Watch How Amazon Delivered a $500 Camera Lens


    Humour


    And now for something cute:


    Great stories from the world of Commercial Photography


    Ten-Month-Old and Rescued Pup Make for an Adorable Portrait Duo


    And funny:


    Doctor Hilariously Recreates Celebrity Photos to Raise Money for Cancer


    With that I will leave you with Oscar Wilde who is meant to have said life is much too important to be
    taken seriously.


    What he actually said was “Life is much too important a thing ever to talk seriously
    about it.”


    Either way he was right.


    If you liked this, please let me know in the comments section below. 


    Or if you want to contact me directly, you can sign up to be notified of any updates or new articles in
    the sign-up section below. 


    You’ll get a handy free guide on how you can improve your marketing images.

  • Make sure your Product Image speaks for itself with this Photography Checklist

    Make sure your Product Image speaks for itself with this Photography Checklist

    So, you think that you’ve taken some great photos of your product. 

    Who wouldn’t want to buy your products with them looking like that.
     
    You’ve looked at your competitor’s best photos. Worked out how you can improve on those with some great composition and processing.
     
    The lighting was perfect, the colour is great and you’ve got that sort of blur going on in the background.
     
    You’ve posted them onto your website, facebook and Instagram and sent a link to Twitter.
     
    You’ve nailed it!
     
    All you have to do now is wait for the orders to come.
     
    But will they?
     
    You see we live in a world of images and instant gratification.
     
    And the problem is that you can never completely get it right.
    Not for everyone, not for your potential customers and not even for you, if you’re honest.
     
    The old saying “you can please some of the people some of the time but you can please all the people all the time” rings true in this case.
     
    The trouble is if you don’t please some of the people then you don’t make sales.
     
    So, you must aim to please as many as you can.

    Make sure your product image speaks for itself with this photography checklist

    But first things first let’s go back to those great photos and check again;
     
    This is a check list of what to look for in a product image:
     
    1 Composition
     
    How many times have you seen a photo and thought that there is something not quite right?
     
    Usually it’s the composition.
     
    The photos that have moved you will be because of their great composition.
     
    Look and study the photos that you have hanging up in your workplace or home. You choose them because you like them and because they have a strong composition.
     
    By using angles and lines, foreground subjects and colour where they exist, you can create a strong and imaginative composition of a photo.
     
    Have you got the right angle?
     
    If applicable, can you see the label?
     
    Does it show what the product does?
     
    2 Story
     
    Do your images tell a story?
     
    A story could be, as an example, showing how a piece of jewellery is worn or giving a sense of scale.
    I recently looked online for some earrings for my wife and I choose the ones that had images of them on a model.
    And that’s because I could see the size and the way they look when hanging.
     
    3 What’s in the frame?
     
    Are there unwanted elements in the photo?
     
    What about the product positioning against the background?
     
    We’ve all seen (and taken) those holiday snaps with the leaning tower of Pisa appearing to grow out the subject’s head.
     
    Can you see anything in the background or foreground that might be distracting?

    Make sure your product image speaks for itself with this photography checklist

    4 Light
     
    Is the light on the product side lit or front lit? Either way is it lighting the part of the product that reflects the ‘best side’.
     
    Have you looked at the image on different monitors, tablets and mobiles?
    You will be surprised at how the brightness and contrast vary depending on the medium you are viewing.
     
    5 Clarity
     
    Does the image look crisp and clear?
     
    Blow up the image on the largest screen you have. See if there is any sign of unintended blur.
     
    It may be around the edges of your subject.
    Or is it at the front of your subject? e.g. If it were a portrait would the nose be ever so slightly out of focus.
     
    6 Post processing
     
    Does the colour look real or is it over or under saturated?
     
    Has it got the “WOW’ factor?
     
    Nothing wrong with either but it’s what lends itself to the product.
    If it doesn’t look real it may not convey the right message.

    Make sure your product image speaks for itself with this photography checklist
     
    That’s just for starters! You could go deep in reviewing your images.
     
    Remember that you have to put yourself in your customers shoes. Ask yourself “based on the image and the copy with it would I buy that?”
    If you feel you can not answer this without bias then ask someone else to review it and answer that question.
     
    Post links to your images in the comments below if you want some feedback from me or other readers.
    Want to keep this article? You can get an accompanying checklist from here or the box below.
    While you are at it why not share this article with someone who could benefit.
    And don’t to forget to subscribe in the top bar for more ways in which I can help you sell more.


  • 5 Ways to Eliminate Camera Shake

    5 Ways to Eliminate Camera Shake

    How many times have you looked at those beautiful images only to realise on closer inspection there’s a slight blurriness about it. It’s just not as crisp and clear as it should be.

    That’s called softness and is usually caused by Camera shake.


    Like most cities in the USA, Anchorage has a big fourth of July parade. This one was in 2012
    He’s a bit soft! (Probably wouldn’t tell him that!)


    https://katinimages.smugmug.com/Travel/Independence-Day/i-WnMvsVN/A
    That’s better! (Fourth of July parade.)

    In my last post How to hold a camera correctly on this topic, I went through the best ways to hold a camera to try and reduce camera shake. Now lets’ look at 5 other ways in order you can help eliminate camera shake


    1 Use a fast shutter speed


    Typically, Camera Shake is caused by the shutter speed being too low.

    Selecting the correct shutter speed can be a challenge. On most cameras, you can select the shutter speed and a rule of thumb, depending on the camera is the focal lens x 1.5 or 2 = the shutter speed.

    So, if you have a focal length of 100mm then you will need a minimum shutter speed of 1/160; a 200mm focal length would be 320 etc. etc…
    Now on some compacts and a lot of Smartphone cameras you can’t adjust the Shutter speed so the next best thing is to either adjust the exposure compensation or the ISO.
    If you are going to shoot a lot of images at low light, then experiment so you know how your camera performs.


    2 Use image stabilisation


    Many years ago, I met a photographer who was taking clear and sharp images of wildlife at dusk without a tripod. That was my first introduction to image stabilisation.
    Basically it compensates for camera shake caused by slow shutter speeds.

    Initially they were only available on the lens but nowadays most cameras have it inbuilt. So now you don’t have to worry about what lens to use.
    Having it inbuilt also means that most cameras have options and settings that can give flexibility.

    Smartphone cameras also have them built in but usually only have the option to turn it on or off.

    Just a little warning – some manufacturers advise you to turn off stabilisation if using a tripod.

    An image stabiliser only goes so far. At the end of the day if the shutter speed is too low for the conditions then it won’t help.


    3  Use a tripod


    This one is obvious. After all, if you don’t have to hold it then it’s not likely to move. Right?
    Well yes and no and I’ll explain in the next tip but for now putting a camera on a tripod is always going to be better than hand holding.

    Nowadays there are lots of different tripods out there. Some are designed for different applications and cameras.

    For a mirrorless, compact or DSLR cameras there is a few considerations such as the weight, ease of use and sturdiness.
    And it also depends on the use. As an example, I have 3 tripods, a studio tripod that never leaves the ‘studio’ a heavy duty one that I use for assignments and a lightweight one which I take travelling or on assignments where weight is an issue.

    For smartphone cameras, there are also a lot of choices but they are usually chosen on convenience. I use the Joby Grip Tight Micro Stand, a great little find that has a mini stand. It can also be fitted to a standard tripod head.


    4 Use the timer


    The other main reason for camera shake is the shutter button action. When you press down on the shutter button the camera moves. Even if you are gentle it still moves. Of course, if you have a fast-enough shutter speed then it’s not a problem but if you are shooting in low light then it will create vibration which equals camera shake

    Another option is to use the timer. In all seriousness, you wouldn’t use the timer if you were hand holding. The idea is to use it when on a tripod or if you have the camera mounted on something sturdy.

    Most cameras have 2 or 3 timer settings. Use the lowest unless there’s some reason you need time like taking a self-portrait. After all, 2 seconds is not a lot of time to get into position.


    5 Use a remote


    For the same reason as the previous point (5) using a remote will take that that heavy human press out of the equation.
    There are a lot of types of remotes out there.
    From the old-school release cable for a DSLR to using a smartphone app to trigger your mirrorless camera to using a Bluetooth remote trigger for your smartphone.

    Choose the one that is right for you or choose a couple for different applications.


    Did you understand all that? I’m happy to clarify anything you’re not sure of.

    Just post in the comments section below. Don’t be shy.

    While you are at it why not subscribe for future updates below.

    You’ll get my free guide “Eleven easy ways to improve your marketing photography”.

  • How to hold a camera correctly

    How to hold a camera correctly

    So, you think you can hold a camera or smartphone correctly? Well how do you know?

    Take a good look at your photos.

    No, not on the camera or phone screen but on your PC, Mac or Laptop. Even a tablet is better than a smartphone or camera screen but the bigger the better.

    Now does it look really sharp or does look a little bit blurred (the industry phrase is “soft”) in parts or may even a quite a bit blurred?

    If so, there is a good chance you are not paying enough attention to the fact that a camera moves when you hold it. Now that’s not the camera moving on its own but you moving it.
    Got It?

    Now there are several techniques to overcome this but I’m going to basically cover how you should be holding your camera and smartphone.

    Let’s start with the camera.

    • If it has a view finder – then use it! When you use the view finder you are putting the camera up to your face and therefore bracing it on your face.

    Now to add to that, tuck your elbows in against your side.

    • Ok so it doesn’t have a viewfinder or you don’t want to use it! The overwhelming majority of people ta king pictures using the view finder do not hold it correctly and consequently having pictures that are ‘soft’.

    If you have studied physics you will know what the pendulum theory is. Holding the camera at arm’s length creates a pendulum effect and ‘soft’ or blurry photos unless the light is very good and you have a high shutter speed.

    So just like using the viewfinder tuck those arms in against your sides and bring the camera closer to your eyes.

    • For either situation, depending on the weight of the camera, grip one side with one hand usually the right where the shutter button is and the position the other hand underneath the body or if it’s a fairly long lens then under the lens.
    • Ideally you want to stand with your legs shoulder width apart so that you well grounded.
    • If there happens to be a handy surface, say a wall, rest the camera on that.
    • Or you can support yourself against a vertical surface such as a tree or a wall if practical.
    • The portrait position is similar for both the viewfinder and rear screen.
      You just need to decide which side is more comfortable for the shutter button. The shutter speed at the bottom is the most practical so that you can use the bottom to help support the bottom of the camera.
    How to hold a camera correctly
    Camera Holds

    Ok now the smartphone

    • Most smartphones these days have the option to operate the shutter with a physical button like a volume control instead of tapping the screen.
      So, if you have that option then use it! Especially for the landscape position.
    • As with a camera most people using a smartphone camera often don’t hold it correctly. So tuck in your elbows
    • Use both hands. It gives me nightmares watching some people take photos one handed. With a smartphone, you need to use 2 different handling techniques.
    • In the horizontal or landscape position hold it with your hands in the same spot on each side. With whatever hand you are using to press the shutter button make sure you have that trigger finger free so that you can tap the virtual shutter or press the physical shutter button.
    • Now the vertical or portrait position is bit trickier.

    If you are using a physical shutter, then hold the phone with whichever side it’s on and curl it around the back below of course the lens with the thumb operating the shutter.
    The other hand can hold the bottom of the phone with the index finger and thumb.
    For a virtual button the difference is that it’s the hand at the bottom that presses the virtual button and can’t in that case grip the bottom of the smartphone at the same time.

    In all honesty when in portrait mode, it’s often better to use the virtual button.

    How to hold a camera correctly
    Smartphone Holds

    In some situations, you may not be physically vertical. You may have to lie or sit to take the photo. If you are lying down, you have the added support of the ground or floor but you need to rest the elbows on the ground or you will end taking a steady of image of the ground which may not be your intended subject.

    If you are sitting, then usually there is something you can rest the camera on.

    Of course, there are lots of ways to avoid that blurry or soft photo.

    Use a tripod, make sure you have image stabilisation turned on (if fitted), ensure that your shutter speed is fast enough, use the timer and so on. 

    But this piece is just the basics on holding the camera.

    More on those tips on the next post.

    If you have any tips, please don’t be shy just stick ’em in the comment box below?

    Is there anything else that you want explained? Again just ask.

  • Why the use of Still and Video images is the most Valuable Marketing Strategy of 2018

    Why the use of Still and Video images is the most Valuable Marketing Strategy of 2018

    Once upon a time there was a world without colour.

    This world, which we will call Blanc Noir only had black and white.
    The population saw everything in black and white and hence everything they had was either black or white (pretty obvious, really what sort of story is this anyway??).

    One day a visitor from another world called Couleur (I’ve a bit of a soft spot for French) came along and wore clothes that were red and yellow. 

    The visitor couldn’t understand why the inhabitants of Blanc Noir didn’t wear anything but black and white when all about them was colour.

    The trees the sky, grass, only man made objects were in black and white.

    The inhabitants on the other hand saw his clothes as black (red) and White (yellow).

    One day something strange happened this stranger had a camera that took pictures in colour. 

    As he took more pictures and showed everyone what he took in the rear screen of the camera, they noticed that there was something strange going on, everything in the camera was in colour!

    As they looked around they realised that in fact that all natural world was in colour, it was only themselves and the buildings and vehicles that were in black and white.

    Imagine seeing this for the first time how did you think they reacted?

    How would you react?

    Of course they immediately took steps to colourise everything.


    Why the use of Still and Video images are the most valuable marketing strategy of 2017

    Which was great for all the business’s on Couleur as they had plenty of colour products. 

    But not so good for the business’s on Blanc Noir as everything they had was black and white.

    This year 2016 has been the start of something special. It’s been a year when some clever small businesses like the businesses on Couleur have realised that their strongest ally in their marketing is images and video.

    Our world is changing and the growth of technology to help create visual content is now easier than ever and will continue to get even easier for the foreseeable future.

    Of course those that don’t take steps to take advantage of this will be like those businesses on Blanc Noir.

    The world of visual content is about to take over from world of words.

    Why is this?

    Well for one thing our lives are so busy that we only give marketing material a nano-second to get our attention and images are our first impression of the message.

    If we like it, we will hang around and read the written content and even look to buy the product or service.

    Or, if we don’t like it then we move on.

    That’s why Facebook has been ramping up its image and video posting platform, why Instagram and Snapchat are so popular and why Twitter has also beefed up its image posting platform. 

    They all realise that if content is king then it’s visuals are all powerful.

    You know, it’s no wonder that this has happened.
    Our TV screens have become bigger. I bought one a few months ago which is 60”! 60” is huge! The TV we had before was 42” and probably the one before that was 30”.

    Movie screen sizes have increased almost to the point that we have to exercise our peripheral vision to see the whole screen.

    Our mobile phones have got bigger, so much so that they’ve almost taken over from tablets.

    We have screens on cameras, watches, fridges, printers, security equipment, automobiles, cooking appliances and much more.

    Giant LED screens in public places assault our visual senses.

    So visual content is everywhere and that’s what we as consumers look for.

    Now, don’t get me wrong here! Written content is still important.
    As the saying goes a picture may paint a thousand words but you may need another thousand words to tell the whole story.

    Today visual content is a no-brainer for any business looking to market their product or service.

    Why the use of Still and Video images are the most valuable marketing strategy of 2017

    Not just visual content but good visual content.

    So what about your experience with visual content?

    What’s the number one obstacle stopping you from creating images or video for your marketing?

    I’d really like to know. So please leave your answers in the comments below. 

    For more like this subscribe to my newsletter below and get a free guide “Eleven Easy Ways to Improve your Marketing Photography”.

  • Understanding the 3 points of the exposure triangle

    Understanding the 3 points of the exposure triangle

    So, what is the exposure triangle?

    Well the exposure triangle is the relationship between aperture, shutter speed and ISO.
    Each one affects the other.

    OHM’s Law

    Remember Ohm’s law? Well if you don’t (I’m not even sure they teach it at school these days).
    It’s basically an electrical equation V Volts (power) = R Ohms (resistance) x I Amps (current) and if you change one you change the other.
    If you know the power and the resistance then by changing the equation to Volts ÷ Ohms = Amps, you can work out the current (amps).

    Understanding the 3 points of the exposure triangle

    It’s the same for the exposure triangle.

    The Three Points of the Exposure Triangle

    1. Aperture

    Aperture is a hole that lets light in. The bigger the hole the more light you let in.
    What does that mean?
    It means the smaller the hole the more in focus – the bigger the hole the less in focus.

    Let’s say you took a picture with a setting of F2.4. Because the size of the hole is inversely proportional to its setting that’s a large hole. The subject will be in the focus but the background will be blurry.

    But if you took a picture with a small hole e.g. a setting of F22. then everything will be in focus. That’s not strictly true as the amount in focus starts at the point at which you are focusing the camera out towards, potentially, infinity. 

    2. Shutter speed

    This is an easier one to grasp.
    As with the aperture, the longer the shutter is open the more light you allow in.
    Shutter speeds are measured in fractions of second to seconds.
    So, a shutter speed setting of 1/100 is one hundredth of a second or .001. A setting of 5 is 5 seconds.
    However, the effect is totally different from the aperture. A fast shutter speed will generally freeze motion e.g. sports. Whilst a slow shutter speed will blur motion e.g. a fluid looking waterfall.

    3. ISO

    ISO stands for International Organization for Standardization and in the film days was an indicator of how sensitive to light a film was.
    An ISO 400 film was 4 times as sensitive to light than a ISO 100 film.
    On digital cameras that sensitivity is for the camera sensor. When the ISO is increased or decreased you are in effect, making the camera sensor more or less sensitive to light.
    ISO 100 being the least sensitive whilst ISO 25600 plus is the most sensitive.

    Practical Example

    So, there you have the three points of the exposure triangle.

    I’ve already mentioned how each one affects the other but let’s see how that affects, for example, Product photography and look at a couple of specific examples.

    OK, so we’ve got this new beaut product that we want to take to the market place and we want to create some really cool images to use for marketing.
    Let’s say it’s this toy soldier
    We’re taking the picture inside which is fairly bright, even though we’re using just natural light. To make sure we get a properly exposed image we are going to take a couple at different settings.

    Understanding the 3 points of the exposure triangle

    The first image has an aperture of f5 and a ISO of 800 whilst the camera has calculated the shutter speed.
    You can see everything is in focus and the light looks fairly normal.
    But look closely and you’ll see that it looks a bit soft e.g. slightly blurred?
    That’s because the shutter speed is too low at 1/20 which means I couldn’t hold it still enough.

    Understanding the 3 points of the exposure triangle

    The second image had an aperture of f1.2 and a ISO of 2000. Here you can see that the soldier is in focus whilst the background is blurred (bokeh).
    That’s a fairly common way for ensuring that the spotlight is on the product and not distracted by the back ground.

    Because of the high ISO the shutter speed is 1/200 which means the image is much sharper.
    That’s because the shutter speed is now 10 times as fast and is a bit more forgiving.

    As an aside if you think you can hold a camera still regardless, think again. Our hands move without us knowing.

    [mailerlite_form form_id=7]

    However, the disadvantage of having a high ISO is that the image could have noise which may or may not be an issue.

    As a rule of thumb, with newer cameras the higher the maximum ISO setting on the camera the less likely noise will occur at lower settings. E.G. The OMD1 MKII Mirrorless Camera that I have, has a maximum setting of 25600. Realistically I don’t really see any noise in an image until around 1000. Compare that with my Galaxy S8 Smartphone Camera that has a maximum ISO of 800. With this one I notice noise at around 400 ISO

    Of course, there are ways of reducing or getting rid of noise in post-production with software like Adobe Lightroom. So, it’s not that a big issue.

    Below are two examples of noise from two different cameras.

    Understanding the 3 points of the exposure triangle
    Understanding the 3 points of the exposure triangle

    There you have it, that’s the exposure triangle.

    Did you understand all that? I’m happy to clarify anything you’re not sure of.
    Just post in the comments section below. Don’t be shy.

    Thanks for reading this article

    There must have been something that piqued your interest.

    Is it that you see yourself taking some great travel photos that you can share or display?

    Or is it you can see yourself reliving your travel experience by bringing home some emotive travel photos?

    Maybe you aspire to getting your travel photos published.

    If one or all of these is YOUR goal, I can help.

    If you sign up in the box below you’ll get my free eBook “9 ways to improve your Travel Photography”. At the same time, you will also subscribe to my Travel Photo Tips Newsletter.

    Remember if you want to take great travel photos

    •   that you can share and display.

    •   that help you relive your travel experience

    •   give you a chance to have your travel photos published

    then sign up below and subscribe to my Travel Photo Tips Newsletter and for your trouble get my eBook “9 ways to improve your Travel Photography”

    [mailerlite_form form_id=7]

    Any questions then please write your comments below or contact me here and please say hello at these places:

    FacebookTwitterInstagramLinkedIn:


  • How to take an ‘awesome’ selfie

    How to take an ‘awesome’ selfie

    In Why You Need a Professional Selfie I talked about having the need to have a decent self-portrait or ‘selfie’ on your website, social media or publication to show the human face.

    Maybe you’ve decided to get this done but don’t want to use a professional photographer or Uncle Eric who has a good camera.

    In which case read on.

    So just to refresh. In Why You Need a Professional Selfie I suggested that you need to

    Decide what sort of self-portrait you think represents your brand best

    A financial adviser or lawyer may want a more conservative head shot.

    Or they may want a full-length portrait with business like clothes like jacket and trousers.

    A social media site may wish to convey a trendy relaxed image. So, it may decide that, rather than have a headshot, an image of its employees being active may be better.

    Whilst I have concentrated on websites and maybe social media you may also wish to use it for some printed marketing material or even billboards.

    And that’s when the capability of the camera and printing become important

    The four most crucial factors to getting a professional self portrait

    1. Equipment

    I’m going to show you on a smartphone but any camera should do the job provided it works 🙂

    1. Light

    Light is everything. If the light is dull or too bright the image can be too dark or ‘blown out’

    (a term for images that have the highlights way too bright).

    1. A way of mounting the camera.

    How to take a selfie

    A tripod is undoubtable the best way if someone e.g. an employee, is not taking it for you

    1. Staging

    Make sure you select the correct pose. You may have to take several different images at different angles to get one you want to use.

    Incidentally there is no rule that says you must use the same image across the all platforms and marketing material.

    Set the camera up;

    1. Regardless of what the use is, make sure you have the biggest resolution. Much better to size down that attempt to upsize.

    On the Samsung S series smartphone cameras for example you will find picture size next to the settings icon.

    Select 16M or 12M or whatever the largest number is.

    The resolution on the IPhone is set to maximum and has no adjustment from that except with the use of a third-party app.

    Some other brands only give you the option to select large or high

    Note: The front camera usually has a much smaller resolution than the main camera so avoid using it for this application

    1. Find the timer and set it to 10 seconds
    1. You can usually just leave the camera on auto if the light is pretty good. But you can change the settings on some smartphones. The only ones I recommend is possibly the ISO or exposure compensation.
    1. Mount the camera on a tripod or any other way you can find to mount.

    I use the Joby Grip Tight Micro Stand a great little find that has a mini stand. It can also be fitted to a standard tripod head.

    Set the scene

    1. Find a well-lit position. You can be creative by sitting or standing near a window and allow the light to be strongest on one side.

    Alternatively, if you want to light up both sides, use a whiteboard on the side away from the light.

    1. Think about the background. Make sure it’s not cluttered and distracting to the eye.

    Again, a whiteboard is handy. White (or off white) backgrounds are always the best way.

    1. Think about your position. Ideally you want to be slightly lower than the camera if possible to avoid unflattering distortion.
    1. Now comes the tricky bit. Unless you have someone else helping, you are going to have to focus the camera on your final position, be it a full length or head shot.

    The easiest way to do this is to put something in that position and then focus on it.

    1. Just press the shutter button and then get into position.
    1. Take plenty of images trying different poses and maybe different locations. You can’t take too many!

    How to take a good selfie


    Review

    1. Review on your phone and add a filter if you wish. There’s plenty of them out there.
    1. Load the images onto your computer.
    1. Look for softness (slightly blurry), unwanted distractions or items and light
    1. Crop if required. You may need to crop for different applications.
    1. Upload to your website, social media or another platform.
    1. Discuss requirements with your printer if you are using hard copy marketing material.

    Finally

    Rinse and repeat if need be.

    You may think you’ve got it right but there’s always room to improve.


    Is there anything else you want to know? Did you give it a go?

    I’d be really interested in any results that you wish to share.

    Let me know in the comments below.


  • How to get ahead of your competition? Get good images

    How to get ahead of your competition? Get good images

    As a photographer and someone who has been involved in sales and marketing as a profession, I shake my head at the way some business’s view the use of images in marketing.

    Because image is everything!!

    I’ll say that again; “image is everything!!”

    It’s no longer about what your product is, it’s now about what the product looks like and represents, and that means image.

    To be fair I have seen some amazing imagery from some companies but in there are a lot that are pretty average.

    Let’s take the wine industry (I’m a pretty sad wine enthusiast)
    An out of focus, dimly lit picture of a bottle plonked on a dining table is just not going to encourage anyone to buy.
    With some care given to background, lighting and props, the final image can reflect a sense of place, lifestyle and even culture and give a much needed professional feel to a website, for example, which all helps to sell wine.Card Farm Pinot Noir

    Recently I attended a wine tasting that had little or no imagery available for the wines on tasting. The tasting was at a liquor store and was run by a distributor and the winemaker for this particular winery, yet amazingly the bottles were only seen when poured from.
    Nowhere on the literature were there photographs of the winery, wines or anything else that may leave a lasting impression.
    Unless I have my tasting notes or price list with me I wouldn’t recognise these wines were I to go into any other liquor store today.

    Sadly, I find that this is the norm

    There are 4 reasons why a business doesn’t invest in their marketing images

    1. Cost
    2. Time
    3. Lack of knowledge.
    4. Attitude that it ‘doesn’t matter’.

    The first two, cost and time are understandable but lack of knowledge, with some motivation, is easily remedied.
    There are plenty of resources both online and off line that can help the budget conscious business learn how to take good photographs.

    However for anyone who thinks it doesn’t matter then think again!
    Images are the new language. As at May 2014 (the last accurate report) 1.8 billion images were uploaded every day which is 30% higher than 2013!
    It is now estimated that we will have exceeded the 2 billion per day by the beginning of this year.
    In fact some estimators are saying that the number of images uploaded this year alone is more than the total of all previous years.

    No longer are purchasing decisions based on sales copy alone.

    Images are attracting attention and it’s never going to change back.

    So you’ve got to get your potential customers attention and that’s where striking images that grab comes in.

    What you shouldn’t do

    If I produced wine, (I did think about it once but it seemed much less enjoyable than drinking it) I would want to control the image of all facets of my operation from the product to the winery to the location.
    I hear of wineries having competitions to find the best image, usually on Facebook or Flickr, so that they can use it for marketing. Some may say that is a certain degree of control.
    However I would challenge that view as the vast majority of photos generated won’t provide the image that is best suited to that particular winery, even if it’s a good image.
    When you consider the effort and time to organise the competition and the cost of providing the prize, usually a case of wine, surely that energy would be better spent producing an image that conveys what the winery would like to show the world, rather settle for possibly the best of a bad bunch!

    Celebrities now days are going to great lengths to protect and control their image, some of it a bit too zealously see An Open Response to Taylor Swift’s Rant Against Apple. They understand the power that the image now has and its potential to affect either positively or negatively their business and consequently their earnings.

    What you should you do

    Well in the above wine tasting example, some great images of the winery and its location.
    At the beginning of the tasting they showed a YouTube video of the winemaker being interviewed and part of the footage was some amazing scenery next to the winery.
    Images of that scenery (a desert landscape next to the Pyrenees in Spain) could have been on a cover for the tasting notes or large prints on pull up banners or posters could have been placed or hung around the room.
    Then they could also have had some inventive and colourful images of the bottle and its label on the tasting notes.
    And that’s just to start with.

    Here’s 5 things to look for in your marketing images right now

    1. The biggest one is do they represent how you think your business should appear to others.
    2. Are they sharp i.e. no sign of unintended blurriness?
    3. Do they blow up to a reasonable size?
    4. Does it have impact?
    5. Is it memorable?
    6. Is your product clear and concise?

    Conclusion

    It’s your business and your product that are being represented.

    No amount of text will compensate for a poor first impression

    So just start by critiquing your images regardless of who created them.

    So if I could leave you one simple message it’s this:

    “A photograph shouldn’t be just a picture, it should be a philosophy”

    So what do you think? Anything I’ve missed?

    Please leave your comments below


  • Why You Need a Professional Selfie.

    Why You Need a Professional Selfie.

    Why You Need a Professional Selfie.

    We all know that a picture paints a thousand words.
    And we know that images are important to our marketing, particularly our online presence.

    Why is it then that often the one image that we should have, is missing or at best average?

    Which image is that? The SELFIE or as it used to be known as, the self-portrait.

    So why do you need a professional Selfie?

    When I visit a website I usually go straight to the about or start here page.
    It often surprises me how many about pages make no mention of the people behind them.
    For whatever reason they have no human images.

    In my many years of sales and marking there has been one truism: “People buy from People”.
    Usually people they like but most certainly people they trust and know something about.

    The human face

    There has been a lot of testing and research that confirms a human face on about page increases trust.

    When you have trust, the more likely visitors are to stick around and consume your content and/or buy your stuff!

    The about (or start here) and contact pages are the usually the most visited pages on a website.

    So if you don’t have a picture and some sort of bio you are telling visitors to your site that you are anonymous.


    why you need a professional selfie

    We as human beings tend not trust anonymous.

    Sure sites like Amazon or Microsoft are anonymous but they have multimillion marketing budgets that go a long way to overcoming their anonymous disadvantage.

    So make sure you have a professional selfie of yourself and your key personnel on your website.

    So the first 2 steps to think when taking a professional selfie are:

    1. What sort of self-portrait do you think represents your brand?

    A financial adviser or lawyer may want a more conservative head shot. Or they may want a full length portrait with business like clothes like a jacket and trousers.

    A social media site may wish to convey a trendy relaxed image.
    So it may decide that, rather than have a headshot, an image of its employees being active may be better.

    A tradesperson my want to have an image of themselves in working gear with a tool as a prop.

    Real estate agents tend to want half body (torso and head) shots.

    why you need a professional selfie

    Maybe you want black and white or sepia (a reddish brown hue that resembles the effect of aging in old photographs, the photograph not the subject!) as a point of difference.

    2. What are you using it for?

    Well as I said earlier the priority should be the about page of your website.
    If you have a team then make sure they too are on that page which could easily be a separate page underneath the main about page.

    Social media profiles are also pretty important. They show the human touch and are more likely to attract engagement

    You may also wish to use it for some printed marketing material like flyers and business cards.

    If you have been featured in publications, then a great head shot.
    Most publications, primarily due to the cost, are moving away from using a photographer.
    So having your own portfolio of self-portraits can be very useful

    Maybe you’re thinking really big and looking to get your face on a billboard.

    Whatever you are using it for make sure you take plenty of images, trying different poses and maybe different locations.

    And by the way, there’s no rule that says you have to use the same images across the all platforms and marketing material.
    You may want to convey a different image on your social media accounts than say, your business card.

    Why you are at, why not stick a ‘selfie’ on your contact page. It makes it feel more personal.

    So you can’t really take too many!

    Summary for why you need a professional selfie

    People buy from people, so make sure your brand shows you and/or your people.

    Take plenty of different professional selfie’s.

    Use them for not only your website but for other publications and social media.

    Check out some portraits in this gallery

    So what do you have? Do you have good ‘selfies’?

    Where have you posted and used them?

    Please leave the answers in the comments below

    While you are at it why not subscribe and get a free e-book to help you take better photos.
    The principles in this e-book apply not only to travel photography but to all types of photography. 

    [mailerlite_form form_id=7]

  • The 6 features you don’t need on your camera

    The 6 features you don’t need on your camera

    This is the last in my series features to have (or not have) on your camera

    The previous posts were:

    The essential feature to have on your camera

    4 features you must have on your camera

    8 more features to have on your camera

    If you haven’t had time to read them all whilst you are here for a visit then you can scroll to the bottom and get all four in a PDF.

    I have strong opinion on what you should have on your new (or existing) camera but guess what?
    I have an equally strong opinion on what you didn’t need as well.

    So, let’s get into it:

    1. Picture Styles

    Often there are picture styles, modes or scenes available and they can be countless; Action, Portrait, Landscape, Panorama, Sunset, Candle, Fireworks, Beach & Snow, Fisheye, Wide-angle, Macro etc. etc.

    Some models also give you some tips for certain photo genres in the same mode. E.G. “Tips for flower Photos”The street art act, Dream State Circus at the Street arts festival in Fremantle, Western Australia. the festival attracts over 100,000 spectators over the Easter long weekend.

    What is often not discovered until the camera is used is that some of these modes, e.g. Fisheye, Wide-angle or Macro need to have lens that support those scenes.

    There is one camera that it’s probably better to have some modes available for and that’s a good smartphone camera, like maybe the Samsung or Apple varieties. Most images taken by a smartphone are shared so it can be a shortcut to getting a good image first time.

    Rating: 2/10


    2. 3D

     Here’s a useless option ‘3D Photography’.

    3D TV’s bombed and as far as I can tell there’s not many 3D monitors either, so why would anyone want to shoot a 3D image or video.

    It is used for some specific industries e.g. Computer-graphics, Architecture or Health.

    However, for marketing purposes it’s useless as it relies on the viewer having the equipment to view it.

    Rating: 0/10

     3. Multiple Exposures

     Not so useless but not essential is the recording of multiple exposures.

    Multiple Exposures are photographs in which two or more images are superimposed in a single frame. For marketing images that could be handy although somewhat tricky.

    Some would say that it’s much easier to do it in something like Photoshop.

    Rating: 4/10

     4. Digital Zooms

    Digital Zooms are commonplace at the compact level and all phone cameras have it.
    Personally I avoid using them as much as possible and will use an optical zoom over a digital one.

    What’s the diff?

    Well an optical zoom is a true zoom lens. They produce much better-quality images.

    A digital zoom uses some in-camera image processing. When you use a digital zoom, the camera enlarges the image area at the centre of the frame and trims away the outside edges of the picture.

    The result is the same as when you open an image in your photo-editing program, crop away the edges of the picture, and then enlarge the remaining portion of the photo.

    By using the in camera digital zoom you lose the information around the crop, whilst if it’s cropped during post processing you can keep the entire frame for use later on.

    Rating: 2/10

    5. Face Priority

    My pet irritation is Face Priority. Personally I think it’s a gimmick.

    Originally in small compacts it’s spread its way into phone cameras and now even DSLR’s.

    If you are taking a portrait, then supposedly the camera will aid your focus by detecting the face.

    Really!

    Rating: 0/10

    Like most cities in the USA, Anchorage has a big fourth of July parade. This one was in 2012

    6. Printing

    Printing is on its way back and whilst the option to directly print from the camera could be handy, it’s also generally restrictive, requiring certain functions to be available on the printer.

    At the end of the day, if you are going to do any post processing even if it’s minimal you should be able to print from that software or alternatively take it to a print shop if you are looking for high quality.

    Of course, you can always use the self-service machines that are everywhere.

    Rating: 2/10


    Of course, there are others but they the main ones you will most likely come across.

    Now over to you do you agree with me?

    Do you find some of these useful?

    Any others that could be added to the list?

    As I mentioned in the beginning got no time to read this now? Download all four articles in one document and read both offline and when it suits you.


  • 8 features to have on your camera

    8 features to have on your camera

    “*I Still Haven’t Found What I’m Looking For”

    This follows on from my previous posts:

    The essential feature to have on your camera

    and

    4 features you must have on your camera

    Over the next few weeks I’m going to suggest some essential features you need to consider having when you are in the market for a new camera or even mobile phone with a camera.

    At the end of each feature I’ll give a rating out of 10 – 10 being must have.

    At the end of the series if you haven’t had time to read them all then you can scroll to the bottom of the last in the series and get all four in a PDF.

    1. Being able to turn off Flash. 

    Controversially I used to rarely used flash, preferring natural light.

    Yet the degree of control some of these cameras allow you to have over flash means that it can be used to enhance daylight and improve the image.

    So I use it more and more these days.

    There are options to use flash in several different ways, Fill in, Slow, Red Eye reduction, Auto, Off or On etc.

    But it’s the option to be able to turn it off especially if the camera comes with an inbuilt flash that’s really important.

    Speaking of inbuilt flash. Avoid using them as much as possible.

    The ideal flash should be off camera. Something I’ll discuss in a future post.

    Rating: On camera flash 4/10. Turn off flash 10/10

    2. Focus targeting

    Another option again almost universally supplied is focus targeting.

    Looking through the viewfinder and the rear screen you can bring up a rectangular or square grid of around 30 boxes that you can select to use as a focus target.

    Options usually include single, selected groups or all targets.

    Rating: 6/10

    3. Exposure Compensation

    Exposure compensation is great!

    The ability with just a twist of a dial to alter the exposure or brightness without having to alter the aperture or shutter speed that you’ve already set is extremely handy.

    Of course it has to adjust something so it should only be used for small incremental changes.

    Rating:10/10

    4. Metering

    Metering, whilst another handy option to have, is not used much.

    I think that’s because it’s not understood by most camera buyers.

    That too is a post for another day but suffice to say it’s a must have for the future.

    Rating: 7/10

    5. Image Stabilisation

    Many years ago I met a photographer who was taking clear and sharp images of wildlife at dusk without a tripod.

    That was my first introduction to image stabilisation.

    Basically it compensates for camera shake caused by slow shutter speeds and is a must have.

    Initially they were only available on the lens but nowadays most cameras have it inbuilt. So now you don’t have to worry about what lens to use.

    Again a must have.

    Rating: On camera 10/10

     6. AEL/AFL Lock

    (Auto exposure Lock/Auto Focus Lock)

    I use this option all the time. The ability to be able to lock your exposure and/or focus is invaluable.

    How does work?

    Well usually there is a button on the camera that allows you lock the exposure and or the focus and then recompose.

    When would you use it?

    In lots of situations Landscapes, Portraits, Products, even macro work

    Rating: 10/10

     7. White balance

    What’s white balance I hear you cry!

    Well it’s on every camera these days so if you leave the setting on auto you don’t have to think about it. But (always a but) there are times when auto doesn’t get it right.

    For example, tungsten or fluoro lighting tend to confuse it a bit.
    That’s when you take it off auto and set it to appropriate setting like, duh, tungsten or flouro

    Rating: 8/10

     8. RAW Format (Image Quality)Pike Place markets in Seattle, Washington, USA

    One phrase that is somewhat misleading is the term “Image quality”. Used for having the choice of what format to use i.e. JPEG or Raw.

    I’m not about to expand too much on what the difference is but if you shoot in Raw then you will need to do some post processing whilst JPEG is mostly ready to go.

    That’s simplifying it but to do the argument justice I like to use the analogy of cooking a supermarket bought ready to go meal that you sling in the microwave (JPEG) against a meal that contains the raw ingredients you have bought at the local farmer’s market and prepared and cooked from scratch (Raw).

    The former is what you see is what you get (unless you can’t cook and cock it up altogether). Whilst the latter is a creation that you can manipulate to give you whatever flavour and presentation you like.

    Clear? Another future post maybe.

    Anyway most cameras will give you the option to select either and/or both and other variations.

    But the option to be able to shoot in Raw is a must, if not to use now but in the future!

    Rating: Raw Option 10/10

    So did you understand all that? I’m happy to clarify anything you’re not sure of.
    Just post in the comments section below. Don’t be shy.
    While you are at it why not subscribe for future updates here.
    You’ll get my free guide “Eleven easy ways to improve your marketing photography”.

    *U2, I Still Haven’t Found What I’m Looking For