Katin Images Travel Photography

Travel Photos, Travel Photography Tips and Software

Blog

  • How to create the right stock photo background

    How to create the right stock photo background

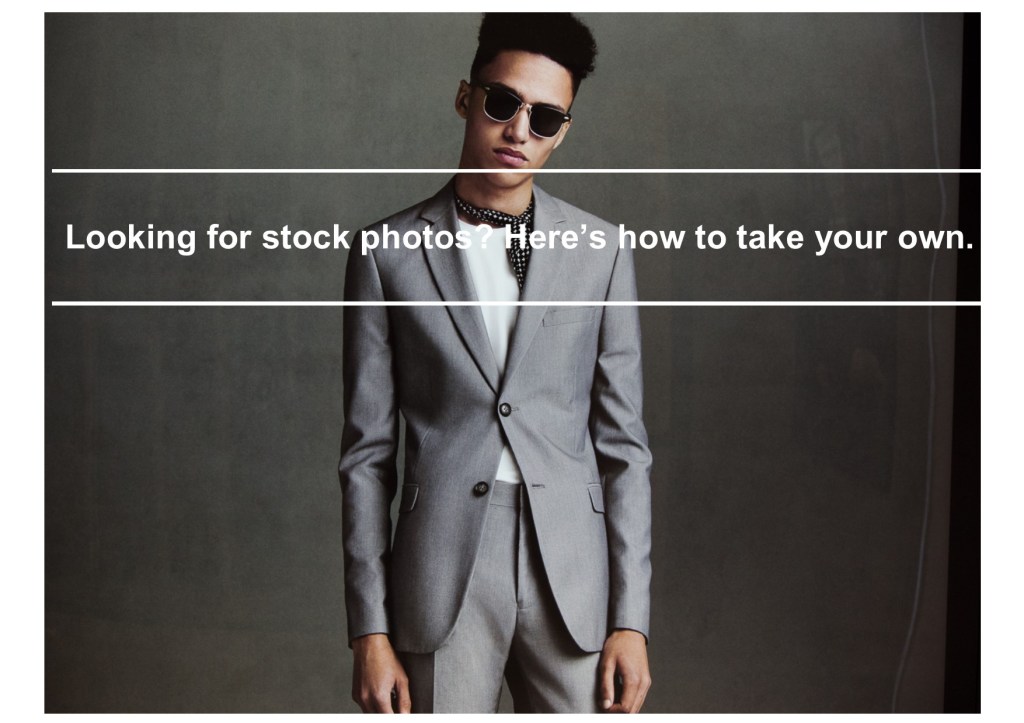
    A few weeks ago, I posted Looking for stock photos? Here’s how to take your own.

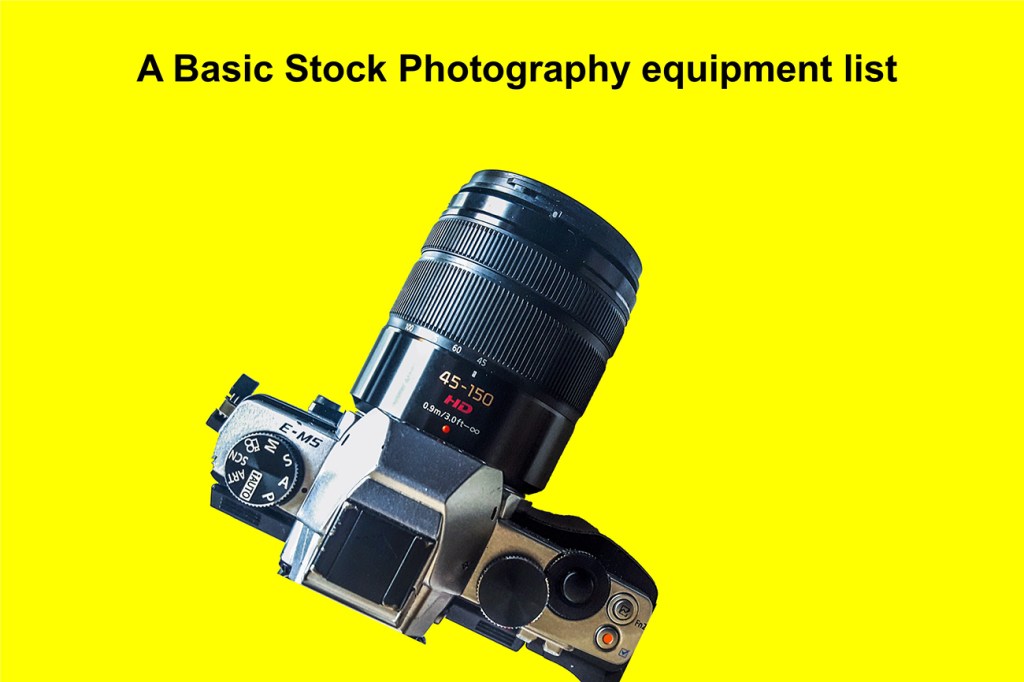
    In this post, I listed Four Basic Elements of Stock photography and gave a brief description of each one.


    Well in the next few weeks I’m gonna expand on each one. Then you, as a business owner can learn to take your own stock photos. Whilst it’s not easy initially, it is doable for almost anyone.


    Even if you have no intention of taking your own, this is still a good guide to how good – nay great – stock images should be:


    The first of these basic elements of stock is one that most will not even think about but is arguably the most important for a great image.

    And that is – drumroll –


    Background


    In general, most backgrounds should be clear of any distractions and that means being ‘clean’ and simple.


    Good backgrounds can vary in form but their prime importance is to highlight the main subject and purpose of an image.


    A lot of backgrounds are bland, often either black or white. Some are blurred or out of focus.


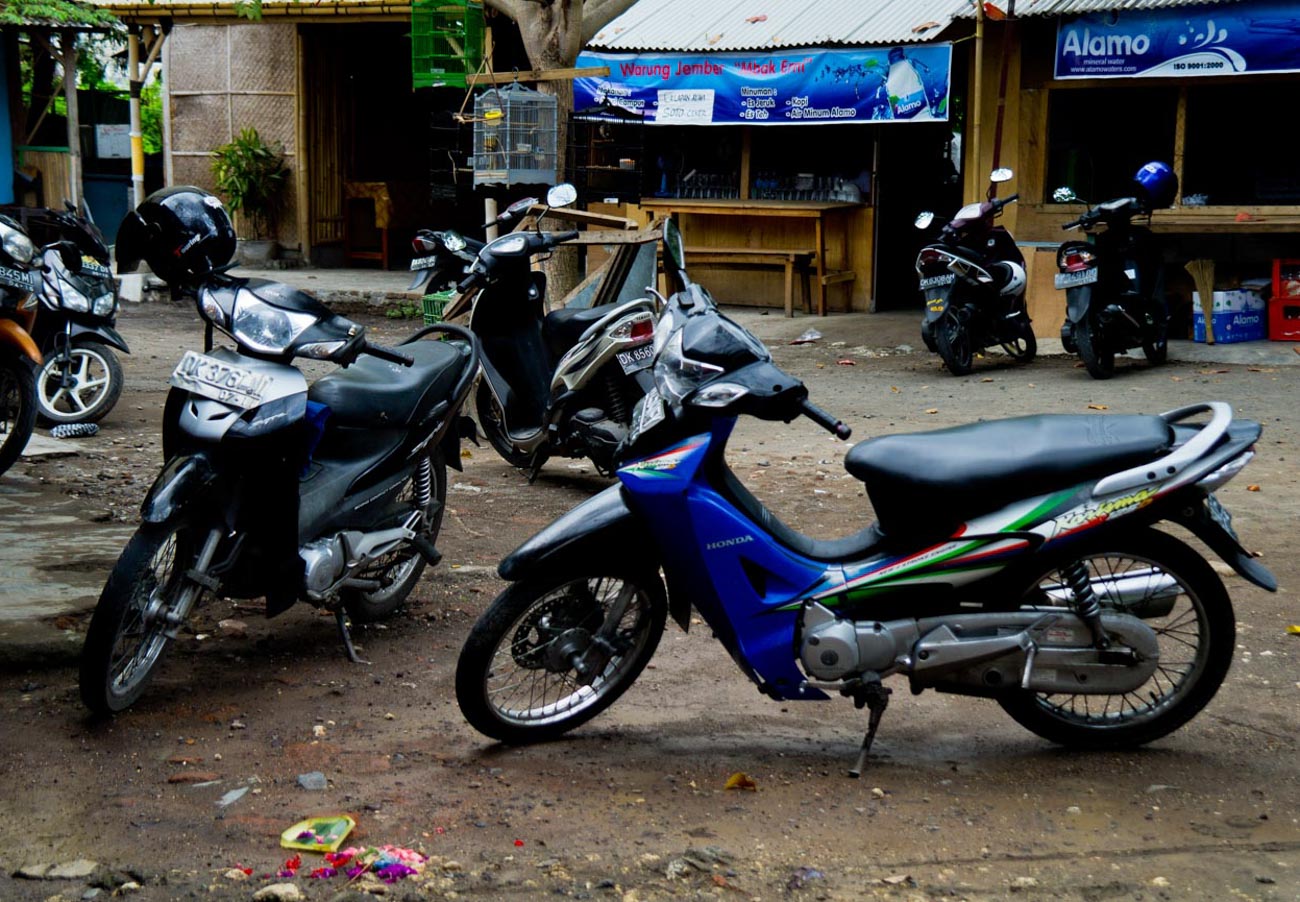
    But, if you look at this image below you can see that the background is full of distractions. That’s because the subject matter is not just the shop seller but the stuff and trinkets all over the shop.


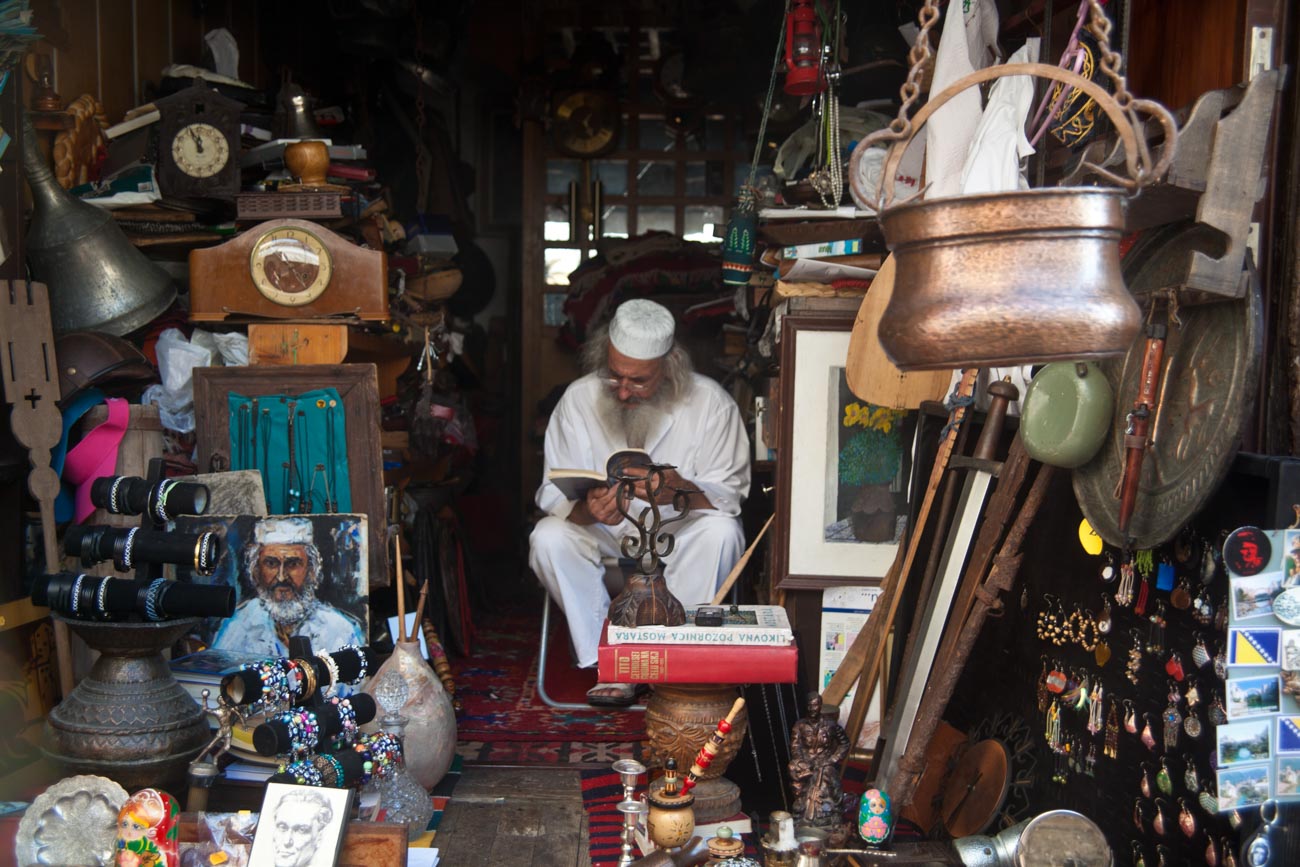
    Taking the same scene with an out of focus background just wouldn’t be the same.
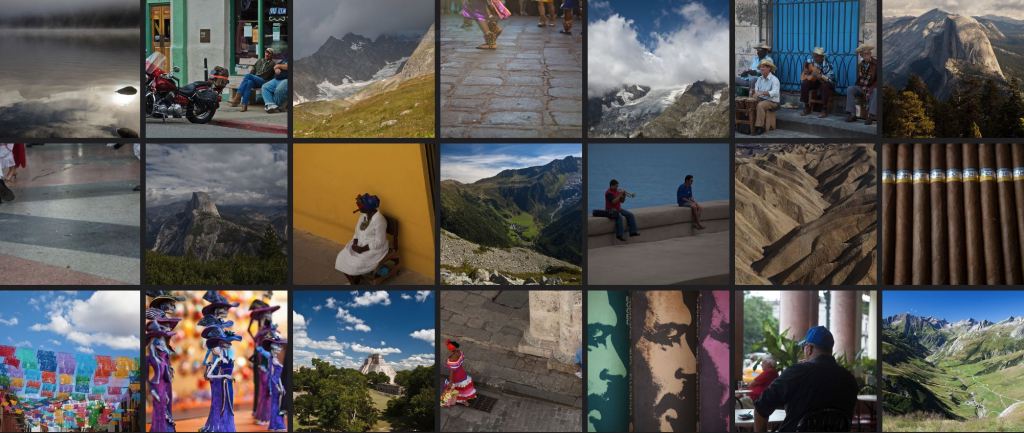
     

    Genres


    There are 100’s of genres of stock photos:


    There’s Abstract, Aerial, Architectural, Conceptual, Conservation, Cloudscape, Documentary, Ethnographic, Fashion, Fine-art, Fire, Glamour, High-speed, Landscape, Nature, Photojournalism, Portrait, Selfie, Social documentary, Sports, Still life, Street, Underwater, Wedding and Wildlife to name but a few.


    But rather than go through each one, we’ll pick out the most common types of background that a business owner will most likely need regardless of genres.


    Let’s jot down some examples;


    Staged backgrounds


    Most product shots use a white or black background. There are lots of ways of creating either.


    The simplest being the use of board like a matt board.

    Of course if you are a master of photoshop you can take an image of your product on any background that contrasts with the product itself.
    Then do a quick select and create layer to put onto another background.


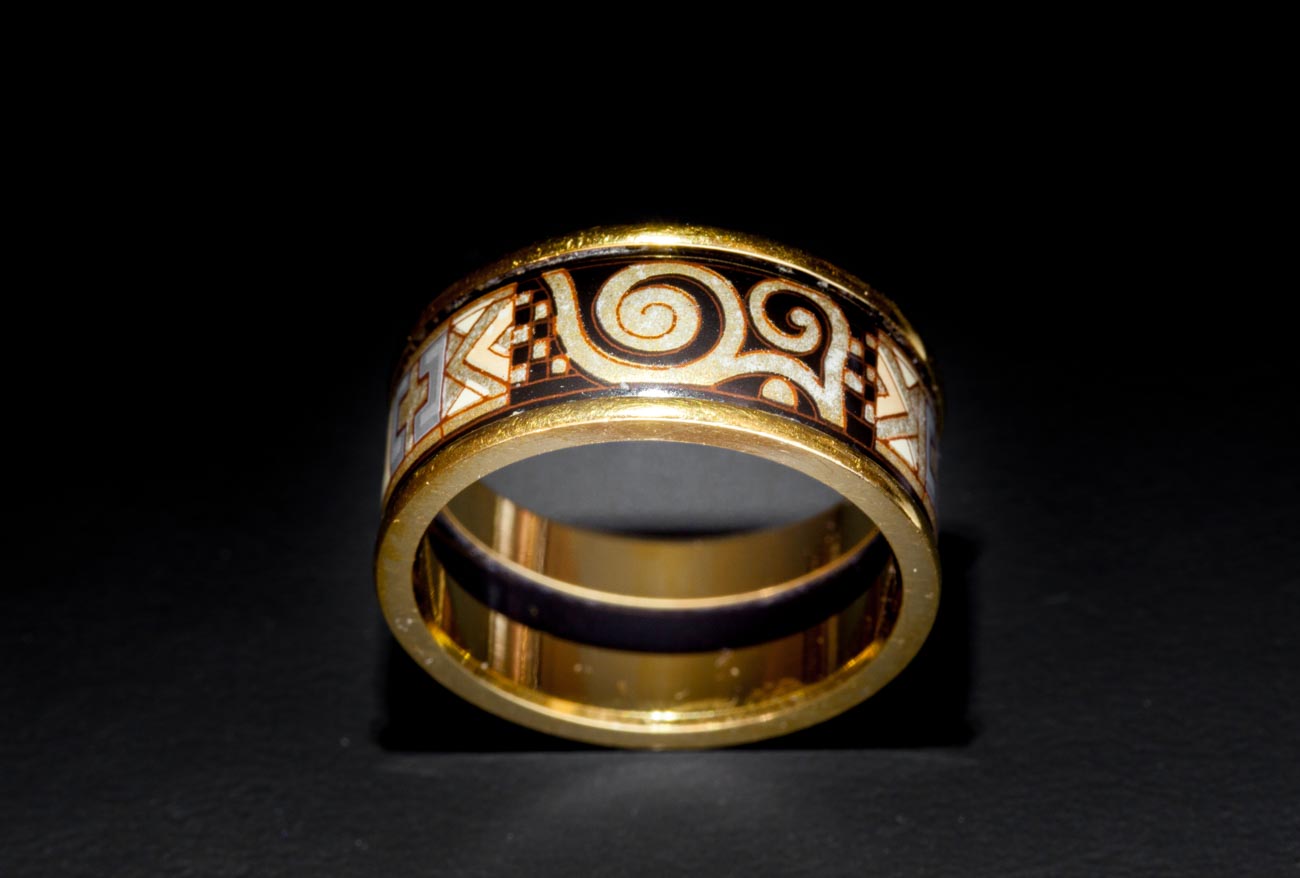
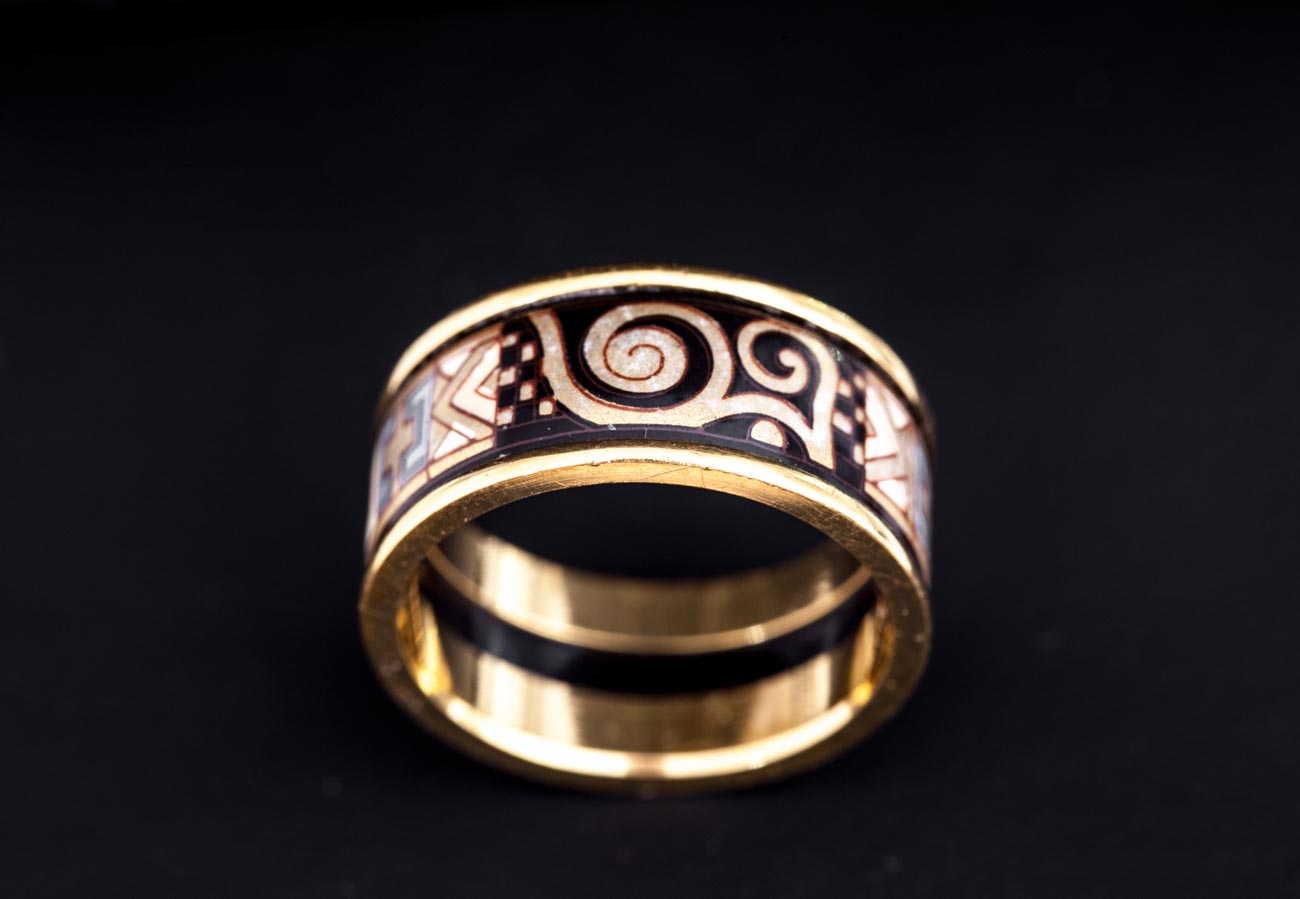
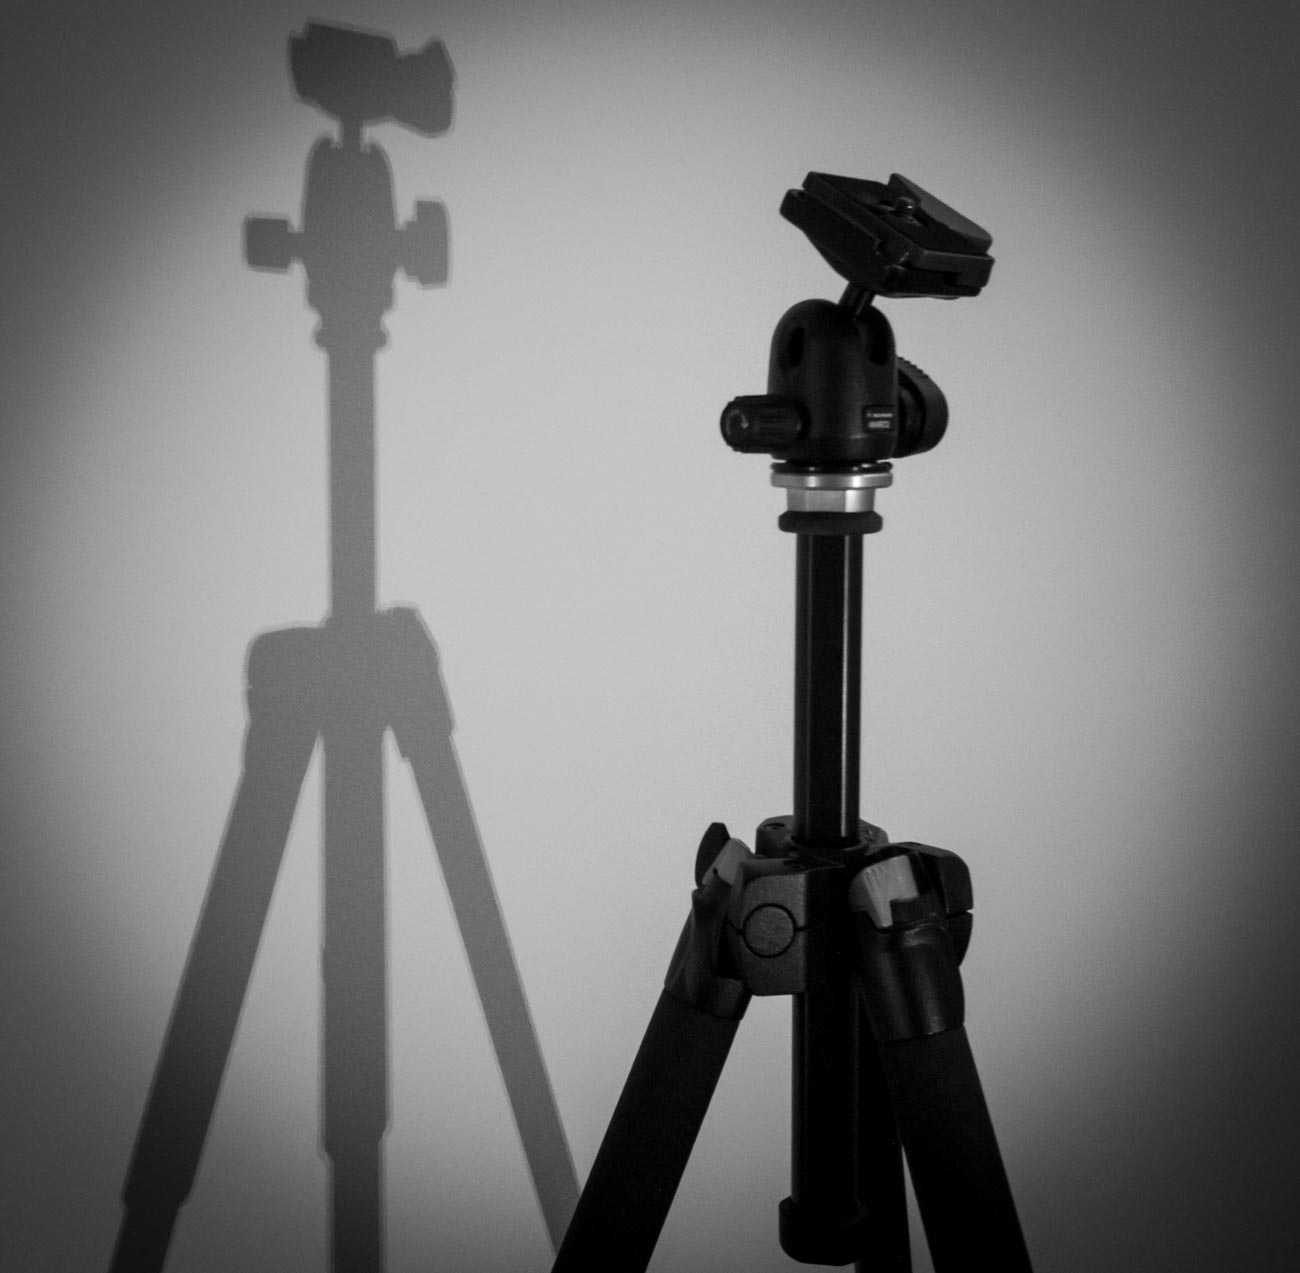
    Another way is to position the product on a piece of glass with a black background so that it appears to be floating.
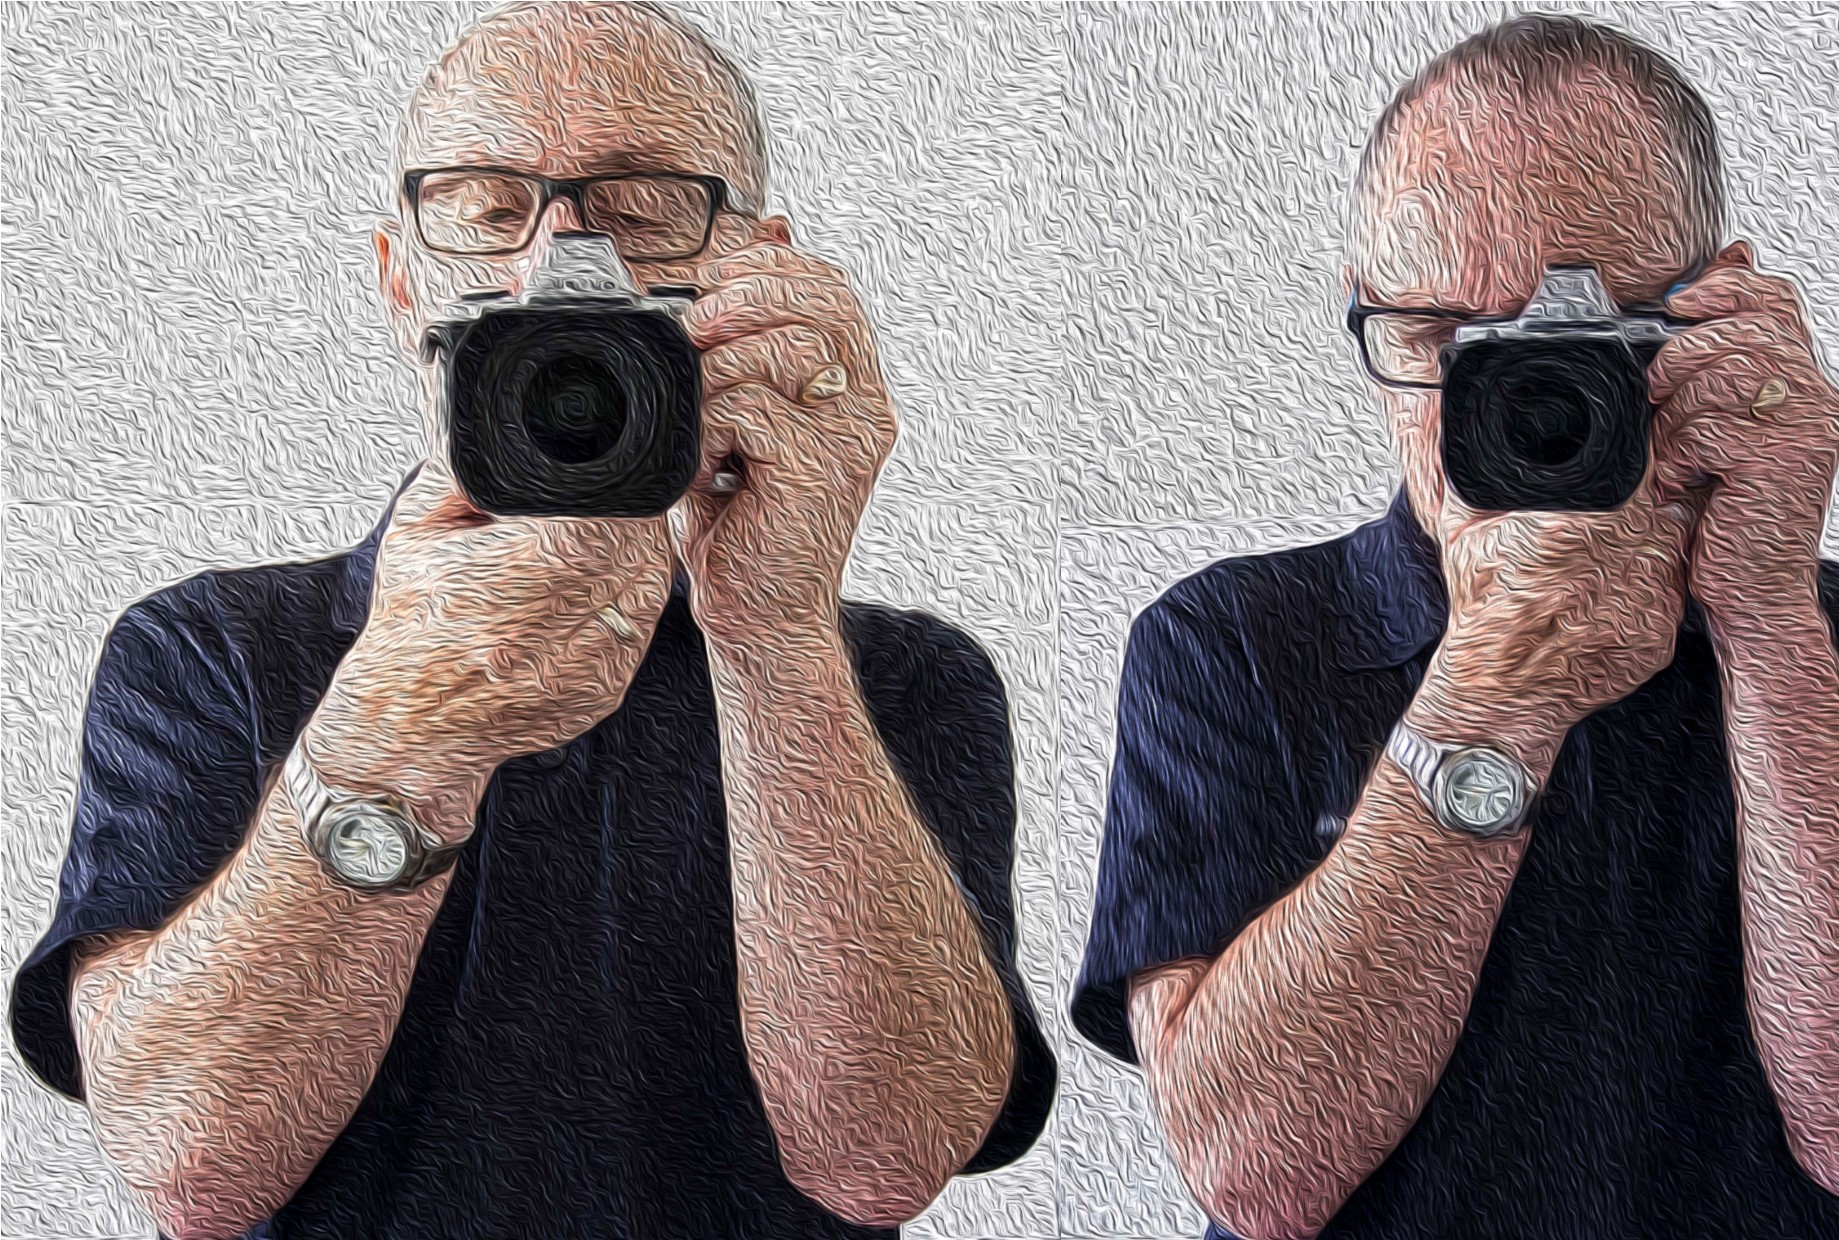
    How to create the right stock photo background


    Bokhe backgrounds


    The out of focus (it’s called bokhe) look is best with people shots so that the whole image looks more authentic.
    Why is that?
    Well if you look at another person your eyes will focus on them and something most of us don’t notice, make the background slightly out of focus.
    Slightly out of focus on an image doesn’t seem to have the same effect on the viewer as totally out of focus.

    So, the photographer is trying get, to quote Wikepedia’s definition of Bokeh, “an aesthetic quality of the blur produced in the out-of-focus parts of an image produced by a lens”.

    Not sure what all that means?

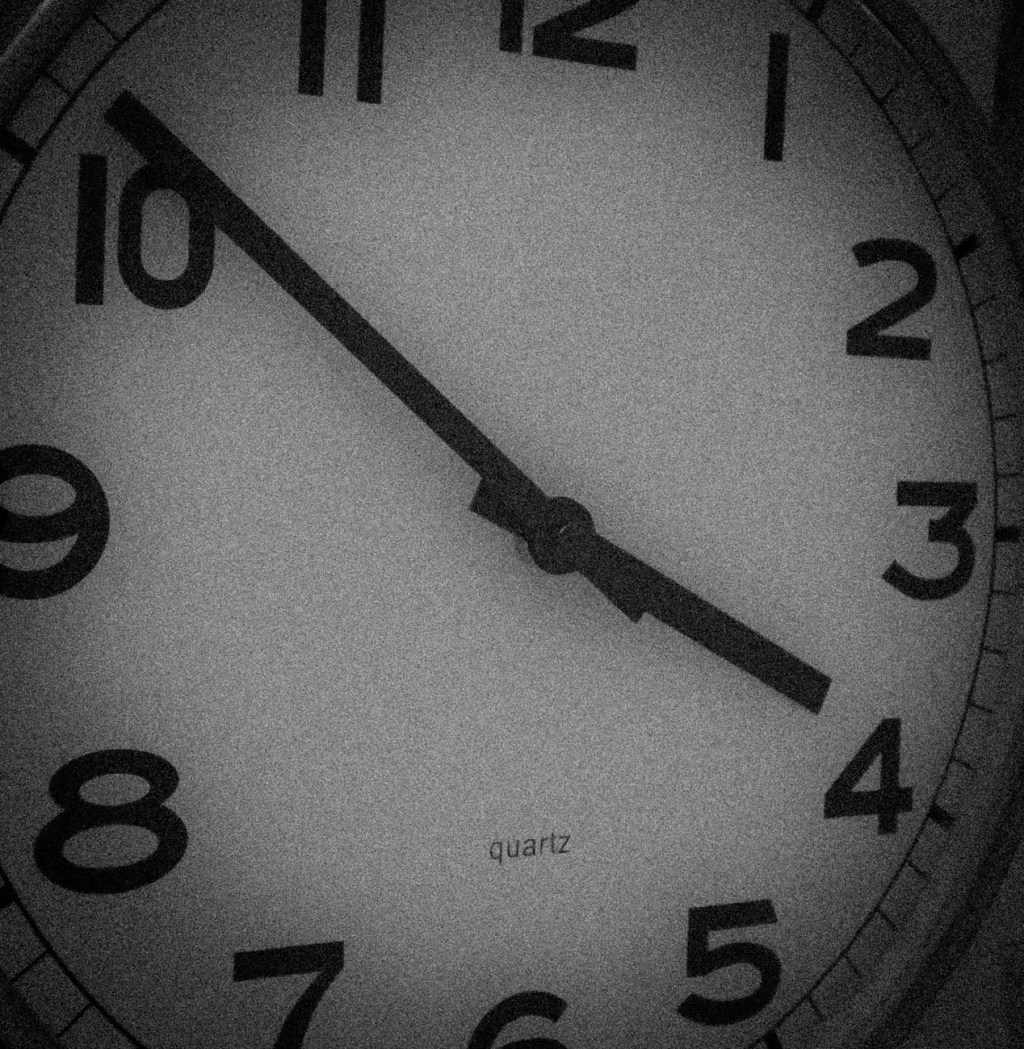
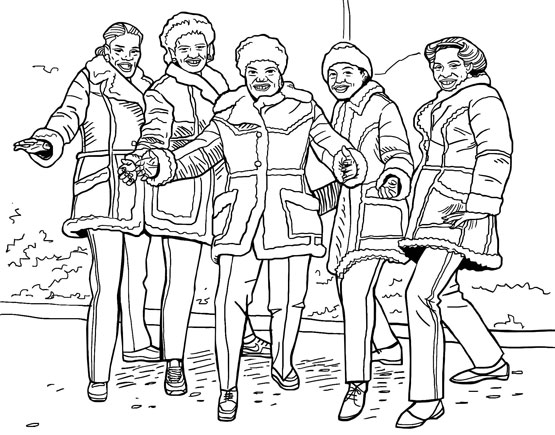
    Look at this image and read 10 Vital Facts about Camera Aperture.


    How to create the right stock photo background


    Other types of stock photos that use Bokhe are Abstract and Macro (e.g. flowers or small items like jewellry). A more left field genre that uses Bokhe is conceptual which is a type of photography that illustrates an idea.
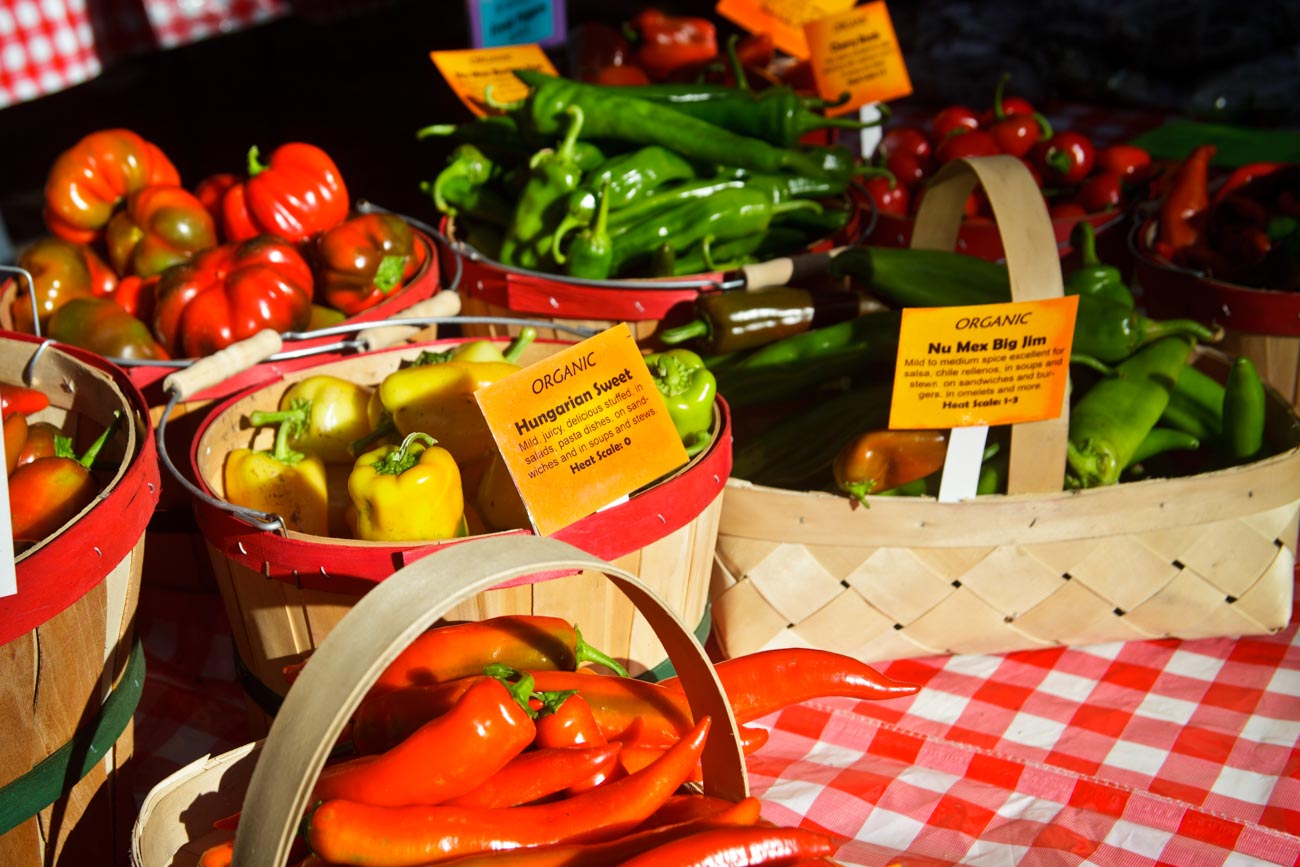
     

    Busy backgrounds


    Most business photos usually have a slightly busy background to typify activity in the workplace and often include people as part of the scene.


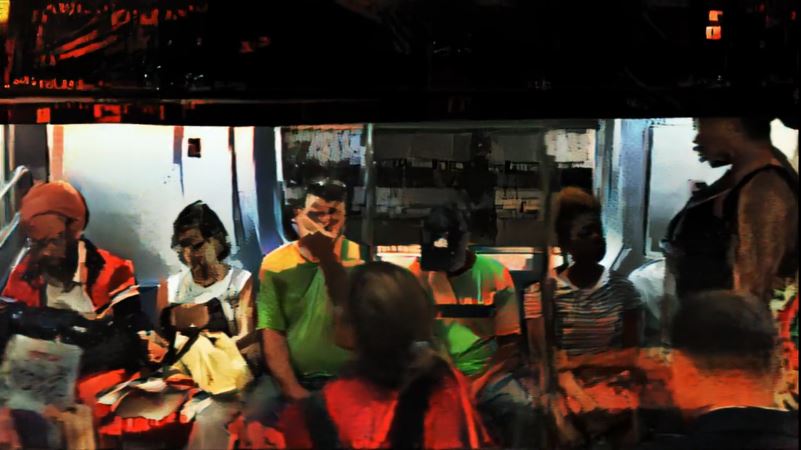
    If you are looking to show an activity e.g. making coffee in a cafe then you can get away with a fairly busy background. That can work well, so long as it doesn’t have distracting elements like bright colours or some other activities that take the eyes away from the main subject.


    No background


    In my years of learning photography, and I’m still learning by the way, the phrase of fill the frame was used in stock photography.

    Filling the frame or zooming in, either by foot or by telescopic lens, to your subject matter is a great way of not having to worry too much about the background.

    Stock agencies have tons of pictures that have filled that frame, with categories such as textures and abstract.

    The benefits of these pictures is that sometimes you can also use them as a background which does mean a touch of post processing is required.


    In the coming weeks I will create a basic background checklist which will help remind you of some of the items that we have just covered.


    I cannot stress how important a good background is for a stunning image that will help you make more sales.


    So as I said at the beginning, even if you are not going to take your own it’s vital you pay careful attention to the background of any image you are looking to use.


    If you have any questions or comments about this post, please leave them in the comments section below.


    Or feel free to contact me directly via my contact page


    Sharing is caring as they say (although not sure who “they” are).


    If there’s some people you know who may enjoy this or any other post on this site, please share with them.


  • A Basic Stock Photography Equipment List

    A Basic Stock Photography Equipment List

    Introduction


    So, you’ve had enough. You’ve spent hours trolling stock photography sites, looking around the web for any royalty free or creative commons images that will fit your business and your message.


    Finally, you’ve said, stuff it! Let’s create our own, after all how hard can it be.


    It’s a brave decision because it’s actually not that easy but, it can give you the image you’ve spent hours looking for.


    So how do you go about it?


    Well let’s forget the creative side for a moment, I’ll cover that in future posts. Let’s look at the second most important item and that’s equipment. Below is a basic stock photography list 


    A Basic Stock Photography equipment list
    “Talk Here” can be used as stock photo for communication

    Equipment


    Whilst equipment is not everything. It’s a bit like wanting to drive a car you have to have one or at least access to one and then you start to learn.


    Now I wouldn’t recommend you borrow the equipment, at least not all of it.


    Where the car analogy differs is that it usually will take you a few minutes to adapt to the basics of a different car. Unless of course it’s a car from a different country that drives on the opposite side of the road, in which case that’s going to take a lot longer.


    With a camera, there are similarities and different cameras of the same brand often have strong similarities.


    But to speed up the learning process and then the shooting process, it’s best to stick with the same equipment if possible.


    So, without further ado, here’s’ a list of what you need to get started:


    Camera:


    Yes, I know, that’s obvious.


    There is a whole range of cameras out there.

    To help guide you in choosing, I have written a series of posts called “A Guide to Camera Features” which you can download as a free pdf here.

    My suggestion is to have either a DSLR or a Mirrorless, i.e. a camera that has interchangeable lens.


    Small camera:


    A few years ago, I would have said a compact camera but nowadays a good smartphone camera more than does the job.


    Why do you need this as well? To take reference pictures to help stimulate creativity. To quickly record some visual ideas about your business that you can come back to.


    A Basic Stock Photography equipment list
    Architectural images are always good as stock photos


    Lighting:


    As with cameras there are countless lighting systems available. Your camera may have a flash but I would recommend that you have off camera lighting or flash.


    A lot will depend on whether you intend taking images that will need artificial lighting.


    Even you intend to use natural lighting there will be a situation where artificial lighting will be necessary, even if only for a special effect.


    Tripod:


    Keeping a camera still will be essential on some shots especially in the light is low.


    Lens:


    As I mentioned earlier if you have a camera that has interchangeable lens then you need a couple of lens at the least. Allrounders are the best way to go. In 35mm speak, 24-70mm and a 50-120mm or close to are good examples.


    If you can stretch your budget to a prime lens, then a 50 or 100mm will give you nice crisp images.


    Computer or Laptop:


    Most people and businesses have at least one desktop or Laptop or something in between.


    How much RAM and Processing Speed you need it will depend on the amount of post processing you want to do and what programs you will use.


    I’ve found that having a SSD drive rather than a standard moving parts drive is worth the extra cost.


    It’s like choosing between a motor bike or a pedal bicycle for speed! You’ll get there slowly on a bicycle but nowhere as quick as a motor bike will take.


    Storage is cheap so make sure you have plenty of it.


    Portable hard drives or NAS type storage always works well.


    Monitor:


    If you are using a laptop it’s worth investing in a good easy to calibrate monitor, so you can view and see your images as you want them to look.


    Best size is around 22-26”. Bigger if you can afford it.


    Accessories:


    Some basic but necessary accessories would be SD or memory cards, spare camera batteries, camera bag, cleaning cloths and back up hard drives.


    A Basic Stock Photography equipment list
    Good lighting can help spotlight products


    Conclusion


    Of course, buying photographic equipment can be a bit like a black hole.


    But don’t let that scare you, what’ve I’ve listed above is the basics and even that could be cut back a bit.


    It’s not the equipment that takes the photo it’s you and you can take excellent photos with even a basic smartphone camera.


    Whilst the better camera equipment will give you increased quality in some circumstances, better equipment is more about having additional flexibility and options.


    I hope I haven’t put you off because this is an investment in yourself and your business.


    Taking some great and powerful images that compliment your brand can provide a huge return on investment, especially if you use them for marketing on the right platforms.


    If you have any questions or comments about this post, please leave them in the comments section below.


    Or feel free to contact me directly via my contact page


    Sharing is caring as they say (although not sure who “they” is).


    If there’s some people you know who may enjoy this or any other post on this site, please share with them.


  • 8 reasons to post Images and Visual Content online

    Why good photography is a great investment for any small business

    “Don’t let nobody take care of your business better than you!”

    So wrote James Brown in his lesser known song “It’s a new day” and he is as right today as he was in 1970

    You see

    In the game of marketing the big brands are winning hands down.

    They hire large marketing companies and/or specialist photographers to make their brands stand out in an increasingly crowded market.

    So does that mean that the small business like you can’t compete in the visual stakes?

    Of course not!

    As I wrote in 8 reasons to post Images and Visual Content online the internet has changed things for the better.

    Expanding on that subject – well sort of anyway –
    Why good photography is a great investment for any small business is pretty self-explanatory.

    Don’t forget to leave a comment at the bottom of the article or if you wish you can hit the reply button.

    Please enjoy and share with ya mates.

    Nick

    nickatin.com

  • Looking for stock photos? Here’s how to take your own.

    Looking for stock photos? Here’s how to take your own.

    Ever wondered how there are so many good stock photos out there? And how they got taken?


    Have you also downloaded one and had to settle “for almost but not quite right”?


    Maybe you’ve got fed up looking for the right one and just settled for something free and second rate.


    Well, ‘you’ can take your own.


    If you know your way around a camera or even a smartphone you can take the image
    you need to display for your business.


    Don’t get me wrong I’m not against stock photos. They have their place.


    But most small businesses often can’t afford to use the good ones.
    So, they end up looking for free ones, which has a big cost in time, and then use them, more often
    than not, for their online presence and a lot of these free ones are just not good enough.


    In this article by Paul Suggett of the Balance. He uses the analogy of stock photography being
    the “off the shelf clothing” and either your own or your photographer’s photos being the made to
    measure that “fits you like it fits no one else”


    Of course any Stock photo you use is not exclusive to you which can create other issues.


    For more on that read Why stock images are bad for business!


    But you can take a leaf out of the stock photography industry and follow these rules to take
    your own purpose taken image.


    Looking for stock photos?


    Most *stock photographers use these following elements when taking stock photography.


    Four Basic Elements of Stock photography


    1. Background


    2. People (Model/S)


    3. Subject


    4. Involvement


    Let’s break this down:


    1. Background


    Almost as important as the subject matter. Simplicity and Clarity are the keys here.

    You want to ensure that the background doesn’t have distractions.


    Choose a background that’s uncluttered and depicts the story that you want to tell.

    For example, say you have a kitchen product, then use an actual kitchen or at least
    have a background that looks like a kitchen.


    The Kitchen needs to be a fairly bland kitchen with no other brands or appliances obvious.

    Using contrast between the people, your subject and the background can give the image a
    3-dimensional feel (without photo-shopping)


    2. People (Model/S)


    A vast majority of stock photos have people. People evoke emotion and interest.


    In the Kitchen product example, ideally you would have someone using it.


    Make sure they are posing naturally not as if this a family photo or portrait.


    You want to convey the feel that you as the photographer are a fly on the wall and
    not make it look staged.


    If you are going to use the image for commercial or marketing use, ensure you get the model,
    even if it’s your Aunt Amy, to fill out a model release. Just in case you fall out with the old girl
    and she wants you to pay her in money instead of tea and scones later.


    I will cover this issue in a later post. But it’s worth being flagged here.


    Looking for stock photos?

    3. Main subject


    This is the main focal point of a stock image. You want it to shine out. Most products, and services are
    meant to be used, worn or consumed. Like the Kitchen product show it in use.


    But be careful! Don’t go overboard with the subject after all the story you are telling is what
    benefit it will bring to your potential customer’s life.


    If as another example, you are wine producer just taking images of your label or bottle is not
    going to get you sales.

    You could depict when is a good time to drink it. A Rose on a warm summers
    afternoon, a Riesling matched with Thai food.


    4. Involvement


    This is gives the opportunity to show your subject being used by someone who is really involved.
    They should be showing some emotion maybe enjoyment or surprise.


    Some images can work better if there is more than one person.

    In the kitchen product example, they could be using it and interacting with someone else,
    who looks amazed at the results or else could be helping or also using the product.


    Remember it’s not a portrait you are after. Even if you have a piece of clothing or Jewellery,
    much better to show how people wearing it being active even if it’s only reading a book.


    *By the way I have defined a stock photographers as a photographer that takes images for
    certain markets. They are not taking images on behalf of a specific client


    If you have a product that you are considering taking your own images of then you may be
    interested in this article Make sure your Product Image speaks for itself with this Photography Checklist.

    At the bottom of that post is a link to download a checklist which will help.


    Thanks for reading


    Post any comments below. I’d love to hear them.


    And do us a favour! Please share any way which works for you.


    If you want more like this then please subscribe below and you will get a
    free guide on how to improve your photography.


  • 20 easy ways to find time to learn photography (or anything else!)

    20 easy ways to find time to learn photography

    Time, time, time is on my side, yes it is

    So said the Rolling Stones in Time is on my side in 1964

    Like you, I’m not sure time is on my side.

    We’ve all been there – not enough time in the day to get everything done.

    So I understand the complaint of “I don’t have time to learn how to take better pictures of my product or service”

    But now it’s not about working harder or even time management (apparently that’s soo 20thcentury!).

    Now it’s about having the energy to do what’s needed.

    So to help you I have a little read that will hopefully give you ideas on how to make the most of your time.

    20 easy ways to find time to learn photography (or anything else!)

    TIP:

    Sticking to your priorities and limiting your decisions will give you more energy.

    Feel free to comment by either hitting the reply button or using the post comment section.

    Please share and enjoy

    Nick
    nickkatin.com

  • How to Take a Great Photograph – 9 Essential Elements

    How to Take a Great Photograph – 9 Essential Elements

    In life, everything can be broken down to essential ingredients. In other words, you can simplify
    anything as long as you understand your audience or student/s.


    In this post, I will endeavour to answer the question “how to take a great photograph”.


    Of course, to some photography is art and great art is very much in the eyes of the beholder.


    So, let’s clarify what I think a great photograph is. Again, I am going to simplify because I think there
    are only two elements:


    Does it evoke a response from the viewer?


    Does it capture the subject matter in a way you intended?


    So, without further ado, let’s look at the 9 essential elements required to take a great photograph:

    1 Composition


    Composition is everything! You can have a great subject and a great camera and take a pretty awful photograph.


    There are two basic rules of composition.


    Make sure the subject matter is properly composed and make sure there is nothing in the frame
    that will distract the viewer’s eyes.

    2 Focus


    Making sure your subject is in focus is vital.


    Get this wrong and there is no turning back. Whilst there are some tools that will allow you to
    correct focusing after the fact, they are not perfect.


    Of course, correct focusing may be out of focus for effect.


    But either way it’s up to the person behind the camera to control this essential element

    3 Depth of Field (DOF)


    DOF is by far the most misunderstood element of the these 9. Like focus, it’s essential that
    you decide and control what you want in focus and what you want out of focus.


    The example below shows 2 different DOF. DOF is controlled by the aperture.


    For more on aperture I wrote a post 10 Vital Facts about Camera Aperture


    How to Take a Great Photograph - 9 Essential Elements

    How to Take a Great Photograph - 9 Essential Elements

    4 Light


    Light is to Photography as a kitchen is to cooking. Very hard to create a dish without somewhere to cook.

    Very hard to create a great photograph without light.


    It’s pretty important you pay attention to the light.


    Also pay attention to where the darks or highlights are falling so you get the right balance.


    Avoid extreme contrast if it doesn’t enhance the image.


    Over exposure can spoil an otherwise great image.


    How to Take a Great Photograph - 9 Essential Elements

    5 Stability


    The biggest enemy of a great photograph is blur commonly caused by camera shake.


    The use of a tripod is the best way to ensure crisp great photographs but there are other techniques.


    See this post 5 Ways to Eliminate Camera Shake for more on that.

    6 Subject


    It should go without saying but I’ll say it anyway, a great photograph needs a great subject. Whether it’s a
    product, person or landscape. Street scene or sports competition.

    The subject should always be the most important component in the frame. Otherwise what’s the point!


    The subject is the story and the most likely the one thing that will invoke a response from the viewer
    (and that could be your customer)

    7 Position


    As with composition and subject it’s a great idea to put yourself in the right position so that both of
    these elements are as good as you are going to get them.


    It’s always a good idea to try out different positions if there is time, to make a point of difference.


    Try lying on the floor or siting or standing on a chair, you know, experiment.

    8 Moment


    Now you could be forgiven into thinking that if you are taking a product picture that’s stationary, the
    moment doesn’t matter.


    But it could.


    Maybe the light is changing.
    Maybe your props are precariously balanced and could fall over any minute.


    Maybe you or your subject are getting tired.


    There are lots of factors that can dictate the right moment to press the shutter. If it’s action or
    a portrait every second is different.

    9 Pressing the shutter


    Can’t take a great photograph if you don’t take the photo!


    That shutter is the only thing between you and greatness!


    That’s “how to take a great photograph” using these 9 essential elements.

    Are there other factors? Of course, but most of these are technical and that’s not what
    I wanted to discuss today.


    If you have comments or questions, chuck them in the comments box below


    If you liked this then sign up below and you’ll get a free guide which expands on some of these elements.

    Plus, you’ll get future updates straight into your inbox.


    If you know anyone who would be interested or enjoy this newsletter,
    please encourage them to sign up here


  • Great stories from the world of Commercial Photography

    Great stories from the world of Commercial Photography

    This is the first of an occasional series of interesting Photography stories from around the web. 


    My hope is that they will inspire, interest, educate or at the least amuse.


    Of course, we are all different but I’ve grouped these stories into how they got my attention:

    Educate


    DIY Photography have a great short explanation on the full frame v crop sensor comparison. 


    They use portrait photography as an example but you could easily apply this to other genres
    such as product photography.


    Great stories from the world of Commercial Photography


    Full Frame Sony a7ii Vs. Crop Sony A6000, Which Is Better for Portraits?


    Ever looked at your holiday snaps and wondered how you could make them better?
    The suggestions in this article this could be your answer.


    How to make a boring vacation photo something AMAZING!


    Inspire

    This article on Digital Rev caught my eye. It shows what’s possible with some imagination and
    I think, lots of time!


    Great stories from the world of Commercial Photography


    Watch as New York City is Transformed into a Moving Picasso Painting


    While most of us will never use a photo editor, this article on Peta Pixel explains the value of
    using one if you have the money.


    The Olympics Prove the Value of a Photo Editor


    Never got into Hip-Hop much but I don’t need to with this inspirational idea of how you can
    utilise your images and get an edge.


    Great stories from the world of Commercial Photography


    Your Favorite Hip Hop Photo Book is Now a Coloring Book


    If you need any ideas on marketing yourself or your business, then Clint Nolan has an amazing prom mailer


    Photographer’s Handmade Promo Mailer is Beyond Impressive


    Interest Frighten


    These 2 are more than interesting, they are downright scary.


    The first is one selfies on the go. 


    I wish I could say that as an Aussie it doesn’t happen in Australia but I have no doubt the numbers
    per capita would be the same here.


    #Driving Danger: Instagram Posts Shed Light on a Distracted Driving Trend 


    Not quite so scary but quite revealing is the care taken by some of Amazon’s delivery contractors. 


    Let’s be fair though, this issue is not unique to Amazon.


    Watch How Amazon Delivered a $500 Camera Lens


    Humour


    And now for something cute:


    Great stories from the world of Commercial Photography


    Ten-Month-Old and Rescued Pup Make for an Adorable Portrait Duo


    And funny:


    Doctor Hilariously Recreates Celebrity Photos to Raise Money for Cancer


    With that I will leave you with Oscar Wilde who is meant to have said life is much too important to be
    taken seriously.


    What he actually said was “Life is much too important a thing ever to talk seriously
    about it.”


    Either way he was right.


    If you liked this, please let me know in the comments section below. 


    Or if you want to contact me directly, you can sign up to be notified of any updates or new articles in
    the sign-up section below. 


    You’ll get a handy free guide on how you can improve your marketing images.

  • Make sure your Product Image speaks for itself with this Photography Checklist

    Make sure your Product Image speaks for itself with this Photography Checklist

    So, you think that you’ve taken some great photos of your product. 

    Who wouldn’t want to buy your products with them looking like that.
     
    You’ve looked at your competitor’s best photos. Worked out how you can improve on those with some great composition and processing.
     
    The lighting was perfect, the colour is great and you’ve got that sort of blur going on in the background.
     
    You’ve posted them onto your website, facebook and Instagram and sent a link to Twitter.
     
    You’ve nailed it!
     
    All you have to do now is wait for the orders to come.
     
    But will they?
     
    You see we live in a world of images and instant gratification.
     
    And the problem is that you can never completely get it right.
    Not for everyone, not for your potential customers and not even for you, if you’re honest.
     
    The old saying “you can please some of the people some of the time but you can please all the people all the time” rings true in this case.
     
    The trouble is if you don’t please some of the people then you don’t make sales.
     
    So, you must aim to please as many as you can.

    Make sure your product image speaks for itself with this photography checklist

    But first things first let’s go back to those great photos and check again;
     
    This is a check list of what to look for in a product image:
     
    1 Composition
     
    How many times have you seen a photo and thought that there is something not quite right?
     
    Usually it’s the composition.
     
    The photos that have moved you will be because of their great composition.
     
    Look and study the photos that you have hanging up in your workplace or home. You choose them because you like them and because they have a strong composition.
     
    By using angles and lines, foreground subjects and colour where they exist, you can create a strong and imaginative composition of a photo.
     
    Have you got the right angle?
     
    If applicable, can you see the label?
     
    Does it show what the product does?
     
    2 Story
     
    Do your images tell a story?
     
    A story could be, as an example, showing how a piece of jewellery is worn or giving a sense of scale.
    I recently looked online for some earrings for my wife and I choose the ones that had images of them on a model.
    And that’s because I could see the size and the way they look when hanging.
     
    3 What’s in the frame?
     
    Are there unwanted elements in the photo?
     
    What about the product positioning against the background?
     
    We’ve all seen (and taken) those holiday snaps with the leaning tower of Pisa appearing to grow out the subject’s head.
     
    Can you see anything in the background or foreground that might be distracting?

    Make sure your product image speaks for itself with this photography checklist

    4 Light
     
    Is the light on the product side lit or front lit? Either way is it lighting the part of the product that reflects the ‘best side’.
     
    Have you looked at the image on different monitors, tablets and mobiles?
    You will be surprised at how the brightness and contrast vary depending on the medium you are viewing.
     
    5 Clarity
     
    Does the image look crisp and clear?
     
    Blow up the image on the largest screen you have. See if there is any sign of unintended blur.
     
    It may be around the edges of your subject.
    Or is it at the front of your subject? e.g. If it were a portrait would the nose be ever so slightly out of focus.
     
    6 Post processing
     
    Does the colour look real or is it over or under saturated?
     
    Has it got the “WOW’ factor?
     
    Nothing wrong with either but it’s what lends itself to the product.
    If it doesn’t look real it may not convey the right message.

    Make sure your product image speaks for itself with this photography checklist
     
    That’s just for starters! You could go deep in reviewing your images.
     
    Remember that you have to put yourself in your customers shoes. Ask yourself “based on the image and the copy with it would I buy that?”
    If you feel you can not answer this without bias then ask someone else to review it and answer that question.
     
    Post links to your images in the comments below if you want some feedback from me or other readers.
    Want to keep this article? You can get an accompanying checklist from here or the box below.
    While you are at it why not share this article with someone who could benefit.
    And don’t to forget to subscribe in the top bar for more ways in which I can help you sell more.


  • The essential feature to have on your new camera

    commercial-photography-for-business-owners

    Been dazed and confused for so long it’s not true

    Led Zeppelin sang this in (you’ve guessed it) Dazed and Confused in 1969.
    They could have been singing about how most people feel when shopping for new electronic equipment these days.

    A few months ago we bought a new TV and Stereo. The pain I went through trying to work out what features we needed to have, got me thinking about how difficult it must be for you to buy a new camera. It’s probably worse than buying a new TV!

    So I’ve got a series going that hopeful will ease the pain of that rather painful process.

    The first one is Why selecting a new camera is like selecting a new date (or TV).

    Then I wrote The essential feature to have on your new camera

    Whilst both these articles and the next couple are aimed at the new camera buyer – they may be worth a look even if you already have a camera (or just a smartphone).

    As always feel free to comment by either using the post comment section below, on the contact page or drop me a line at nick@nickkatin.com .

    Please share and enjoy

    Ciao

    Nick

    Nick Katin
    nickkatin.com

  • How to create great Infographics using Microsoft Publisher

    How to create great Infographics using Microsoft Publisher

    As great as online creators such as Canva and Piktochart are, there are times that you need or want to create something without being Online.

    Plus, if you are only using the free versions then you can be limited in what templates and other images you can use.

    So, here’s an off the radar alternative called Microsoft Publisher.

    I must confess that I have being using publisher for many years now and have used it in the past for brochures, flyers, and books so I’m a bit biased.

    Now there are number of ways you can get publisher the most popular way being through an Office 365 subscription service which cost around $70 a year for the complete suite of offices software such as Word, Excel, PowerPoint, Outlook, OneNote and Publisher and a couple of others. But you can buy it outright for around $110.00 if you don’t wish to subscribe.

    So how to use it:

    1. Open the program (that’s a big step)
    2. On the first page, you will get many choices of pages with templates etc. for the example I have used here I created a blank publication of A4

    How to create great infographics using Microsoft publisher

    Now the fun begins.

    1. You can easily change the size of the publication by the drop down menu under page design. You have choice of selecting a standard size or creating a new page size

    How to create great infographics using Microsoft publisher


    If you prefer to change to unit of measurement e.g. pixels then go to the options menu under file and find advanced. Display is the second area

    How to create great infographics using Microsoft publisher

    1. Now that you have created a blank page of whatever size you want, let’s do some creating
    2. I usually select the background colour by going to the background drop down menu under page design. You can select some standard variations or make your own

    How to create great infographics using Microsoft publisher

    How to create great infographics using Microsoft publisher

    1. Ok let’s stick some shapes in. From the insert tab there’s a drop down menu under shapes and you can knock yourself out inserting all sort of different shapes.

    How to create great infographics using Microsoft publisher

    1. For text go to the text section under insert and you can insert text with different fonts etc.

    How to create great infographics using Microsoft publisher

    And that is really all there is to it.

    How to create great infographics using Microsoft publisher

    The added benefit of publisher is that you can also insert photos add some texts and shapes etc. and then save just that page as JPEG. I use it like that for my Instagram posts.

    If you have any queries on this just post them in the comments below.


  • 5 Ways to Eliminate Camera Shake

    5 Ways to Eliminate Camera Shake

    How many times have you looked at those beautiful images only to realise on closer inspection there’s a slight blurriness about it. It’s just not as crisp and clear as it should be.

    That’s called softness and is usually caused by Camera shake.


    Like most cities in the USA, Anchorage has a big fourth of July parade. This one was in 2012
    He’s a bit soft! (Probably wouldn’t tell him that!)


    https://katinimages.smugmug.com/Travel/Independence-Day/i-WnMvsVN/A
    That’s better! (Fourth of July parade.)

    In my last post How to hold a camera correctly on this topic, I went through the best ways to hold a camera to try and reduce camera shake. Now lets’ look at 5 other ways in order you can help eliminate camera shake


    1 Use a fast shutter speed


    Typically, Camera Shake is caused by the shutter speed being too low.

    Selecting the correct shutter speed can be a challenge. On most cameras, you can select the shutter speed and a rule of thumb, depending on the camera is the focal lens x 1.5 or 2 = the shutter speed.

    So, if you have a focal length of 100mm then you will need a minimum shutter speed of 1/160; a 200mm focal length would be 320 etc. etc…
    Now on some compacts and a lot of Smartphone cameras you can’t adjust the Shutter speed so the next best thing is to either adjust the exposure compensation or the ISO.
    If you are going to shoot a lot of images at low light, then experiment so you know how your camera performs.


    2 Use image stabilisation


    Many years ago, I met a photographer who was taking clear and sharp images of wildlife at dusk without a tripod. That was my first introduction to image stabilisation.
    Basically it compensates for camera shake caused by slow shutter speeds.

    Initially they were only available on the lens but nowadays most cameras have it inbuilt. So now you don’t have to worry about what lens to use.
    Having it inbuilt also means that most cameras have options and settings that can give flexibility.

    Smartphone cameras also have them built in but usually only have the option to turn it on or off.

    Just a little warning – some manufacturers advise you to turn off stabilisation if using a tripod.

    An image stabiliser only goes so far. At the end of the day if the shutter speed is too low for the conditions then it won’t help.


    3  Use a tripod


    This one is obvious. After all, if you don’t have to hold it then it’s not likely to move. Right?
    Well yes and no and I’ll explain in the next tip but for now putting a camera on a tripod is always going to be better than hand holding.

    Nowadays there are lots of different tripods out there. Some are designed for different applications and cameras.

    For a mirrorless, compact or DSLR cameras there is a few considerations such as the weight, ease of use and sturdiness.
    And it also depends on the use. As an example, I have 3 tripods, a studio tripod that never leaves the ‘studio’ a heavy duty one that I use for assignments and a lightweight one which I take travelling or on assignments where weight is an issue.

    For smartphone cameras, there are also a lot of choices but they are usually chosen on convenience. I use the Joby Grip Tight Micro Stand, a great little find that has a mini stand. It can also be fitted to a standard tripod head.


    4 Use the timer


    The other main reason for camera shake is the shutter button action. When you press down on the shutter button the camera moves. Even if you are gentle it still moves. Of course, if you have a fast-enough shutter speed then it’s not a problem but if you are shooting in low light then it will create vibration which equals camera shake

    Another option is to use the timer. In all seriousness, you wouldn’t use the timer if you were hand holding. The idea is to use it when on a tripod or if you have the camera mounted on something sturdy.

    Most cameras have 2 or 3 timer settings. Use the lowest unless there’s some reason you need time like taking a self-portrait. After all, 2 seconds is not a lot of time to get into position.


    5 Use a remote


    For the same reason as the previous point (5) using a remote will take that that heavy human press out of the equation.
    There are a lot of types of remotes out there.
    From the old-school release cable for a DSLR to using a smartphone app to trigger your mirrorless camera to using a Bluetooth remote trigger for your smartphone.

    Choose the one that is right for you or choose a couple for different applications.


    Did you understand all that? I’m happy to clarify anything you’re not sure of.

    Just post in the comments section below. Don’t be shy.

    While you are at it why not subscribe for future updates below.

    You’ll get my free guide “Eleven easy ways to improve your marketing photography”.

  • Commercial Photography for Business Owners

    Commercial Photography for Business

    Imagine no internet, I wonder if you can?

    I wonder if *John Lennon was to write Imagine today whether this wouldn’t be an additional verse.

    Hi there. I wanted to thank you for subscribing to this blog.

    You would have noticed (or maybe not) that this site has been dormant since July last year and that’s because I’ve been working on other projects.

    I have a commercial photography site nickkatin.com that’s aimed at helping business’s take, edit and post their marketing images, whether it be for social media, a website or in print.

    It occurred to me that some of the audience for this site could looking for some of the information that is on that site.
    After all, if you are a blogger then it’s more important than ever to ensure you have great images which I know you have but also know how to use them.

    The thing is if you subscribe via wordpress.com to a wordpress.com site such as this, your email address remains hidden to the site owner who can only communicate by posting articles (blog posts).

    So this is basically the text of the newsletter I send out to email subscribers of nickkatin.com. You can choose to subscribe at nickkatin.com to get the original newsletter and whilst there is no immediate need for you to do that there are some things that I can’t do in blog post that I can in a personalised newsletter
    So what to expect?

    Basically I’ll be providing info on how you can take and edit marketing images.
    And then providing the how and why on what’s the best way to for you to get those images out there with your brand.

    Now I don’t pretend to know it all!
    Something I learnt long ago is that the day you think you know it all is actually the day you know nothing.

    I figure that we are on this journey together. So it’s my duty to make sure you get new and useful content.
    This might come straight out of the top of my head (which is pretty small) or it could be something I had to go and learn.

    So to help me, help you, please feel free to let me know what interests you.

    I know that can be difficult because we are in state of constant change, we often don’t know what we don’t know.

    So to kick-off what about answering the following:

    What’s your real pain when it comes to Marketing?

    What’s your number one challenge when it comes to Photography?

    What else is a challenge for you in Marketing and/or Photography?

    Just post your answer in the box below, on the contact page or drop me a line at nick@nickkatin.com.

    OK bye for now and talk to you next week

    Nick

    Here’s a couple of articles to take a look to start with:

    Why stock images are bad for business!

    8 reasons to post Images and Visual Content online

    PS: * John Lennon actually wrote “Imagine no possessions I wonder if you can” and then goes on to say “No need for greed or hunger a brotherhood of man”
    Those words are as relevant today as they were in 1971

  • Could you be a Sales Rep?

    Could you be a Sales Rep?

    You are in sales!

    Yes, that’s right you are in sales.

    We are all in sales.

    Not a day goes past when you are not selling something – unless you are a hermit living in a cave in which case it’s unlikely you would be reading this anyway.

    We are often selling ideas, ourselves, actions, facts, arguments etc.

    But of course, sales to most people means selling something to someone who may or may not need or want it.

    I often hear from some of the most surprising people say that “I could never be in sales” or “that’s much to salesy for me”.

    Often these people are already in sales but just don’t consider themselves as sales people.

    But could they be a sales rep?

    Sales Meeting in Jerome, Arizona, USA

    Of course, we have some fancy titles for Sales representatives these days, Sales managers, Business development manager, Account managers, Sales engineer, Sales executive but in the main they are all sales reps with some specialties or a particular market niche.

    But to answer that, let me tell you my story.

    My career in sales started as a young National Service Manager Part of my job description was to go out and talk to some of customers about maintenance programs for our products. It was easy!
    After all we manufactured heating and hot water systems and most customers wouldn’t want it serviced by anyone else especially, as at that time, there really wasn’t anybody else.

    As I progressed up the food chain I employed sales people to do that job for me as I was too busy pushing paper around my desk.
    As these reps sold product as well, they were well rewarded and even though I was at that time one of the executive team they were earning much more than I was and they were getting pats on the back from the MD as well.

    It was at that time that I decided if I ever got the chance I would go into sales full time.

    That chance came quicker than I thought when I left the company to go travelling for a few months.
    On my return, I soon found out that specialist service managers were few and far between so I elected to go into sales as there appeared to be quite a few sales reps jobs around.

    In took 6 months to get a job as a sales rep.

    I applied for 100’s.

    I was either overqualified or lacked sales experience and networks or a combination of all three.

    When finally I cracked it, the reason was because of my experience in the construction industry not my individual sales potential.

    And it didn’t take long before I realised that being a sales rep was hard, really hard.

    You see the thing is that you are trying to get meetings with people who really don’t want to talk to you. Usually about products or services that they are not that interested in unless there is a big benefit to them.

    The one thing I learned is to leave your ego at home otherwise you wouldn’t last too long.

    Going to see people you didn’t know and present your case can be scary for a lot of people.

    I’ve heard of some reps who will sit in the customers car park for a few minutes and then decide to drive 20 k’s to see someone else rather than have to face that particular customer.

    As an example, I left this company after 18 months of building up the business to exceed budget (thought I’d bang my own gong) and went travelling for couple of years.

    On my return, the guy who took it over, had let it go.

    Why had he let it go and why wasn’t he fired?

    Well he got stage fright!

    He had worked in internal sales where everything is reactive and the only real customer contact was by phone, fax and email which came to him.

    So, when he had to go out and actually visit people face to face he couldn’t do it.

    Add the fact that he had to be proactive and he was well out of his comfort zone.

    Why wasn’t he sacked? Well the company I left was merging with another and he pretty much went under the radar.

    And that’s another thing that fazes people being proactive. We are naturally wired to be reactive and being proactive is not natural to most.

    Yet when as a sales rep you do get times when you have to be reactive. When orders come through, when you have to answer the phone, do quotes, answer email, chase up deliveries, etc. etc. It becomes almost a welcome break.

    But it’s also a trap!

    You see the most successful sales reps have schedules and rituals that they stick to.

    That might be making 10 client phone calls before 10 in the morning, visiting 3 clients per day, following up quotes, making appointments or writing reports (a big pain for most salespeople).

    I heard of stockbroker (yes, they are sales reps as well) in Vancouver who would make 120 calls a day religiously and measured that every morning by starting with 120 paper clips in one jar and would keep calling until he had moved them all to a second jar.

    That’s the sort of single mildness you need to be a successful sales rep.

    So, when these reactive events come along and they can often continue for days, focus is lost, the rituals go out of the window and then you have to refocus and get back into some sort of momentum.

    I can tell you that’s hard not just for me but for most other sales reps.

    So why is that?

    Well as I said earlier we are naturally wired to be reactive. 1000’s of years being reactive to our environment is how we have survived as a species.

    Being reactive is much more comfortable than being proactive (I’m being general here as there is the odd individual who is naturally proactive).

    The conundrum in sales is that these reactive events don’t happen unless you as the sales rep make them happen and that involves being proactive and being out there talking to people.

    So, when I get the odd comment from desk bound colleagues, friends or acquaintances that I have it easy. That all I have to do is drive around and talk to me over coffee, I reply, when you go to work your work comes to you.

    Another Sales rep waiting for coffee near one of London’s famous markets, Borough Markets.

    When I go to work I have to go and find it and if I don’t over a period of time, I’m out of a job.

    Of course, the other comment I get is about money.

    Just as I thought, before becoming a sales rep, that it’s not fair that salespeople earn too much, so I now get the odd similar comment.

    Yes, good sales rep earn more than nurses, teachers, emergency response personal and other worthy occupations and really successful salespeople will get paid more than Doctors and some Politicians (what’s the old saying? – pay peanuts and get monkeys).

    The fact is as I have learned a successful sales rep will always get a job and will always get paid well.

    I could never be nurse or paramedic but I imagine there are many nurses and paramedics who could never be a sales rep either.

    So could you be a Sales Rep? Or are you one? In which case do you agree?

    Write your comments below. I’d like to hear them.

    This is slight off topic from my normal marketing and image making posts but what the heck!

  • How to hold a camera correctly

    How to hold a camera correctly

    So, you think you can hold a camera or smartphone correctly? Well how do you know?

    Take a good look at your photos.

    No, not on the camera or phone screen but on your PC, Mac or Laptop. Even a tablet is better than a smartphone or camera screen but the bigger the better.

    Now does it look really sharp or does look a little bit blurred (the industry phrase is “soft”) in parts or may even a quite a bit blurred?

    If so, there is a good chance you are not paying enough attention to the fact that a camera moves when you hold it. Now that’s not the camera moving on its own but you moving it.
    Got It?

    Now there are several techniques to overcome this but I’m going to basically cover how you should be holding your camera and smartphone.

    Let’s start with the camera.

    • If it has a view finder – then use it! When you use the view finder you are putting the camera up to your face and therefore bracing it on your face.

    Now to add to that, tuck your elbows in against your side.

    • Ok so it doesn’t have a viewfinder or you don’t want to use it! The overwhelming majority of people ta king pictures using the view finder do not hold it correctly and consequently having pictures that are ‘soft’.

    If you have studied physics you will know what the pendulum theory is. Holding the camera at arm’s length creates a pendulum effect and ‘soft’ or blurry photos unless the light is very good and you have a high shutter speed.

    So just like using the viewfinder tuck those arms in against your sides and bring the camera closer to your eyes.

    • For either situation, depending on the weight of the camera, grip one side with one hand usually the right where the shutter button is and the position the other hand underneath the body or if it’s a fairly long lens then under the lens.
    • Ideally you want to stand with your legs shoulder width apart so that you well grounded.
    • If there happens to be a handy surface, say a wall, rest the camera on that.
    • Or you can support yourself against a vertical surface such as a tree or a wall if practical.
    • The portrait position is similar for both the viewfinder and rear screen.
      You just need to decide which side is more comfortable for the shutter button. The shutter speed at the bottom is the most practical so that you can use the bottom to help support the bottom of the camera.
    How to hold a camera correctly
    Camera Holds

    Ok now the smartphone

    • Most smartphones these days have the option to operate the shutter with a physical button like a volume control instead of tapping the screen.
      So, if you have that option then use it! Especially for the landscape position.
    • As with a camera most people using a smartphone camera often don’t hold it correctly. So tuck in your elbows
    • Use both hands. It gives me nightmares watching some people take photos one handed. With a smartphone, you need to use 2 different handling techniques.
    • In the horizontal or landscape position hold it with your hands in the same spot on each side. With whatever hand you are using to press the shutter button make sure you have that trigger finger free so that you can tap the virtual shutter or press the physical shutter button.
    • Now the vertical or portrait position is bit trickier.

    If you are using a physical shutter, then hold the phone with whichever side it’s on and curl it around the back below of course the lens with the thumb operating the shutter.
    The other hand can hold the bottom of the phone with the index finger and thumb.
    For a virtual button the difference is that it’s the hand at the bottom that presses the virtual button and can’t in that case grip the bottom of the smartphone at the same time.

    In all honesty when in portrait mode, it’s often better to use the virtual button.

    How to hold a camera correctly
    Smartphone Holds

    In some situations, you may not be physically vertical. You may have to lie or sit to take the photo. If you are lying down, you have the added support of the ground or floor but you need to rest the elbows on the ground or you will end taking a steady of image of the ground which may not be your intended subject.

    If you are sitting, then usually there is something you can rest the camera on.

    Of course, there are lots of ways to avoid that blurry or soft photo.

    Use a tripod, make sure you have image stabilisation turned on (if fitted), ensure that your shutter speed is fast enough, use the timer and so on. 

    But this piece is just the basics on holding the camera.

    More on those tips on the next post.

    If you have any tips, please don’t be shy just stick ’em in the comment box below?

    Is there anything else that you want explained? Again just ask.

  • Why the use of Still and Video images is the most Valuable Marketing Strategy of 2018

    Why the use of Still and Video images is the most Valuable Marketing Strategy of 2018

    Once upon a time there was a world without colour.

    This world, which we will call Blanc Noir only had black and white.
    The population saw everything in black and white and hence everything they had was either black or white (pretty obvious, really what sort of story is this anyway??).

    One day a visitor from another world called Couleur (I’ve a bit of a soft spot for French) came along and wore clothes that were red and yellow. 

    The visitor couldn’t understand why the inhabitants of Blanc Noir didn’t wear anything but black and white when all about them was colour.

    The trees the sky, grass, only man made objects were in black and white.

    The inhabitants on the other hand saw his clothes as black (red) and White (yellow).

    One day something strange happened this stranger had a camera that took pictures in colour. 

    As he took more pictures and showed everyone what he took in the rear screen of the camera, they noticed that there was something strange going on, everything in the camera was in colour!

    As they looked around they realised that in fact that all natural world was in colour, it was only themselves and the buildings and vehicles that were in black and white.

    Imagine seeing this for the first time how did you think they reacted?

    How would you react?

    Of course they immediately took steps to colourise everything.


    Why the use of Still and Video images are the most valuable marketing strategy of 2017

    Which was great for all the business’s on Couleur as they had plenty of colour products. 

    But not so good for the business’s on Blanc Noir as everything they had was black and white.

    This year 2016 has been the start of something special. It’s been a year when some clever small businesses like the businesses on Couleur have realised that their strongest ally in their marketing is images and video.

    Our world is changing and the growth of technology to help create visual content is now easier than ever and will continue to get even easier for the foreseeable future.

    Of course those that don’t take steps to take advantage of this will be like those businesses on Blanc Noir.

    The world of visual content is about to take over from world of words.

    Why is this?

    Well for one thing our lives are so busy that we only give marketing material a nano-second to get our attention and images are our first impression of the message.

    If we like it, we will hang around and read the written content and even look to buy the product or service.

    Or, if we don’t like it then we move on.

    That’s why Facebook has been ramping up its image and video posting platform, why Instagram and Snapchat are so popular and why Twitter has also beefed up its image posting platform. 

    They all realise that if content is king then it’s visuals are all powerful.

    You know, it’s no wonder that this has happened.
    Our TV screens have become bigger. I bought one a few months ago which is 60”! 60” is huge! The TV we had before was 42” and probably the one before that was 30”.

    Movie screen sizes have increased almost to the point that we have to exercise our peripheral vision to see the whole screen.

    Our mobile phones have got bigger, so much so that they’ve almost taken over from tablets.

    We have screens on cameras, watches, fridges, printers, security equipment, automobiles, cooking appliances and much more.

    Giant LED screens in public places assault our visual senses.

    So visual content is everywhere and that’s what we as consumers look for.

    Now, don’t get me wrong here! Written content is still important.
    As the saying goes a picture may paint a thousand words but you may need another thousand words to tell the whole story.

    Today visual content is a no-brainer for any business looking to market their product or service.

    Why the use of Still and Video images are the most valuable marketing strategy of 2017

    Not just visual content but good visual content.

    So what about your experience with visual content?

    What’s the number one obstacle stopping you from creating images or video for your marketing?

    I’d really like to know. So please leave your answers in the comments below. 

    For more like this subscribe to my newsletter below and get a free guide “Eleven Easy Ways to Improve your Marketing Photography”.