An Introduction to Travel Photography
https://katinimages.smugmug.com/Travel/Travel-Different-North-America/i-89KvTGd/A
Katin Images Travel Photography
Travel Photos, Travel Photography Tips and Software

You’ve got the new beaut camera or maybe you dusted off an old one that you’ve had for a couple of years and instead of using your smartphone, you thought you would use this for your marketing images. After all you have had enough of searching for stock photos that just aren’t what you need.
After looking at this camera you realise there’s a dial on it that says A, P, S and M and maybe a couple of other items like the picture of a video camera, auto or some other sign that gives you choices to select a genre. But you’ve heard that one of the best ways to shoot is to use “S’. But what is S?
Well it’s Shutter priority. Now to refresh your memory on what the shutter is I’ll send you off to have a quick read of these 2 articles.
10 Vital Facts about Camera Shutter Speed
Understanding the 3 points of the exposure triangle
So now you’ve done that or at least scanned it. Lets’ go forward
S stands for Shutter – yes, you’ve worked that out. Great!
But unlike Aperture which is a dimension of the hole that allows light in and is measured in f-numbers, it’s actually a speed. So, you are effectively measuring the time it takes to open and close the shutter in front of the sensor.
As with Aperture usually the numbers relate to a stop. However unlike Aperture the range of Shutter speeds is usually much greater so it doesn’t follow that each stop represents twice the preceding value and half the next higher value.
In shutter speeds the measurements look like this:
60”, 30”, 2”, 1”, 1/2.5, 1/5, 1/10, up to 1/4000. Each of these values relate to seconds or fractions of a second. 60” is actually 60 seconds whilst 1/4000 is actually 0.00025 of a second. That is the time that that the shutter is open and allowing light to reach the sensor. In film days it used to be the film strip that the shutter was exposing to light.
It is arguable that changing the Shutter Speed setting is the best or at least one of the best ways to be creatively in control with the final image that you want.
So why would you want that? Well from a creative control point of view it gives you options.
But the most important effect of shutter speed is its effect on camera shake. Camera Shake is probably the single most noticeable effect on an image.
Having the correct minimum shutter speed is vital to prevent Camera Shake. Notice I said “minimum”. That’s because it’s better to have a faster shutter speed than a slow one.
For more on this go to 5 Ways to Eliminate Camera Shake
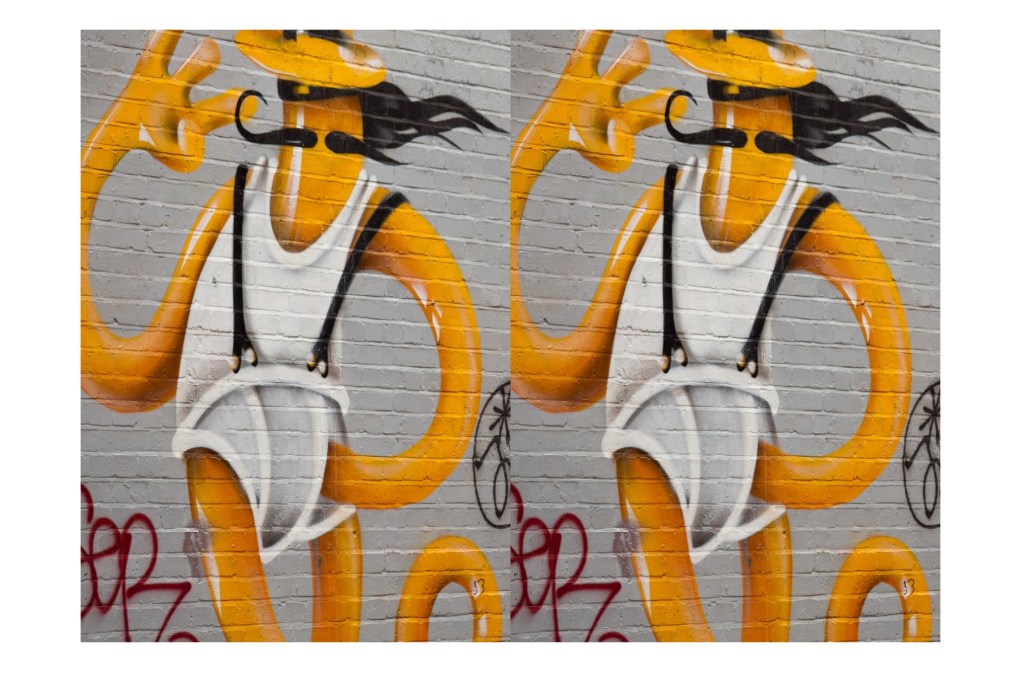
Have you looked at a what you thought was a good photo close up only to realise that it’s slightly blurred? Well that’s camera shake and in the industry it’s called “soft”.
Here’s an extreme example:

The first one is noticeably soft. The photographer (that’s me) didn’t have a lot going for him. Not much light, using s telephoto lens and as the subject (the leopard) was moving had no time to compose or even think about the shot.

However, in the above shot I had just enough time to jack up the ISO so that I could get a shutter speed that would freeze the action. Probably still not the best photo of a Leopard but not bad.
So apart from reducing or eliminating Camera Shake what else do we use the shutter speed for?
Well there are 3 main ways to use it:
1 Freezing
That is you freeze action with a fast shutter speed. That could be anything from sports action to facial expressions to droplets of water
2 Blurring
Blurring on the other hand is using a slow shutter speed to blur movement. The most well know “blur” is the cascading of water through rocks or a waterfall. But there are lots of other uses as well such as rain or snowfall, slowing down action found in cycling or surfing. Another example would be transport like trains or cars
3 Panning
To pan or track means you are moving the camera to follow someone or something as they move leaving the background blurred and the subject relatively sharp. This gives the impression that the subject is speeding past the viewer (photographer)

Here’s some exercises to experiment with based on the three main ways mentioned above.
I’ve made the basic assumption that you have access to an outside tap with a hose. If not then use an indoor tap but make sure the area is well lit preferably with natural light.
1 Grab that camera, turn it on and take off the lens cap!
2 Now go outside
3 Use an outside tap that’s easy to access. If you don’t have one (that’s easy to access) then mount the end of a garden hose (with or without a nozzle) on something like a washing line that’s no higher than head height.
4 Before turning on the tap set your shutter speed to around 1/500 by finding that dial that has the “S” adjustment
5 If you have a zoom lens make sure it’s between 50mm and 100mm (35mm equivalent) and have it ready to go (so you don’t waste too much water.
6 Turn on the tap
7 Now take at least one shot. This is your freezing exercise
8 Repeat steps 1-7 except you now adjust the shutter speed to 1/15 to blur the water as it comes out of the tap. At that speed it’s preferable to mount the camera on a tripod with a remote shutter release. If you don’t have a remote shutter release, then use your timer. And if you don’t have a tripod use a wall or chair – in other words use your imagination!
9 Finally to get a panning effect you need to:
1 Repeat steps 1 and 2
2 Go outside to the (or any) road. Stay on the footpath or verge.
3 Adjust the shutter speed to around 1/30.
4 If you have a zoom lens make sure it’s between 50mm and 100mm (35mm equivalent)
5 Pick a moving vehicle and press the shutter button as you track it
This last one is a bit tricky so you may need a few goes at it.
After your shoot, if possible, compare images on a monitor or at least a tablet.
Voila, you should now have an understanding of how to use the S or Shutter Speed setting.
All in all, that should have taken you around 15 minutes (not counting any travelling time).
As an aid to this I have a simple checklist for you to download.
Just pop your name and email in the box below and it will magically appear in your inbox.
Compare the shots to see the differences and then play around with different focal lengths and shutter speeds.

Do you produce wine but are not sure how to display it?
Are you in marketing and are struggling for the best way to market your wines or the wines of your clients?
When browsing the wine store for the evening’s bottle of wine how many labels do you recognise? One, two, three if you’re lucky?
What about the corner liquor store or wine merchant, what do they push your way?
Don’t get me wrong some wine shop assistants are excellent but most go with the wines they are familiar with and a lot are only familiar with the label, not what’s inside the bottle.
If any of this sounds like you then read on.
The wine industry is highly competitive and whilst you can have the best made wines from some of the world’s best vineyards, it doesn’t mean that it will sell.
Like any product it’s not just the quality but increasingly image!
Just look at how the wines of Bordeaux and Burgundy sell.
What about Grange from Australia? Or Mondavi from California, Guigal from the Rhone Valley.
Then there are regions,
Sauvignon Blanc from Marlborough, Pinot Noir from Oregon and Central Otago.
I could go on and on!
The point is that these wines are all about image and in some cases prestige.
I’m not here to educate you on how to position your brand, only you can do that but what I can tell you is that you need great images to help formulate your marketing strategy.

Where are these images displayed?
Well obviously, anywhere that sells wine but before that, the vast majority of potential customers will come across the image of your wine or winery somewhere online.
And more and more its social media channels that wine consumers will see wine and winery images.
Instagram, Snapchat and Pinterest are the most visual whilst Facebook, Google + and LinkedIn have both visuals and information and let’s not forget YouTube and Twitter and apps like Vivino.
Then you have blogs, winery websites, reviewer’s websites, online magazines, etc. all of which, by the way, now need to be mobile friendly, so the online space is really where you need good images for consumers to share.
Studies have proven that we as human beings remember things that are connected with our emotions whether it be curiosity, anger, sadness, happiness, laughter etc. so an image needs to be memorable.
Think of one photograph you remember, maybe it was of friends, family, travel, or a photo you saw in a magazine or online somewhere, I’ll bet another 1000 words that it evoked some sort of emotion.
That’s what I’m talking about!

You must produce visual content that helps you stand out.
Have images that help evolve your brand and tell a visual story of who you are.
The key to that is to see visual moments everywhere.
Behind-the-scenes peeks are becoming popular with some of the big brands.
For example, active photos that show real customers or employees doing real things — as opposed to staged shots or logos.

Of course, someone still needs to push the shutter button and that can be by engaging a good photographer.
Many organizations have photographers they contact in times of need — for events, product launches, etc. But that makes Photography a bit of an afterthought.
And will they be able to capture the essence of what you are about?
The other option is to DIY.
All you need is to start is good technique and a good eye, assuming that you have a camera. These things can be taught to anyone who is willing to learn and follow specific instructions.
Don’t get me wrong this won’t get you to the levels of the greats, they spent years honing their craft, but you can quickly and easily get to the stage where your photos become the envy of your peers.
Do you agree? Is Photography an afterthought for a lot of wine business? Feel free to add your tips and opinions below. I would really like to hear them.
For some good examples of photography on some wine websites see http://www.timatkinphotography.com/
http://www.vinography.com/archives/vinography_images/
https://www.burchfamilywines.com.au/trade/images.aspx

I Know, you’re happy using other people’s stock photos – And that’s fine.
However, your business is unique and it deserves unique content to grow and scale.
I’m not saying that you need great photos to be successful, you may have other advantages or skills that can offset that.
But we are an image driven society and without originality a business will struggle to stand out from the crowd.
You can read more on this topic here.
By the way I’m not the only one to hold this opinion read these articles as well:
Stock Photography Sucks! Let’s Do Something about It!
11 Ways Photos Harm Ecommerce Conversions
Say No to Stock Photography and Create Authentic Photos
So let me ask you this:
If you answered “yes” to even one of these questions, then read on.
Because despite everything you read to the contrary you can learn to take some great photos consistently to impress and attract customers.

So what’s the advantages:
Well you can
Taking photos (and videos) for business marketing is different. Not harder or easier but different.
The eye should be looking to make your product or service as attractive as possible sometimes in an obvious way, other times in a subliminal or subtle way.

It always amazes me how little is understood about just the basics of copyright
When a photographer conducts a shoot for any business (or wedding or portrait session or any other third party) they keep the copyright. What that can mean is that unless you have a watertight contract with them, that they are prepared to sign (and then the price will increase) they can resell that photo to another business or alternatively a stock agency who can then sell it on.
Read more on this here
As I said before you know your business and it’s not the same as other businesses. It’s unique and only you know the sort of photo that you want to represent your business.
And then you will
There are some great photographers out there who will no doubt give you exactly what you want. But they are expensive and often hard to book. Getting a less expensive job will save you money but it can cost you if the quality and/or service is substandard.
Photographers, stock agencies and marketing agencies are all just interpreting what they think you want.
Earn yourself the freedom to choose what you want.
Now I know some you will say:
1 I don’t have time – well how much time do you spend on searching for stock photography now?
More on this here.
2 I don’t have the money to spend on photo education – Look I get that you want to run your business on the smell of an oily rag. I’m in business too.
But sometimes you have to pay for something that’s going to take your business forward and will give you potentially a big ongoing return on investment.
More on this here
3 I don’t have a decent camera – Assuming you have a camera that works then you have a ‘decent’ camera.
The idea that you need a certain quality of camera to take great photos is simply not true.
Check out an article on this here.
4 I can’t learn photography because ………. (fill in the blank) – Well there might be a reason that I can’t think of where this is true but if you can run a business or hold down a challenging job then you will be surprised how quickly and easily you can learn.
To summarise
You own or run a business and you want it to succeed.
Well you can’t do that by buying, or downloading for free, photos that only vaguely represent what your business is about.
You have a unique offering and therefore all your marketing needs to be unique and that includes photos.
You can achieve this by taking your own photos and
1 Save time and money on searching for photos.
2 Save money by not having to pay for a photographer who may not give you want you need.
Taking you own photo means learning the basics and building on that.
Have I convinced you?
If so, I’d like to suggest you sign up to, not only get notified of future updates, but also get some exclusive content that won’t be available on this site.
If you’ve been here before and haven’t already signed up, then what are you waiting for?
Either way you can sign up at these places and get a checklist or guide for your trouble:
Eleven easy ways to help you take your own stock photography
Alternatively pop your email in the box below.
Any questions then please contact me here and please say hello at these places:
Facebook: Twitter: Instagram: LinkedIn:
And feel free to share this to your social media of choice

You’ve got the new beaut camera or maybe you dusted off an old one that you’ve had for a couple of years and instead of using your smartphone, you thought you would use this for your marketing images. After all you have enough of searching for stock photos that just aren’t what you need.
After looking at this camera you realise there’s a dial on it that says A, P, S and P and maybe a couple of other items like the picture of a video camera, auto or some other sign that gives you choices to select a genre. But you’ve heard that the best way to shoot is to use “A’. But what is A?
Well it’s Aperture priority. Now to refresh your memory on what aperture is I’ll send you off to have a quick read of these 2 articles.
10 Vital Facts about Camera Aperture
Understanding the 3 points of the exposure triangle
So now you’ve done that or at least scanned it. Lets’ go forward
A stands for Aperture – yes, you’ve worked that out. Great!
Aperture is measured in f-numbers. An f-no. or f-stop is the size of the aperture and by moving that dial you control it.
Usually the numbers relate to a stop and each stop represents twice the preceding value and half the next higher value. So, if the number was 1 then the next number would be 2 and then the next number would be 4 and so on.
In f-nos they look like this:
f/2.8, f/4, f/5.6, f8, f11, f16, f/22 which is slightly different from what I just told you and that’s because it works in the amount of light it lets in. f/4 lets in half as much light as f/2.8, f/5.6 lets in half as much light as f4, f/8 lets in half as much light as f5.6 and so on.
It is arguable that changing the Aperture setting is the best or at least one of the best ways to be creatively in control with the final image that you want.
So why would you want that? Well from a creative control point of view it gives you options.
Options like how much you have in focus;
Basically, as you look at a subject or scene you can set the F-no. so that you can decide what you want in focus. That could be just the subject or everything you can see within the frame.
How does it do that? Well I won’t go into the physics too much as you’re here to learn quickly and I don’t want you to get bogged down in detail.
In simple terms, the bigger the hole or aperture the less of the scene in front of the camera from front to back is in focus.
And that is called the Depth of Field (DOF).
Let’s look at this infographic that shows the differences in f-no in a plan or overhead view:
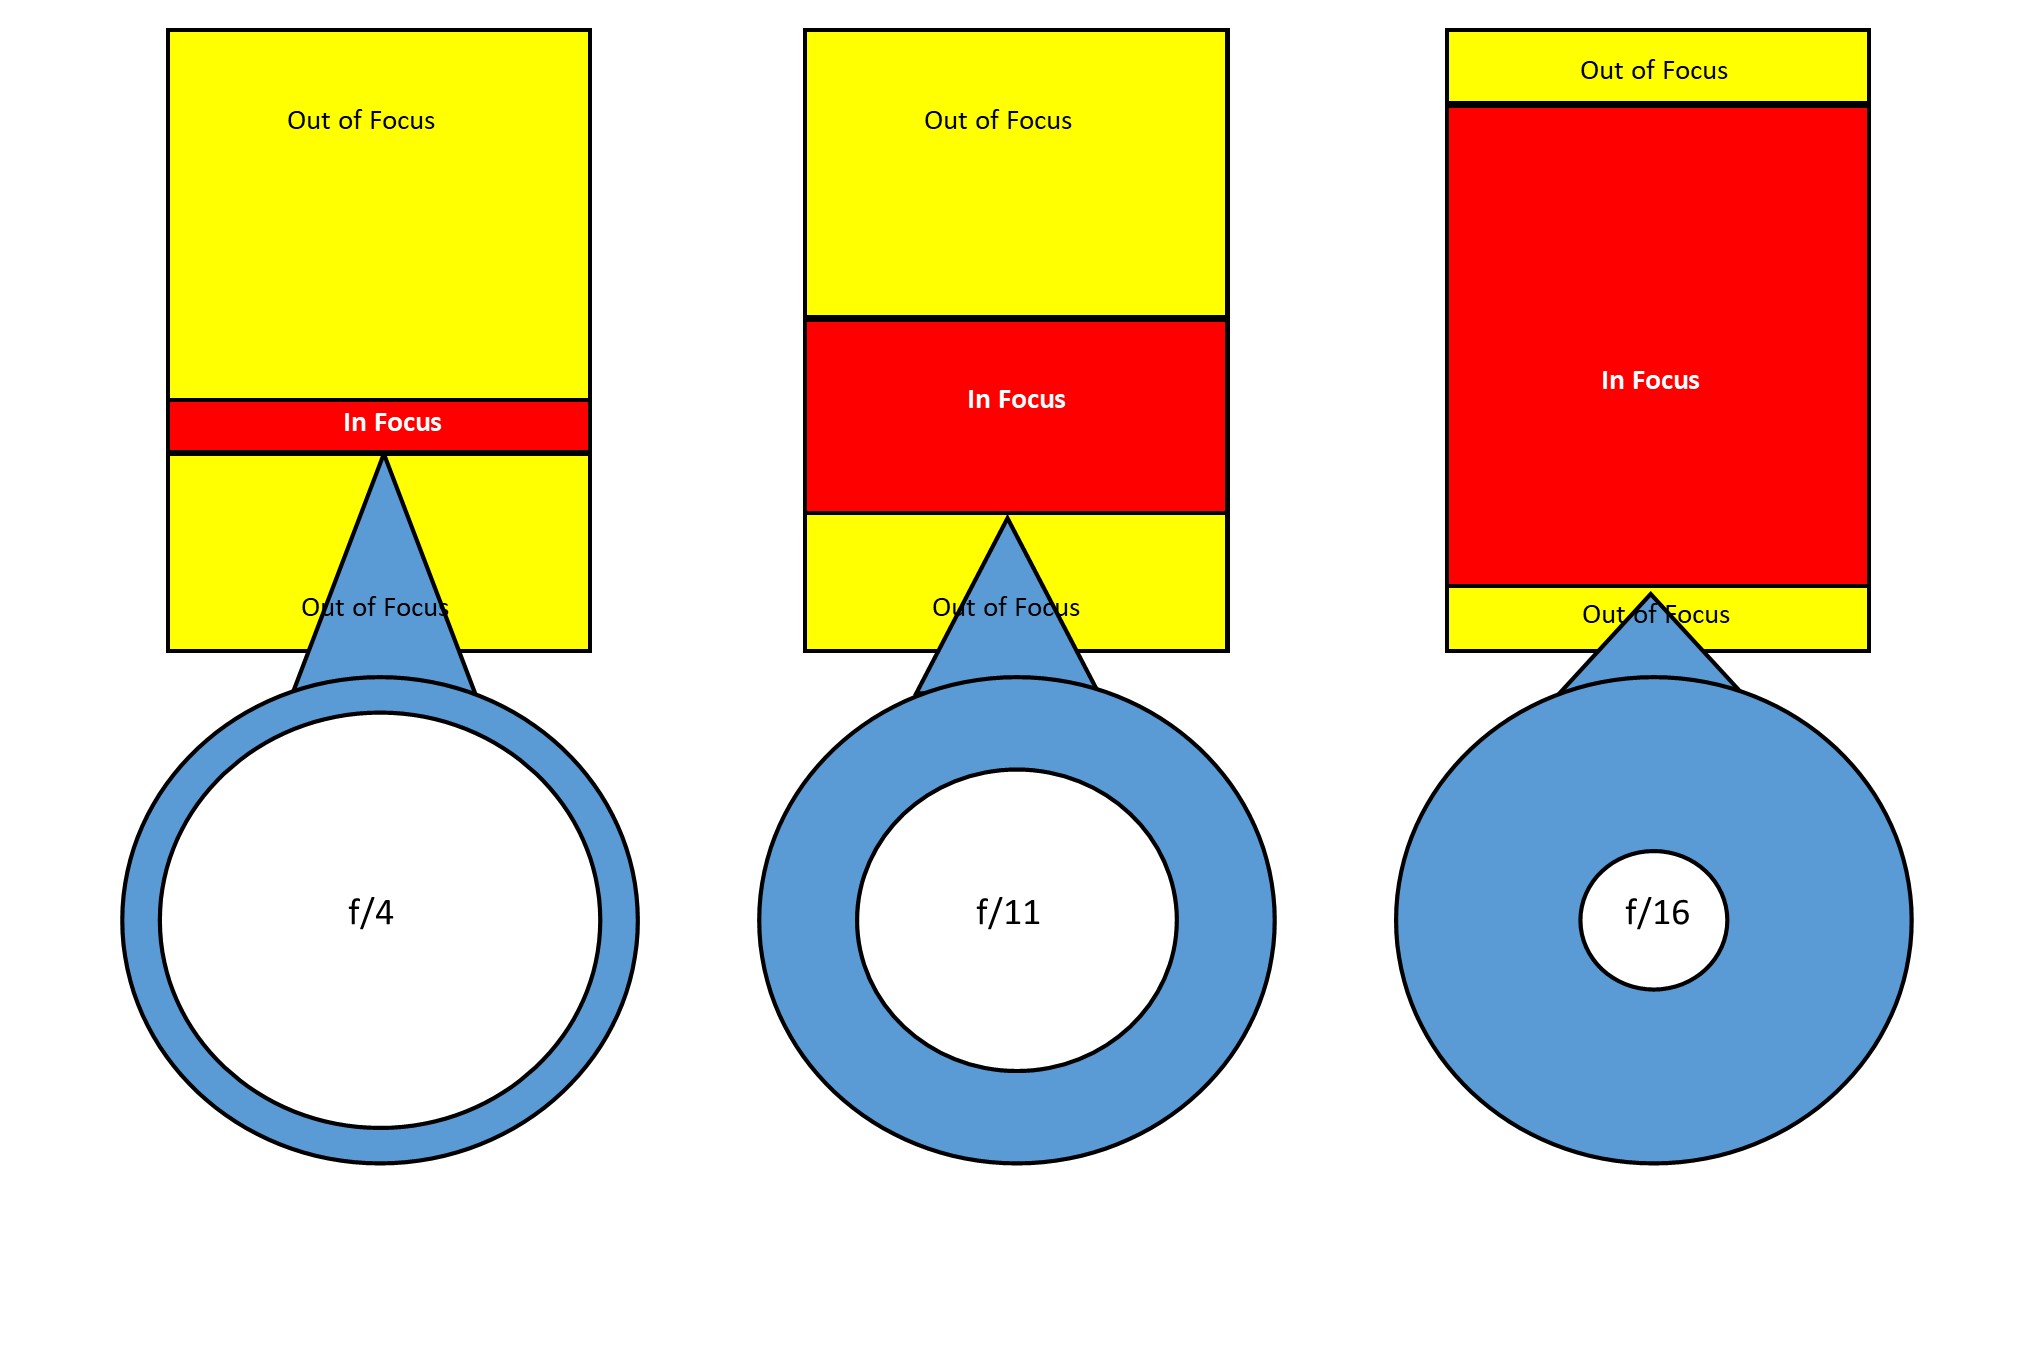
The left-hand side shows a shallow DOF due to a small f-no or a large aperture. The amount in focus is quite narrow. Whilst if we go to the right-hand side the amount in focus is significantly greater.
If I added another diagram to the far right showing an even smaller aperture then the amount in focus would extend out to infinity. I didn’t want to confuse you though.
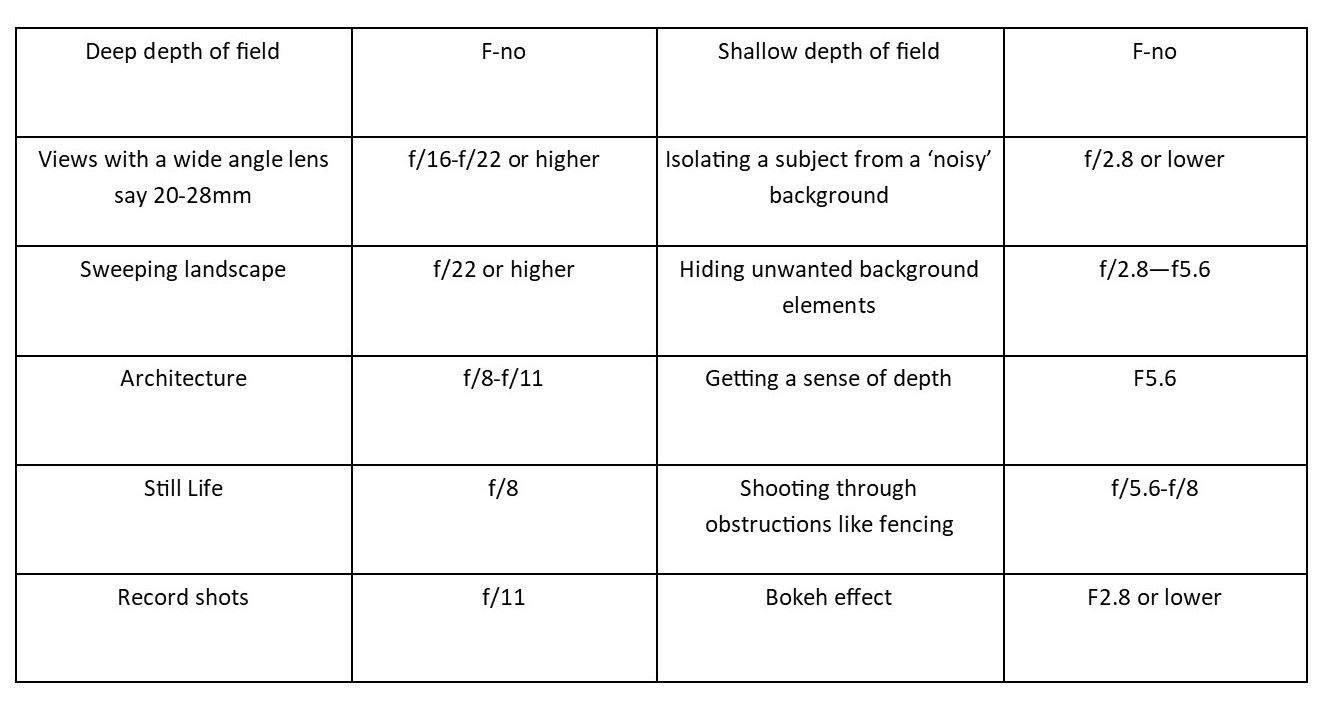
So, let’s look at when you would use this with this little chart:
OK enough from me, now it’s down to you.
1 Grab that camera, turn it on and take off the lens cap!
2 Get a bottle or a can or vase (the subject)
3 Now go outside
4 Mount ‘the subject’ on a table or some support
5 Find that dial that has “A” on it and find the dial that you use to adjust it.
6 If you have a zoom lens make sure it’s between 50mm and 100mm (35mm equivalent).
7 Now take three shots:
1 At Ff2.8 or lower if your camera goes that low. You may find that you can’t go as low as that due to the lens you have. So, in that case just go with the lowest setting.
2 At f/11
3 At f/22. If possible, this shot should have a long background.
Because ideally you want the same background, having a big garden or living in an apartment with a view are the ideal locations.
But you could just go to the nearest park and take all three there.
Compare the shots to see the differences and then play around with different focal lengths as that can make also change the DOF.
See these examples:

It’s best, if possible, to compare images on a monitor or at least a tablet.
Voila, you should now have an understanding of how to use the A or Aperture setting.
All in all, that should have taken you around 15 minutes (not counting any travelling time).
As an aid to this I have a simple checklist for you to download.
Just pop your name and email in the box below and it will magically appear in your inbox.

Buying any sort of technology whether it be a phone, a TV or in this case, a camera, can be mystifying in a lot of cases and more importantly, time consuming.
But it doesn’t have to be.
Ask these questions and you have a fair chance of coming away with a decent camera from a camera store. Note that I said camera store not online store. Sure, you can still buy it from Amazon or B & H or any online store but as with a TV you really want to ‘try before you buy’. Cameras are personal and if doesn’t feel right it won’t help you take the sort of photos you want.
All these questions are for you to answer not the camera store salesperson or online forums, facebook groups but you.
1 What are you going to use it for?
Are you are a business looking to take product picture.
Are you in the travel industry and looking for a general all-rounder for travel pictures?
Do you just want to use it for your blog?
Do you also want to take pictures of your family?
You get the point.
2 What’s your budget?
Whilst the camera is not always the main reason for taking great photos it does give flexibility and that flexibility is usually but no always proportional to the amount of you want to spend.
Don’t get into financial stress over it but don’t scrimp if you can afford not to.
3 What size camera do you want?
Cameras come in all sort of shapes and sizes. If you’ve been used to using a smartphone then buying a DSLR may not suit. The camera is big and the lenses quite heavy.
So maybe a top end compact or a mirrorless camera may be better. If on the other hand you’ve had a DSLR but it’s a bit old in the tooth then consider a Mirrorless. It also depends how mobile you want to be.
Do you have an existing interchangeable lens camera that you want to upgrade?
In which case you will want to keep to the same brand if possible.
4 Are you the only one going to use it?
If one of your staff or another member of your family are also going to use it then it may be worth getting their input as well. On the other hand, that could also confuse the issue so think this one through first.


5 Are you going to buy more than one lens?
Nearly all interchangeable lens cameras come with a ‘kit’ lens which is usually enough to get you started. You can always add to it later
So that’s it. All you need to do now is to go into a camera store and say the following for example:
I want an camera with an interchangeable lens,
that’s light,
than can be used for portraits that will be used commercially and
that I only need one lens for.
Try it out. It’s much quicker and better to ask yourself these questions than spend hours of research on the net and then be totally confused.
You can change your mind once you get into the shop but I’d try and be certain as you can before looking at different cameras so that you can keep on point.
For more on buying a camera please go to:
BUYING A NEW CAMERA? THEN READ THIS
You may also want to download my free Camera Features Guide
Thanks for reading
Post any comments below. I’d love to hear them.
And do us a favour! Please share any way which works for you.
If you want more like this then please subscribe below and you will get a free guide on how to improve your photography.
When taking any photo, it’s the done thing to have rules.
Now I don’t go along with rules all the time after all, aren’t they made to be broken?
But this one is an essential rule for anyone starting out or even still learning (not that you ever finish learning but you get my drift)
So, what is the rule of thirds?
It’s way of ensuring that the photo has some sort of balance.
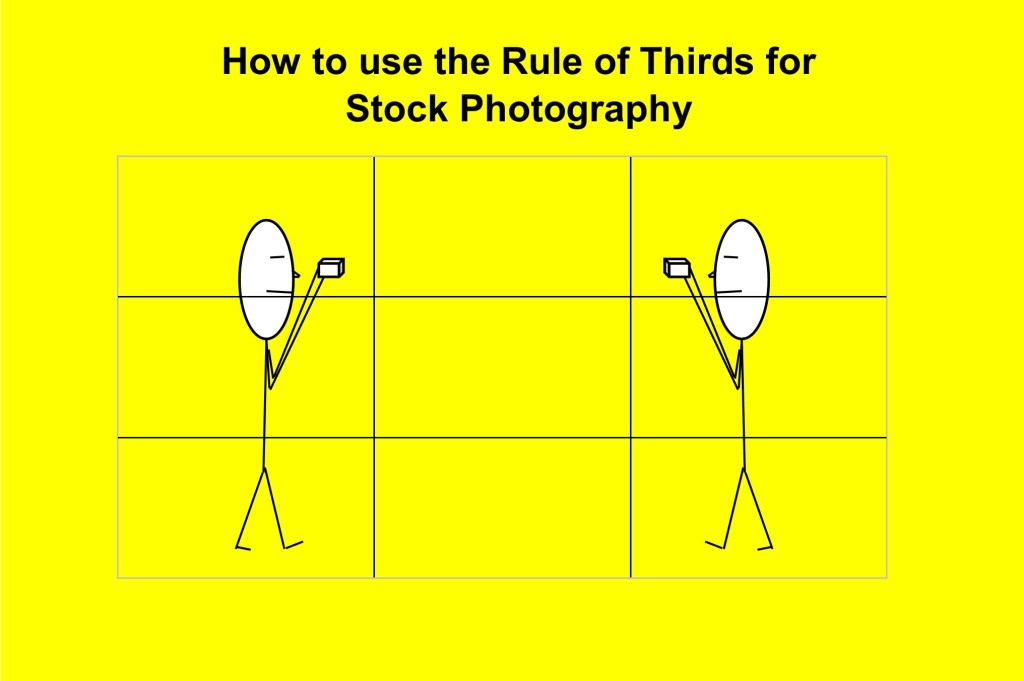
Basically, you divide the photo frame into thirds.
You have a top third, middle third and a bottom third, plus you then have 2 vertical lines that divide the frame into 3 going from one side to the other.

It’s like an imaginary empty noughts and crosses box overlayed on your photo
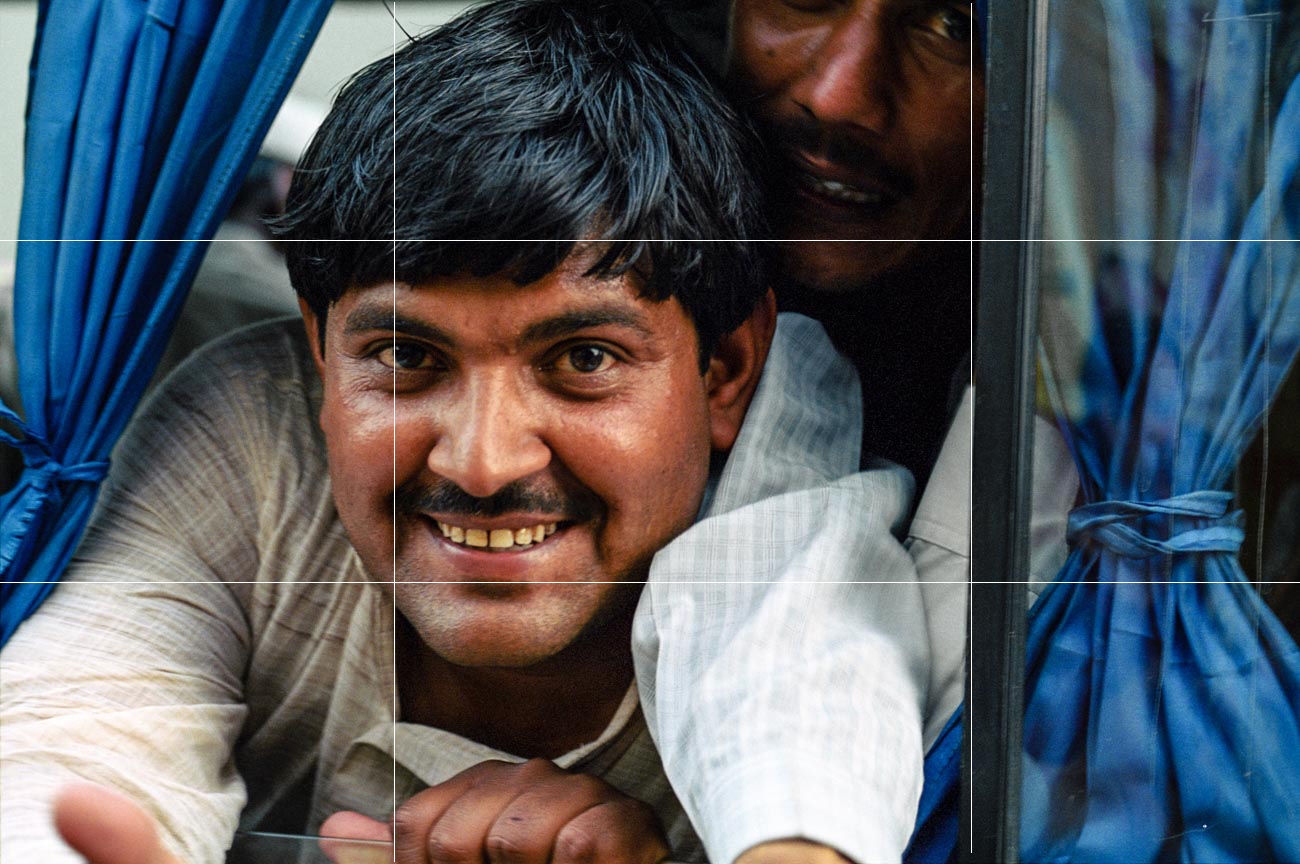
The idea is that you position your subject along one of these lines.
For example, generally speaking, a horizon shouldn’t be right in the middle, it could be on the lower third or upper third line depending on what’s interesting in, usually, the sky or the foreground.
Basically, the rule of thirds promotes that the main elements of a composition in any photo should be placed one third away from the edges of the frame.
The idea behind it is that our eyes are naturally drawn to the intersecting points, how we are drawn to the balance of an image. This is all theory of course.

But it is a good start. The example of avoiding putting the horizon smack bang in the middle is probably the most obvious.
Other examples could be having a model over to one side along, let’s say, the right-hand line, the moon in the right-hand corner or a lone tree to one side.
Here’s three more examples:


You can see by these examples it’s really all about keeping the main elements to one side and not smack bang in the middle.
So how to use it?
Well from a purely technical point of view the easiest way if you want to see when composing an image is to use the focus points.
On every camera and even some smartphones there is now the ability to display multiple focus points and/or a grid similar to the thirds grid which can see through the viewfinder or rear LCD screen.

And that’s fine when you are trying to get the hang of it but once you get into the habit of where to put the imaginary lines roughly I suggest you go back to using the points more naturally.
For stock or marketing photos your composition you may have to take into account any captions you want to overlay over the photo.
No point putting it across a vital part of the image as you will lose the impact of both the image and caption or message.
Of course, as I stated at the beginning it’s a rule that doesn’t have to rule every photo you take (excuse the pun).
It should really be called a guide to creating composition using thirds or something like that as not every situation lends itself to this rule.
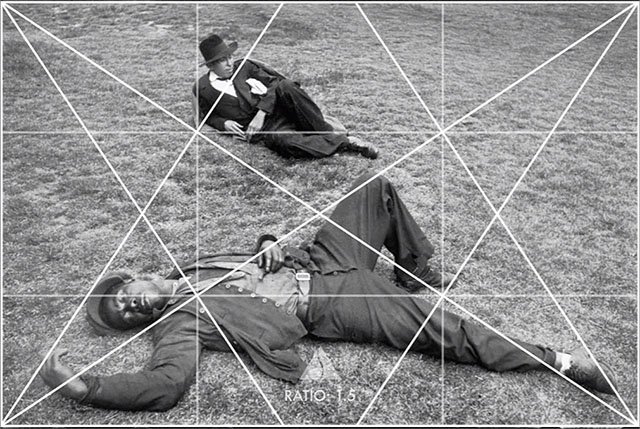
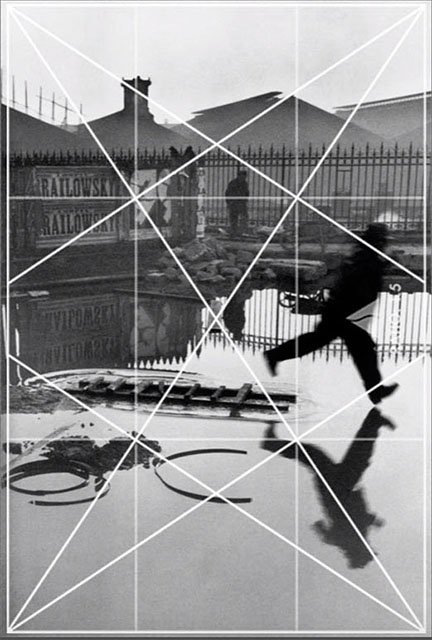
Of course, you can go overboard as well.
The image lines below, that have been drawn anonymously, are an analysis of the how supposedly of one of the greats, Henri Cartier-Bresson, framed his images.
That I’m not convinced about.
He was a natural talent and I’m sure in his mind’s eye he composed around the frame but I don’t think it was to as detailed.

So to summarise
The rule of thirds is a is a way of making sure the viewer focuses on what you want them to by dividing a photo frame width and height into thirds.
Thanks for reading
Post any comments below. I’d love to hear them.
And do us a favour! Please share any way which works for you.
If you want more like this then please subscribe below and you will get a
free guide on how to improve your stock photography.
We often spend too much time searching for things that we have under our noses.
Let’s take Stock photos for your marketing as an example.
We’ll either jump on the net and spend hours searching for images that will fit the bill or set up our own temporary photo studio and take something ourselves that we believe will do the job.
Often, we may already have the image in our ‘carefully ordered’ catalogue of photos that we have accumulated over the years.
Sometimes the image doesn’t have to be of you, your product, your shop or your staff.
It can just represent your business in a less straight forward way the message you are trying to get across.
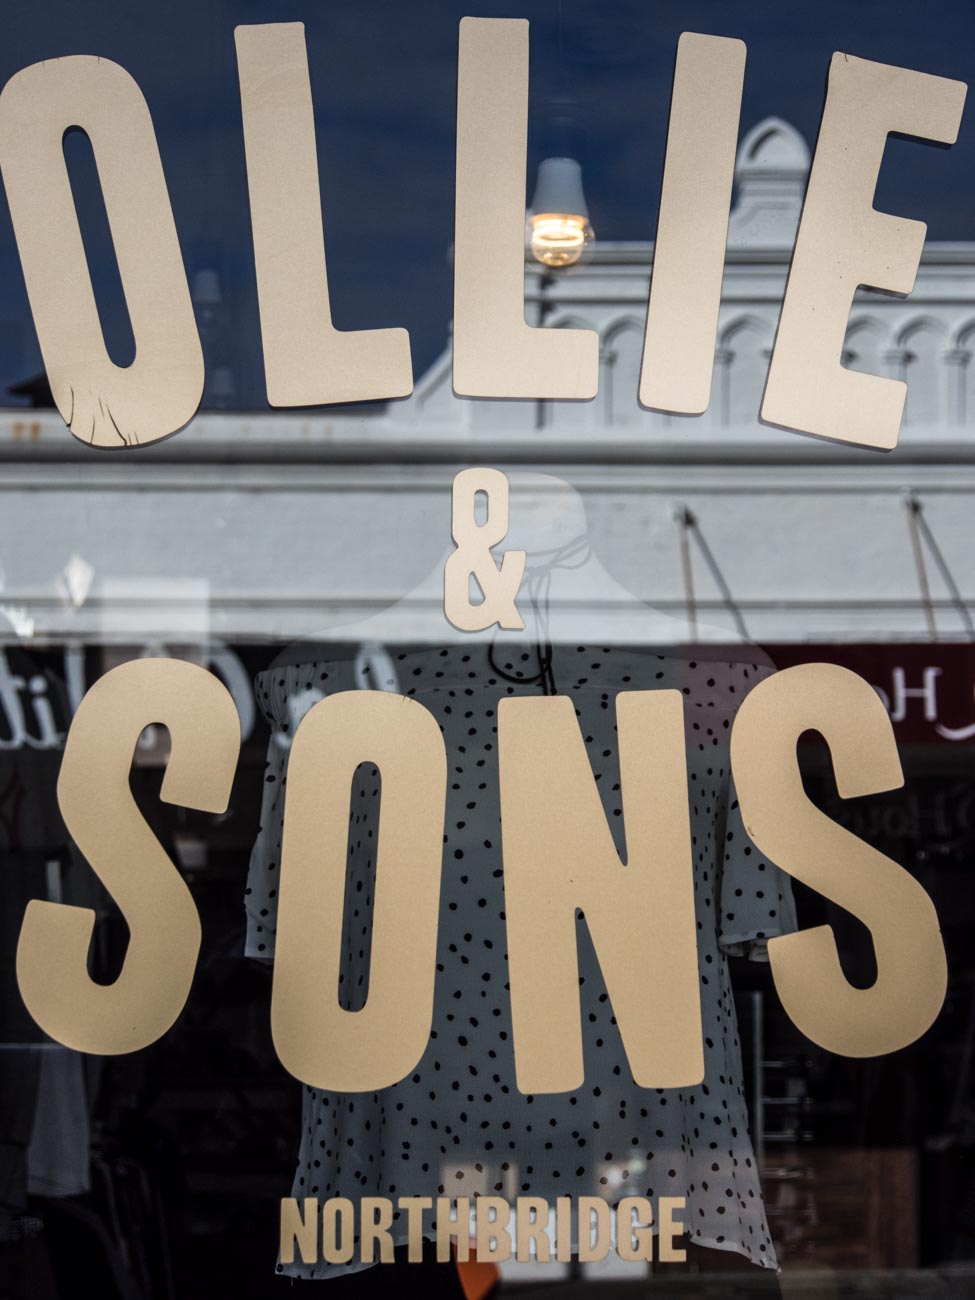
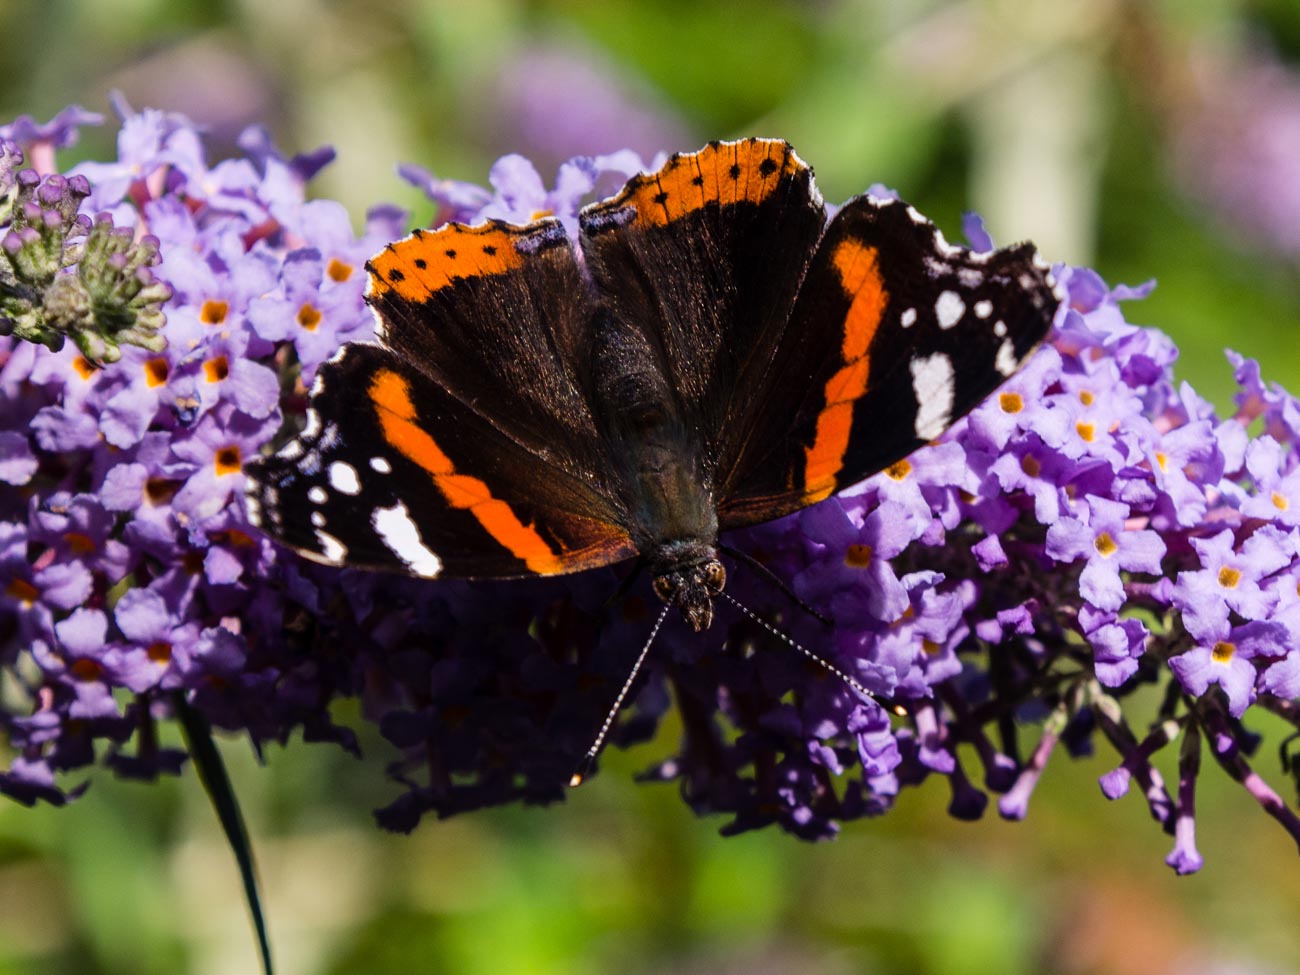
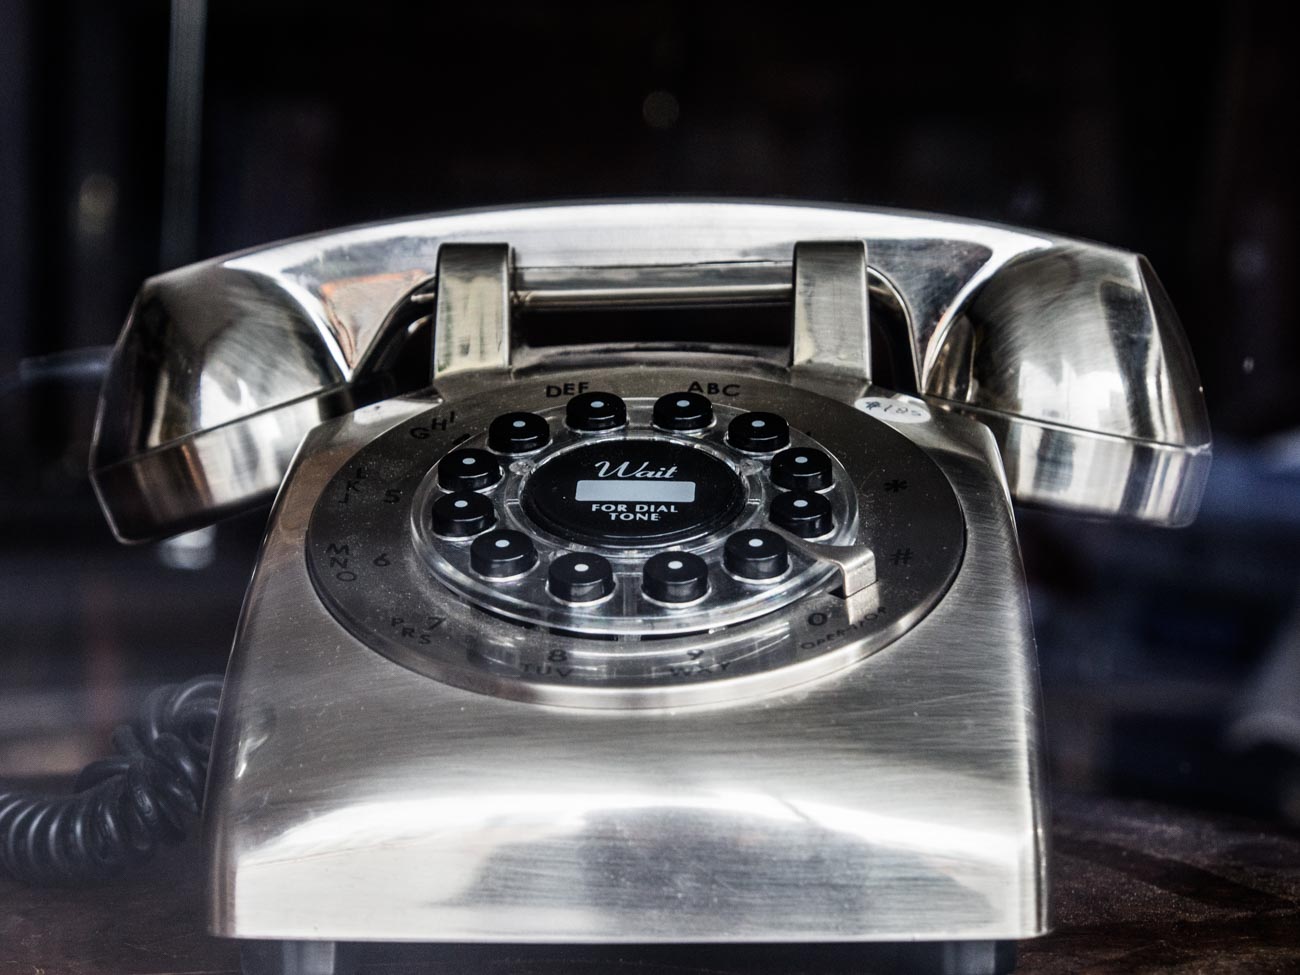
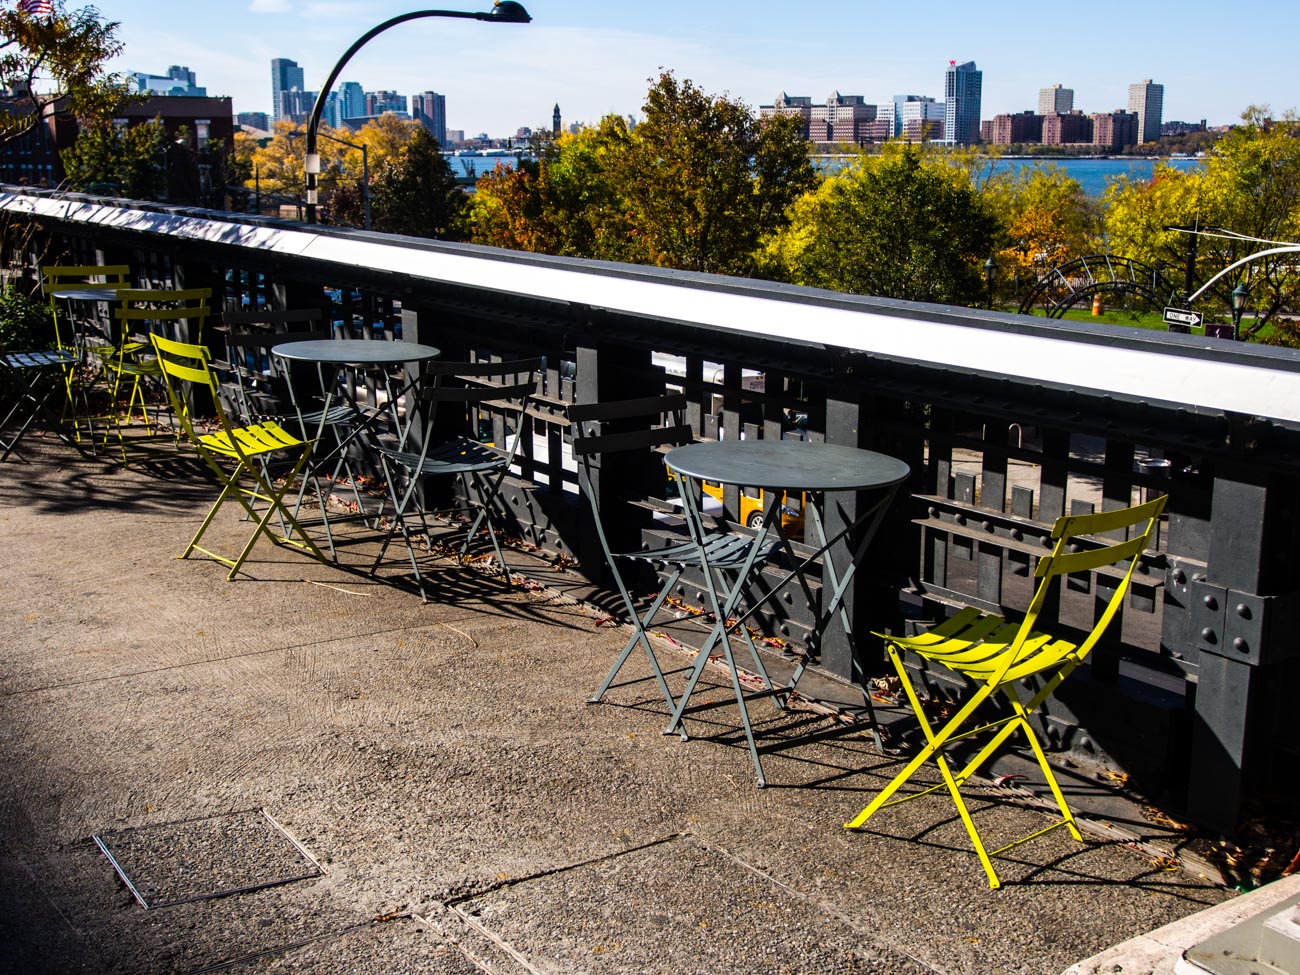
So below are several examples of images that can be used to speak to your potential market with suggested captions.
This is not meant to be a promotion for my other brand katinimages.com.
However, if you are interested in any of these images just click on them and you will be taken to my gallery where you can, if you so desire, make a purchase or just see a bigger version.
https://katinimages.smugmug.com/Travel/Australia/i-qRnK3zz/A
Don’t waste away worrying when one call can help.
Are you wondering where you are? Our customer service can help orient you.

Does you email look like this? Call 1234 56778 for a way to get your email into one box.
Need a mails collection from multiple mail boxes. We can help with our special collection service.
https://katinimages.smugmug.com/Travel/Travel-different-street/i-rHfjWRD/A
Sometimes you have to walk away! Call us now for an appraisal on your business.
Knowing where to price your product can be the difference between success and failure. Visit us at knowyourprice.com
https://katinimages.smugmug.com/Travel/Travel-Different-North-America/i-g4MnbBv/A
Are you winging with your finances? Go to dontwingit.com
Fed up with flying an empty plane. Talk to us about charter flights
OK so maybe the captions are not that good but hopefully you get the idea.
Maybe you’ve got some better ones. If so don’t be shy share them in the comments section below. You could help someone else who’s struggling to coin good marketing phrases.
Additionally if you have any questions or comments about this post, you can also leave them in the comments section below.
Or feel free to contact me directly via my contact page
Sharing is caring as they say (although not sure who “they” are).
If there’s some people you know who may enjoy this or any other post on this site, please share with them.


