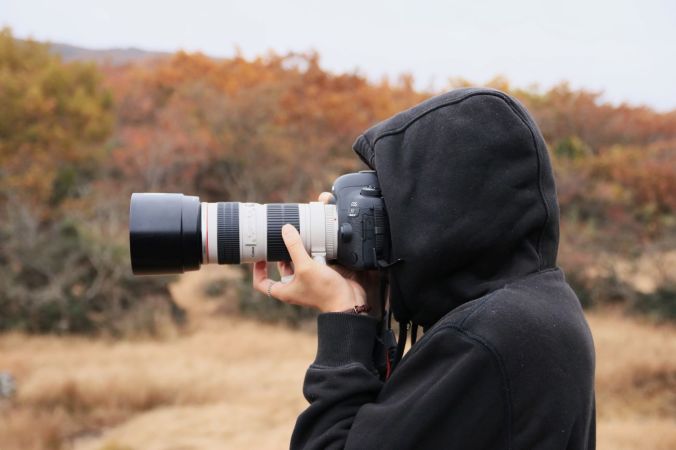
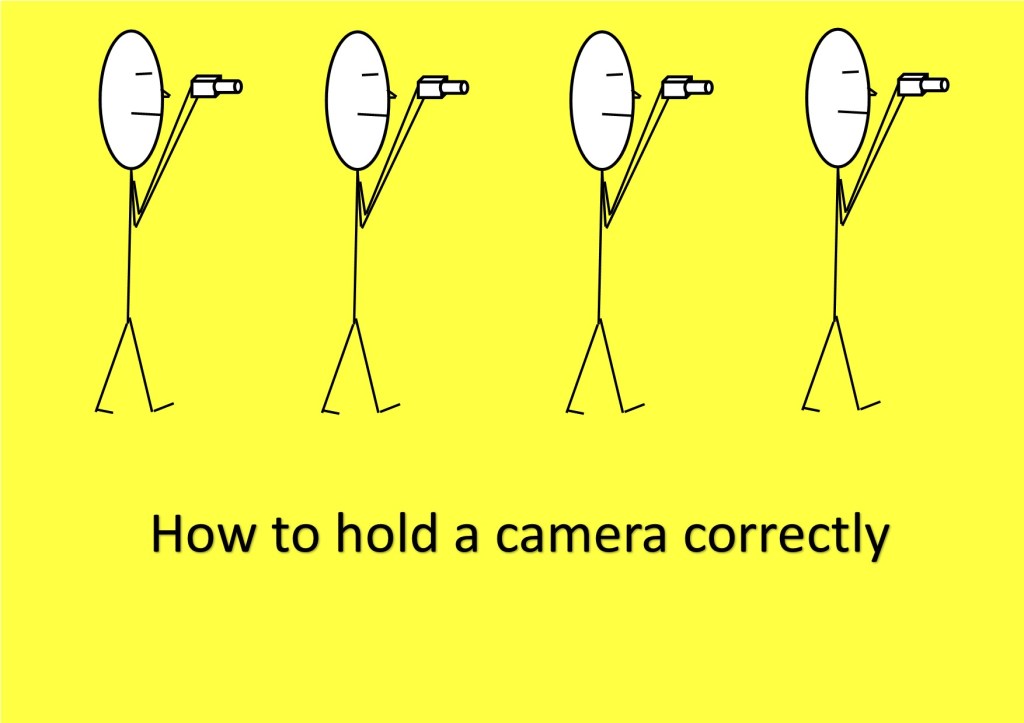
How to hold a camera correctly (Photo by Hyunwon Jang on Unsplash)
So, you think you can hold a camera or smartphone correctly? Well how do you know? In this article learn why camera shake can be avoided with a little of knowledge.
Take a good look at your photos.
No, not on the camera or phone screen but on your PC, Mac or Laptop. Even a tablet is better than a smartphone or camera screen but the bigger the better.
Now does it look really sharp or does look a little bit blurred (the industry phrase is “soft”) in parts or may even a quite a bit blurred?If so, there is a good chance you are not paying enough attention to the fact that a camera moves when you hold it. Now that’s not the camera moving on its own but you moving it. Got It?
Techniques
Now there are several techniques to overcome this but I’m going to basically cover how you should be holding your camera and smartphone.
Camera with a Viewfinder.
If it has a view finder – then use it!
When you use the view finder you are putting the camera up to your face and therefore bracing it on your face.
Now to add to that, tuck your elbows in against your side.
Depending on the weight of the camera, grip one side with one hand usually the right where the shutter button is and the position the other hand underneath the body or if it’s a fairly long lens then under the lens. .
Camera with no Viewfinder
Ok so it doesn’t have a viewfinder or you don’t want to use it! If either one of those is you. You need to know that:
The overwhelming majority of people taking pictures using the view finder do not hold it correctly
And consequently get pictures that are ‘soft’.
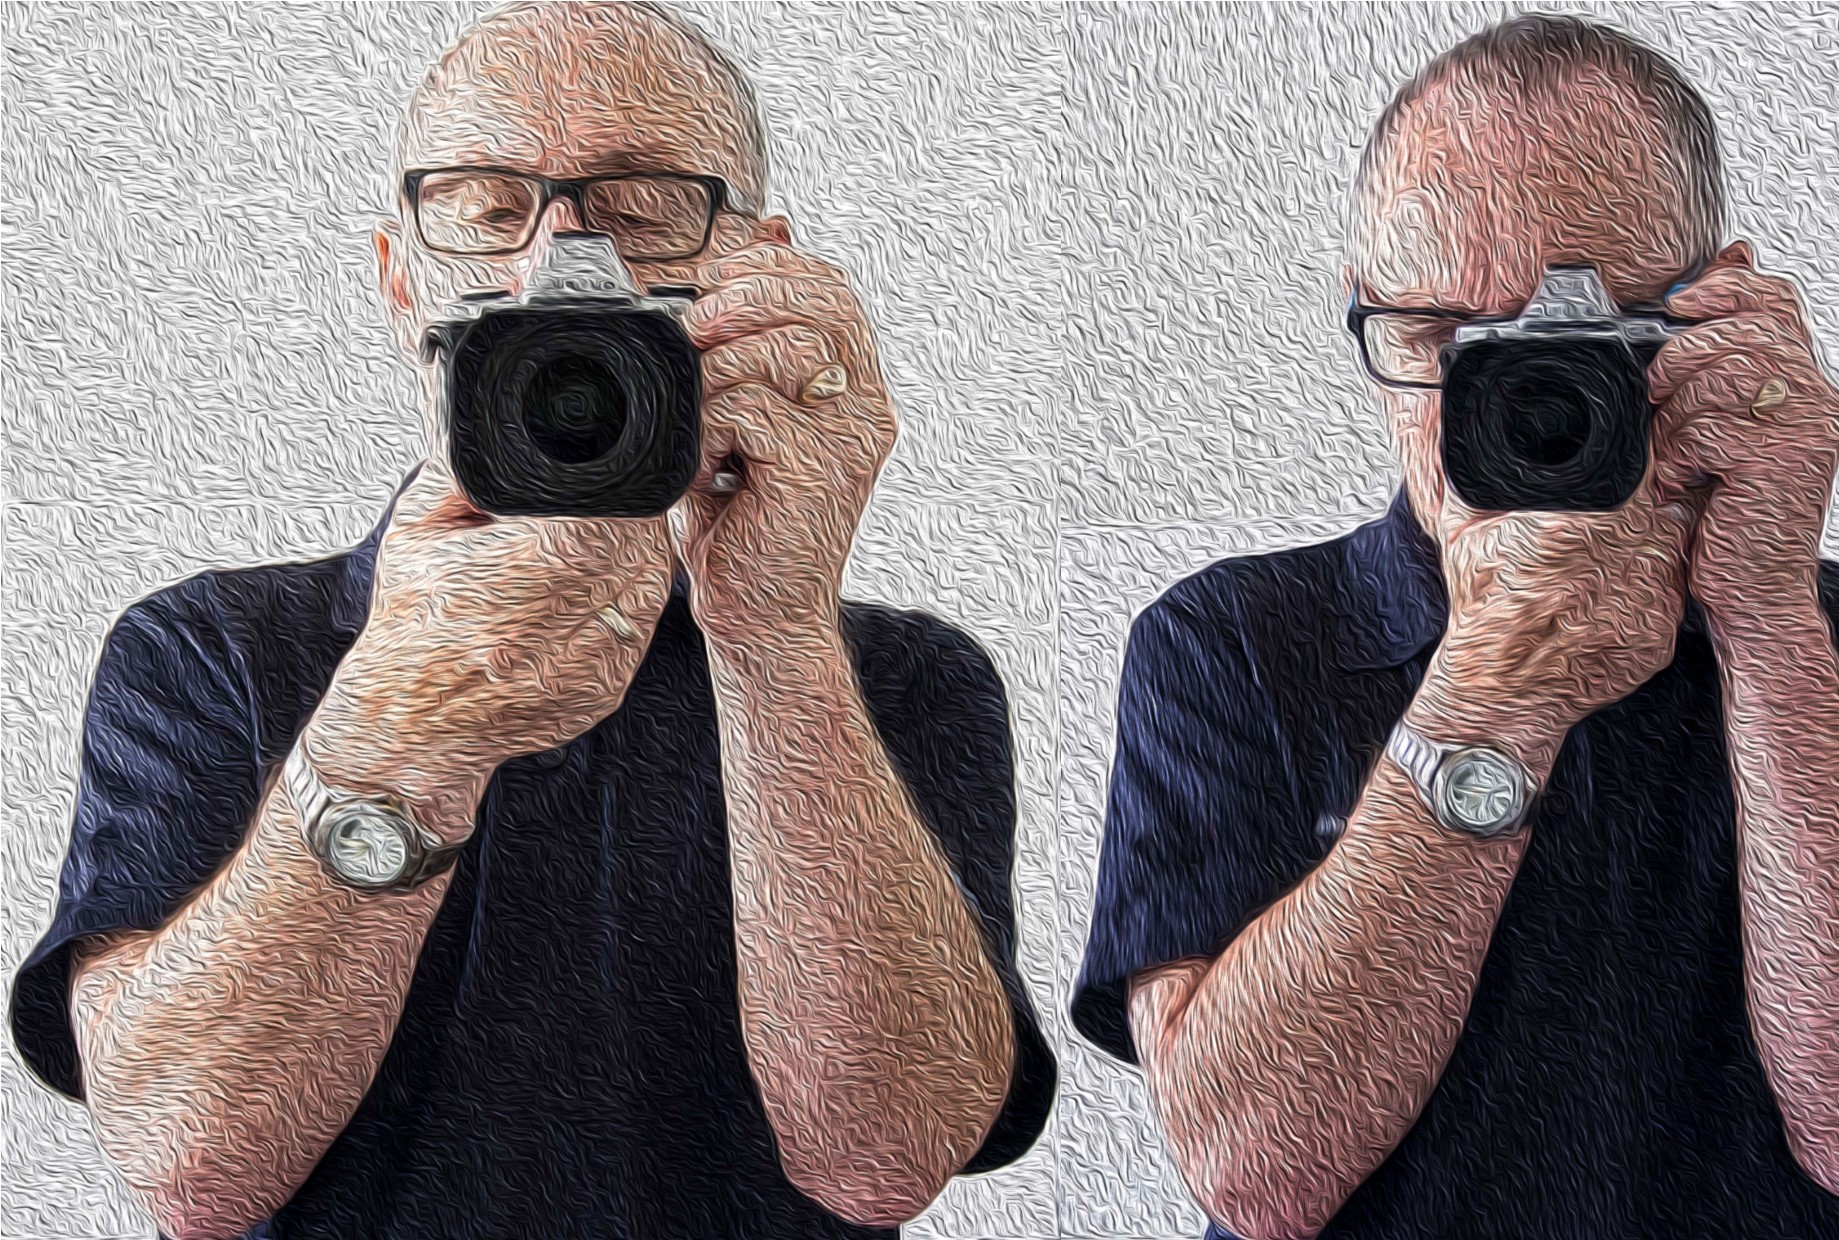
If you have studied physics you will know what the pendulum theory is. Holding the camera at arm’s length creates a pendulum effect and ‘soft’ or blurry photos unless the light is very good and you have a high shutter speed.
So just like using the viewfinder tuck those arms in against your sides and bring the camera closer to your eyes.
Again, depending on the weight of the camera, grip one side with one hand usually the right where the shutter button is and the position the other hand underneath the body or if it’s a fairly long lens then under the lens.
Ideally you want to stand with your legs shoulder width apart so that you well grounded.
If there happens to be a handy surface, say a wall, rest the camera on that.
Alternatively you can support yourself against a vertical surface such as a tree or a wall if practical.
The portrait position is similar for both the viewfinder and rear screen. You just need to decide which side is more comfortable for the shutter button. The shutter speed at the bottom is the most practical so that you can use the bottom to help support the bottom of the camera.
Camera Holds
The Smartphone
Most smartphones these days have the option to operate the shutter with a physical button like a volume control instead of tapping the screen. So, if you have that option then use it! Especially for the landscape position.
As with a camera most people using a smartphone camera often don’t hold it correctly. So tuck in your elbows
Use both hands. It gives me nightmares watching some people take photos one handed. With a smartphone, you need to use 2 different handling techniques.
In the horizontal or landscape position hold it with your hands in the same spot on each side.
With whatever hand you are using to press the shutter button make sure you have that trigger finger free so that you can tap the virtual shutter or press the physical shutter button.
Now the vertical or portrait position is bit trickier.
If you are using a physical shutter, then hold the phone with whichever side it’s on and curl it around the back the lens with the thumb operating the shutter.
The other hand can hold the bottom of the phone with the index finger and thumb.
For a virtual button the difference is that it’s the hand at the bottom that presses the virtual button and can’t in that case grip the bottom of the smartphone at the same time.
When in portrait mode, it’s often better to use the virtual button.
Smartphone Holds
Other Situations
In some situations, you may not be physically vertical.
You may have to lie or sit to take the photo.
If you are lying down, you have the added support of the ground or floor but you need to rest the elbows on the ground or you will end taking a steady image of the ground which may not be your intended subject.
If you are sitting, then usually there is something you can rest the camera on.
Other ways to avoid that Blurry or soft Photo.
Use a tripod,
Have image stabilisation turned on (if fitted),
Ensure that your shutter speed is fast enough,
Use the timer
And so on.
But this piece is just the basics on holding the camera.
More on those tips on the next post.
If you have any tips, please don’t be shy just stick ’em in the comment box below?
Is there anything else that you want explained? Again just ask.
There are so many features now on a camera that its’ both mind blowing and confusing.
The TV Analogy
When we were in the market for a new TV, we discussed all the different features and benefits with retailers.
By the time we had finished we were totally confused. Salespeople in different shops seem to tell us something different about the same TV. For example, one would say this TV doesn’t have Freeview plus, whilst another would say that it does. In the end, I researched on each manufacturers website. I even rang them to ensure that the information I had gathered was accurate. After doing that we went and bought the TV we wanted.
So, what about Camera features? Well compared to TV’s there are way more things to think about.
In my opinion there are too many Camera features that are not needed! This article is to help you navigate the different Camera features. I’m going to suggest some essential camera features you need to consider having.
Either when you are in the market for a new camera or mobile phone or that you should review on your existing camera. This article consists of 4 sections:
1. The single essential camera feature you must have 2. Four Camera features you need 3. Eight Camera features to have 4. Six Camera features you don’t need
After each Camera feature is a rating out of 10 – 10 being must have.
The single essential Camera feature you must have
So, let’s start with absolute must!!
Mechanical Exposure controls
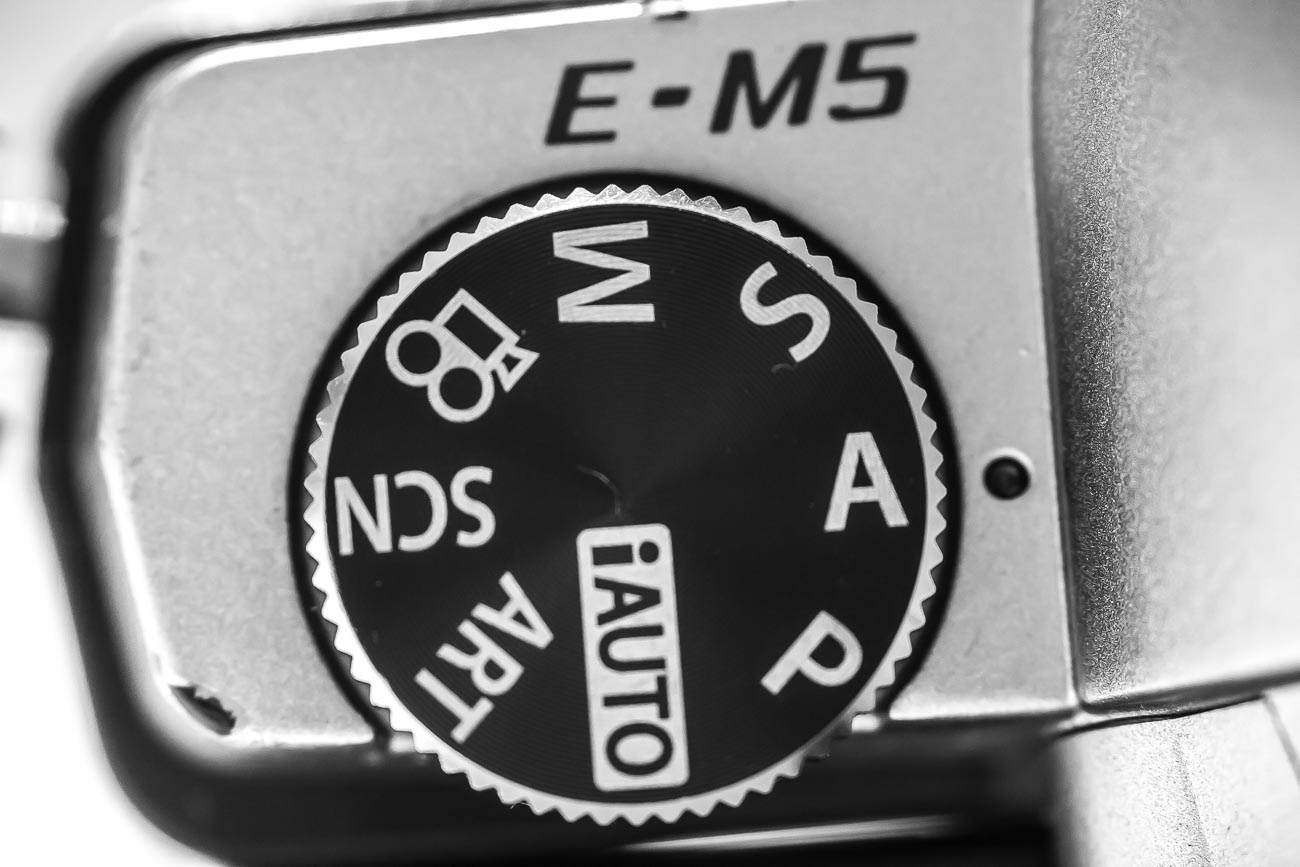
Usually on most cameras there are a P, A, S and M modes.On small compacts there usually is only a P mode.
On smartphone cameras, even the best ones, they don’t yet have the option to adjust the exposure the “old fashioned way”. So what’s with the “old fashioned way”? Well without going into a great deal of details on how a camera works, I’ll explain: All cameras have an aperture and a shutter. Both allow light into the sensor but in different ways.
The aperture allows in light by changing the size of its hole, the shutter allows in light by the speed of its movement. Having the option of being able to control both or at least one of these is one of the keys to getting great photography.
What do all these letters mean?
P stands for program and is a more sophisticated way of shooting in auto. The camera decides which aperture and shutter speed to use.
However the difference is that you can also weigh in by using what’s called in the industry “shift”. A stands for aperture priority and S stands for shutter priority. In both these modes you control one whilst the other one is controlled by the camera.
Most pro photographers depending on their specialisation will shoot in aperture priority. M is where you have complete control. You set both the aperture and the shutter speed.
This is not something a beginner would dabble in until they have got some experience with the other modes
Confused? Let’s go into more detail
If you want to take a photo of a subject with all the background blurred then you would need to adjust the aperture. If on the other hand you want to take a photo of movement.
Let’s say, a dancer practicing or performing then you would more than likely want to adjust the shutter to capture the type of movement you want.
That can be blurred motion or freezing the action. So, it’s handy to have that degree of control.
What’s that you say? You’re only beginning so you only need auto!
That’s fine. However I would suggest that if you want to create images that you can be proud of, then at some time in the future you will need more control.
The ISO factor
One extra control that goes hand in hand with exposure is ISO adjustment. In fact, the aperture, shutter speed and ISO make up the exposure triangle. That is to say that the adjustment of one affects the other two. With each camera manufacturer trying to outdo each other, the ISO on a top end DSLR can now be adjusted to over 400,000.
Which is crazy, as now the camera can take pictures in the dark! When you change your ISO setting, you’re adjusting your camera’s sensitivity to light. ISO settings are normally anywhere from 100 to 10,000 (or higher). These numbers have a direct relationship with the sensor’s light sensitivity.
Therefore the affect both the aperture and shutter speed. so a low setting means you need more light whilst a high setting needs less.
Rating: A or S is 10/10
Four Camera features you need
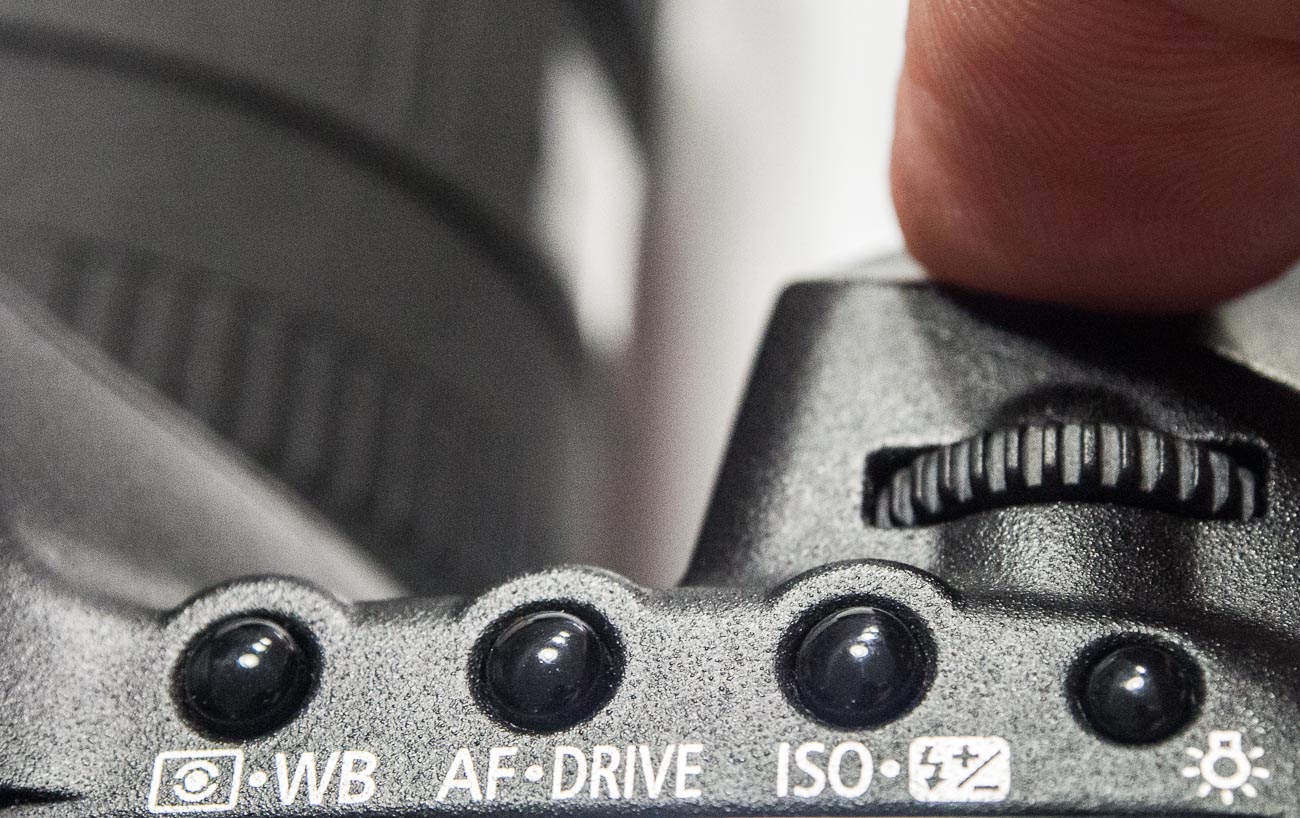
Drive
Drive selection is the option to select single, continuous or timer shooting. Single is one shot each time the shutter button is pressed.
Whilst continuous can be anything up to 15 frames per second (FPS) which is great for action pictures. The self-timer option is great for selfies. It’s also handy if the self-timer has two intervals. For example, a short, say 2 second, interval can be handy to use if on a tripod in low light instead of using a remote cable or wireless device. One thing to be aware of is that cameras these days are really mini computers.
So sometimes there can be a lag if you shoot in continuous, especially in Raw format due to the larger file size. Drive selection is standard on most cameras.
Rating: 10/10
Bracketing
I mentioned earlier that I’m a champion for getting the shot right first time in the camera, well bracketing helps this. Bracketing allows you to automatically take 3 shots of the same subject at different exposures, usually by one or half a stop each. I.e. aperture and/or shutter speed settings. You take the shot at the setting you think is correct and the camera will adjust the exposure settings for your next 2 shots to make those images lighter and darker. Handy when taking images of scenes or subjects where there is a lot of contrast. Some cameras allow you to bracket at different ISO, white balance and flash settings. Apart from the flash option these are a little superfluous.
Rating: Exposure bracketing 8/10 ISO, white balance and flash settings 3/10
Viewfinder
In the early years of digital cameras, very few had viewfinders.
Camera manufacturers thought that everyone would migrate to the rear screen or monitor on the back of the camera. However, the exception to the rule was the DSLR which retained the optical view finder. Nowadays Electronic Viewfinders have come into their own and very good they are too. Why use a view finder at all? Why not the rear monitor? Well 3 reasons come to mind
1. Camera shake is reduced. Holding the camera out from your body means it is a lot harder to keep still.
2. Competing light. Ever looked at the rear screen on a sunny day? You can’t see a bloody thing!
3. Battery power. An LCD screen will always use a lot more power than a viewfinder either optical or electronic.
But there are viewfinders and there are viewfinders. Make sure it feels comfortable. The frame should be 100% not have any cropping, has a central view i.e. as if you were looking through the Lens.
Rating: 10/10
Shooting and viewing videos
This is usually on most cameras and is the rapidly becoming the number one medium on social media. This is a whole article on its own so I won’t go too deep. I would say that at this stage the only recommendation is to ensure that the camera shoots in high definition (HD) at the minimum. A lot of cameras are now able to shoot in 4K but like 3D there are still limitations on being able to view 4K videos. That will change as it’s only a matter of time until 4K TV’s and Monitors will be more common as the price drops. Unfortunately, the image and video quality available is not yet matched by the audio quality that comes standard with most cameras. So, make sure you buy a good microphone that’s compatible.
Rating: 10/10
Eight Camera features to have
Being able to turn off Flash.
Controversially I used to rarely use flash, preferring natural light. Yet the degree of control some of these cameras allow you to have over flash means that it can be used to enhance daylight and improve the image. Because of this, I use it more and more these days. There are options to use flash in several different ways, Fill in, Slow, Red Eye reduction, Auto, Off or On etc. But it’s the option to be able to turn it off, especially if the camera comes with an inbuilt flash, that’s so important. Speaking of inbuilt flash. Avoid using them as much as possible. The ideal flash should be off camera. Something I’ll discuss in a future post.
Rating: On camera flash 4/10. Turn off flash 10/10
Focus targeting
Like most cities in the USA, Anchorage has a big fourth of July parade. This one was in 2012
Another option again almost universally supplied is focus targeting. Looking through the viewfinder and/or the rear screen you can bring up a rectangular or square grid of around 30 boxes that you can select to use as a focus target. Options usually include single, selected groups or all targets.
Rating: 6/10
Exposure Compensation
Exposure compensation is great!
The ability with just a twist of a dial to alter the exposure or brightness without having to alter the aperture or shutter speed that you’ve already set is very handy. Of course, it does adjust something so it should only be used for small incremental changes.
Rating: 10/10
Metering
Metering, whilst another handy option to have, is not used much. I think that’s because it’s not understood by most camera buyers. That too is a post for another day but suffice to say it’s a must have for the future.
Rating: 7/10
Image Stabilisation
The street art act, Dream State Circus at the Street arts festival in Fremantle, Western Australia. the festival attracts over 100,000 spectators over the Easter long weekend.
Many years ago, I met a photographer who was taking clear and sharp images of wildlife at dusk without a tripod. That was my first introduction to image stabilisation. Basically, it compensates for camera shake caused by slow shutter speeds and is a must have. Initially they were only available on the lens but nowadays most cameras have it inbuilt. So now you don’t have to worry about what lens to use. Again, a must have.
Rating: On camera 10/10
AEL/AFL Lock
(Auto exposure Lock/Auto Focus Lock)
I use this option all the time. The ability to be able to lock your exposure and/or focus is invaluable. How does work? Well usually there is a button on the camera that allows you lock the exposure and or the focus and then recompose. When would you use it? In lots of situations Landscapes, Portraits, Products, even macro work
Rating: 10/10
White Balance
What’s white balance?
Well it’s on every camera these days, so if you leave the setting on auto you don’t have to think about it.
But (always a but) there are times when auto doesn’t get it right. For example, tungsten or fluoro lighting tend to confuse it a bit. That’s when you take it off auto and set it to appropriate setting like, duh, tungsten or flouro
Rating: 8/10
RAW Format (Image Quality)
One phrase that is somewhat misleading is the term “Image quality”. Used for having the choice of what format to use i.e. JPEG or Raw.
I’m not about to expand too much on what the difference is but if you shoot in Raw then you will need to do some post processing whilst JPEG is mostly ready to go. That’s simplifying it but to do the argument justice I like to use a cooking analogy.
You could say that Cooking a supermarket bought ready to go meal that you sling in the microwave is a JPEG.
Whilst a meal that contains the raw ingredients you have bought at the local farmer’s market and prepared and cooked from scratch is a Raw file. The former is what you see is what you get (unless you can’t cook and cock it up altogether).
Whilst the latter is a creation that you can manipulate to give you whatever flavour and presentation you like. Clear? Another future post maybe. Anyway, most cameras will give you the option to select either and/or both and other variations. But the option to be able to shoot in Raw is a must, if not to use now but in the future!
Rating: Raw Option 10/10
The 6 features you don’t need on your camera
Cafe in Lixouri. Coffee drinkers in Lixouris main square
As you can see I have strong opinion on what you should have on your new (or existing) camera but guess what?
I have an equally strong opinion on what you didn’t need as well.
So, let’s get into it:
Picture Styles
Pike Place markets in Seattle, Washington, USA
Often there are picture styles, modes or scenes available and they can be countless;
Action, Portrait, Landscape, Panorama, Sunset, Candle, Fireworks, Beach & Snow, Fisheye, Wide-angle, Macro etc Some models also give you some tips for certain photo genres in the same mode. E.G. “Tips for flower Photos” What is often not discovered until the camera is used is that some of these modes, e.g. Fisheye, Wide-angle or Macro need to have lens that support those scenes. There is, however, one camera that it’s probably better to have some modes available for and that’s a good smartphone camera, e.g. the Samsung, Google or Apple varieties.
Most images taken by a smartphone are shared so it can be a shortcut to getting a good image first time.
Rating: 2/10
3D
Here’s a useless option ‘3D Photography’.
3D TV’s bombed and as far as I can tell there’s not many 3D monitors either, so why would anyone want to shoot a 3D image or video. It is used for some specific industries e.g. Computer-graphics, Architecture or Health. However, in my humble opinion, it’s useless as it relies on the viewer having the equipment to view it.
Rating: 0/10
Multiple Exposures
Not so useless but not essential is the recording of multiple exposures.
Multiple Exposures are photographs in which two or more images are superimposed in a single frame.
If you really want to try this for your travel photography be aware that it is somewhat tricky. In fact it’s much easier to do it in something like Photoshop.
Rating: 4/10
Digital Zooms
Digital Zooms are commonplace at the compact level and all phone cameras have it.
Personally I avoid using them as much as possible and will use an optical zoom over a digital one. What’s the diff? Well an optical zoom is a true zoom lens. They produce much better-quality images. A digital zoom uses some in-camera image processing.
When you use a digital zoom, the camera enlarges the image area at the centre of the frame and trims away the outside edges of the picture. The result is the same as when you open an image in your photo-editing program, crop away the edges of the picture, and then enlarge the remaining portion of the photo. By using the in camera digital zoom you lose the information around the crop. Whilst if it’s cropped during post processing you can keep the entire frame for use later on.
Rating: 2/10
Face Priority
My pet irritation is Face Priority. Personally, I think it’s a gimmick.
Originally in small compacts it’s spread its way into smartphone cameras and now even DSLR’s. If you are taking a portrait, then supposedly the camera will aid your focus by detecting the face.
Rating: 0/10
Printing
Printing is on its way back. Whilst the option to directly print from the camera could be handy, it’s also generally restrictive.
This feature often requires certain functions to be available on the printer. At the end of the day, if you are going to do any post processing even if it’s minimal, you should be able to print from that software.
Another option is to take it to a print shop if you are looking for high quality. Of course, you can always use the self-service machines that are everywhere.
Rating: 2/10
Conclusion
Of course, there are other Camera Features not mentioned here. But these are the main ones you will most likely come across. As you can see there are lots of different Camera features and I didn’t cover them all.
But the one thing to remember is it’s not the camera that takes the images, it’s you. All features and benefits do is give you more options a lot of which you will never use or use once or twice a year at best. A short cut is to decide how much you are prepared to spend, go into a shop and test drive those within your budget, decide on the most comfortable and buy it. When you pick it up it needs to feel comfortable. Does the weight seem too heavy, too light or, just right? If it has a viewfinder, does that fit comfortably against your eye? Is the rear screen easy to see? How easy is it to see when you are holding it? How easy is it to adjust the dials and access the menu/s? Does the grip feel good? Is it easy to turn to portrait or landscape mode? That’s what you need to look for in a new camera and to revisit your existing Camera.
Make your life easier and double check the features on your new or existing Camera by downloading a e-book to Camera Features. Just pop your name in the box below.
How many times have you looked at those beautiful images only to realise on closer inspection there’s a slight blurriness about it. It’s just not as crisp and clear as it should be.
That’s called softness and is usually caused by Camera shake.
He’s a bit soft! (Probably wouldn’t tell him that!)
That’s better! (Fourth of July parade.)
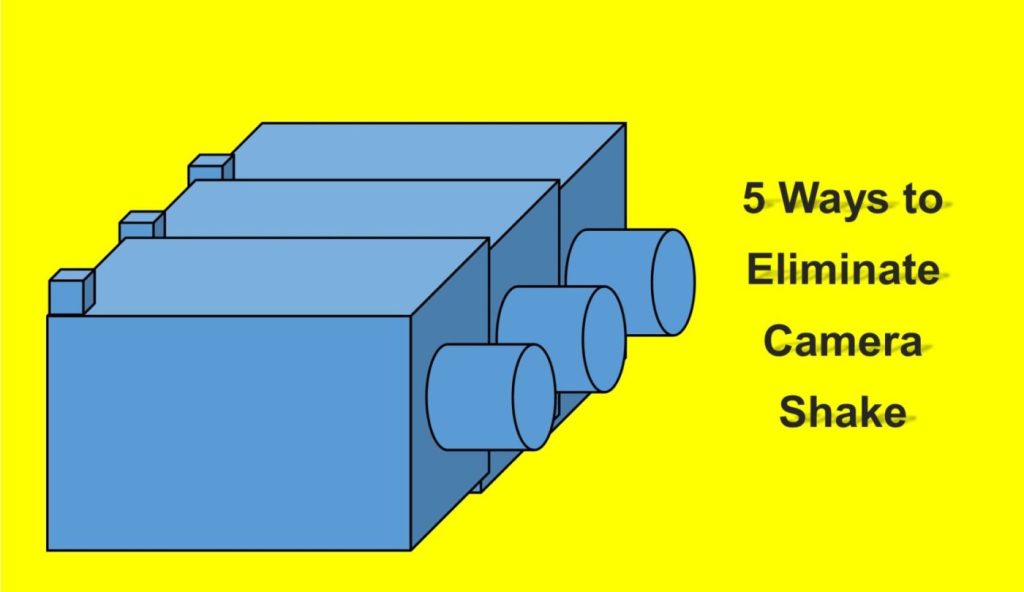
In my last post How to hold a camera correctly on this topic, I went through the best ways to hold a camera to try and reduce camera shake. Now lets’ look at 5 other ways in order you can help eliminate camera shake
1 Use a fast shutter speed
Typically, Camera Shake is caused by the shutter speed being too low.
Selecting the correct shutter speed can be a challenge. On most cameras, you can select the shutter speed and a rule of thumb, depending on the camera is the focal lens x 1.5 or 2 = the shutter speed.
So, if you have a focal length of 100mm then you will need a minimum shutter speed of 1/160; a 200mm focal length would be 320 etc. etc… Now on some compacts and a lot of Smartphone cameras you can’t adjust the Shutter speed so the next best thing is to either adjust the exposure compensation or the ISO. If you are going to shoot a lot of images at low light, then experiment so you know how your camera performs.
2 Use image stabilisation
Many years ago, I met a photographer who was taking clear and sharp images of wildlife at dusk without a tripod. That was my first introduction to image stabilisation. Basically it compensates for camera shake caused by slow shutter speeds.
Initially they were only available on the lens but nowadays most cameras have it inbuilt. So now you don’t have to worry about what lens to use. Having it inbuilt also means that most cameras have options and settings that can give flexibility.
Smartphone cameras also have them built in but usually only have the option to turn it on or off.
Just a little warning – some manufacturers advise you to turn off stabilisation if using a tripod.
An image stabiliser only goes so far. At the end of the day if the shutter speed is too low for the conditions then it won’t help.
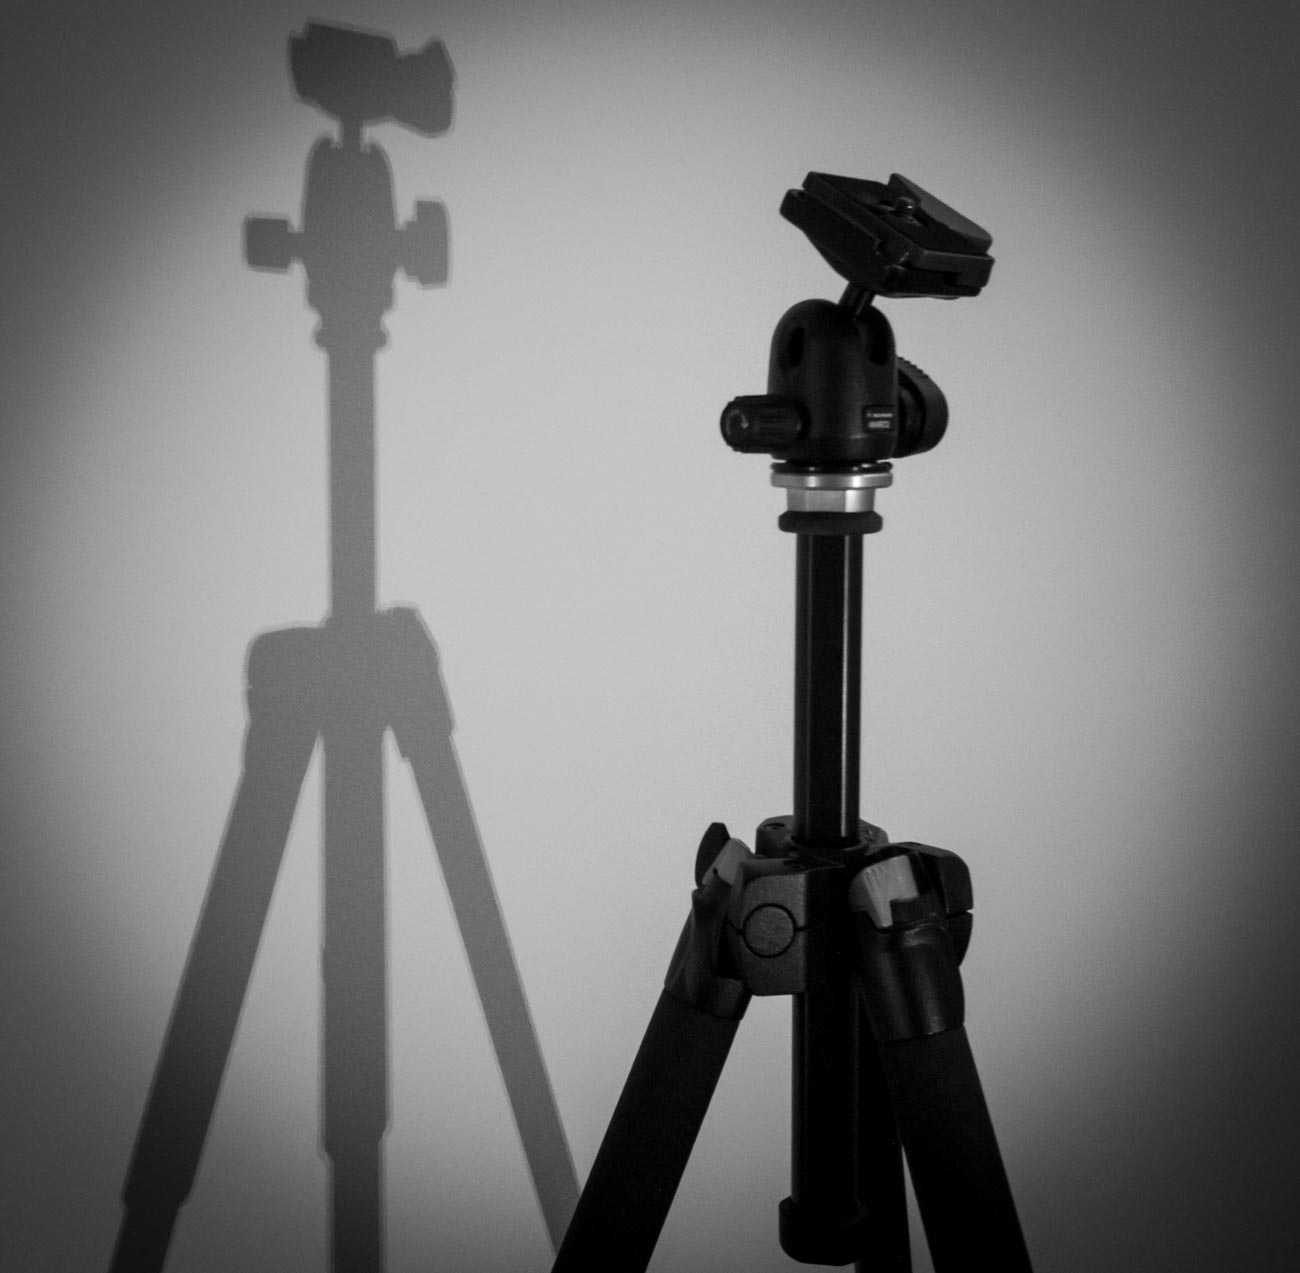
3 Use a tripod
This one is obvious. After all, if you don’t have to hold it then it’s not likely to move. Right? Well yes and no and I’ll explain in the next tip but for now putting a camera on a tripod is always going to be better than hand holding.
Nowadays there are lots of different tripods out there. Some are designed for different applications and cameras.
For a mirrorless, compact or DSLR cameras there is a few considerations such as the weight, ease of use and sturdiness. And it also depends on the use. As an example, I have 3 tripods, a studio tripod that never leaves the ‘studio’ a heavy duty one that I use for assignments and a lightweight one which I take travelling or on assignments where weight is an issue.
For smartphone cameras, there are also a lot of choices but they are usually chosen on convenience. I use the Joby Grip Tight Micro Stand, a great little find that has a mini stand. It can also be fitted to a standard tripod head.
4 Use the timer
The other main reason for camera shake is the shutter button action. When you press down on the shutter button the camera moves. Even if you are gentle it still moves. Of course, if you have a fast-enough shutter speed then it’s not a problem but if you are shooting in low light then it will create vibration which equals camera shake
Another option is to use the timer. In all seriousness, you wouldn’t use the timer if you were hand holding. The idea is to use it when on a tripod or if you have the camera mounted on something sturdy.
Most cameras have 2 or 3 timer settings. Use the lowest unless there’s some reason you need time like taking a self-portrait. After all, 2 seconds is not a lot of time to get into position.
5 Use a remote
For the same reason as the previous point (5) using a remote will take that that heavy human press out of the equation.
There are a lot of types of remotes out there.
From the old-school release cable for a DSLR to using a smartphone app to trigger your mirrorless camera to using a Bluetooth remote trigger for your smartphone.
Choose the one that is right for you or choose a couple for different applications.
Did you understand all that? I’m happy to clarify anything you’re not sure of.
Just post in the comments section below. Don’t be shy.
While you are at it why not subscribe for future updates below.
You’ll get my free guide “Eleven easy ways to improve your marketing photography”.
So, you think you can hold a camera or smartphone correctly? Well how do you know?
Take a good look at your photos.
No, not on the camera or phone screen but on your PC, Mac or Laptop. Even a tablet is better than a smartphone or camera screen but the bigger the better.
Now does it look really sharp or does look a little bit blurred (the industry phrase is “soft”) in parts or may even a quite a bit blurred?
If so, there is a good chance you are not paying enough attention to the fact that a camera moves when you hold it. Now that’s not the camera moving on its own but you moving it. Got It?
Now there are several techniques to overcome this but I’m going to basically cover how you should be holding your camera and smartphone.
Let’s start with the camera.
If it has a view finder – then use it! When you use the view finder you are putting the camera up to your face and therefore bracing it on your face.
Now to add to that, tuck your elbows in against your side.
Ok so it doesn’t have a viewfinder or you don’t want to use it! The overwhelming majority of people ta king pictures using the view finder do not hold it correctly and consequently having pictures that are ‘soft’.
If you have studied physics you will know what the pendulum theory is. Holding the camera at arm’s length creates a pendulum effect and ‘soft’ or blurry photos unless the light is very good and you have a high shutter speed.
So just like using the viewfinder tuck those arms in against your sides and bring the camera closer to your eyes.
For either situation, depending on the weight of the camera, grip one side with one hand usually the right where the shutter button is and the position the other hand underneath the body or if it’s a fairly long lens then under the lens.
Ideally you want to stand with your legs shoulder width apart so that you well grounded.
If there happens to be a handy surface, say a wall, rest the camera on that.
Or you can support yourself against a vertical surface such as a tree or a wall if practical.
The portrait position is similar for both the viewfinder and rear screen.
You just need to decide which side is more comfortable for the shutter button. The shutter speed at the bottom is the most practical so that you can use the bottom to help support the bottom of the camera.
Camera Holds
Ok now the smartphone
Most smartphones these days have the option to operate the shutter with a physical button like a volume control instead of tapping the screen.
So, if you have that option then use it! Especially for the landscape position.
As with a camera most people using a smartphone camera often don’t hold it correctly. So tuck in your elbows
Use both hands. It gives me nightmares watching some people take photos one handed. With a smartphone, you need to use 2 different handling techniques.
In the horizontal or landscape position hold it with your hands in the same spot on each side. With whatever hand you are using to press the shutter button make sure you have that trigger finger free so that you can tap the virtual shutter or press the physical shutter button.
Now the vertical or portrait position is bit trickier.
If you are using a physical shutter, then hold the phone with whichever side it’s on and curl it around the back below of course the lens with the thumb operating the shutter. The other hand can hold the bottom of the phone with the index finger and thumb. For a virtual button the difference is that it’s the hand at the bottom that presses the virtual button and can’t in that case grip the bottom of the smartphone at the same time.
In all honesty when in portrait mode, it’s often better to use the virtual button.
Smartphone Holds
In some situations, you may not be physically vertical. You may have to lie or sit to take the photo. If you are lying down, you have the added support of the ground or floor but you need to rest the elbows on the ground or you will end taking a steady of image of the ground which may not be your intended subject.
If you are sitting, then usually there is something you can rest the camera on.
Of course, there are lots of ways to avoid that blurry or soft photo.
Use a tripod, make sure you have image stabilisation turned on (if fitted), ensure that your shutter speed is fast enough, use the timer and so on.
But this piece is just the basics on holding the camera.
More on those tips on the next post.
If you have any tips, please don’t be shy just stick ’em in the comment box below?
Is there anything else that you want explained? Again just ask.
Well just to contradict myself, sometimes it is the gear.
Having certain equipment can give you shots that you may not be able to get without it.
A sports action photographer won’t get some of the shots he would like if the auto focus in his camera is slow.
Fashion photography requires excellent lighting.
Top quality landscape photographers usually use a tripod and high resolution cameras.
Cameras with more settings will generally have more flexibility and therefore give the photographer choices.
Let’s look at what equipment can give you:
1 Artistic opportunities.
It gives opportunities to create something imaginative.
For instance, with some of the filters that are part of almost every camera today, including smartphones, you have options to give your image a Grainy Film, Pop Art or Sepia old worlde tone look.
The image below is a combination of a couple of filters.
2 Freeze motion
When you are taking images of an event that has motion you generally need a high number of frames per second (FPS) to capture several images at a time.
Some cameras have high FPS and some lower and that can make a big difference.
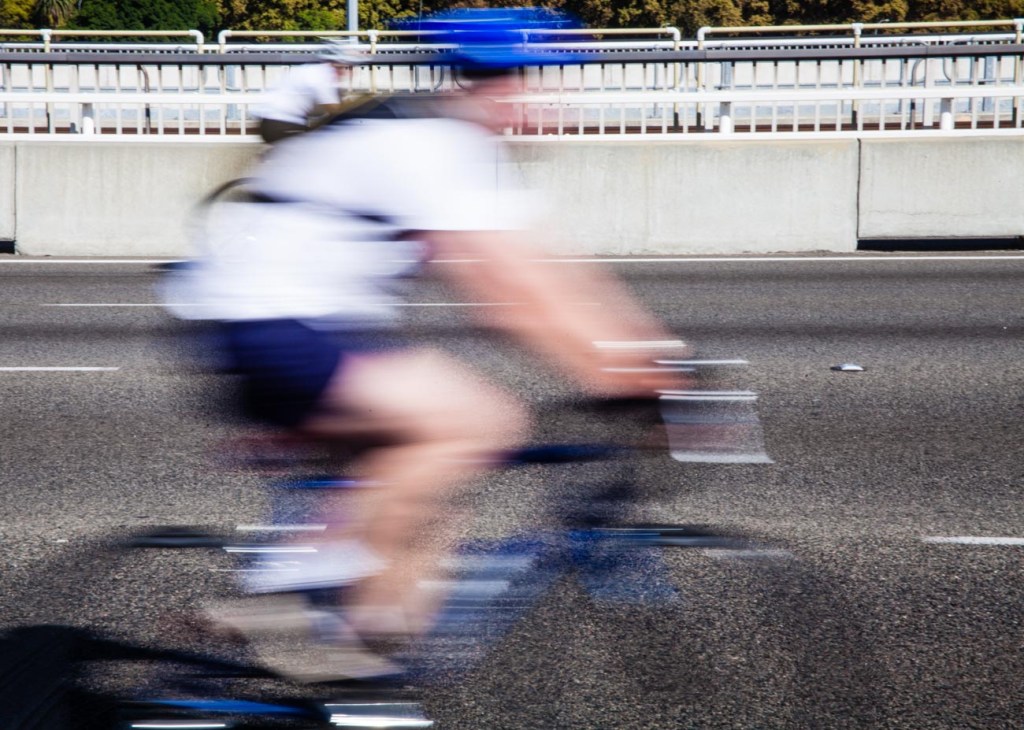
3 Blurring motion
Conversely if you wish to blur motion then you need a camera that will allow a slow enough shutter speed.
That may not always be possible especially in bright light. So, a ND (neutral density) filter can be added so that the amount of light entering the camera is reduced.
4 The ability to take images in low light part 1
There’s no doubt that modern cameras can almost see in the dark.
However not all cameras are created equal. Even though there are cameras that have ISO rating in the 100’s of thousands they may not give the crisp clear images you want.
Why is ISO that important? Well to give you a personal example; when I was first learning photography, back in the film days, I was on a gorilla safari in Uganda.
The forest we were in was dark and as we got a view of the gorillas I snapped away not understanding that I should have had a film with a much higher ISO.
The images were developed some time later and were so disappointing.
Blurred because the camera had a slow shutter speed due to the lack of light.
A priceless experience that was never properly recorded!
Before digital, the ISO rating you had on the film meant that you were locked in for however many frames there were e.g. 36. Now you can change the setting per frame.
Film also only went up to around 1600 and even then, you got a grainy image which is OK if you want to depict a moody grainy photo but not so good if you wanted something crisp and clean.
So, yes, some cameras will give you some great images and high ISO negating the need for tripods or other ways of holding the camera still but not all.
My wife’s camera (granted it’s a few years old now) is ok up to 1600 after that the grain is quite noticeable.
On the other hand, the Olympus OMD5 I have is great up to about 6400.
5 The ability to take images in low light part 2
Image stabilisation can really help if you need to take images in low light or with slow shutter speeds. In some cases, that can eliminate the need for a tripod.
I first saw image stabilisation in Namibia on safari. A photographer had a lens with image stabilisation and he could take images without the need for a tripod in fairly low light. This was 20 years ago when I was first learning photography and that blew my mind!
6 The ability to take images in low light part 3
I’ve always hated carrying and using a tripod but now with these lightweight models and the fact that the cameras are now a lot smaller and weigh less it’s not so much of a burden to carry one. Using it – well that’s still another matter but I will say if you are taking images of products especially in low or artificial light then it’s a valuable tool.
With a tripod, you can take yourself out of the equation and with a wireless (or wired) remote you can take images of subjects reasonably stress free and creatively.
7 Bokeh
Bokeh is the term used for making the subject stand out from its background by ensuring that the subject is in sharp focus and that the back ground is blurred.
The right equipment can allow you to create an image with great Bokeh.
The equipment for this is a little more complex. If you have a full frame camera, then it’s relatively easy with even the package lens to get a reasonable bokeh.
Where it gets tricky is with mirrorless (there is the odd full frame mirrorless but for this purpose, we’ll cater to the majority).
Any none full frame camera is very much dependent on the lens and couple of other factors like distance and zoom.
So, that was my alternative view on the importance of equipment.
In Why You Need a Professional Selfie I talked about having the need to have a decent self-portrait or ‘selfie’ on your website, social media or publication to show the human face.
Maybe you’ve decided to get this done but don’t want to use a professional photographer or Uncle Eric who has a good camera.
Decide what sort of self-portrait you think represents your brand best
A financial adviser or lawyer may want a more conservative head shot.
Or they may want a full-length portrait with business like clothes like jacket and trousers.
A social media site may wish to convey a trendy relaxed image. So, it may decide that, rather than have a headshot, an image of its employees being active may be better.
Whilst I have concentrated on websites and maybe social media you may also wish to use it for some printed marketing material or even billboards.
And that’s when the capability of the camera and printing become important
The four most crucial factors to getting a professional self portrait
Equipment
I’m going to show you on a smartphone but any camera should do the job provided it works 🙂
Light
Light is everything. If the light is dull or too bright the image can be too dark or ‘blown out’
(a term for images that have the highlights way too bright).
A way of mounting the camera.
A tripod is undoubtable the best way if someone e.g. an employee, is not taking it for you
Staging
Make sure you select the correct pose. You may have to take several different images at different angles to get one you want to use.
Incidentally there is no rule that says you must use the same image across the all platforms and marketing material.
Set the camera up;
Regardless of what the use is, make sure you have the biggest resolution. Much better to size down that attempt to upsize.
On the Samsung S series smartphone cameras for example you will find picture size next to the settings icon.
Select 16M or 12M or whatever the largest number is.
The resolution on the IPhone is set to maximum and has no adjustment from that except with the use of a third-party app.
Some other brands only give you the option to select large or high
Note: The front camera usually has a much smaller resolution than the main camera so avoid using it for this application
Find the timer and set it to 10 seconds
You can usually just leave the camera on auto if the light is pretty good. But you can change the settings on some smartphones. The only ones I recommend is possibly the ISO or exposure compensation.
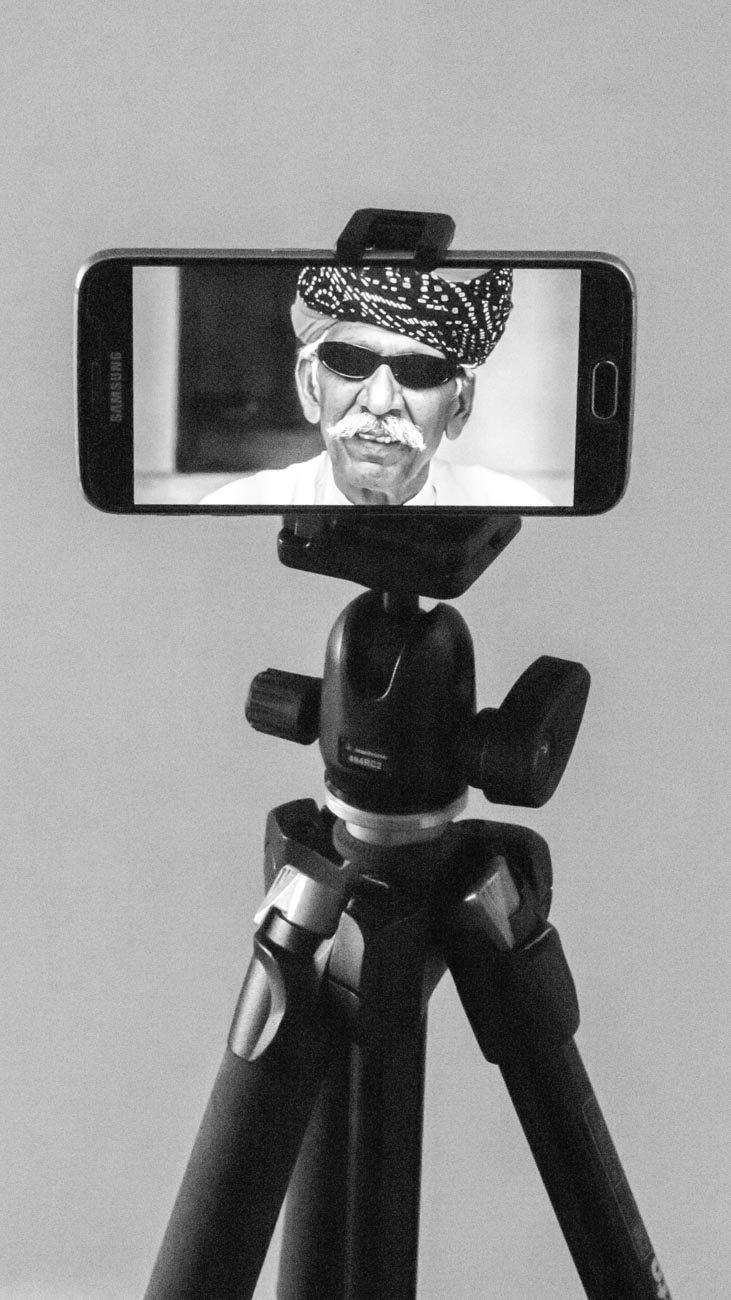
Mount the camera on a tripod or any other way you can find to mount.
I use the Joby Grip Tight Micro Stand a great little find that has a mini stand. It can also be fitted to a standard tripod head.
Set the scene
Find a well-lit position. You can be creative by sitting or standing near a window and allow the light to be strongest on one side.
Alternatively, if you want to light up both sides, use a whiteboard on the side away from the light.
Think about the background. Make sure it’s not cluttered and distracting to the eye.
Again, a whiteboard is handy. White (or off white) backgrounds are always the best way.
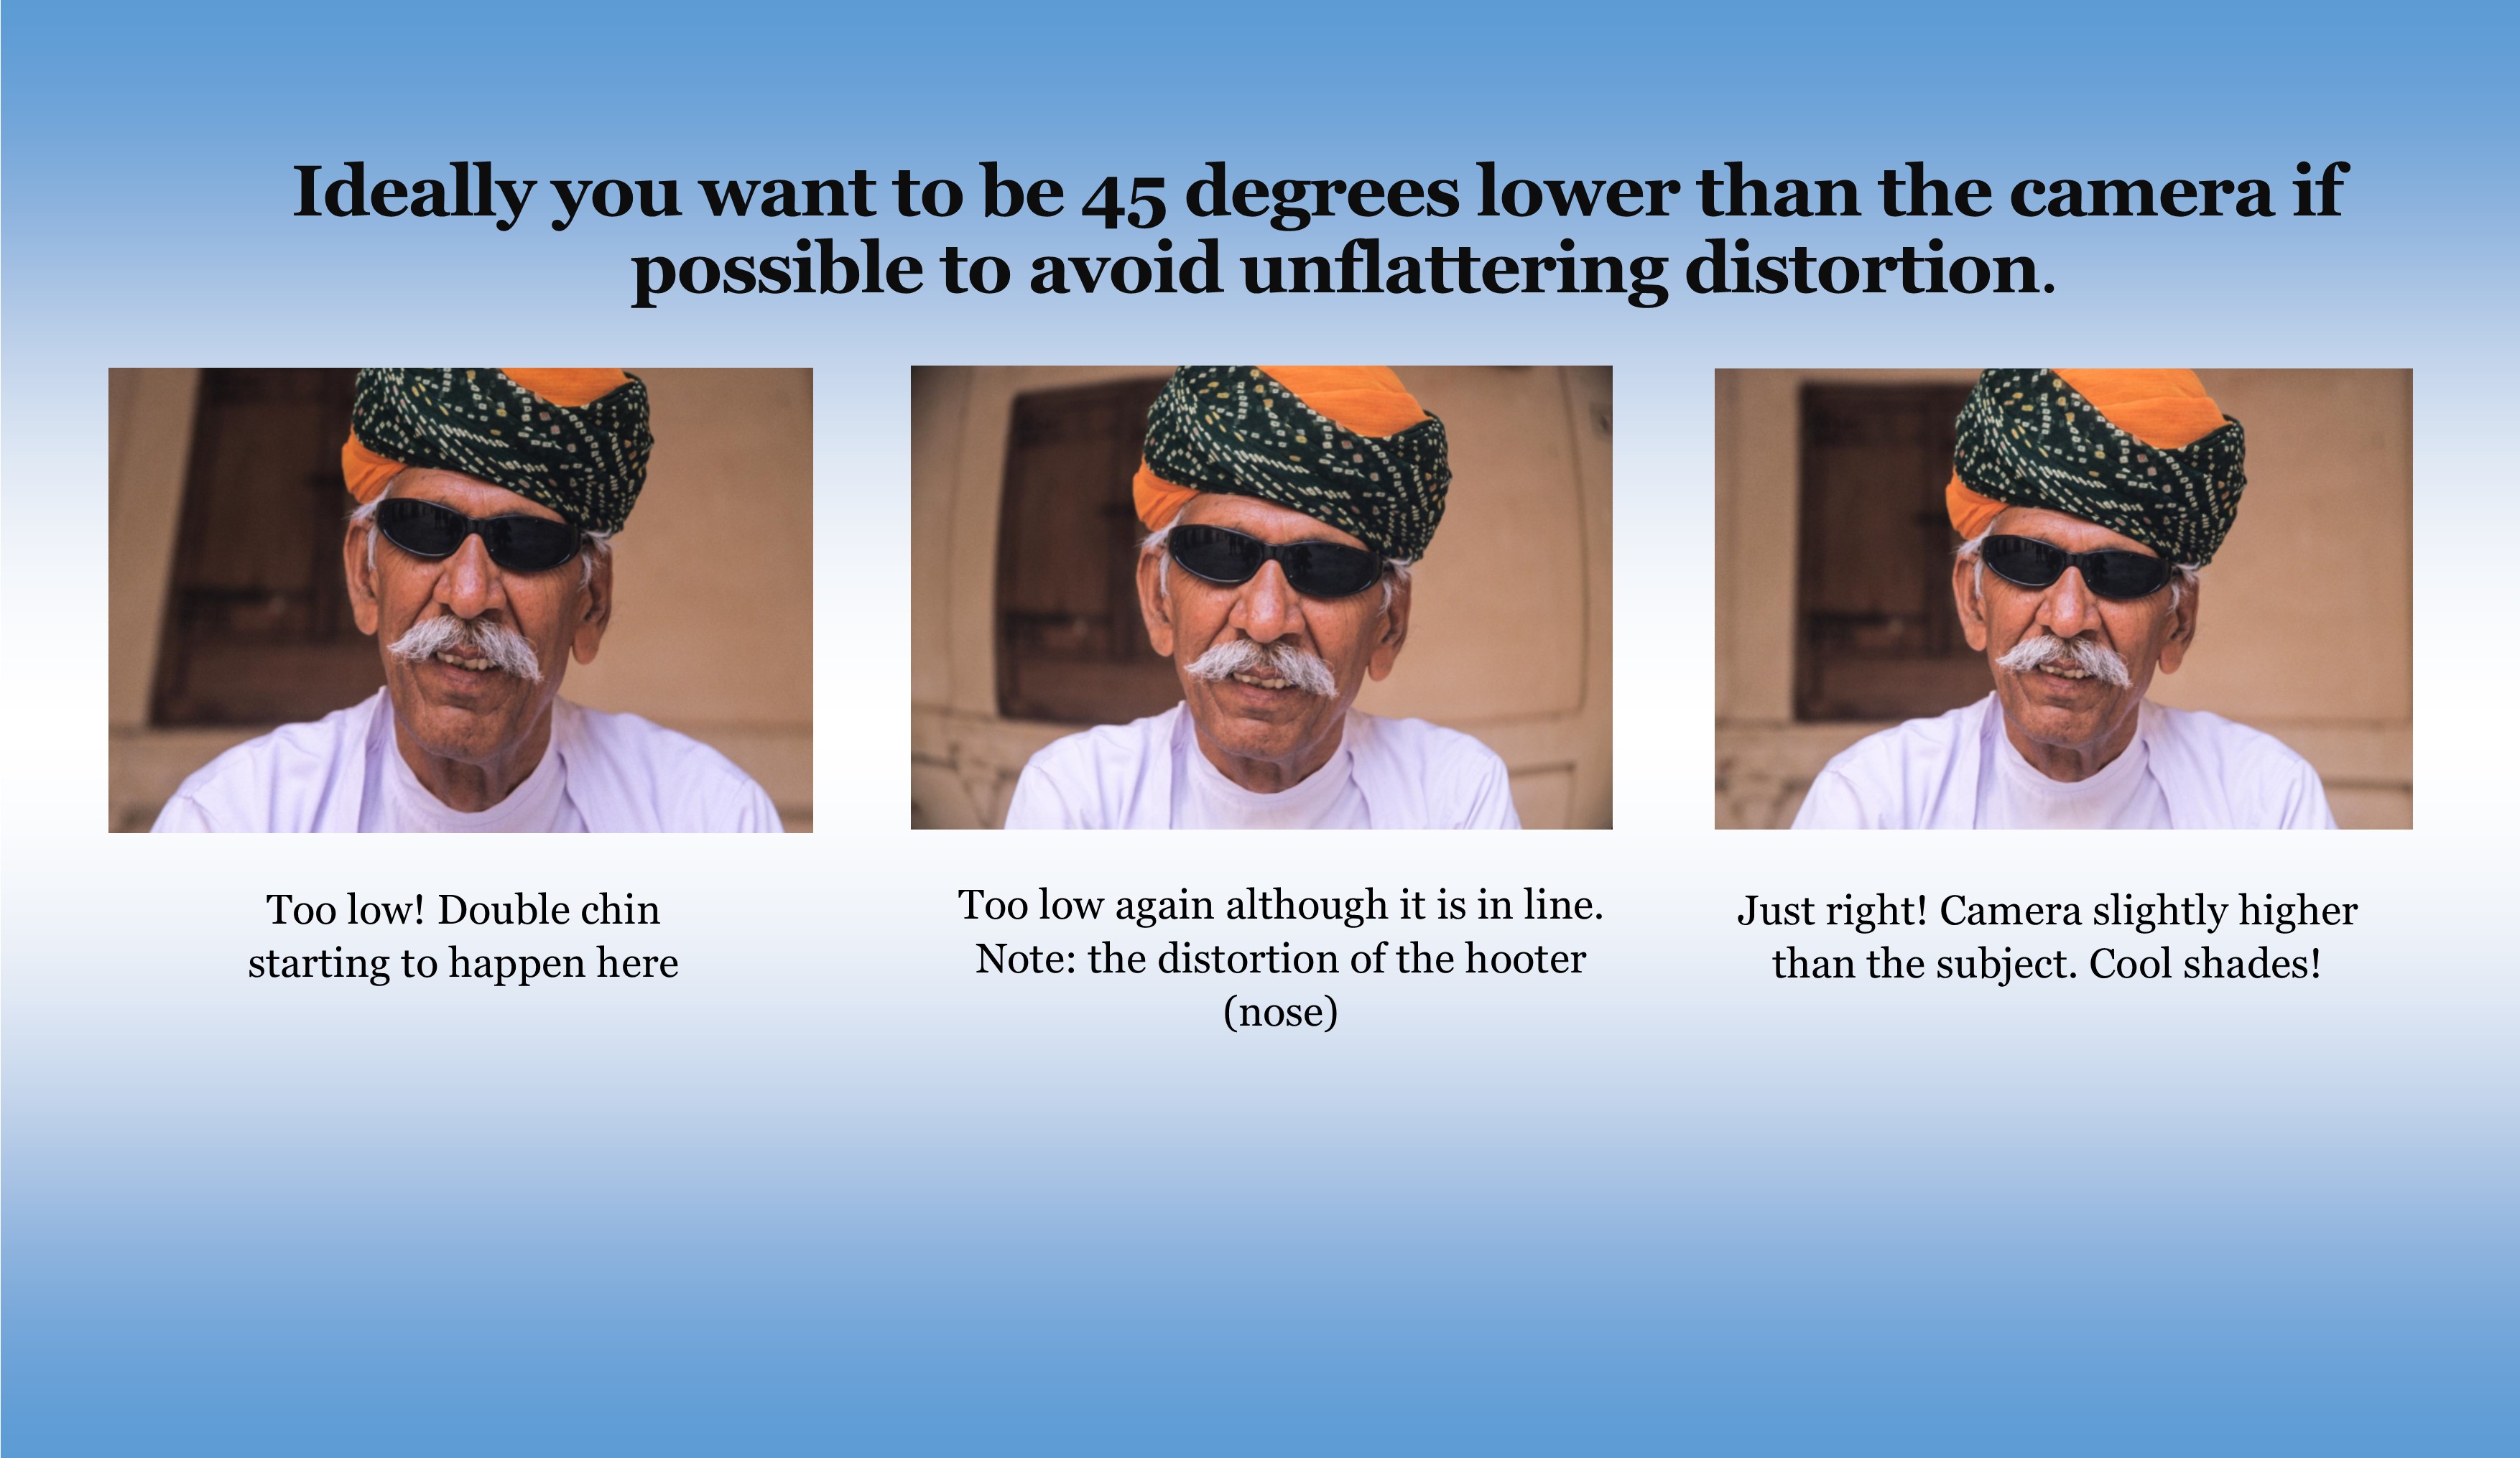
Think about your position. Ideally you want to be slightly lower than the camera if possible to avoid unflattering distortion.
Now comes the tricky bit. Unless you have someone else helping, you are going to have to focus the camera on your final position, be it a full length or head shot.
The easiest way to do this is to put something in that position and then focus on it.
Just press the shutter button and then get into position.
Take plenty of images trying different poses and maybe different locations. You can’t take too many!
Review
Review on your phone and add a filter if you wish. There’s plenty of them out there.
Load the images onto your computer.
Look for softness (slightly blurry), unwanted distractions or items and light
Crop if required. You may need to crop for different applications.
Upload to your website, social media or another platform.
Discuss requirements with your printer if you are using hard copy marketing material.
Finally
Rinse and repeat if need be.
You may think you’ve got it right but there’s always room to improve.
Is there anything else you want to know? Did you give it a go?
I’d be really interested in any results that you wish to share.
The aperture of a camera is the centre of the photographic universe.
Well maybe, the other centre as some would argue, is the shutter.
No matter, let’s continue as if we haven’t heard Mr ‘some would say’ and show you 10 Vital Facts about Camera Aperture.
The Aperture and the Heart
The aperture is pretty much like the human heart, not at a lot goes on in the body without it.
With your heart, almost everything you do relies on the heart beating at all. Then it needs to beat the correct rhythm to ensure what you want to do can be done.
It’s often how fast your heart beats that will determine how quickly you can run/walk/cycle up that hill for example.
So, it is with the aperture.
If that’s not set properly then the image you get is not what you were expecting.
Therefore that you won’t be happy with the end result. Especially if the subject you may never get the opportunity to photograph again.
So, what’s the 10 Vital Facts about Camera Aperture?
The aperture is hole that allows light into the camera sensor that dictates the end result.
It’s adjustable. You increase or decrease the hole size to get the effect you want.
The amount of light the aperture lets in affects your ability to keep the camera still enough to get a crisp shot.
Contrary to the general belief it’s the aperture not the auto or manual focus that is a major factor in what is in focus and what is not
Aperture is measured in f stops. Confusingly for anyone just getting acquainted with it the lower the number the bigger the hole or opening.
Each f stop doubles the size of the aperture when reduced or halves it when increased.
Depth of field (DOF) is controlled by the Aperture
A large DOF F22 reduces the aperture opening and puts everything in focus from the point of focus to infinity
A small DOF F1.8 increases the aperture opening and just puts the closest item focused on in focus.
The lens you use affects the lowest aperture setting. You may have one lens that will have a minimum setting of f1.8 whilst another could be f4.5
So why do you need to worry about those 10 Vital Facts about Camera Aperture?
Well if you are using auto on your camera, you don’t!
But if you want just a small degree of control then adjusting the aperture is a good place to start.
Of course, there are filters (and apps for the smartphone users) that you can use to give you some basic creative control.
But even the best don’t offer the sort of creative control that you can get by understanding how aperture works.
For example
This shot of a toy soldier was taken with a large aperture (small f-stop).
The shot just below was taken with a small aperture (large f-stop).
If we look at the uses for a small DOF (refer to no 9 above), then you could take an image of, say, someone you came across in your travels. Or it can be anything from a piece of Jewellery to food in the market place.
On the other hand, you could take a wide angle shot with a large DOF (no 8 above) of a building or a landscape with everything in focus with a small aperture.
Hope you enjoyed reading this post and found it useful
Please share if you did. Subscribe to nickkatin.com to get my weekly newsletter for exclusive content and to keep[ up to date.
You’ll get a free e-book for just entering your email on the form below
If you haven’t had time to read them all whilst you are here for a visit then you can scroll to the bottom and get all four in a PDF.
I have strong opinion on what you should have on your new (or existing) camera but guess what?
I have an equally strong opinion on what you didn’t need as well.
So, let’s get into it:
1. Picture Styles
Often there are picture styles, modes or scenes available and they can be countless; Action, Portrait, Landscape, Panorama, Sunset, Candle, Fireworks, Beach & Snow, Fisheye, Wide-angle, Macro etc. etc.
Some models also give you some tips for certain photo genres in the same mode. E.G. “Tips for flower Photos”
What is often not discovered until the camera is used is that some of these modes, e.g. Fisheye, Wide-angle or Macro need to have lens that support those scenes.
There is one camera that it’s probably better to have some modes available for and that’s a good smartphone camera, like maybe the Samsung or Apple varieties. Most images taken by a smartphone are shared so it can be a shortcut to getting a good image first time.
Rating: 2/10
2. 3D
Here’s a useless option ‘3D Photography’.
3D TV’s bombed and as far as I can tell there’s not many 3D monitors either, so why would anyone want to shoot a 3D image or video.
It is used for some specific industries e.g. Computer-graphics, Architecture or Health.
However, for marketing purposes it’s useless as it relies on the viewer having the equipment to view it.
Rating: 0/10
3. Multiple Exposures
Not so useless but not essential is the recording of multiple exposures.
Multiple Exposures are photographs in which two or more images are superimposed in a single frame. For marketing images that could be handy although somewhat tricky.
Some would say that it’s much easier to do it in something like Photoshop.
Rating: 4/10
4. Digital Zooms
Digital Zooms are commonplace at the compact level and all phone cameras have it.
Personally I avoid using them as much as possible and will use an optical zoom over a digital one.
What’s the diff?
Well an optical zoom is a true zoom lens. They produce much better-quality images.
A digital zoom uses some in-camera image processing. When you use a digital zoom, the camera enlarges the image area at the centre of the frame and trims away the outside edges of the picture.
The result is the same as when you open an image in your photo-editing program, crop away the edges of the picture, and then enlarge the remaining portion of the photo.
By using the in camera digital zoom you lose the information around the crop, whilst if it’s cropped during post processing you can keep the entire frame for use later on.
Rating: 2/10
5. Face Priority
My pet irritation is Face Priority. Personally I think it’s a gimmick.
Originally in small compacts it’s spread its way into phone cameras and now even DSLR’s.
If you are taking a portrait, then supposedly the camera will aid your focus by detecting the face.
Really!
Rating: 0/10
6. Printing
Printing is on its way back and whilst the option to directly print from the camera could be handy, it’s also generally restrictive, requiring certain functions to be available on the printer.
At the end of the day, if you are going to do any post processing even if it’s minimal you should be able to print from that software or alternatively take it to a print shop if you are looking for high quality.
Of course, you can always use the self-service machines that are everywhere.
Rating: 2/10
Of course, there are others but they the main ones you will most likely come across.
Now over to you do you agree with me?
Do you find some of these useful?
Any others that could be added to the list?
As I mentioned in the beginning got no time to read this now? Download all four articles in one document and read both offline and when it suits you.
Over the next few weeks I’m going to suggest some essential features you need to consider having when you are in the market for a new camera or even mobile phone with a camera.
At the end of each feature I’ll give a rating out of 10 – 10 being must have.
At the end of the series if you haven’t had time to read them all then you can scroll to the bottom of the last in the series and get all four in a PDF.
When we were in the market for a new TV, we discussed all the different features and benefits with retailers and become absolutely confused by salespeople in different shops telling us something different about the same TV.
For example, one would say this TV doesn’t have Freeview plus whilst another would say that it does.
In the end I researched on each manufacturers website and even rang them to ensure that the information I had gathered was accurate.
After doing that we went and bought the TV we wanted.
So what about the features and benefits of a new camera?
Well compared to TV’s I think there way more things to think about and personally I believe that there are too many features that are just not needed!
So over the next few weeks I’m going to suggest some essential features you need to consider having when you are in the market for a new camera or even mobile phone.
At the end of each feature I’ll give a rating out of 10 – 10 being must have.
At the end of the series a free cheat sheet for will be available for you to have on hand when you need it.
So let’s start with absolute must!!
Mechanical Exposure controls
Usually on most cameras there are a P, A, S and M modes.
However, on small compacts there usually is only a P mode and on smartphone cameras, even the best ones, they don’t yet have the option to adjust the exposure the “old fashioned way”.
So what’s with the “old fashioned way”? Well without going into a great deal of details on how a camera works, I’ll explain:
All cameras have an aperture and a shutter. Both allow light into the sensor but differently. The aperture allows in light by changing the size of its hole, the shutter allows in light by the speed of its movement.
Having the option of being able to control both or at least one of these is one of the keys to getting great photography.
So what do all these letters mean?
P stands for program and is basically a slightly more sophisticated way of shooting in auto.
The camera decides which aperture and shutter speed to use but you can also weigh in by using what’s called in the industry “shift”.
A stands for aperture priority and S stands for shutter priority.
In both these modes you control one whilst the other one is controlled by the camera. Most pro photographers depending on their specialisation will shoot in aperture priority.
M is where you have complete control you set both the aperture and the shutter speed and is not something a beginner would dabble in until they have got some experience with the other modes.
Confused?
Let’s simplify. Basically if you want to take a photo of a product with all the background blurred than you would need to adjust the aperture.
If on the other hand you want to take a photo of movement, say one of your dance students practicing or performing then you would more than likely want to adjust the shutter to capture the type of movement you want.
So It’s really handy to have that degree of control.
What’s that you say?
You’re only beginning so you just need auto.
That’s fine however I would suggest that if you really want to create images that represent your brand then at some time in the future you will need a greater degree of control.
One additional control that goes hand in hand with exposure is ISO adjustment.
In fact the aperture, shutter speed and ISO are called the exposure triangle.
That is to say that adjustment of one affects the other two.
With each camera manufacturer trying to outdo each other, the ISO on a top end DSLR can now be adjusted to over 400,000 which is crazy, as now the camera can take pictures in the dark!
When you change your ISO setting, you’re adjusting your camera’s sensitivity to light.
ISO settings are normally anywhere from 100 to 10,000 (or higher), and these numbers have a direct relationship with the device’s sensitivity and therefore the aperture and shutter speed, so a lower setting means you need more light whilst a high setting needs less.
Rating: A or S is 10/10
So did you understand all that? I’m happy to clarify anything you’re not sure of. Just post in the comments section below. Don’t be shy. While you are at it why not subscribe for future updates here. You’ll get my free guide “Eleven easy ways to improve your marketing photography”.