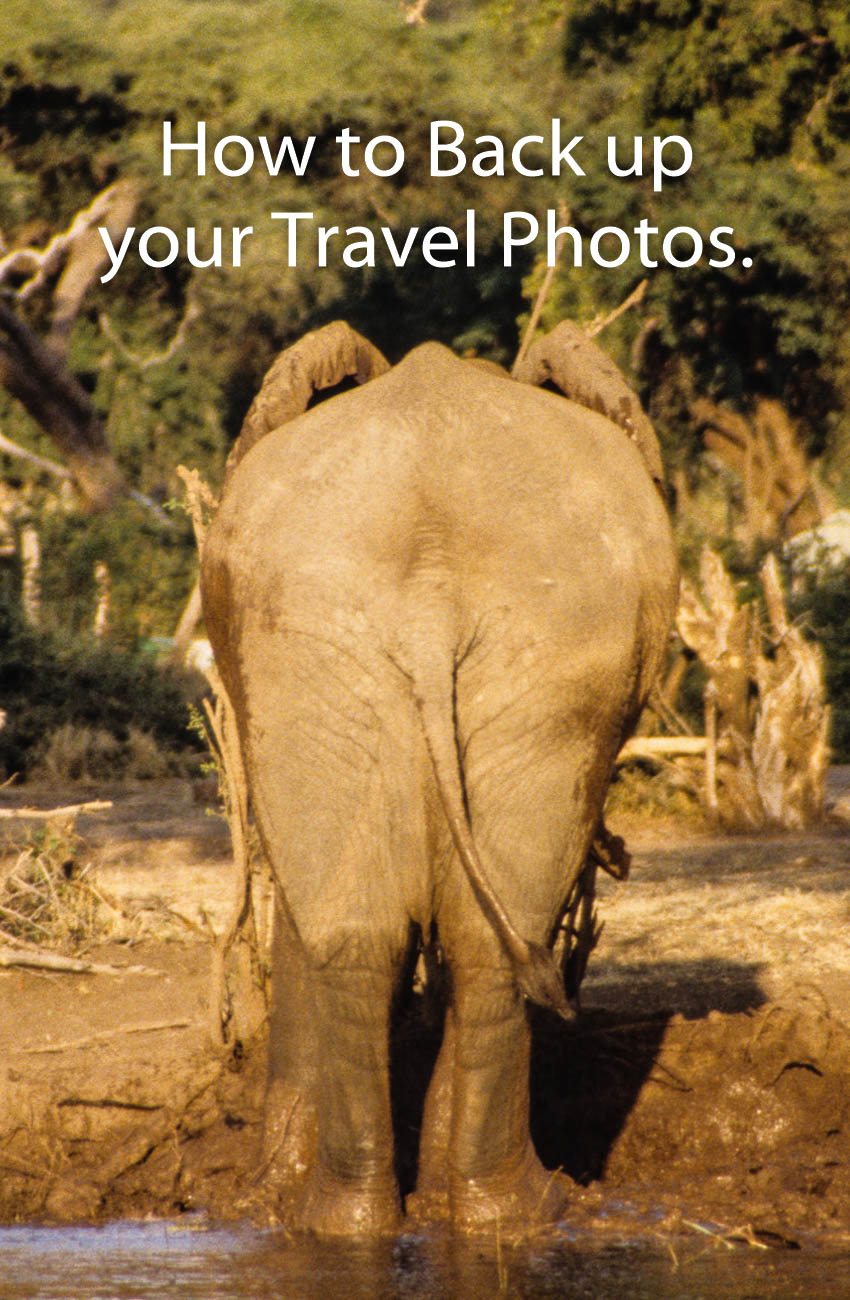
I posted an article to this site “How to Back up your Travel Photos.” about 2 years ago. The info in this post is still accurate and relevant except I’ve also discovered a way of backing up on the go without using a laptop. Now I am talking about backing up memory cards not images taking on a smartphone. The smartphone images should be automatically backed up to the cloud if you have the settings correct. But even with the latest DSLR”s and Mirrorless Cameras being able to send images to the cloud, their systems are still clunky. So let’s get into it. This video takes you through it:
For those who like pictures and words you need the following: A Smartphone. I use an android so I’m not sure about iPhones. But I believe this system works with the latest models. So, if you’re in the Apple ecosphere you’ll need to do your own research.
A hub that has a USB-C cable and USB-A (and/or USB-C) connections.
A hard drive.
A memory card reader
Put it altogether and plug into the smartphone and then open “My Files” and you’ll see “USB Storage 1” and “USB Storage 2” plus “USB Storage 3” if you’ve plugged in 2 hard drives.
Go to the memory card storage, which is usually the one with the smallest storage, and find your way to the images.
On the settings button (in this case 3 vertical dots) and select edit and then select all. Tap “copy” and then go back and select the hard drive. Find where you want the images copied to and tap “copy here” and you’ll get a progress pop up.
The operation is complete once the pop up disappears.
Rinse and repeat if you’ve got another hard drive to back up to (recommended).
In the days of film, the only form of back up was to guard your film and slides as if you’re life depended on it. Nowadays with digital imaging there are many ways of backing up your photos.
So, follow me along as I give you some ideas on how to back up your travel photos.
History of Back up
The term back up only really became used when computers began to take over the world.
With paper you could make copies and file them off-site.
As we all switched from paper to digital, Business’s started to have tape, then floppy disks followed by CD’s for backups of the day’s work.
Now you have back up servers some of which are in the cloud.
Photography back up
Before digital, you were able to have extra copies made of photographic prints and file them somewhere else.
Not so with negatives and slides. Well that’s not strictly true, you could get copies, but it was expensive. It was not until digital came along that we began to realise that we had the option to back up all our precious photos. We could even do it retrospectively, if we had plenty of time or money, by scanning film and slides.
In those early days the floppy disk and then later the CD or DVD were the main back up mediums. But as with film and slides we all ended up with boxes of DVD’s. Whilst smaller than boxes of Slides and Negatives they still took up some room.
Let’s take a look at what options we have now.
Direct backup to a Laptop or Computer
The simplest and most convenient way is to connect directly to a Laptop or computer. This is done via the cable, now mostly a USB-C, that each camera manufacturer supplies to a laptop or computer. Once you have it on the computer you are free to copy it anywhere else. All camera manufacturers give you that option. The main disadvantage is that some of the cables supplied are not usually off the shelf if you lose them. Additionally, some of the older camera ports tend to be non-standard or at best not common.
Memory Cards
When you take an image with a digital camera it sits on the memory card that you have in the camera. With a smartphone that image will generally sit on the phone’s internal drive. However, you can change it to sit on a microSD, if that’s available.
Memory cards can also be used to back up your photos either via a computer or in some camera models.
How does that work?
Well you remove the memory card from the camera and insert into either a computer memory card port or a card reader that plugs into the computer. Likewise, the same applies with a blank memory card. Once both cards are loaded you copy from one to the other.
Backing up in camera is usually confined to some of the more high-end cameras. These now come with two memory card slots that you can use to either extend the memory or use the second slot as back up. When the latter is set, each time you take an image, it not only sits on the first memory card but also on the second.
Another option is to transfer it in camera periodically but that can be dangerous if you forget to do it.
The system of using memory cards as a backup medium is not used that often unless you are looking to immediately back up and that’s your only option.
One recommendation I would make is to use something similar with a smartphone.
Smartphone backup
With a smartphone, the potential to lose it or drop it is much higher than a camera. I would suggest a microSD if that’s easily removable (otherwise you will lose it with the Smartphone!)
Another option is a small flash drive that can be attached, usually through the charging port. Why would we need to do that when we all rely on the cloud to backup our photos on a smartphone? Services like Google Photos, or iCloud work well when you have connectivity. But what about when you don’t have connectivity?
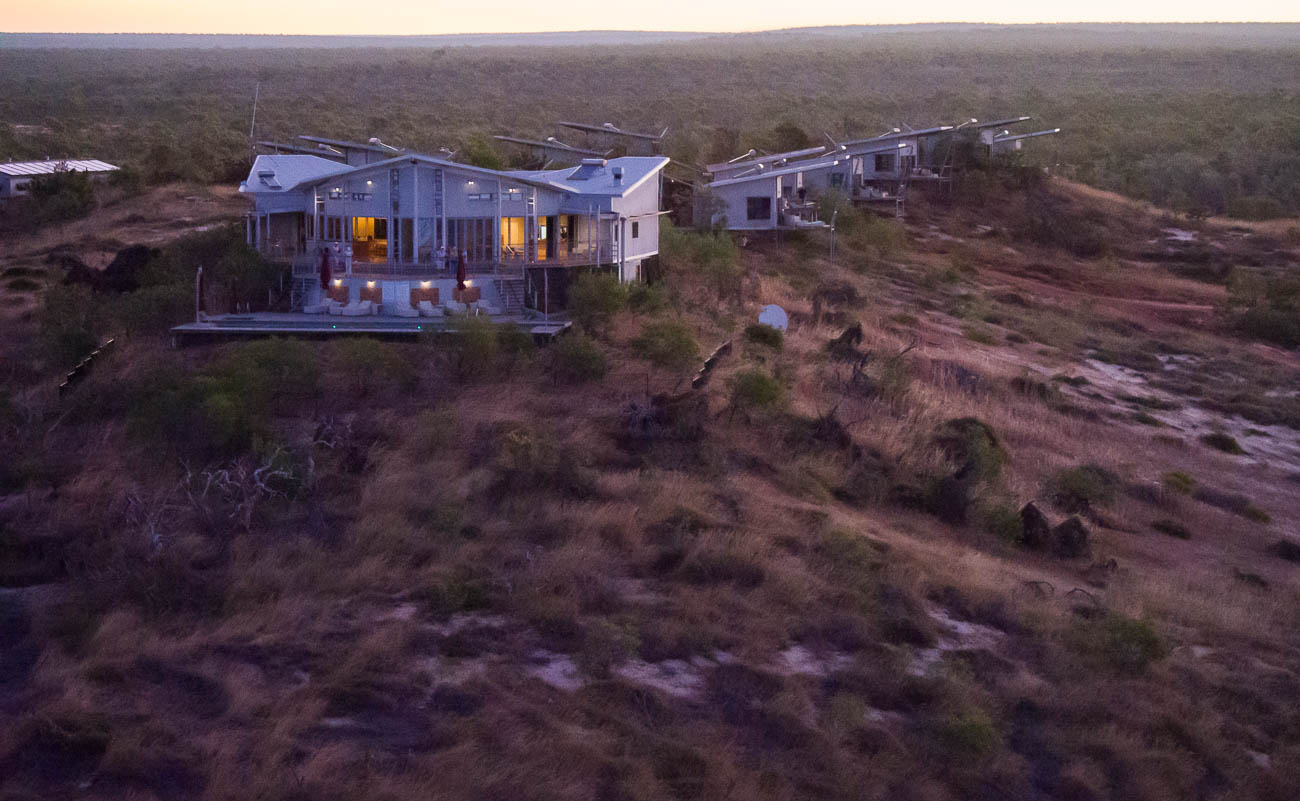
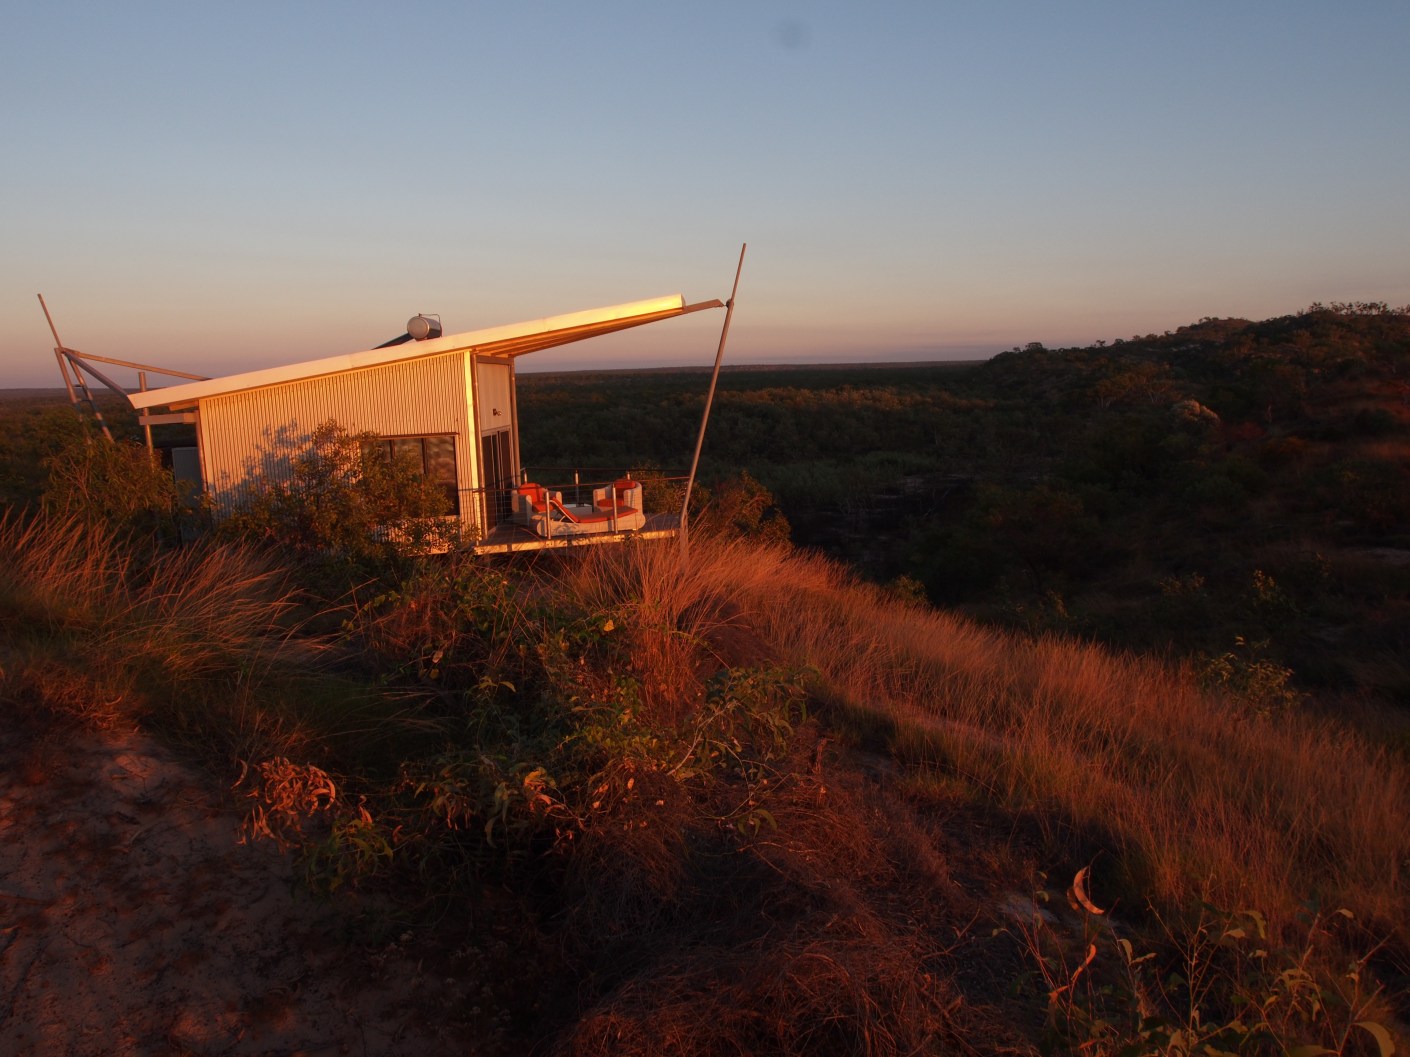
A few years ago I stayed a few days in a remote resort called Berkley River Lodge in the Kimberley region of Western Australia.
There was no phone signal at all and WIFI was limited to 50m from the reception hut. We were on a helicopter trip heading back to the resort. One of the other guests was taking pictures of the sunset with an iPhone when he lost it out of the window. I might add that the phone wasn’t his, it was his partners! We had also all been warned not to take your phone too close to the window during the flight as, you’ve guessed it, it could get sucked out. Anyway, apart from looking like a Kangaroo in headlights, he lost the phone. All the photos that they had taken in the last few days were only on that phone. And as they had no way of backing them up other than using iCloud they were lost with the phone.
Berkley River Lodge from the air
Lesson from that is not to rely on the cloud as back up for smartphones or indeed anything else.
If you have another device like a tablet, then you can set up a hotspot that will enable you to transfer or copy your files to the Tablet. But if you are likely to be without the tablet and have no connectivity, then a Mobile flash drive is a no brainer.
WIFI SD cards
An option to standard Memory Cards are WIFI cards. Even if your camera has Wi-Fi capability this still allows you to back up your images to another device.
If you have a fairly new camera, then chances are it will have WIFI capability anyway, so you can backup via WIFI without a special WIFI Memory Card.
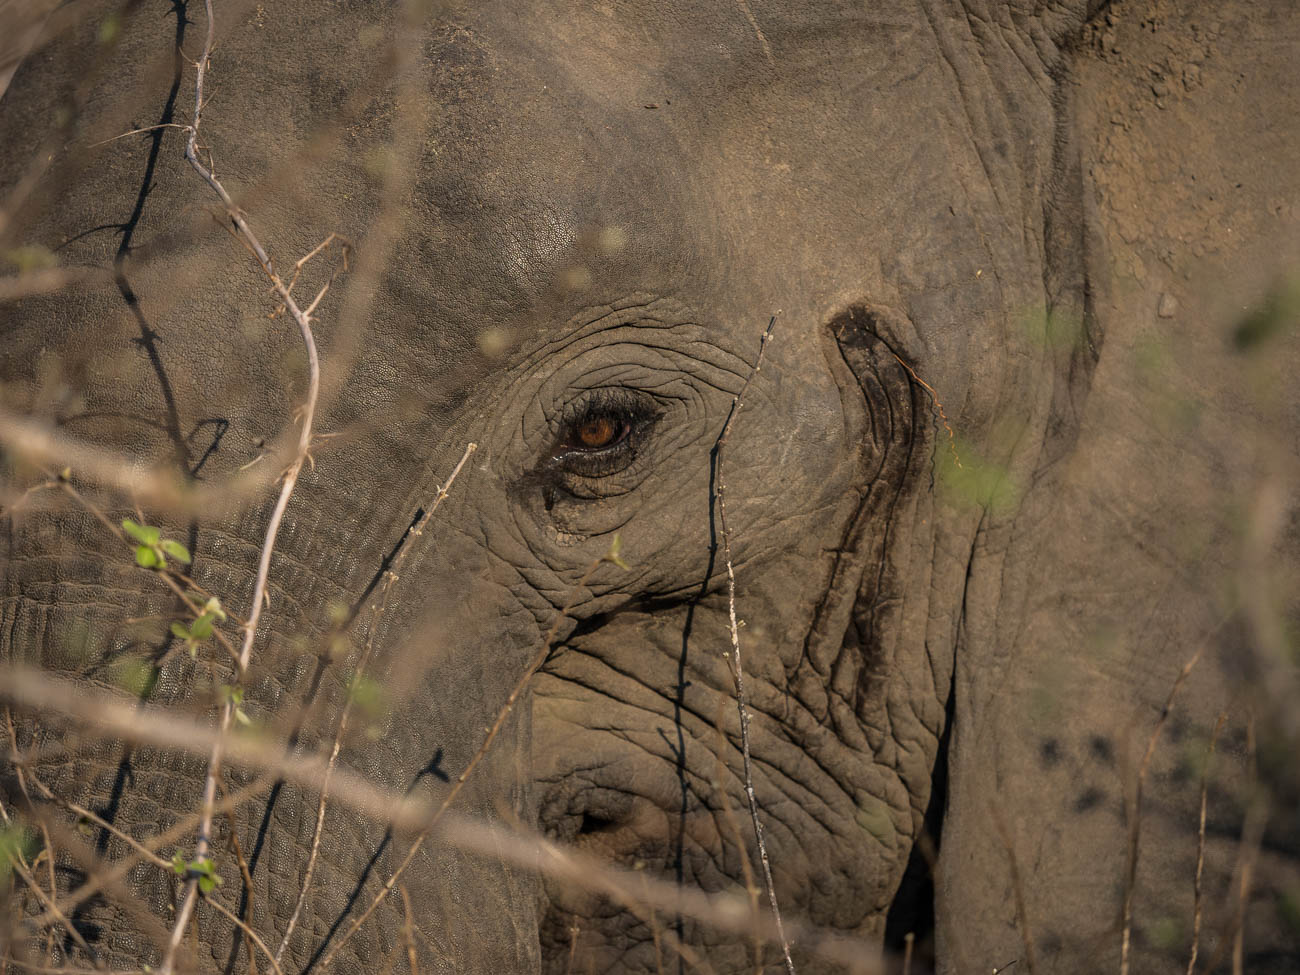
However, in both these instances the issue is space. Most Smartphones or tablets are around 128GB and if you are shooting RAW over a 2-3-week period it doesn’t take long to max out. For example, last year at a African Game Park I shot around 64GB of RAW and JPEG images.
Physical back up devices
There are a lot of devices out there that you can use to back up your photos. Most of them are portable hard drives
There is the basic hard drive that you plug into a laptop or some tablets. You then copy the files to the hard drive via the Laptop or Tablet
Some hard drives have a SD Slot for your memory card. You insert the card and it automatically copies to the drive. So, in theory you don’t need another device. Yet, unless you plug into another device you are not going to know whether it has backed up all your photos correctly.
Another option is the wireless Hard Drive. This is like a hybrid. They have SD slots as well as having the option to wirelessly copy images via the hotspot I mentioned before. This has the same disadvantage of not being able to see what images have been copied across. Although some do allow you to view the contents of the drive from a smartphone or tablet as well as a computer.
Then there are hard drives that have a screen that lets you view the images even if they are RAW.
African Elephant in South Luangwa NP, Zambia. Click on the image to view a larger version and for other options
Hard drive types
Lately hard drives come in two types, HDD mechanical Hard Disk Drives or SSD Solid State Drives. The differences are basically that SSD’s are faster but more expensive. In a computer or laptop then I would go to an SSD every time. With portable hard drives, where there is only data being stored, then it’s really a personal preference.
How many cloud services are there now? There’s Apple’s iCloud, Microsoft OneDrive, Dropbox, Box, Google Drive, Crashplan, Backblaze, Carbonite and there are the Photo Sharing Sites (more on that below).
Of course, all cloud backup services depend on the internet. So if you are travelling, you are relying upon there being an internet connection. That is often beyond your control.
There is much better connectivity than there was 5 years ago and I’m sure that there it will improve even more. But as I mentioned earlier there is always somewhere that the internet is not connected.
Even with an internet connection, the bandwidth or speed can be poor. Meaning that the time taken to upload your photos can be long and arduous, and therefore frustrating.
Using the cloud
Whether you use the cloud or not is dependent on a couple of things:
One is the Camera equipment. For instance, a Smartphone has inbuilt cloud capability and relies heavily on there being an internet connection. That is either by the phone signal e.g. 5/4G or a wireless connection. On the other hand, unless you have a 2-3-year-old camera, then there is every chance that the camera you have will not have Wi-Fi capability. Even a lot of the new ones only allow you to upload to a phone or tablet from which you then have upload to the cloud.
The other reason is the interface and ease of use. I haven’t tried all these services, but of the ones I’ve used, iCloud and Dropbox seem to me to have the best interface and ease of use.
Cloud cost and security
There is one further reason and that is price. Prices vary so much with specials and add-ons that comparing them is likely to be totally inaccurate by the time you might read this.
The other thing to consider is security. I hesitate to say it but using the likes of the big guns like Microsoft, Apple or Google does give a sense of security, compared with the smaller players. That may well be false. But it’s worth asking a few questions. I.E. where are their servers? What happens to the data if a server goes down or heaven forbid the company disappears?
What do I use? OneDrive. Why because Microsoft gives me 5TB with my Office 365 subscription.
Photo Sharing Sites
The other cloud-based storage systems are Photo Sharing sites. These are likes of Flickr, Smugmug, Google Photos, Pixbuf , Photobucket, 500PX, My Portfolio, Amazon Prime Photos plus a few others. These add a bit more to the concept of back up. Usually it’s a subscription service that allows you to view and share all your photos. Some even have their own social media interface meaning you can browse other user’s photos and comment or share.
Flickr was the first of these and now has been gobbled up by the expanding Smugmug.
Take a look at my site on Smugmug to get an understanding.
Unlike the straight cloud backup services, some of these sites don’t support all file types. So, if you are looking for a complete solution to house and view your RAW files for example, do your due diligence.
African Elephant in South Luangwa NP, Zambia. Click on the image to view a larger version and for other options
How to back up your travel photos – at home
We’ve covered a broad summary of what there is out there to back up your travel photos whilst you are on the move.
What about when you get home? All of the above apply to your home base as well.
But you can also add in Desktop Drives
Desktop Hard drives
Desktop Drives used to be fixed to one certain location. But with the growth in portable hard drive storage, the fixed and portable are overlapping.
Most of us these days have Laptops instead of desktop computers which gives us freedom to work pretty much anywhere. So, plugging in a portable hard drive as not only an expansion to the laptop storage, but also as a backup is easy.
For the fixed you have three main types.
Standard hard drives that connect via USB or Apple’s Lightning and have their own power supply.
Cloud based drives that connect into a network also called NAS (Network Attached Storage) This is different to the cloud services mentioned earlier. These are hard drives that are physically in your space but can be accessed remotely via an internet connection. They also come with a power plug for an independent power supply
The last type is called a RAID system (redundant array of inexpensive disks) that also have their own cloud. This is a trickier system to manage and install. Basically, it is several hard drives usually in multiples of 2 that back each other up. Where it can be confusing is the many different set up combinations available. It’s a way of ensuring that should one back up drive fail then there is always another one that has identical data, so that you can sleep easy.
What I use
Now I think it’s time for me to give you my system.
On the road
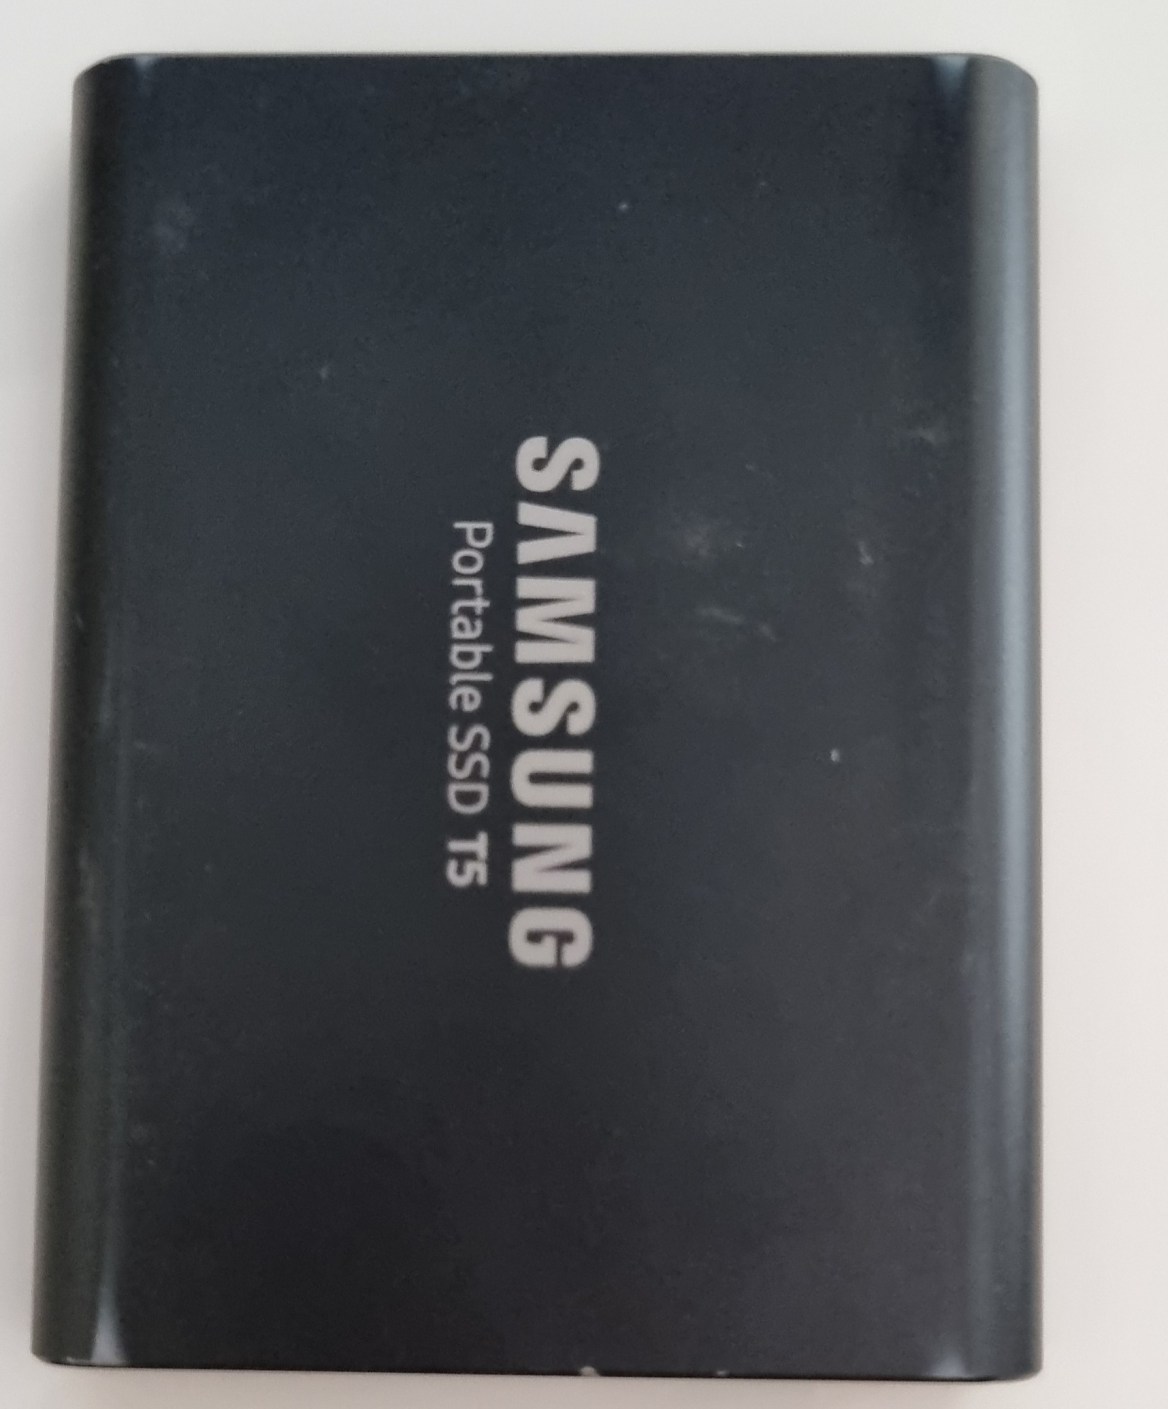
Depending on the duration and the reason for the trip, I will carry either one or two SSD Drives, my surface pro and a memory card reader. I also now carry, since seeing the guy at Berkeley River lose an iPhone, a portable flash drive that fits my Samsung S10.
How do I use them?
I am fortunate that my Olympus OMD1 MKII has dual memory card slots, so I use one of these memory cards as back up. Additionally, every evening or at least every couple of evenings, I back up one of the memory cards to both SSD’s. If I have been diligent enough to clear the hard drive on my surface before travelling, I back up to my surface as well.
I back up my Samsung S10 to my surface if I am confident that I have good internet for the cloud back up to my OneDrive service. If I ‘m unsure of the connectivity, then I will back that up to my portable flash drive and later the surface.
I have used the iPad Pro as back up in the past. But due to the number of apps it has, it only has a small amount of spare storage compared to the surface.
How to back up your travel photos – Summary
Back up is a relatively new concept in the photographic world. It has only been around since the advent of Digital photography
There are many forms of back up for the travel photographer
Memory cards can be used for short term back up
Smartphone Cameras rely on cloud services, which can be unreliable when travelling.
A flash drive or microSD is a more reliable medium
New cameras can upload photos via different WI-FI systems to the cloud but only via another device
There are many different hard drives that can be used as back up devices.
They can be like small computers with their own screens and flexible connectivity.
Speaking of Cloud back up, the number of services available is huge. So, you need to select carefully before using one of these to ensure it meets your needs and security
Photo sharing sites like Flickr and Smugmug can also provide a level of back up for your photos
Then we get into the heavy duty physical hard drives. These use sophisticated software and multiple drives that you can create your own cloud with.
Let’s see what the best ways are for displaying your travel photos
Physical or Hard Copies
The most obvious one is to print them out and then display them in several different ways.
Printing
A word on printing. Printing is very much one of the dark arts. Getting the calibration correct so that what you see in print matches what you see on screen is no easy feat.
At some later date, I will cover this and if you have never delved into printing, then I suggest you get them printed by a third party.
Of course, that’s not that straightforward either. You will need to decide three important elements:
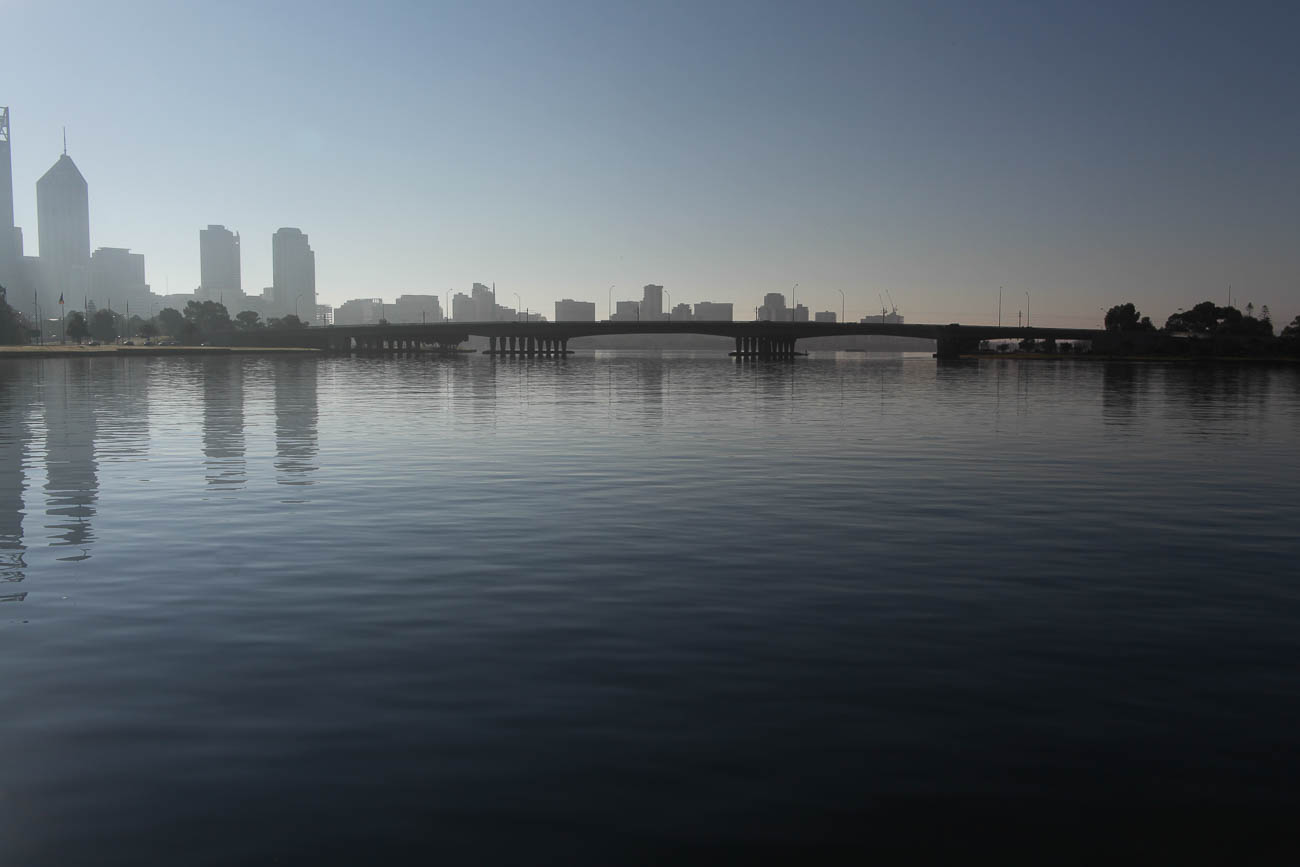
Perth from the Old Swan Brewery on the Swan River in Western Australia. Click on the image for a larger view and for other options
Quality
Quality can be subjective.
Make sure that the digital photo you want printed has had some post processing and you are happy enough with the result to want to get it printed.
There are many different organisations that will print your beloved photo.
This is where quality comes in. If you want to have something that you can mount on your wall (or even someone else’s) then I would recommend that you go to a specialist printing lab. They have varying degrees of quality that you can choose according to your budget and requirements.
For example, they can colour match and also will offer different process’s that will enhance your photo.
There are still some Shopping Mall Photo Printing Labs that will give your photo some attention before printing.
But most stick it through their process and you get what you get. As in most things you get what you pay for.
Some of these also have DIY booths or machines where you can do some of your own ’tweaking’ like contrast and brightness.
You can also find these booths at some department stores like Walmart or K-Mart,
Paper
Again, depending on what you are looking to achieve, choosing the correct paper will be very important.
There are multitudes of different papers available.
To decide on which paper to have you will need to take into consideration things like wear and tear, framing, reflective surfaces etc.
There are 3 main types of paper; Gloss, Lustre and Matte. Gloss is punchy, Lustre is a bit more subdued and Matte will tend to be used to evoke a moody and artistic feel to a photo.
Size
You will need to decide whether you are going to frame the photo and where you will display it. If you intend to display it you want to make sure it’s a reasonable size, at least foolscap, which is A4 or USA Letter.
If on the other hand you just want to show and tell, then 6 x 4” is adequate.
One tip about framing is that unless your budget is big, go for paper sizes that suit standard frames. Going to a framing company is not necessary these days. I like Ikea frames as they are a reasonable quality at an inexpensive price
You want a simple frame that enhances the photo without being a distraction.
Digital
The more likely option of displaying your photos is digitally.
Often, we will get our memory cards, load them on our computer and then forget about them.
Let’s assume you are organised. That your images are all sitting in well organised folders on your computer. If they are not then go to 7 Ways to Organise Your Travel Photos to get some tips on how to do that.
Private Display
What do I mean by private display? The most important person to see your photos is you. We can all get carried away in the moment of taking photos without looking at them. You need to view them on a large screen and learn what worked and what didn’t.
I would suggest you do that before you have even edited any of them, otherwise you will never look at them. Like most photographers, I run well behind my post processing. but I still like to view them even if they are not at their best!
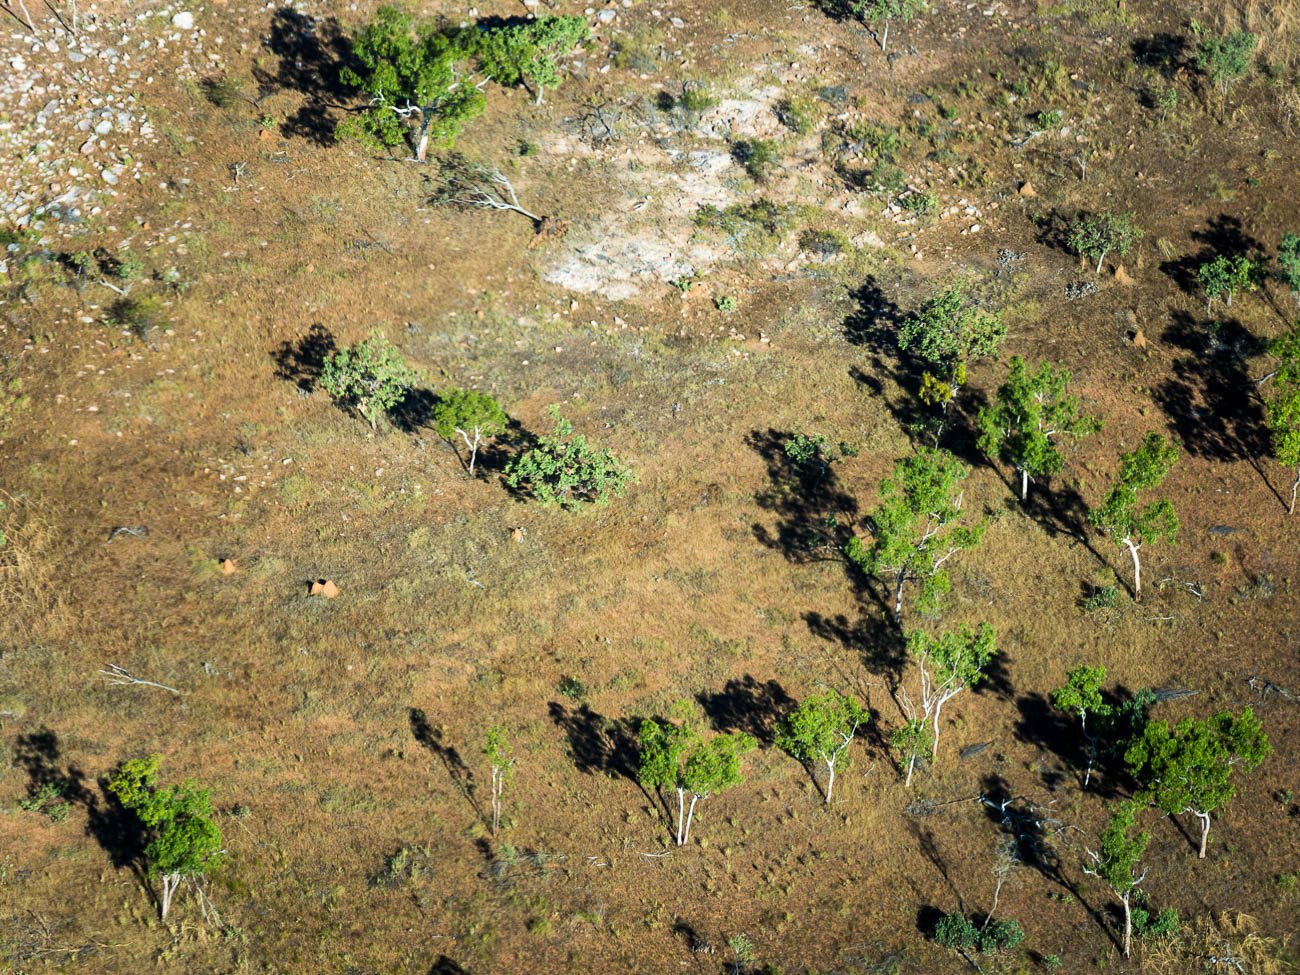
Near Berkley River in the Kimberleys Western Australia, from the air
JPEG Double Up
If you shoot in RAW, which you should be, then a good idea is to also shoot in a small JPEG format, which is usually around 1280 × 960Px.
Then when you take a photo you have 2 versions, the RAW untouched version and a JPEG. The Camera does do some minor processing on the JPEG version which is what you see on the camera rear view screen or monitor. That way you can dump the JPEGs into a separate folder. Note: If you intend printing the JPEG then it’s best to go full size.
Display Options
There are lots of options for displaying at home.
From a physical point of view, you can use a computer or TV screen. The bigger the better, so a TV screen is usually best.
So now how do you get them on your TV?
There are many ways of displaying your photos on a TV. Let’s list the most common of them starting with the most basic:
1 Plugged in Flash Drive. Load your photos onto a flash drive and plug it into your TV
2 Plugged in Hard Drive. Load your photos onto a hard drive and plug it into your TV
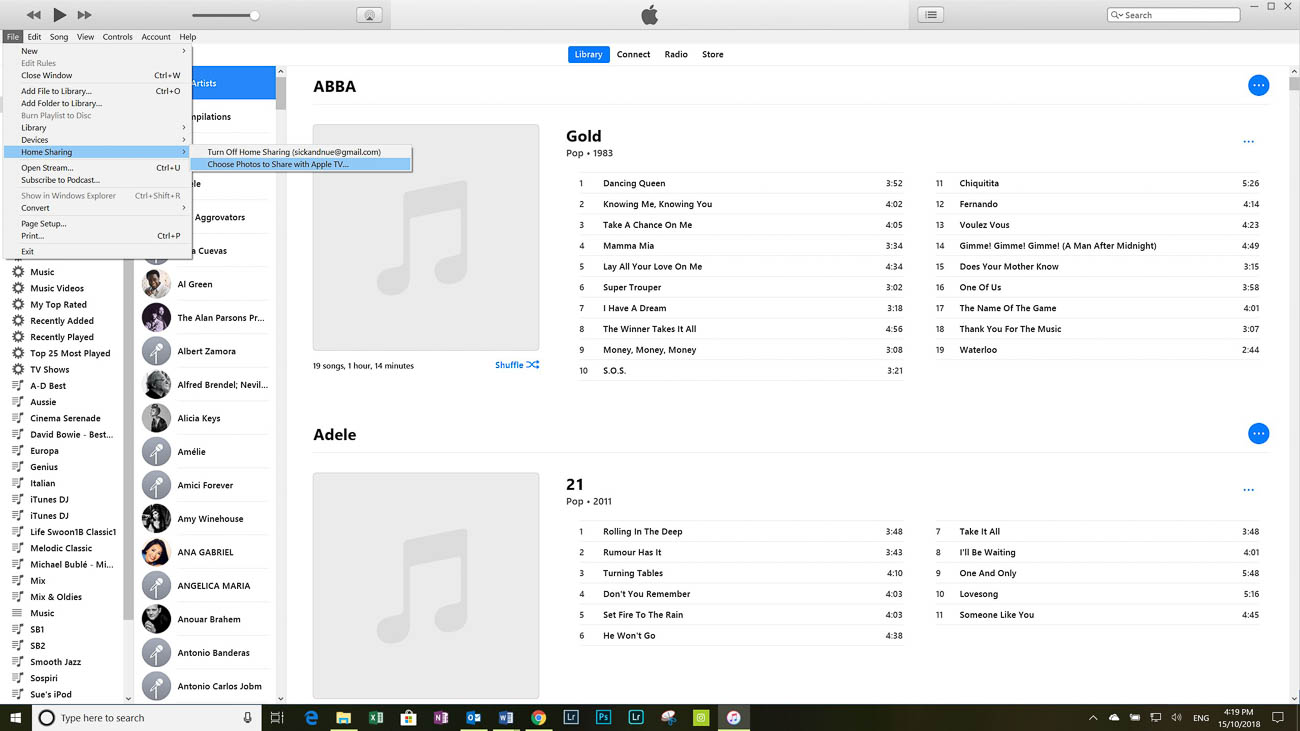
3 Apple TV. Using iTunes select file – home sharing – select photos to share with Apple TV
4 Google. You can cast your photos if you have a Chromecast from either your mobile device or Laptop
5 Plex. Plex is free software that allows you to play music, video and view photos on your TV. There are other smart TV apps that do the same as Plex but not as well.
6 Home Network. One of the best ways to display your photos on TV is to have them on drives or your computer on a home network. But you will need a smart TV or a device that makes your TV ‘Smart’.
Depending on your TV and which of the above methods you use, the images can be set up to have continuous slide shows. I do that with the Apple TV. If I’m playing music via the Apple TV, the screen saver kicks in. Or If I’m not watching my TV I can just have the Apple TV scrolling the images in the background.
Viewing on a computer monitor
If you have a decent size computer screen. By that I mean anything from 18” upwards then looking at your photos is a snip compared to a TV.
If you are either a PC or Mac user, you can view them from the default photo viewers. Both have pretty good photo viewing apps. There are also plenty of free and paid options of course. Ones like Gimp and Ifranview have been around for a while. Whilst Google has Polarr (which is more of an editing suite) and Photos.
However the market leader, Adobe, has the best options for viewing, organising and editing. Especially with it’s very popular Lightroom.
Sharing
If you are using a smartphone to take your travel photos, then there are a lot of ways of sharing your photos. You can share using MMS (text messages) email, social media, Dropbox, iCloud, One Drive, Google Photos and Bluetooth. The list is endless
If there is an application missing, you can change that by granting the app permission (assuming you already have it installed).
Sharing your photos to multiple social media and photo sharing sites can be made easy by using apps like Buffer, Hootsuite and Meet Edgar
So that’s pretty easy but what if you are using a camera that has a memory card?
In How to Back up your Travel PhotosI talked about wireless memory cards and cameras that may also have wireless built in. This is a big advantage as it gives you the option to share to your mobile device and then on to other places. With older cameras without wireless capabilities you have to remove the memory card. Once removed you can use an adaptor and load it onto your mobile device or Laptop and again share it from there.
There are also wireless hard drives like WD’s My Passport Wireless Pro. You can load the contents of an SD card on to it and then stream or view its content on another device turning it into a media server.
Photo Sharing Sites
Another way to share is via a photo sharing site like Flickr, Smugmug or 500px.
There are several ways of uploading your photos to one of these sites.
With Smugmug I counted around 20 different ways. The most common is via Adobe Lightroom. The Smugmug Lightroom Extension will mirror your galleries and photos.
Once you have loaded your pics you can copy and share a link for a photo or gallery.
Click on the image below and you will be taken to one of my galleries on my Smugmug Site.
Colourful umbrellas outside a cafe
Displaying your travel photos – Summary
There are many ways of displaying your photos:
Whilst printing is not so popular these days, with the right print, paper and frame you can enhance a really good image
It’s best to have your own way of displaying your photos for your own personal consumption whether it be through a Smart TV or a large Monitor. If you don’t, you’ll never look at them again which is a shame. Like a good wine, age can improve them and bring back fond memories at the same time.
Once you have selected photos for others to view, then it’s time to share them, whether it’s via Social Media, Photo sharing sites or via cloud services. Most sharing is via a mobile device.
If your camera doesn’t have wireless facilities then there are several workarounds that allow you to share your travel photos on a memory card.
So how do you display and share your travel photos?
I’ve come clean and told you what I do. What about you? How do you display and share your travel photos? I’d love to hear from you. Leave your comments below
Do you want to come home with great Travel Photos?
Pop your email in the box below to learn how and for your trouble, get a free E-Book. 9 ways to improve your Travel Photography”. You’ll also get exclusive content that’s not posted here or anywhere else.
Any questions then please contact me here and/or please say hello at these places:
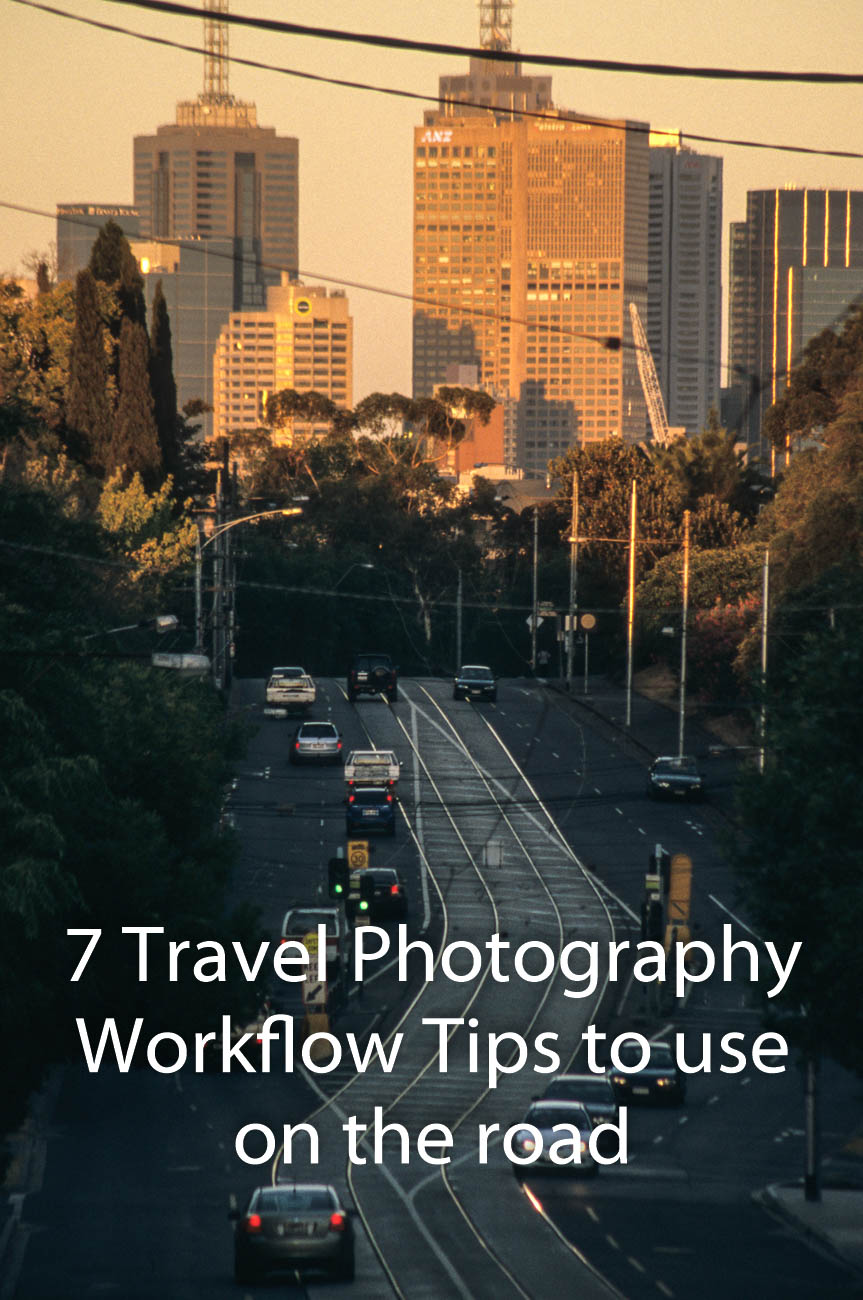
So now you’ve come home with a hard drive full of travel photos. You’ve followed my article 7 Travel Photography Workflow Tips to use on the road. You can’t wait to have a good look at them and show them around. But where do you start? Well, read below to find 7 ways to organise your travel photos.
1 Back up before you get home.
If you have been following my articles or even if you haven’t, you should have backed up everything you took whilst you were away.
Each image should have been renamed and in some sort of order and/or folder and on a hard drive and on a computer. If you haven’t done that then it’s not too late you can do it right now. This is something you should do before you get home and usually as you go. What no back up! You might want to go to How to Back up your Travel Photos.
There are lots of ways to achieve this of course. But the simplest is to use software that will make it easy for you. Adobe Lightroom is one option and I’ll come back to that.
2 Rename
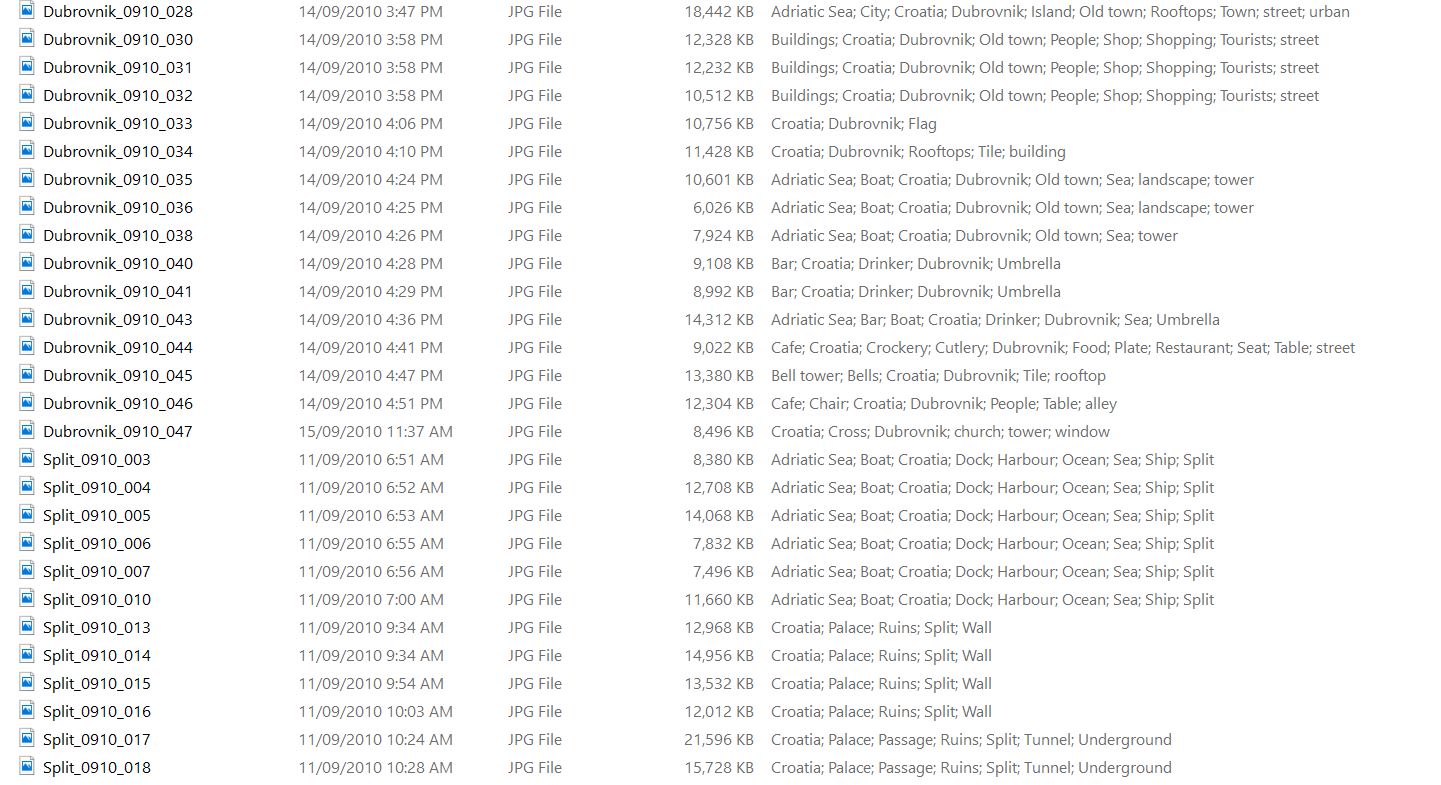
You may think what’s the point. But trust me renaming your photos to something more meaningful will save you a lot of heartache. PB081477.ORF or IMG_6649.CR2 does not even start to give a you clue what it is unless you have dumped it into a suitable named folder.
The first thing to think about is what you will rename it to. There are various options. Some of these can be confusing, others are simple and easy to remember. You can get as simple or as complex as you like. Here are some examples: Date_Number_Place or Shoot Name. Number_Date_Place or Shoot Name. Place or Shoot Name_Date_Number. The date can 2017_08_12 or 12_08_2017. As all photos have a date in the metadata then you only really need the month and year so 08_2017. However, the object should be to keep the length to a minimum so 0817 or 1708 is fine. The number is obviously the image count and you should look to start at 001 or 0001.
3 Optimise
I use Place or Shoot Name_Date_Number. That is name of the place, area or country. Doesn’t sound consistent? You’re right it’s not. But the selection of the hierarchy is dependent on the number of photos. Let’s say I’m in New York and I take 30 photos of the Brooklyn Bridge, then I will probably select “Brooklyn_Bridge”. If on the other hand I take 30 photos in New York of 15-20 different subjects, then I will use “New_York”. To take that up one level. Let’s say I travel around England for a flying visit and took 30 photos in several different areas. In this case I might even use “England”. The latter is less likely for me but you get the point.
Brooklyn Bridge walk way New York
I follow that up with the month and year so 0818 – August 2018 and then the number starting at 001. Putting it together you get England_0818_001. So that would be the first photo I took in England in August 2018. What you do have to be careful of is, that if you return to a place in the same month, you need to make sure that you don’t start at 001 again. Start at one number after wherever the last batch finished, e.g. England_0818_215.
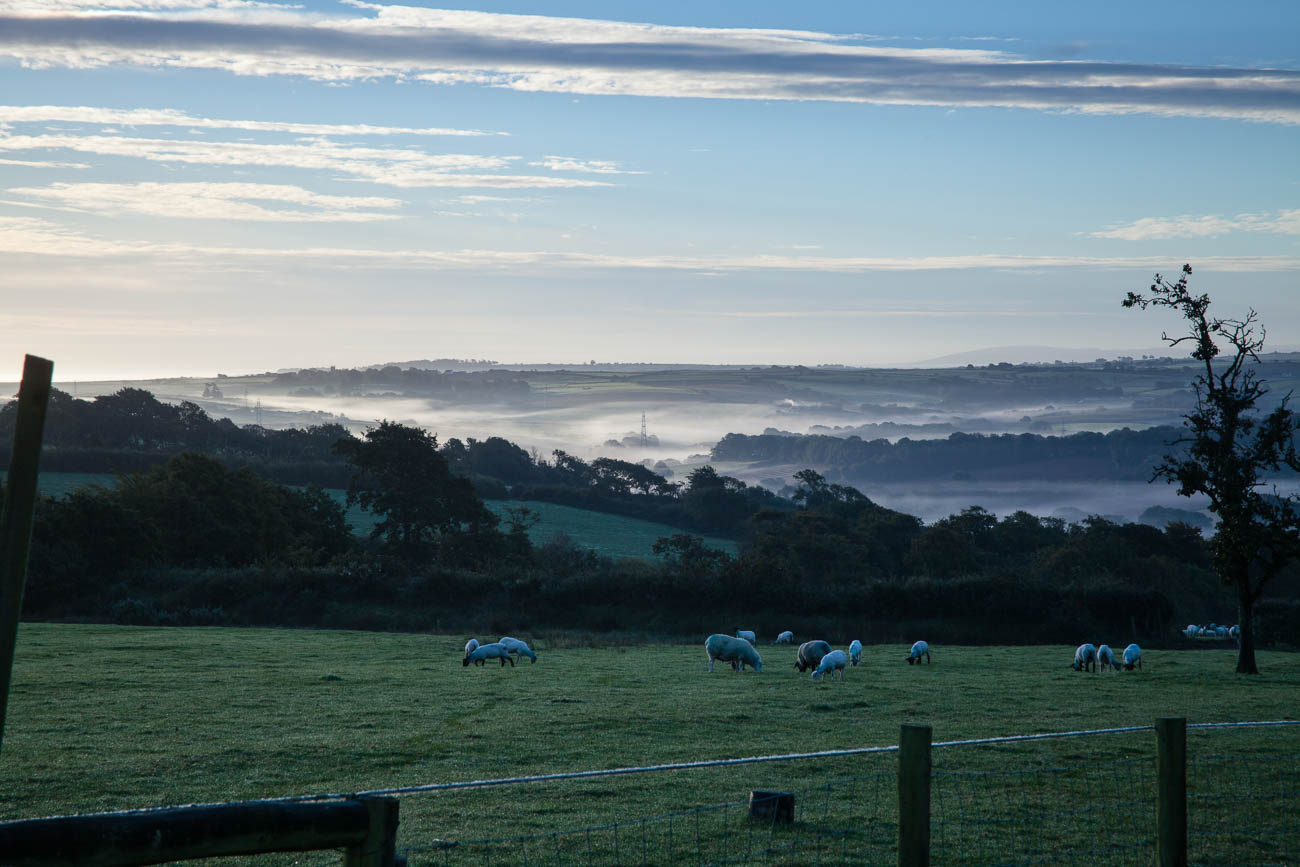
Early morning mist at Winscott farm, nr Bideford, Nth Devon, England
4 Rename Historically
You’ve probably looked at your existing travel photos and have promised yourself that you will get them into some sort of organisation. Part of that job is to rename them in some sort of order. Well fear not, there are some useful ways of renaming multiple files in bulk. If you have Adobe Lightroom you can do that quite easily. Alternatively, if you are a PC user Windows 10 can help you with that. Likewise, Mac users with version Yosemite or better can also get the MAC OS to do it. The links are to a couple of tutorials
Failing all these there is specific software that is either free or inexpensive to buy. As a PC user I have used Bulk Rename Utility which I think is still free. For Mac users A Better Finder Rename comes highly recommended.
5 Use folder hierarchy
The other challenge to organising your travel photos, is the dreaded folder hierarchy. Again, opinion is mixed on this. As with the actual file names you can create folders that have the date or name and various combinations. I usually create a folder when I’m loading through Adobe Lightroom with the Place or shoot name. This folder is a sub folder of the year. So my hierarchy looks something like ImagesRaw ImagesRaw 2017Trip_2017Zambia_17. But you can do it in date order e.g. 2017108_ZambiaRaw Images.
It’s really about how you look for your images. Whether you look for them in batches of dates or subjects. Both Windows and Macs search options will cover either way. But they are not foolproof and nowhere as good as Adobe’s Lightroom.
Whichever way you decide to follow you need to stick with it. Changing it later can be very time-consuming and tedious.
So what sort of keywords do you need? Well again that depends on how you are going to search. If you have some wedding photos and you want to see all the ones with Uncle Joe, then you would use “joe” or “uncle joe”. If you wanted to see all the images you took of the Eiffel Tower, then you would use “eiffel” or “eiffel Tower”. My system is usually country, locality, town, subject, type, anything else. If I took a picture of the Brooklyn bridge, then the keywords I might use would be USA, New York, Brooklyn, Brooklyn Bridge, Bridge, River, East River, Water. If there were people in it, I could add people, street, tourists. Any word that you may at some future date want to use for searching can be used.
7 Use other tags
If the camera you were using has face recognition and/or Geo-Tags, then that’s another form of creating searchability. You will still need to refine it depending on how you want to search. The algorithms for face recognition are good but not infallible.
7 Ways to Organise Your Travel Photos – Summary
It’s important for future searches to make sure that you organise your travel photos.
First things first backup, then look at how you will rename your photos. (Don’t use the camera generated file names – you’ll never find anything!)
Optimise the names so you understand them. Once you have a system of naming and optimising, you may want to consider renaming some of your existing photos to maintain consistency.
Of course, naming them is one thing but you also need to be careful of how you store them. Having a logical folder hierarchy is the best way.
There are other ways of searching for photos using keywords and tags, such as Geo-Tags.
How does that make you feel about travel photography? Do you want some help with your travel photos? Why don’t you pop your email in box below and not only will get content that’s not always posted on this site, but you will get a free guide to get you started
Any questions then please contact me here and/or please say hello at these places:
Death Valley NP California, USA. Click on the image for a larger view
In the last couple of posts the travel photographer destination part I and part II, we discussed what to do when you reach your destination.
But what about your travel photography workflow whilst you are on the road?
Follow me as I give you some tips and tricks on how to handle the photos you are taking whilst you are on the road.
A Recap
You’ve learnt in the last few posts about being prepared and ready to take travel photos. Making sure your camera equipment is always set up correctly, clean, has the correct lens and plenty of memory and battery power.
So now you are out there taking images, how should you go about it.
1. Keeping tabs on what you are taking
Newer cameras have GPS tags and dates.
So you could be thinking that taking down details of the photos you take is a no longer necessary
But, if you actually want to relive the experience of when you took the image, then note taking is essential.
It doesn’t have to be ‘war and peace’. It can be as simple as “Sydney Harbour Bridge taken from the Rocks area”. You could go into more detail like: “Sydney Harbour Bridge taken from the Overseas Passenger Terminal Quay on Circular Quay West. Time 4Pm 27/05. Weather was overcast and the sun was a few minutes from setting.”
Sydney Harbour Bridge taken from the Rocks area
Taking notes can help:
As a backup for the metadata that’s captured in the photos itself. Locations and even times are not always accurate
To add a caption to the photos if you are going to share and/or display it.
As a record of where you took this photo. If you ever return and that could be a few days or years later, you know where you’ve been and whether it’s worth going back to the same spot.
2. Making sure you are secure.
Depending on where you are in the world, security is something to pay attention to.
There will always be someone who is keen to steal from you as a tourist.
There are countless stories of tourists having their bags, cameras and other items ripped from them.
However, whilst there’s never a guarantee that you won’t find yourself in that situation, you can definitely minimise the chances.
If you want to have your camera ready to go, make sure you have it around or across your neck.
Carry your bag across your body or if it’s a backpack carry it as a back pack.
Keep all your bag pockets and openings firmly closed.
And speaking of bags, it’s best to have a non-descript bag that doesn’t shout to the world “CAMERA”!
There will be times when you need to put your bag on the ground. A foot through one of the straps is always a good idea.
Beware of what and who is around you. If you see anyone suspicious move away.
Keep away from the kerb if you are in an area that’s known for motorbike thieves.
3. Subjects
Whilst strictly not part of any travel photography workflow, I’ve included it here. Without thinking about subject matter then you’re not going to create great images.
As you roam the streets of your destination, always look for something interesting and unique.
That can be anything from the usual famous Icons to much smaller obscure subjects like rubbish on a street, or street art, even a close up of the bark on a tree. The list is endless.
Street art in Perth Western Australia
Whatever subject you choose to take, play around with different settings, angles and positions.
The goal is not to copy what everyone else is doing but to be individual.
That’s not to say that you shouldn’t ever take a straight forward image of an icon. After all, you may be able to bring a different style to a subject even if from the same position as everyone else.
Often you will think that these different experimental images didn’t work. Because of that you will be tempted to delete it after looking at it through the camera viewfinder.
Don’t do it.
In fact, don’t look at what you have taken at all until you have moved away and are resting somewhere away from the subject.
4. Reviewing through the viewfinder
There are few times when you should review what you have taken.
The most important being if you want to make sure you captured something that you may never see again.
Even then it’s only worth looking if you have the opportunity to retake it, otherwise what’s the point.
If you missed that multi coloured Aston Martin with a James Bond look alike standing up through the sun roof, then that’s too bad.
The thing is that looking through the viewfinder at what you have taken, can rob you of any other photo taking opportunities.
Things can move quickly, light changes, people and vehicles move, and the weather can change in a instant.
The time to review, as I said is away from the action. You are only doing it for some immediate gratification and to show others anyway.
Of course, in the present-day social media share society, you may want to share some images that you have just taken immediately.
That’s all down to personal choice. Personally, I don’t share anything publicly until I know the image is at it’s best.
5. Back up
The best time to review the day’s images is when you get back to your accommodation.
Before you do anything, you need to back everything up.
If the only copy of your image is on the memory card, then you are playing with fire.
As a rule of thumb, it’s best to have a least 2 other copies in different locations. If you’ve copied all your images to both a hard drive and your laptop then store the hard drive in a different bag to your laptop.
How much you can review is dependent on what other equipment you have with you.
If you have a laptop with processing software, then you can start by picking your keepers or at least allocating stars.
You can even begin post processing if that’s what you want to do.
But there’s no point in starting to post process if your laptop screen is small and/or hasn’t been calibrated
Any adjustments you make are likely to be inaccurate.
You can of course still review and maybe go through and rate them or select the keepers.
I’ll cover that process in another post.
7. Deleting
So, let’s say you have backed up the days’ shooting and have gone through them and rated them.
What do you do with the ones that are no good?
In general – nothing!
Unless you have images that are totally out of focus or you’ve had a few accidental hip shots then don’t delete.
I’ve actually had a couple of good shots that have been accidentally taken from the hip.
My final note on this travel photography workflow is that it’s a personal choice on how much time you spend on your images when you are back at your digs.
But I would again recommend that if you are not travelling alone then do the minimum or be prepared to suffer the consequences of being anti-social.
Travel Photographers Workflow on the road – Summary
The wonders of having dates and even Geo Tags on each file are great. But it’s still essential to keep a written, whether electronically or by hand, record on each image or batch of images.
It’s essential to keep a low profile if you have an expensive (even if it’s not) looking camera.
Pay attention to who and what is around you.
Don’t rely on others but don’t obsess either. You are there to enjoy yourself.
Look for individual shots that speak to the viewer and give you a sense of satisfaction.
Only review through the view finder when you believe you really need to.
The world keeps spinning while you are looking at the viewfinder.
Once you are back at your accommodation back up first, then review and finally start rating.
But make sure you have a big enough screen to give you plenty of detail.
Don’t delete anything unless it’s obvious that you will never see the image again.
Finally remember you can review, rate, delete and post process when you get home.
Nothing like relaxing with a beer at the end of the day at a place you like or have never been before with friends and/or family.
What’s your workflow?
I’ve come clean and told you what I do. What about you? Do you have a travel photography workflow that’s totally different from what I’ve mentioned in this article? Leave your comments below
And while you’re at it why don’t you pop your email in the box below. Not only will you get content that’s not always posted on this site, but you will get my free e-book “9 ways to improve your Travel Photography”.
Any questions then please contact me here and/or please say hello at these places:
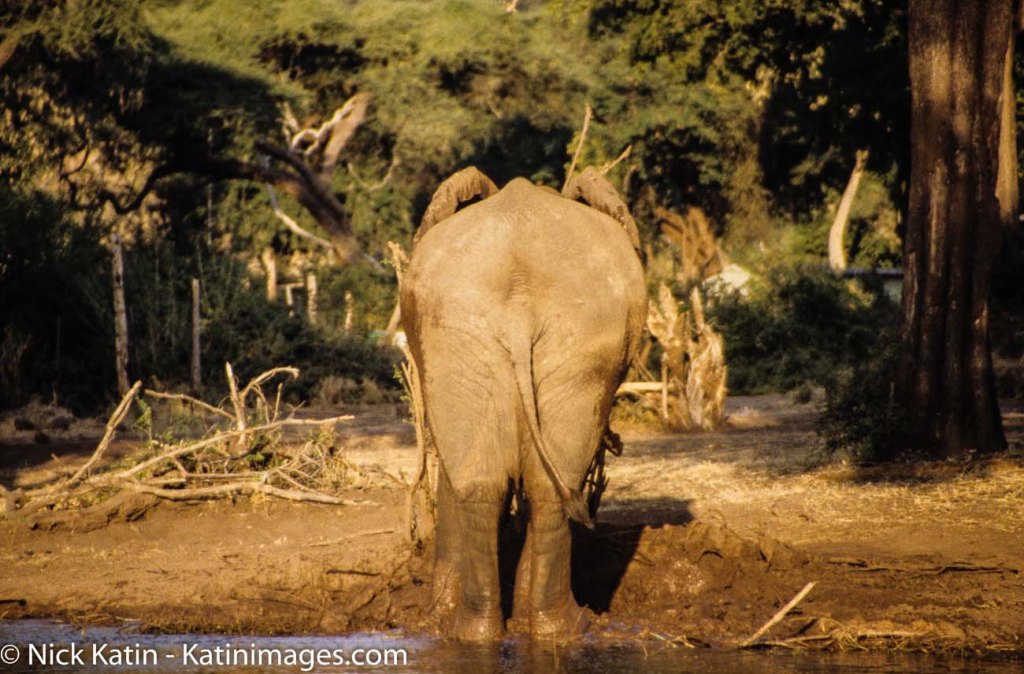
An elephant shows us his rear end by the edge of Chobe lake in Botswana
In the days of film, the only form of back up was to guard your film and slides as if you’re life depended on it. Nowadays with digital imaging there are many ways of backing up your photos. I touched on this in Planning and Preparation for Travel Photos.
So, follow me along as I give you some ideas on how to back up your travel photos.
History of Back up
The term back up only really became used when computers began to take over the world.
With paper you could make copies and file them off-site.
As we all switched from paper to digital, Business’s started to have tape, then floppy disks followed by CD’s for backups of the day’s work.
Now you have back up servers some of which are in the cloud.
Photography back up
Before digital, you were able to have extra copies made of photographic prints and file them somewhere else.
Not so with negatives and slides. Well that’s not strictly true, you could get copies, but it was expensive. It was not until digital came along that we began to realise that we had the option to back up all our precious photos. We could even do it retrospectively, if we had plenty of time or money, by scanning film and slides.
In those early days the floppy disk and then later the CD or DVD were the main back up mediums. But as with film and slides we all ended up with boxes of DVD’s. Whilst smaller than boxes of Slides and Negatives they still took up some room.
Let’s take a look at what options we have now.
Direct backup to a Laptop or Computer
The simplest and most convenient way is to connect directly to a Laptop or computer. This is done via the OEM cable that each camera manufacturer supplies to a laptop or computer. Once you have it on the computer you are free to copy it anywhere else. All camera manufacturers give you that option. The main disadvantage is that the cable supplied is not usually off the shelf if you lose it. Additionally, the camera port tends to be non-standard or at best not common.
Memory Cards
When you take an image with a digital camera it sits on the memory card that you have in the camera. With a smartphone that image will generally sit on the phone’s internal drive. However, you can change it to sit on a microSD, if that’s available.
Memory cards can also be used to back up your photos either via a computer or in some camera models.
How does that work?
Well you remove the memory card from the camera and insert into either a computer memory card port or a card reader that plugs into the computer. Likewise, the same applies with a blank memory card. Once both cards are loaded you copy from one to the other.
Backing up in camera is usually confined to some of the more high-end cameras. These now come with two memory card slots that you can use to either extend the memory or use the second slot as back up. When the latter is set, each time you take an image, it not only sits on the first memory card but also on the second.
Another option is to transfer it in camera periodically but that can be dangerous if you forget to do it.
The system of using memory cards as a backup medium is not used that often unless you are looking to immediately back up and that’s your only option.
One recommendation I would make is to use something similar with a smartphone.
Smartphone backup
With a smartphone, the potential to lose it or drop it is much higher than a camera. I would suggest a microSD if that’s easily removable (otherwise you will lose it with the Smartphone!)
Another option is a small flash drive that can be attached, usually through the charging port. Why would we need to do that when we all rely on the cloud to backup our photos on a smartphone?
Services like Google Photos, or iCloud work well when you have connectivity. But what about when you don’t have connectivity?
Last year I stayed a few days in a remote resort called Berkley River Lodge in the Kimberley region of Western Australia.
There was no phone signal at all and WIFI was limited to 50m from the reception hut. We were on a helicopter trip heading back to the resort. One of the other guests was taking pictures of the sunset with an iPhone when he lost it out of the window. I might add that the phone wasn’t his, it was his partners! We had also all been warned not to take your phone too close to the window during the flight as, you’ve guessed it, it could get sucked out. Anyway, apart from looking like a Kangaroo in headlights, he lost the phone. All the photos that they had taken in the last few days were only on that phone.
And as they had no way of backing them up other than using iCloud they were lost with the phone.
Berkley River Lodge from the air
Lesson from that is not to rely on the cloud as back up for smartphones or indeed anything else.
If you have another device like a tablet, then you can set up a hotspot that will enable you to transfer or copy your files to the Tablet. But if you are likely to be without the tablet and have no connectivity, then a Mobile flash drive is a no brainer.
WIFI SD cards
An option to standard Memory Cards are WIFI cards. Even if your camera has Wi-Fi capability this still allows you to back up your images to another device.
If you have a fairly new camera, then chances are it will have WIFI capability anyway, so you can backup via WIFI without a special WIFI Memory Card.
However, in both these instances the issue is space. Most Smartphones or tablets are around 64GB and if you are shooting RAW over a 2-3-week period it doesn’t take long to max out. For example, last year at a African Game Park I shot around 64GB of RAW and JPEG images.
Physical back up devices
There are a lot of devices out there that you can use to back up your photos. Most of them are portable hard drives
There is the basic hard drive that you plug into a laptop or some tablets. You then copy the files to the hard drive via the Laptop or Tablet
Some hard drives have a SD Slot for your memory card. You insert the card and it automatically copies to the drive. So, in theory you don’t need another device. Yet, unless you plug into another device you are not going to know whether it has backed up all your photos correctly.
Another option is the wireless Hard Drive. This is like a hybrid. They have SD slots as well as having the option to wirelessly copy images via the hotspot I mentioned before. This has the same disadvantage of not being able to see what images have been copied across. Although some do allow you to view the contents of the drive from a smartphone or tablet as well as a computer.
Then there are hard drives that have a screen that lets you view the images even if they are RAW.
African Elephant in South Luangwa NP, Zambia.
Hard drive types
Lately hard drives come in two types, HDD mechanical Hard Disk Drives or SSD Solid State Drives. The differences are basically that SSD’s are faster but more expensive. In a computer or laptop then I would go to an SSD every time. With portable hard drives, where there is only data being stored, then it’s really a personal preference.
How many cloud services are there now? There’s Apple’s iCloud, Microsoft OneDrive, Dropbox, Box, Google Drive, Crashplan, Backblaze, Carbonite and there are the Photo Sharing Sites (more on that below).
Of course, all cloud backup services depend on the internet. So if you are travelling, you are relying upon there being an internet connection. That is often beyond your control.
There is much better connectivity than there was 5 years ago and I’m sure that there it will improve even more. But as I mentioned earlier there is always somewhere that the internet is not connected.
Even with an internet connection, the bandwidth or speed can be poor. Meaning that the time taken to upload your photos can be long and arduous, not to mention frustrating.
Using the cloud
Whether you use the cloud or not is dependent on a couple of things:
One is the Camera equipment. For instance, a Smartphone has inbuilt cloud capability and relies heavily on there being an internet connection. That is either by the phone signal e.g. 4G or a wireless connection. On the other hand, unless you have a 1-2-year-old camera, then there is every chance that the camera you have will not have Wi-Fi capability. Even a lot of the new ones only allow you to upload to a phone or tablet from which you then have upload to the cloud.
The other reason is the interface and ease of use. I haven’t tried all these services, but of the ones I’ve used, iCloud and Dropbox seem to me to have the best interface and ease of use.
Cloud cost and security
There is one further reason and that is price. Prices vary so much with specials and add-ons that comparing them is likely to be totally inaccurate by the time you might read this.
The other thing to consider is security. I hesitate to say it but using the likes of the big guns like Microsoft, Apple or Google does give a sense of security, compared with the smaller players. That may well be false. But it’s worth asking a few questions. I.E. where are their servers? What happens to the data if a server goes down or heaven forbid the company disappears?
What do I use? OneDrive. Why because Microsoft gives me 5TB with my Office 365 subscription.
Photo Sharing Sites
The other cloud-based storage systems are Photo Sharing sites. These are likes of Flickr, Smugmug, Google Photos, Pixbuf (a new one), Photobucket, 500PX, My Portfolio, Amazon Prime Photos plus a few others. These add a bit more to the concept of back up. Usually it’s a subscription service that allows you to view and share all your photos. Some even have their own social media interface meaning you can browse other user’s photos and comment or share.
Flickr was the first of these and now has been gobbled up by the expanding Smugmug. As a user of both I have yet to establish what that will mean.
Take a look at my site on Smugmug to get an understanding.
Unlike the straight cloud backup services, some of these sites don’t support all file types. So, if you are looking for a complete solution to house and view your RAW files for example, do your due diligence.
African Elephant in South Luangwa NP, Zambia.
How to back up your travel photos – at home
We’ve covered a broad summary of what there is out there to back up your travel photos whilst you are on the move.
What about when you get home? All of the above apply to your home base as well.
But you can also add in Desktop Drives
Desktop Hard drives
Desktop Drives used to be fixed to one certain location. But with the growth in portable hard drive storage, the fixed and portable are overlapping.
Most of us these days have Laptops instead of desktop computers which gives us freedom to work pretty much anywhere. So, plugging in a portable hard drive as not only an expansion to the laptop storage, but also as a backup is easy.
For the fixed you have three main types.
Standard hard drives that connect via USB or Apple’s Lightning and have their own power supply.
Cloud based drives that connect into a network also called NAS (Network Attached Storage) This is different to the cloud services mentioned earlier. These are hard drives that are physically in your space but can be accessed remotely via an internet connection. They also come with a power plug for an independent power supply
The last type is called a RAID system (redundant array of inexpensive disks) that also have their own cloud. This is a trickier system to manage and install. Basically, it is several hard drives usually in multiples of 2 that back each other up. Where it can be confusing is the many different set up combinations available. It’s a way of ensuring that should one back up drive fail then there is always another one that has identical data, so that you can sleep easy.
What I use
Now I think it’s time for me to give you my system.
On the road
Depending on the duration and the reason for the trip, I will carry either one or two Wireless Hard Drives, my surface pro or iPad Pro. I also now carry, since seeing the guy at Berkeley River lose an iPhone, a portable flash drive that fits my Samsung S8.
How do I use them?
I am fortunate that my Olympus OMD1 MKII has dual memory card slots, so I use one of these memory cards as back up. Additionally, every evening or at least every couple of evenings, I back up one of the memory cards to both wireless hard drives. If I have been diligent enough to clear the hard drive on my surface before travelling, I back up to my surface as well.
I back up my Samsung S8 to my surface if I am confident that I have good internet for the cloud back up to my OneDrive service. If I ‘m unsure of the connectivity, then I will back that up to my portable flash drive and later the surface.
I have used the iPad Pro as back up in the past. But due to the number of apps it has, it only has a small amount of spare storage compared to the surface.
How to back up your travel photos – Summary
Back up is a relatively new concept in the photographic world. It has only been around since the advent of Digital photography
There are many forms of back up for the travel photographer
Memory cards can be used for short term back up
Smartphone Cameras rely on cloud services, which can be unreliable when travelling.
A flash drive or microSD is a more reliable medium
New cameras can upload photos via different WI-FI systems to the cloud but only via another device
There are many different hard drives that can be used as back up devices.
They can be like small computers with their own screens and flexible connectivity.
Speaking of Cloud back up, the number of services available is huge. So, you need to select carefully before using one of these to ensure it meets your needs and security
Photo sharing sites like Flickr and Smugmug can also provide a level of back up for your photos
Then we get into the heavy duty physical hard drives. These use sophisticated software and multiple drives that you can create your own cloud with.
What do you use?
I’ve come clean and told you what I use. What about you? Do you use something or have a system that’s totally different from what I’ve mentioned in this article? Give me your take on how to back up your travel photos Leave your comments below
And while you’re at it why don’t you pop your email in the box below. Not only will you get content that’s not always posted on this site, but you will get my free e-book “9 ways to improve your Travel Photography”.
Any questions then please contact me here and/or please say hello at these places: