Blog
-
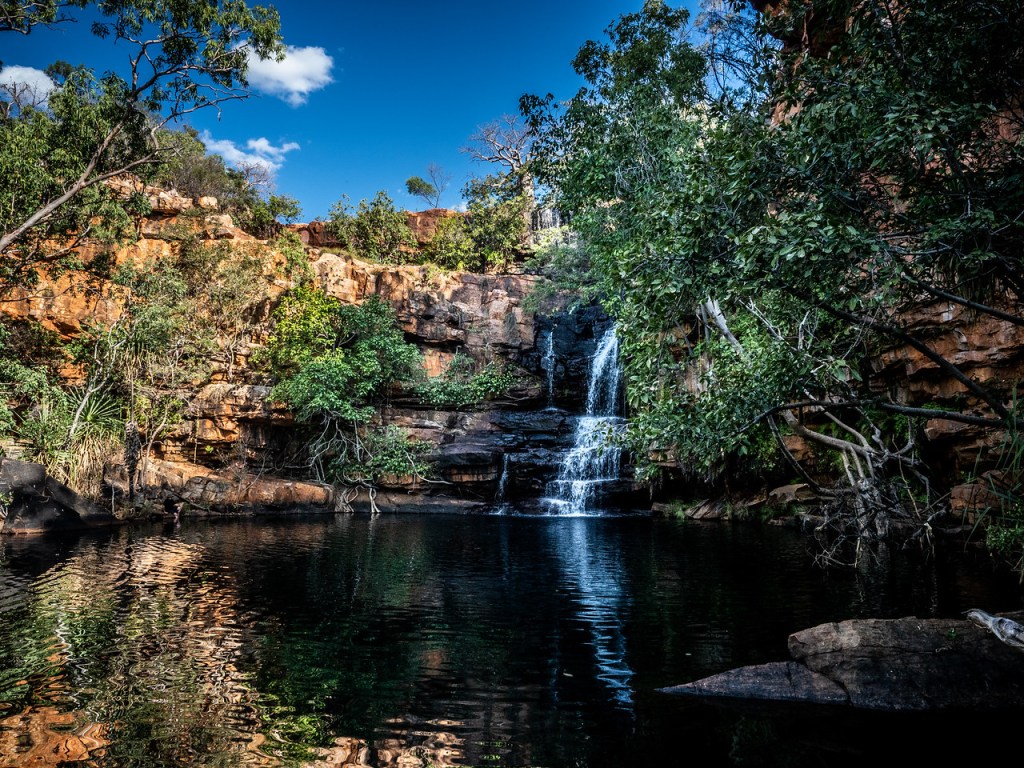
Bell Gorge Pool 1
Bell Gorge in the Kimberley North West Australia. Click on the Image for a larger view -
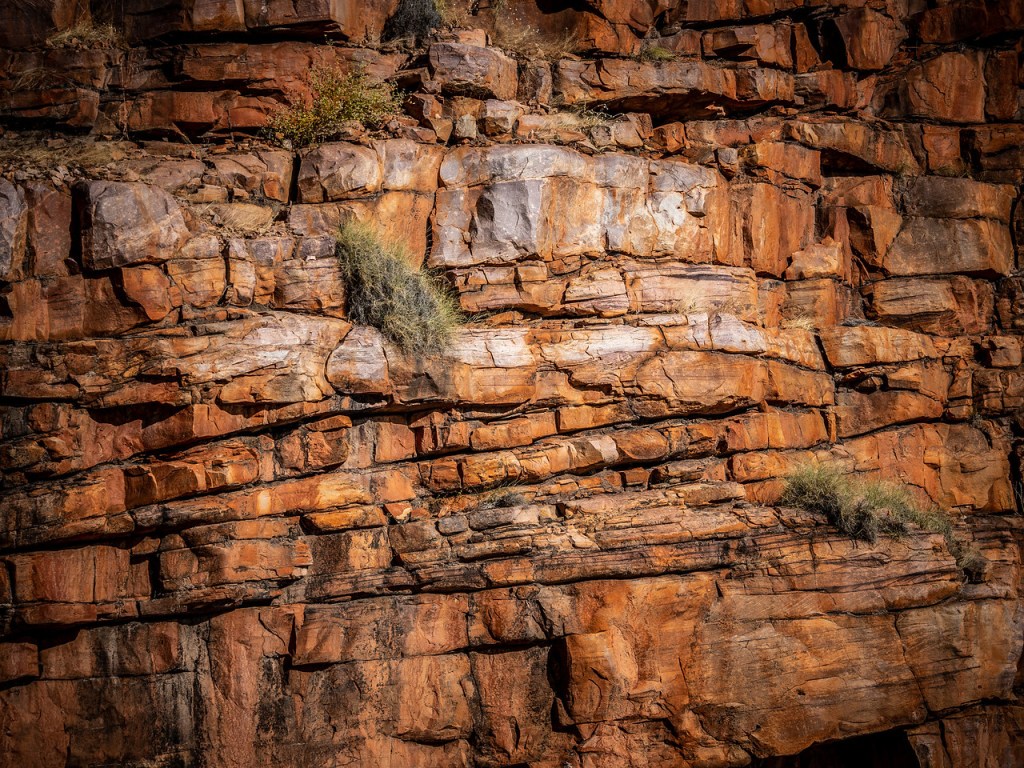
Chamberlain River Gorge Wall

Chamberlain River Gorge at El Questro in the Kimberley, North West Australia. Click on the image for a larger image Share this:
-
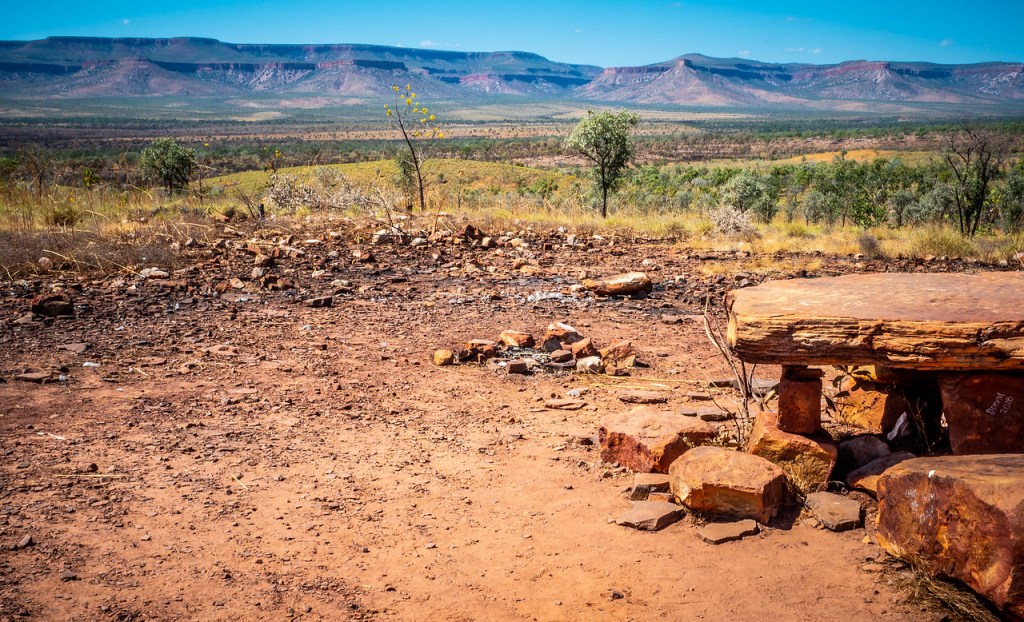
Kimberley Landscape

The wonderous landscape of the Kimberley in North West Australia. Click on the image for a larger view Share this:
-
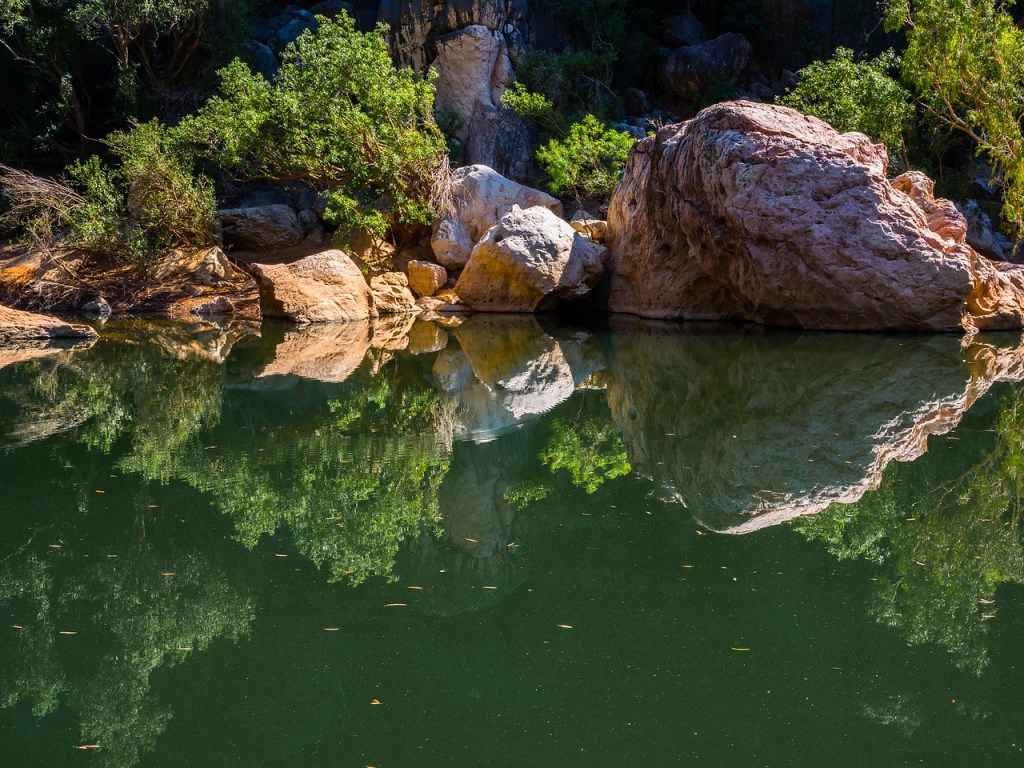
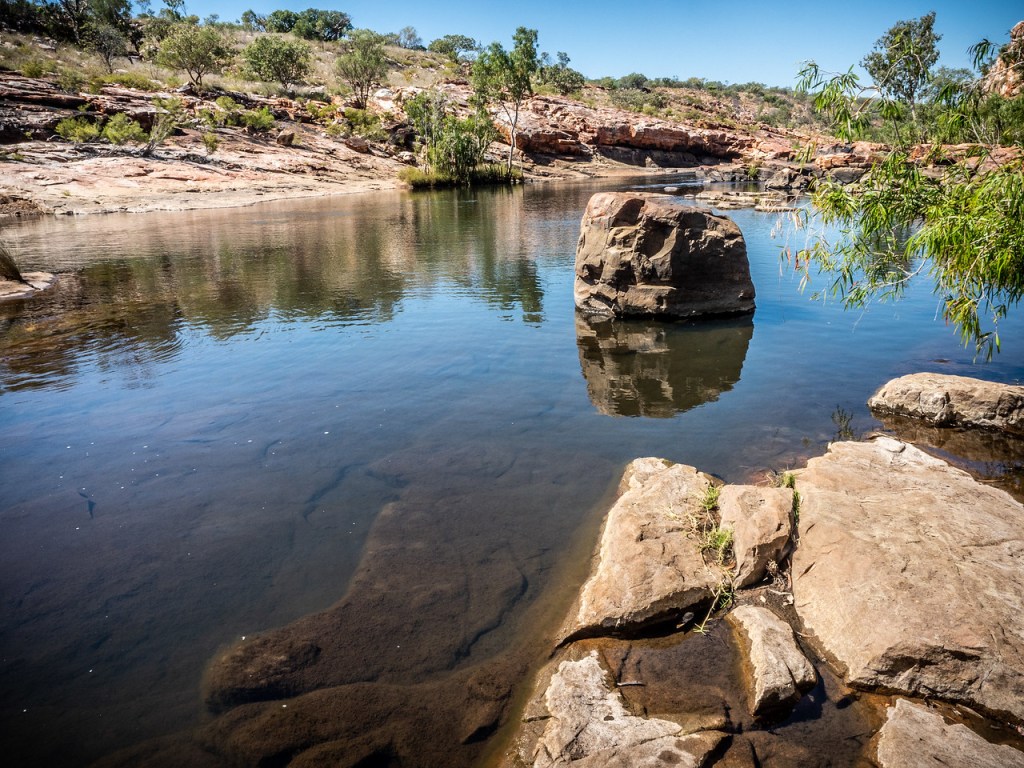
Pool at Windjana Gorge

Pool at Windjana Gorge in the Kimberley in North West Australia. Click on the image for a larger view Share this:
-

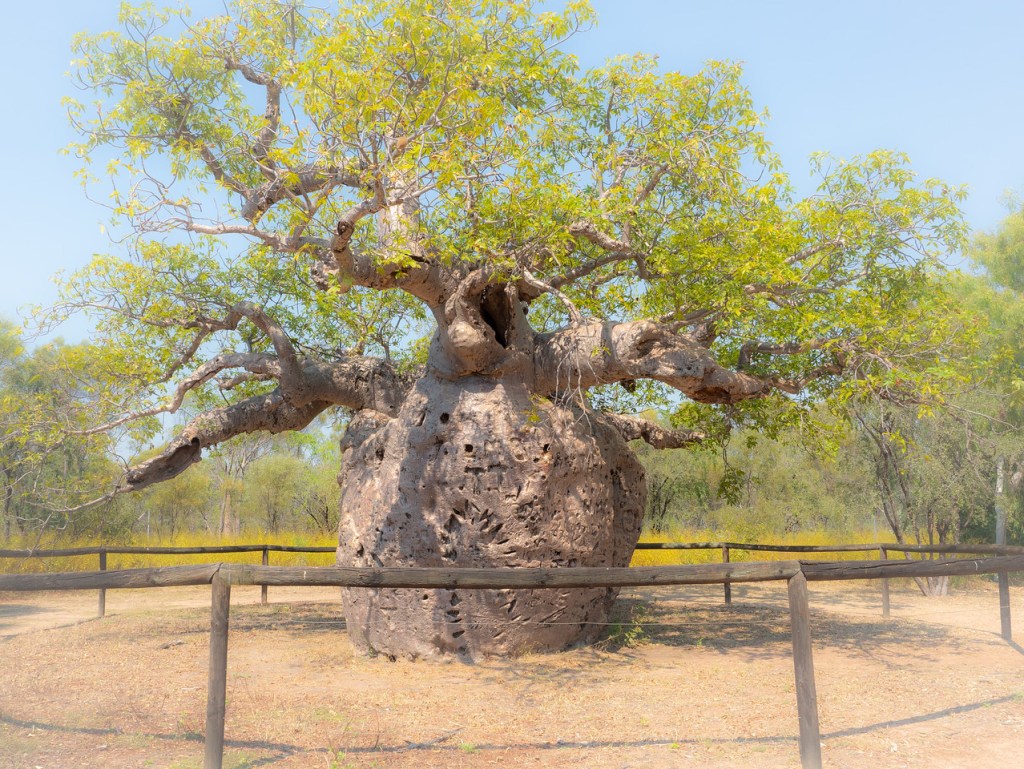
Cemetery Boab Tree

Boab tree in Derby cemetery in North West Australia. Click on the image for a larger view Share this:
-

Crocodile Paparazzi

Crocodile paparazzi at Windjana Gorge in the Kimberley in North West Australia. Click on the image for a larger view Share this:
-
The Prison Boab Tree

The Prison Boab Tree near Derby in the Kimberley in North West Australia is culturally significant site for the local Nyikina people .
Click on the image for a larger viewShare this:
-

Luminar AI Update 4 and Portrait Bokeh
If you been sitting on the fence about buying this editing software, then this could be a game changer for you.
Luminar AI’s fourth update gives us Precise Horizon Control in Sky AI, Improved Textures with visual preview and here’s the real deal breaker, Complete focus control with Portrait Bokeh AI.
So what does that all mean? Well let’s get the minor upgrades out of the way:
Precise Horizon Control in Sky AI
A new on-screen tool makes it even easier to control positioning of new skies when performing sky replacements with the Sky AI tool. In the Sky Orientation controls three sliders have been replaced by a single, intuitive Horizon Position control which makes accurate sky alignment easier for any of us.
Improved Textures with visual preview
You can now visually browse Textures in the dropdown list just like you can with Sky Selection and instantly have an idea of what your result might look like.
Now let’s talk about Portrait Bokeh AI
For those that are not familiar with the term Bokeh, it’s the blurriness you find in the background of a photo. For more about this go to https://en.wikipedia.org/wiki/Bokeh
Traditionally, creamy bokeh has always required expensive cameras and lenses. And has always been the main domain of full frame cameras.
There are ways of creating it with mirrorless and crop frame camera. And I know the iPhone and Android mobiles have software that can create it. Plus, you can go to Photoshop and create it too.But Luminar AI’s Portrait Bokeh AI is something else.
Using artificial intelligence, Luminar AI can recognize people in a photo – even groups of people, and people posed in unusual positions. And then will automatically generate bokeh to a certain point, then it’s entirely controlled by you with a single amount slider. This allows you to create beautiful background blur in seconds – adding realistic and dreamy 3D bokeh effects to your portraits.
Lets’ take a look at it in practice.
Here’s one I took on a shoot that the client wanted me to shoot these employees in front of this tree. On the review of the pictures, they wanted a blurry background. Well, they were really to close to get the a strong bokeh effect. And I wasn’t about to retake it a few days later, so I did attempt it in photoshop and gave up. I just don’t have the time, attention to detail and to be totally honest the enthusiasm to spend an hour or 2 on one image.

So, let’s see how we go with Portrait AI
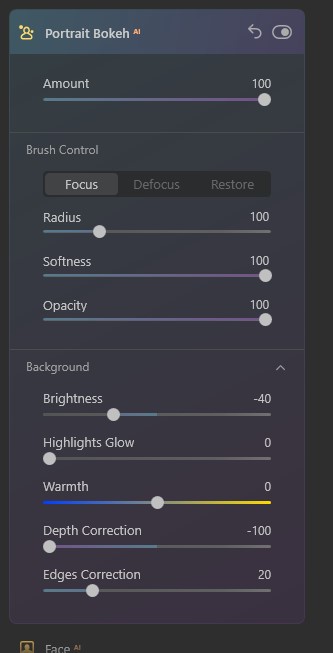
Go into edit mode then scroll down to the portrait section. The first section is portrait AI
Once you open that, you get straight into the first and important slider “amount”. Now you can see by moving this, you get a good control of the bokeh. Lets’ slide right over and see what happens. Pretty good.
The way it works is that it automatically masks humans (and just so you know it doesn’t work on anything else – yet).
So you are able to get some control of the mask with the brush control but I’m going to go down to the background section and slide the depth correction over to see if it helps blur the bottom of the planter box that is still in focus.Now we can go back to brush control and tidy it up.
Boom done.
To me that’s more than impressive that’s something every photographer has wanted in their armour for decades.
So, if you are still not sure about buying this software Luminar AI Portrait Bokeh should convince you. And that to the many more AI updates they have planned and you’ll have a great product to make your editing life so much easier.
Go to Luminar AI to grab it and make your life a lot easier when editing photos.
Share this:
-

Pixbim Unblur Shake AI
Pixbim have a new software called Unblur Shake AI. As it sounds it reduces the blur in a photo.
See the video to watch it in action or scroll down for more info.
Ready to get now? Go to Unblur Shake AI enter the code KATINCSAI20 for a discount
So why should you care?
Well there would have been times when you took a photo whether it be with a mobile, DSLR, or mirrorless camera, and found that when you enlarged it looked blurry.
The most common form of blur is caused by camera shake, which for those who don’t know, is when you have taken a handheld photo with a shutter speed that’s too low for the light available or the photographer just hasn’t kept the camera still. Very common with mobile images.
There are other types of blur of course. Not being in focus is one kind. Motion is another.So, if this has happened to you then you’ll like this program which can fix the majority of images that have blur. Although it struggles with bad blur and motion blur (a speeding car for example).
Let’s take a look.
First you open the program and then click on the “load Image” button, select a photo and ‘boom’ the magic starts.
Straight away it starts analysing the image and quite quickly previews the results.
Once the preview is loaded you can see another part of the image by going to the preview panel and moving the red square.The buttons at the top (the magnifying glass and the double arrow) don’t work very well or maybe it’s just my copy. But they’re irrelevant anyway.
There is also a an “Unblur Factor” slide that allows you to increase the process. At this stage there are only 2 settings “Low”, the default setting, and “High”. Setting it to high is going to take longer and sometimes can be too much.
If you are happy with the result, just click on the “start process full image and save”. A window will pop up asking you to save it to a location of your choice with the same file name plus “unblurSAI_result”
One last thing, the image formats you can use with exclude raw and psd files. I’ve only tried tiff, png and jpeg images so I’m not sure if you can use other non-raw files.
Look it’s not fancy but at US$34.99 less 20% if you use my code KATINCSAI20, I think it’s steal and a great tool for photography enthusiasts. It’s a once off purchase with free updates for life.
Go to Unblur Shake AI to grab this and enter the code KATINCSAI20 for a discount
Share this:
-

Luminar AI Update 3 Reminder
This is your last chance to get a special deal on the this easy to use software. Go to Luminar AI Update 3 for more info on the software.
See below to go get it.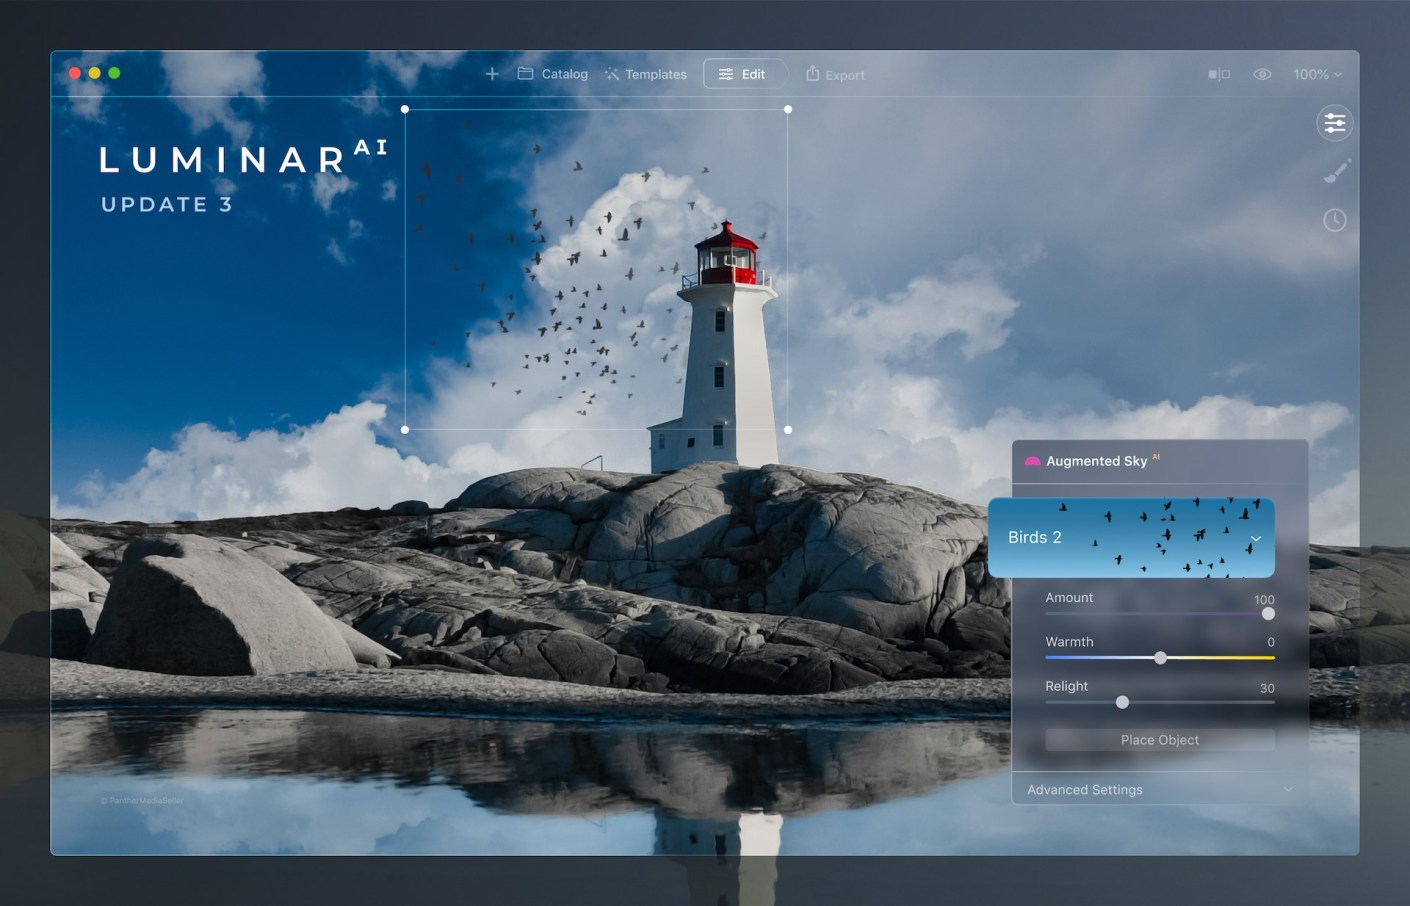
Luminar AI Update 3. Click on the image for the discount. If you don’t have a copy of this software – now is the time to get it at a 25% discount.
Go to July 1 – 9th sales.
That’s right you’ve only got today and tomorrow to get LuminarAI at this discount.Share this:
-
Luminar AI Update 3
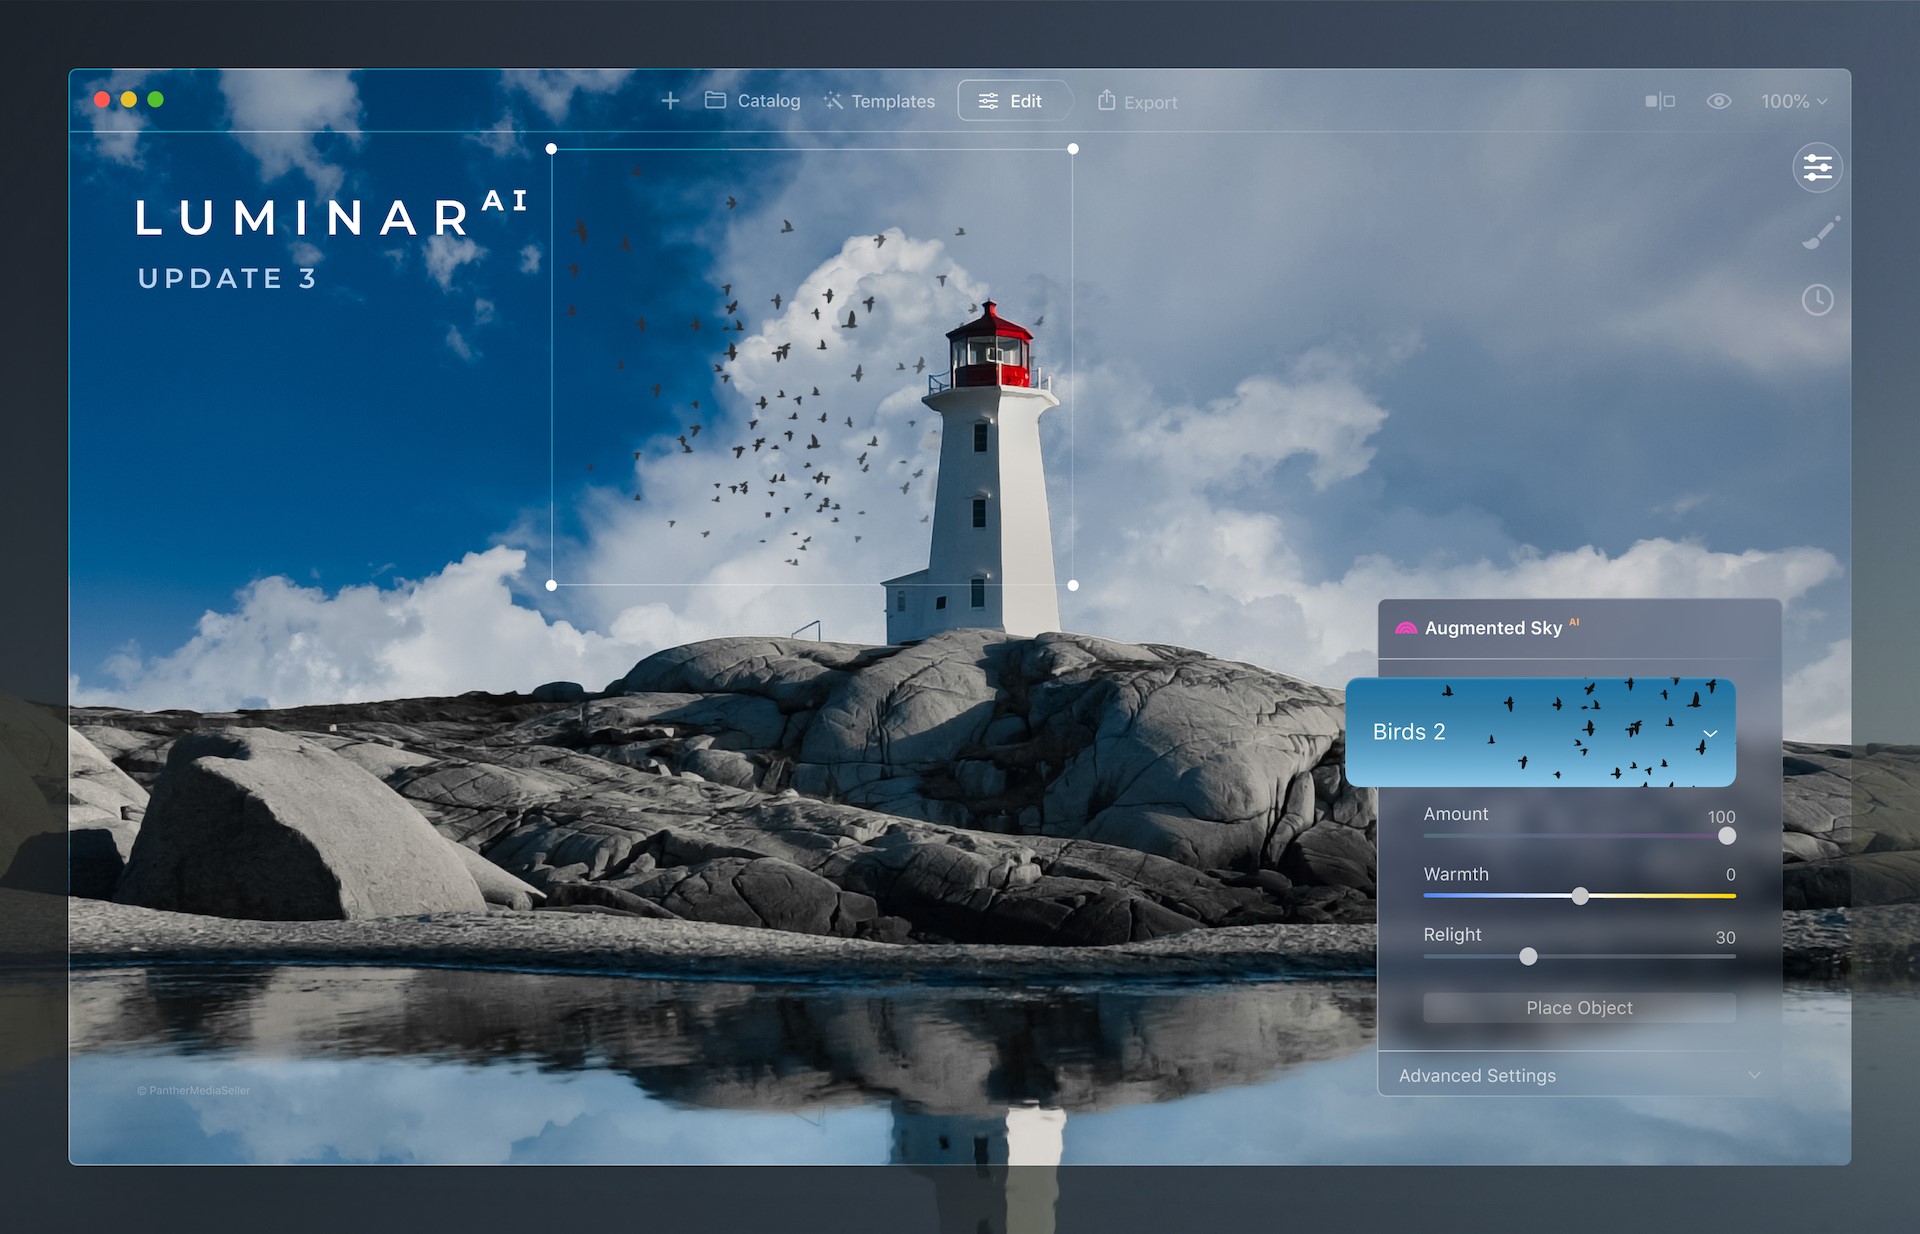
There is now a third free update to LuminarAI that brings new benefits to the AI-powered editing tool.
These are the changes you should find useful especially if you use it a lot to improve the skies in your images.
Picture-perfect horizons with the improved SkyAI tool
In Update 3, there’s been significant improvements to the SkyAI tool:
Better Sky Detection
Once a new sky is selected, SkyAI now uses improved horizon detection to place it more accurately in the scene. The new sky is automatically adjusted to better match the perspective of the photo. Refined edge detection and masking are used to better integrate the new sky for a more organic effect.
Horizon Position & Sky Orientation
When replacing the sky in previous versions of LuminarAI, it could be difficult to realistically align the new sky with its reflection in the water. This was because the Vertical Offset slider controlled the alignment of both the sky and the water reflection, moving them in the same direction.
Now, you can replace the sky and set the desired position of your horizon line thanks to the Shift slider in the Horizon Position section of the SkyAI tool. If the horizon is tilted, you can take advantage of the Rotation slider.
You can then use the Vertical Position slider in the Sky Orientation section to further adjust your image. This slider controls the position of the new sky in both the sky and water areas but moves them in opposite directions in relation to the horizon line until you get the ideal match between your new sky and its reflection.
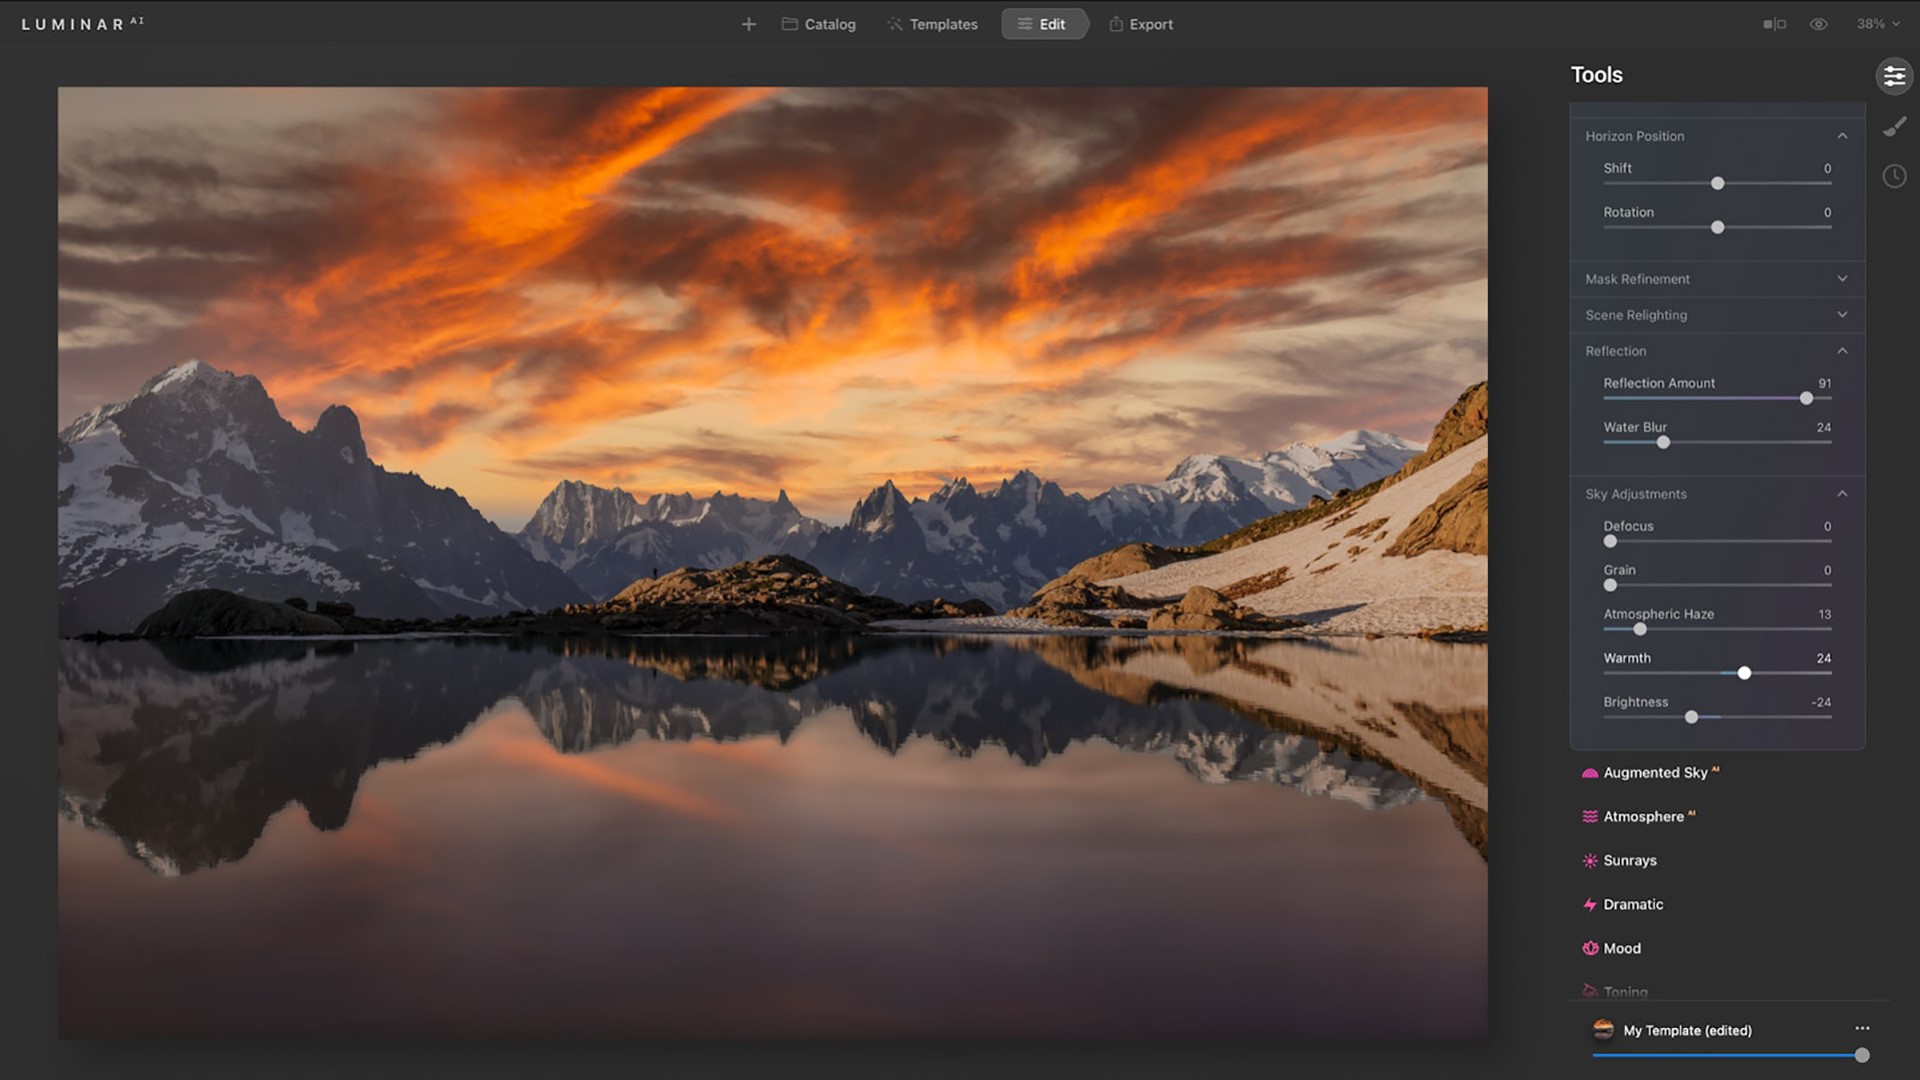
Better Reflections

The Sky Adjustments section in SkyAI is where you can easily adjust the new sky to refine Atmospheric Haze, Warmth, and Brightness. These controls let you precisely adjust the mood of the sky and match it to your scene… and now to your reflections too! With the Sky Adjustments tools, you can precisely colour grade and tone your photos with great flexibility.
Plus, you can now add a realistic Water Blur to the reflections in your image. This lets you better match reflections when the water surface has waves or ripples.
Better Relighting

Improvements in colour accuracy create a more natural effect when the new sky is used to automatically relight the entire scene, including reflections. Three relighting controls allow you to fine-tune the lighting to fit your creative vision.
As soon as you replace the sky, the water is instantly relit. This gives you the ability to replace a daytime sky with an evening sky or a simple sky with a dramatic one.
LuminarAI calculates the correct reflection in the water and matches lighting across the whole image.Fantastic worlds in your skies with Augmented SkyAI
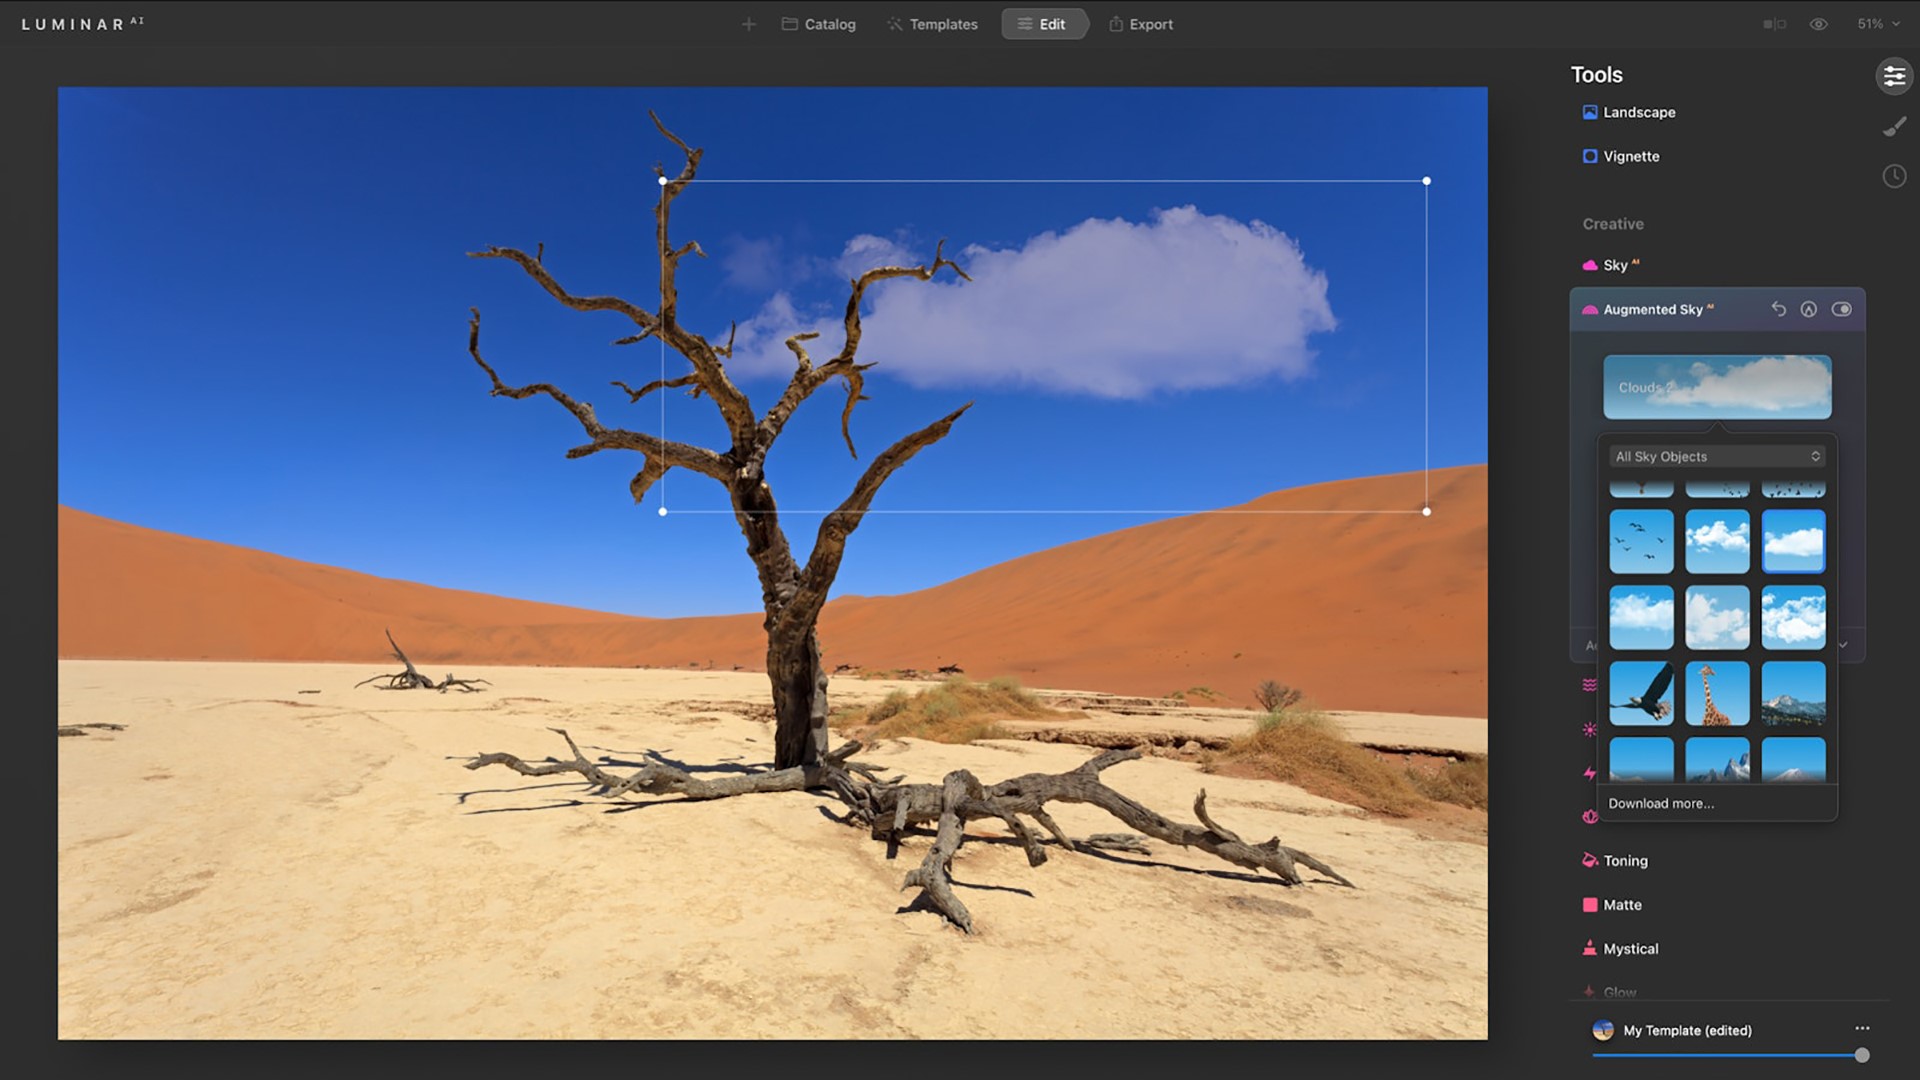
You can now instantly preview Sky Objects you add to the custom folder. Select any Sky Object in the visual browser to instantly preview it in your scene.
Just be aware that augmented Sky Objects will not be reflected in the water.
Convenient Template browsing

Templates are a great way to explore creativity. LuminarAI scans each image and can recognize more than 7,000 types of objects. It then offers editing suggestions based on image contents. For example, LuminarAI can recognize a dog in a photo and suggest Templates especially for pets. You can use these suggestions to finish your images quickly or as a starting point to get up and running.
Faster application launch time
This one is a real deal breaker for me.
There’s been improvements to the core engine that loads when you launch Luminar. So you should see reduced launch times when you startup the application.This will let you get to editing sooner.
Improved tools

- Dodge & Burn tool — Easily paint highlights and shadows in your photos to enhance the mood. And with the new Softness slider, you can subtly refine the edges of the affected area for a more natural result.
- Erase tool & Clone tool — Both of these tools offer non-destructive editing to easily remove unwanted objects or blemishes. Thanks to the Undo and Redo commands that are now available not only on macOS but also on Windows, there is no need to start over if you make a mistake or change your mind. Just undo the brushstroke and make fine adjustments.
Browsing Purchased Templates
In LuminarAI Update 3, you can now access your purchased Templates visually. Templates in the purchased tab are now organised in a grid so you can easily find and use them. Plus, you can use the “Get More Templates” button to find new Templates directly in LuminarAI.
Seen enough?
But wait there’s more:- New support for Apple hardware and image format
- Support for HEIC image format
- Bug Fixes and Minor Enhancements
Finally if you don’t have a copy of this software – now is the time to get it at a 25% discount.
Go to July 1 – 9th sales.
So, yes, you’ve only got to July 9th to get LuminarAI at this discount.
Go get it!
Share this:
-

Blue water

The tranquil scenic waters of Coral Bay in North West Australia. Click on the link for a bigger image Share this: