
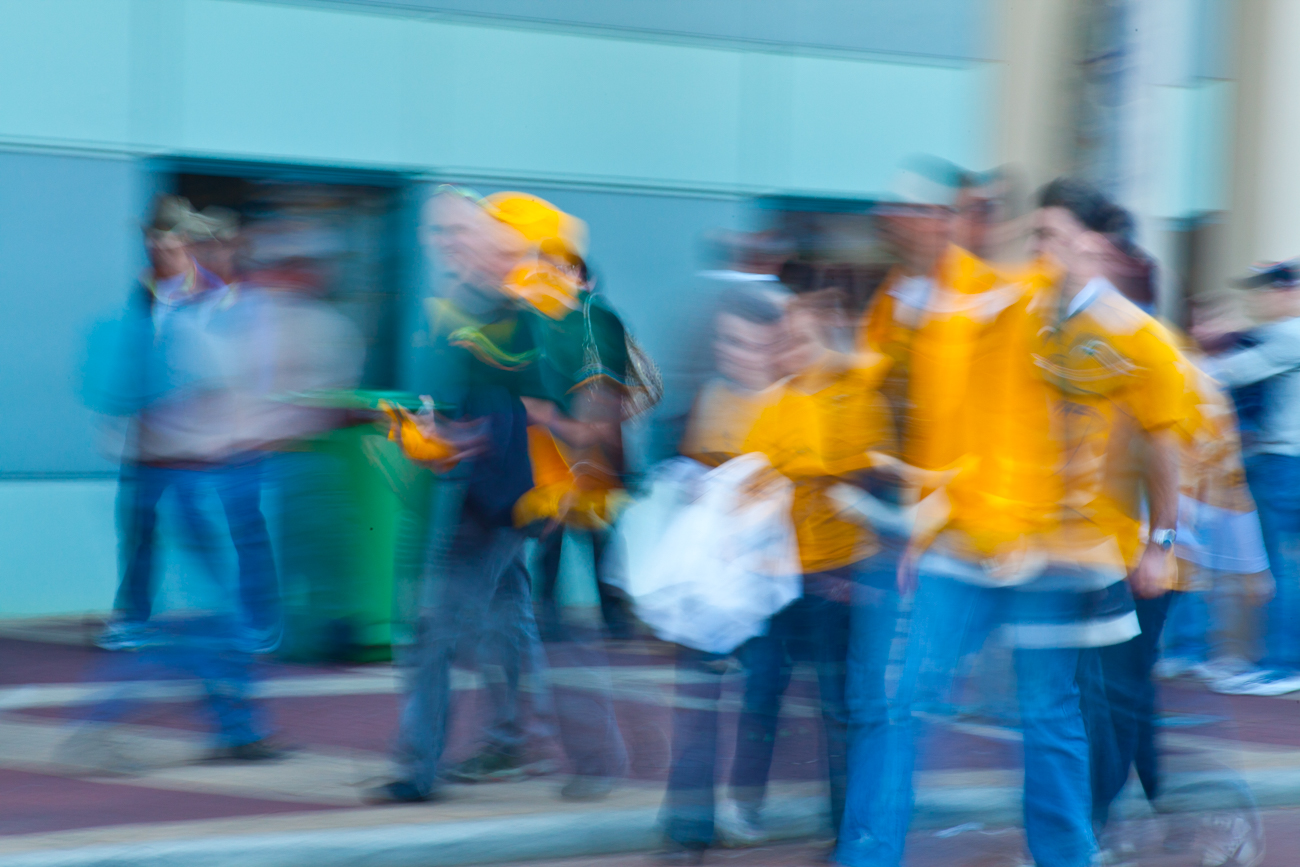
Rugby supporters outside Subiaco Oval in Perth Western Australia
Katin Images Travel Photography
Travel Photos, Travel Photography Tips and Software


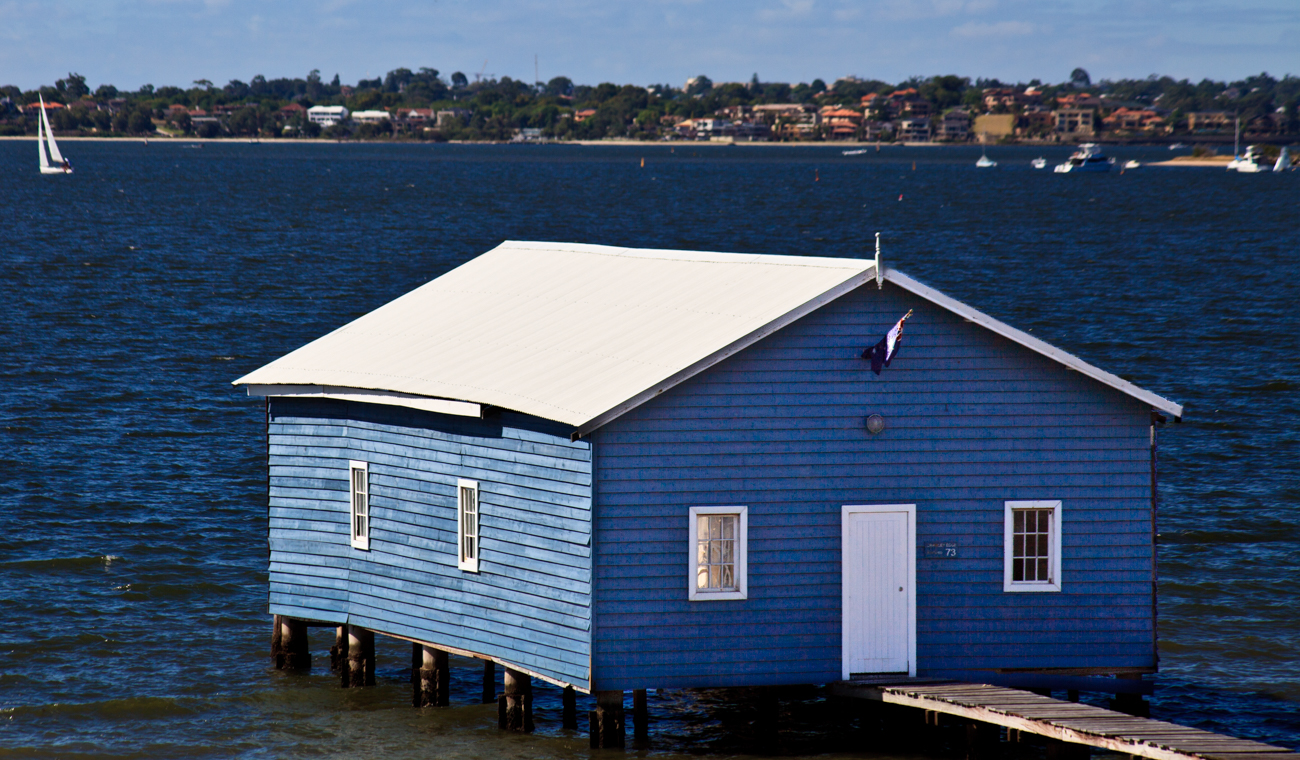
The Crawley Edge Boatshed is a 90 year old blue boathouse at the end of a pier popular with tourists in Crawley, Western Australia

02/02/2022 UPDATE THIS OFFER HAS NOW EXPIRED BUT YOU CAN STILL GET LUMINAR AI AT A REALLY GOOD PRICE USING THE LINKS BELOW.
The big release of Luminar Neo comes up in February.
So if you haven’t yet pre-ordered your copy you have another opportunity to buy before then at discounts up to 66% off on Luminar Neo and get this, LuminarAI and Aurora HDR.
They are calling it the “Travel Beyond” offer and it also includes the some great template packs with their software in bundles or separately. The sale starts on January 26, 2022 (Australia Day for us Aussies) and ends: January 31, 2022
I haven’t been able to show you everything about Neo yet but here’s some images below to show what else there is:
Portrait Background Removal AI
This looks terrific. The ability to change backgrounds in portraits with just a couple of clicks has great potential for portrait photographers

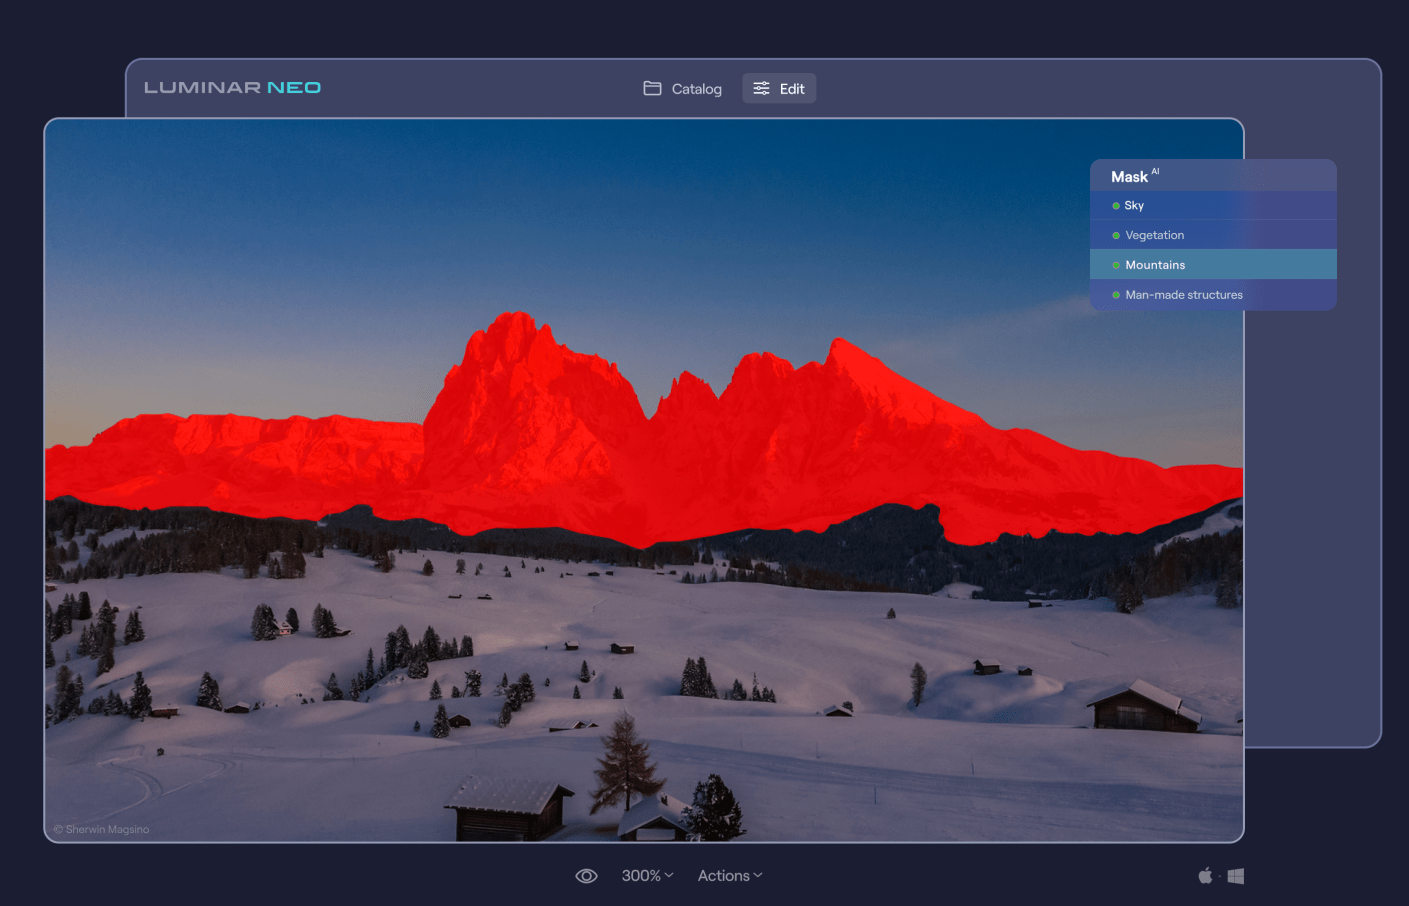
Mask AI
One click masking of objects that have been identified by the software. Sounds crazy!
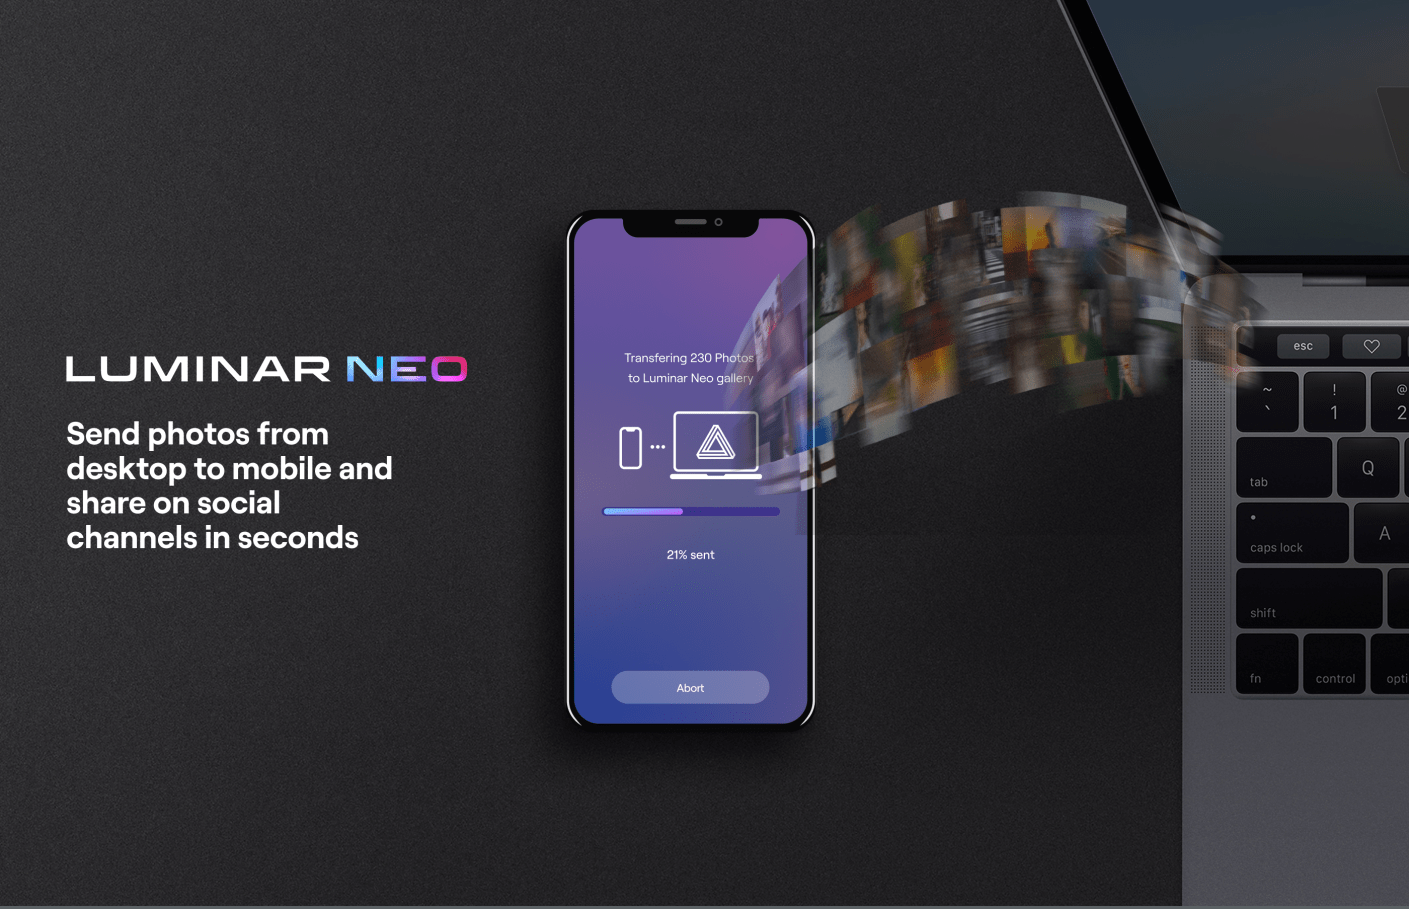
Luminar Share
Luminar Neo has pretty easy way to share images from the desktop software to your smartphone.
So the offers in USD are as follows:
Luminar Neo offer:
1 seat:
Luminar Neo + 1 Free Pack – 30% discount: $69
Luminar Neo + LuminarAI + 1 Free Pack – 45% discount : $98
Luminar Neo + LuminarAI + Aurora HDR + 1 Free Pack – 61% discount: $108
2 seats:
Luminar Neo + 1 Free Pack – 25% discount: $89
Luminar Neo + LuminarAI + 1 Free Pack – 41% discount: $128
Luminar Neo + LuminarAI + Aurora HDR + 1 Free Pack – 56% discount: $138
You need to go here for this offer
If you haven’t got LuminarAI or Aurora (HDR) yet then they have this offer:
1 seat:
LuminarAI + 1 Free Pack – 52% discount: $47
LuminarAI + Aurora + 1 Free Pack – 66% discount: $67
LuminarAI + Luminar Neo + Aurora HDR+ 1 Free Pack – 61% discount: $108
2 seats:
LuminarAI + 1 Free Pack – 50% discount: $59
LuminarAI+ Aurora HDR + 1 Free Pack – 64% discount: $79
LuminarAI + Luminar Neo + Aurora HDR + 1 Free Pack – 56% discount: $138
You need to go here for this offer
These are pretty big discounts which when you consider Neo is due our next month are very generous.
So what are you waiting for?
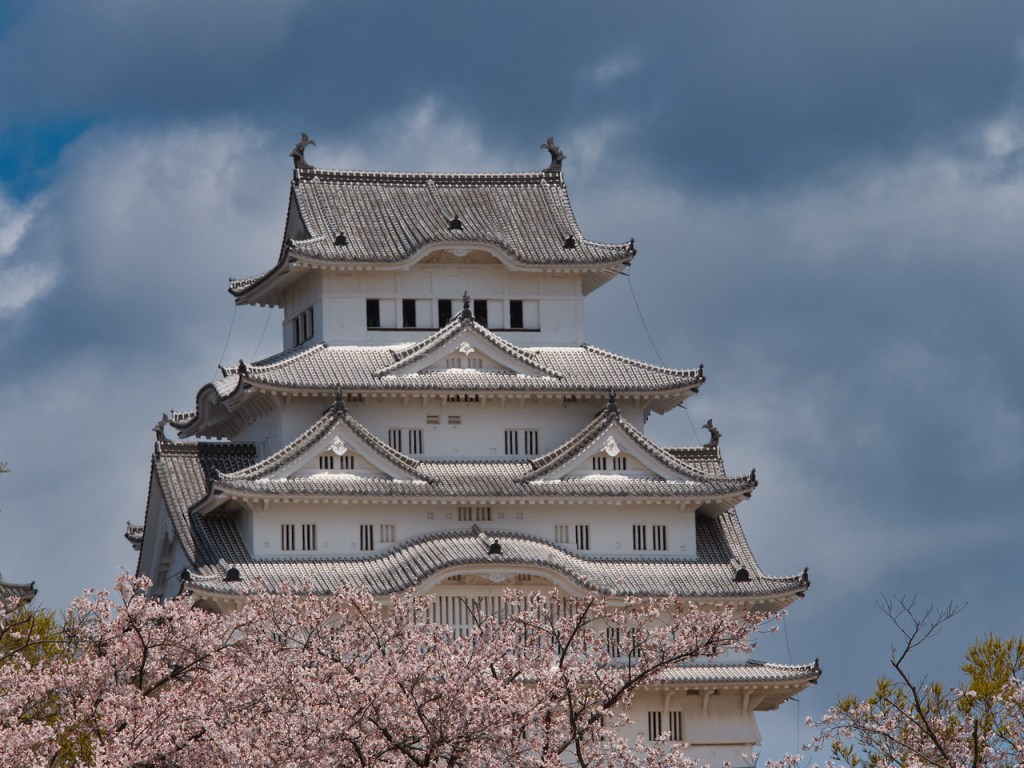

Himeji Castle and Cherry Blossoms, Himeji, Japan. Click on the lick for a larger view and other options


Torii shrine gates at the Fushimi Inari-Taisha complex in Kyoto, Japan. Click on the lick for a larger view and other options

As you may or may not know I’m an affiliate for Skylum who make some great editing software including that of Luminar AI – go to the link below for more on that.
I wouldn’t promote them if I didn’t use and like their software.
Well, they are releasing a new editing software called Luminar Neo that I think is a game changer. It’s aimed at the photography enthusiast, semi pro or pro who wants to have complete control but also want some of the more mundane tasks done with one click.
As a comparison Luminar AI is aimed at those photographers who really want to edit their photos quickly but at the same time want to be able to tweak.
Some (certainly not all) of the features are removal of dust spots, relighting, sharing to your mobile device, background removal, portrait bokeh which you can see on one of the links below in Luminar AI, and what I’m about to show you, removal of powerlines in one click.
So if we go into an image and then click on edit followed by erase. Now we have a drop down menu and second from the bottom is “Remove Powerlines”. Click on that and watch the magic.
While you’re watching let me show you another tool that I have a demo for. Again click on the image then edit and then “Relight”. Another menus appears where you can control the level of brightness for both the foreground and background and then adjust the depth of the adjustment from the front to the back. Easy!
It’s not due for release until February 2022 but at the moment they are taking preorders for around US$60 for a single licence which is a $20 saving. But it’s only available for the next 2 days. Go to Luminar-neo before it’s too late.
For more on Luminar AI go here. To see the portrait bokeh specifically in action on Luminar AI go here.


Rice paddie worker near Padangaling, Bali Indonesia. Click on the lick for a larger view and other options
The term back up only really became used when computers began to take over the world.
With paper you could make copies and file them off-site.
As we all switched from paper to digital, Business’s started to have tape, then floppy disks followed by CD’s for backups of the day’s work.
Now you have back up servers some of which are in the cloud.
Photography back up
Before digital, you were able to have extra copies made of photographic prints and file them somewhere else.
Not so with negatives and slides. Well that’s not strictly true, you could get copies, but it was expensive. It was not until digital came along that we began to realise that we had the option to back up all our precious photos.
We could even do it retrospectively, if we had plenty of time or money, by scanning film and slides.
In those early days the floppy disk and then later the CD or DVD were the main back up mediums.
But as with film and slides we all ended up with boxes of DVD’s. Whilst smaller than boxes of Slides and Negatives they still took up some room.
Let’s take a look at what options we have now.
The simplest and most convenient way is to connect directly to a Laptop or computer. This is done via the cable, now mostly a USB-C, that each camera manufacturer supplies to a laptop or computer. Once you have it on the computer you are free to copy it anywhere else.
All camera manufacturers give you that option. The main disadvantage is that some of the cables supplied are not usually off the shelf if you lose them. Additionally, some of the older camera ports tend to be non-standard or at best not common.
When you take an image with a digital camera it sits on the memory card that you have in the camera.
With a smartphone that image will generally sit on the phone’s internal drive. However, you can change it to sit on a microSD, if that’s available.
Memory cards can also be used to back up your photos either via a computer or in some camera models.
Well you remove the memory card from the camera and insert into either a computer memory card port or a card reader that plugs into the computer.
Likewise, the same applies with a blank memory card. Once both cards are loaded you copy from one to the other.
Backing up in camera is usually confined to some of the more high-end cameras. These now come with two memory card slots that you can use to either extend the memory or use the second slot as back up. When the latter is set, each time you take an image, it not only sits on the first memory card but also on the second.
Another option is to transfer it in camera periodically but that can be dangerous if you forget to do it.
The system of using memory cards as a backup medium is not used that often unless you are looking to immediately back up and that’s your only option.
One recommendation I would make is to use something similar with a smartphone.
With a smartphone, the potential to lose it or drop it is much higher than a camera. I would suggest a microSD if that’s easily removable (otherwise you will lose it with the Smartphone!)
Another option is a small flash drive that can be attached, usually through the charging port.
Why would we need to do that when we all rely on the cloud to backup our photos on a smartphone?
Services like Google Photos, or iCloud work well when you have connectivity. But what about when you don’t have connectivity?
A few years ago I stayed a few days in a remote resort called Berkley River Lodge in the Kimberley region of Western Australia.
There was no phone signal at all and WIFI was limited to 50m from the reception hut. We were on a helicopter trip heading back to the resort. One of the other guests was taking pictures of the sunset with an iPhone when he lost it out of the window. I might add that the phone wasn’t his, it was his partners!
We had also all been warned not to take your phone too close to the window during the flight as, you’ve guessed it, it could get sucked out.
Anyway, apart from looking like a Kangaroo in headlights, he lost the phone.
All the photos that they had taken in the last few days were only on that phone.
And as they had no way of backing them up other than using iCloud they were lost with the phone.
Lesson from that is not to rely on the cloud as back up for smartphones or indeed anything else.
If you have another device like a tablet, then you can set up a hotspot that will enable you to transfer or copy your files to the Tablet.
But if you are likely to be without the tablet and have no connectivity, then a Mobile flash drive is a no brainer.
An option to standard Memory Cards are WIFI cards. Even if your camera has Wi-Fi capability this still allows you to back up your images to another device.
If you have a fairly new camera, then chances are it will have WIFI capability anyway, so you can backup via WIFI without a special WIFI Memory Card.
However, in both these instances the issue is space.
Most Smartphones or tablets are around 128GB and if you are shooting RAW over a 2-3-week period it doesn’t take long to max out. For example, last year at a African Game Park I shot around 64GB of RAW and JPEG images.
There are a lot of devices out there that you can use to back up your photos. Most of them are portable hard drives
There is the basic hard drive that you plug into a laptop or some tablets. You then copy the files to the hard drive via the Laptop or Tablet
Some hard drives have a SD Slot for your memory card. You insert the card and it automatically copies to the drive.
So, in theory you don’t need another device. Yet, unless you plug into another device you are not going to know whether it has backed up all your photos correctly.
Another option is the wireless Hard Drive. This is like a hybrid. They have SD slots as well as having the option to wirelessly copy images via the hotspot I mentioned before.
This has the same disadvantage of not being able to see what images have been copied across. Although some do allow you to view the contents of the drive from a smartphone or tablet as well as a computer.
Then there are hard drives that have a screen that lets you view the images even if they are RAW.
Lately hard drives come in two types, HDD mechanical Hard Disk Drives or SSD Solid State Drives.
The differences are basically that SSD’s are faster but more expensive.
In a computer or laptop then I would go to an SSD every time. With portable hard drives, where there is only data being stored, then it’s really a personal preference.
For more on the difference read this article on PCMag.
How many cloud services are there now? There’s Apple’s iCloud, Microsoft OneDrive, Dropbox, Box, Google Drive, Crashplan, Backblaze, Carbonite and there are the Photo Sharing Sites (more on that below).
Of course, all cloud backup services depend on the internet. So if you are travelling, you are relying upon there being an internet connection. That is often beyond your control.
There is much better connectivity than there was 5 years ago and I’m sure that there it will improve even more.
But as I mentioned earlier there is always somewhere that the internet is not connected.
Even with an internet connection, the bandwidth or speed can be poor. Meaning that the time taken to upload your photos can be long and arduous, and therefore frustrating.
Whether you use the cloud or not is dependent on a couple of things:
One is the Camera equipment.
For instance, a Smartphone has inbuilt cloud capability and relies heavily on there being an internet connection. That is either by the phone signal e.g. 5/4G or a wireless connection.
On the other hand, unless you have a 2-3-year-old camera, then there is every chance that the camera you have will not have Wi-Fi capability. Even a lot of the new ones only allow you to upload to a phone or tablet from which you then have upload to the cloud.
The other reason is the interface and ease of use. I haven’t tried all these services, but of the ones I’ve used, iCloud and Dropbox seem to me to have the best interface and ease of use.
There is one further reason and that is price. Prices vary so much with specials and add-ons that comparing them is likely to be totally inaccurate by the time you might read this.
The other thing to consider is security. I hesitate to say it but using the likes of the big guns like Microsoft, Apple or Google does give a sense of security, compared with the smaller players.
That may well be false.
But it’s worth asking a few questions. I.E. where are their servers? What happens to the data if a server goes down or heaven forbid the company disappears?
What do I use? OneDrive. Why because Microsoft gives me 5TB with my Office 365 subscription.
The other cloud-based storage systems are Photo Sharing sites. These are likes of Flickr, Smugmug, Google Photos, Pixbuf , Photobucket, 500PX, My Portfolio, Amazon Prime Photos plus a few others.
These add a bit more to the concept of back up.
Usually it’s a subscription service that allows you to view and share all your photos. Some even have their own social media interface meaning you can browse other user’s photos and comment or share.
Flickr was the first of these and now has been gobbled up by the expanding Smugmug.
Take a look at my site on Smugmug to get an understanding.
Unlike the straight cloud backup services, some of these sites don’t support all file types.
So, if you are looking for a complete solution to house and view your RAW files for example, do your due diligence.

We’ve covered a broad summary of what there is out there to back up your travel photos whilst you are on the move.
What about when you get home?
All of the above apply to your home base as well.
But you can also add in Desktop Drives
Desktop Drives used to be fixed to one certain location. But with the growth in portable hard drive storage, the fixed and portable are overlapping.
Most of us these days have Laptops instead of desktop computers which gives us freedom to work pretty much anywhere.
So, plugging in a portable hard drive as not only an expansion to the laptop storage, but also as a backup is easy.
For the fixed you have three main types.
Standard hard drives that connect via USB or Apple’s Lightning and have their own power supply.
Cloud based drives that connect into a network also called NAS (Network Attached Storage)
This is different to the cloud services mentioned earlier. These are hard drives that are physically in your space but can be accessed remotely via an internet connection.
They also come with a power plug for an independent power supply
The last type is called a RAID system (redundant array of inexpensive disks) that also have their own cloud. This is a trickier system to manage and install.
Basically, it is several hard drives usually in multiples of 2 that back each other up. Where it can be confusing is the many different set up combinations available.
It’s a way of ensuring that should one back up drive fail then there is always another one that has identical data, so that you can sleep easy.
Now I think it’s time for me to give you my system.
Depending on the duration and the reason for the trip, I will carry either one or two SSD Drives, my surface pro and a memory card reader. I also now carry, since seeing the guy at Berkeley River lose an iPhone, a portable flash drive that fits my Samsung S10.
I am fortunate that my Olympus OMD1 MKII has dual memory card slots, so I use one of these memory cards as back up. Additionally, every evening or at least every couple of evenings, I back up one of the memory cards to both SSD’s. If I have been diligent enough to clear the hard drive on my surface before travelling, I back up to my surface as well.
I back up my Samsung S10 to my surface if I am confident that I have good internet for the cloud back up to my OneDrive service. If I ‘m unsure of the connectivity, then I will back that up to my portable flash drive and later the surface.
I have used the iPad Pro as back up in the past. But due to the number of apps it has, it only has a small amount of spare storage compared to the surface.
Back up is a relatively new concept in the photographic world. It has only been around since the advent of Digital photography
There are many forms of back up for the travel photographer
Memory cards can be used for short term back up
Smartphone Cameras rely on cloud services, which can be unreliable when travelling.
A flash drive or microSD is a more reliable medium
New cameras can upload photos via different WI-FI systems to the cloud but only via another device
There are many different hard drives that can be used as back up devices.
They can be like small computers with their own screens and flexible connectivity.
Speaking of Cloud back up, the number of services available is huge. So, you need to select carefully before using one of these to ensure it meets your needs and security
Photo sharing sites like Flickr and Smugmug can also provide a level of back up for your photos
Then we get into the heavy duty physical hard drives. These use sophisticated software and multiple drives that you can create your own cloud with.
Any questions then please contact me here
Feel free to share this to your social media of choice
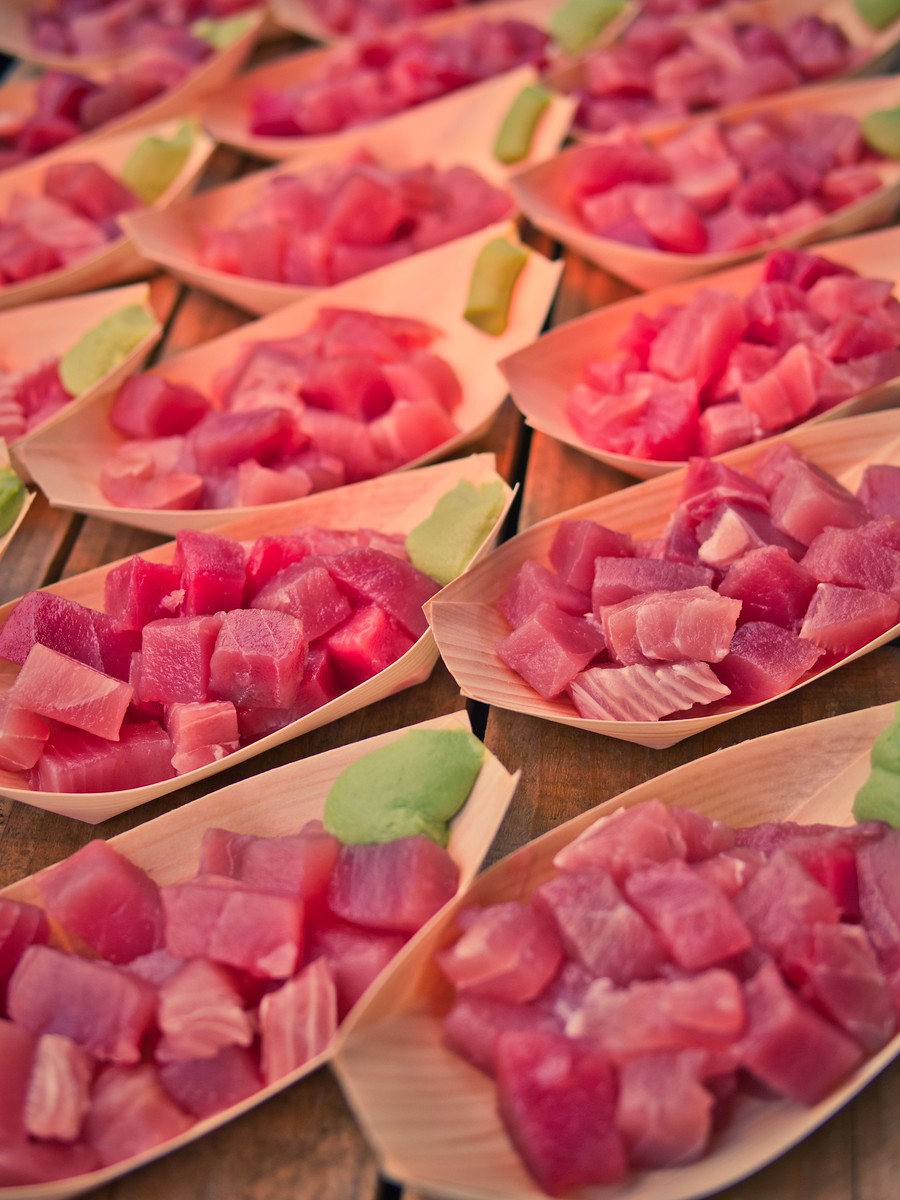

A boat of Tuna and Otoro served up in Tokyo’s Tsukiji Market. Click on the image for a larger view and other options
In the previous post, “Introduction to Travel Photography,”
I touched on the fact that there are several different types of travel photography.
In this article we cover the different types and genres and how they apply to your future travels
The best way I find, is to break it down into destinations. By doing that you are preplanning what skills you need to learn or refresh for your upcoming or future trip.
Let’s take an easy one. Europe
What do we travel to Europe for?
These are a few reasons:
History
Food
Landmarks
Landscapes
Activities
Sporting Activities
Language
Drink
So each of these reasons will correlate to a different type of travel photography.
Let’s take history:
Interior shots of museums, Churches, Palaces and galleries are a few examples.
To get some good shots you would need to get comfortable shooting in low light. By learning how to do this and how your equipment will perform will enhance your photography.
Another genre for History would be architectural.
Shooting some of the worlds’ most impressive buildings like Saint Peter’s at the Vatican are a must if you are travelling to Rome.
Then of course there are battlefields from different wars over the ages.
From Gallipoli to the Battle of Hastings to the trenches of World War I in Belgium. Most of these would be landscapes.
We now have the theory behind using destinations to think about different types of travel photography.
Europe
Landscapes, Architectural, Interior, Festivals, Lifestyle, Food and Drink, Street
North America
Landscapes, Architectural, Lifestyle, Nature, Wildlife, Street, Food and Drink, Wilderness

Asia
Street, Food and Drink, History, Landscapes
South America
Landscapes, Architectural, Lifestyle, Nature, Wildlife, Street, Food and Drink, Wilderness
Antarctica
Wilderness, Landscapes
Africa
Wildlife, Landscapes, Street, Food and Drink, Wilderness
Australia and New Zealand
Nature, Landscapes, Street, Food and Drink, Lifestyle, Wilderness. Wilderness could be considered a part of Landscape. Yet there are some specific challenges that need to be considered when you are out in the remote areas.
I’ll go into more detail in future posts.
But the trick is to look at the destination and then decide what sort of images are available and what you would like to take.
For instance, if you were travelling to France, you may decide that you don’t want to take photos of the landscape as you are only going to be in a couple of cities like Paris and Lyon.
But even in cities there can be opportunities to take landscape photos e.g. Jardin des plantes des Paris – the Botanical Gardens of Paris
As you can see there are many different types of travel photography.
But what if you want to choose a few main ones? Which ones should you choose?
Well if you go back to the list you can see a few that reoccur. Landscape, Architectural and Street are three that would set up any budding travel photographer with the building blocks to improve and learn new skills.
It also depends on interests.
If you are an outdoors sort of person and you intend spending time at travel destinations with wild open spaces then you may wish to concentrate on Landscape, Wildlife and Wilderness.
Breaking down these different types of travel photography into subjects is also useful:
Landscape
Mountains, Snow, Ice and Glaciers, Deserts, Coastal, Forests, Water,
Wilderness
Similar subjects to Landscapes. As I mentioned before, it’s not so much about the subjects but more about the logistics and specific challenges i.e. Extreme temperatures, Remoteness etc.
Street
Portraits, Daily Life, Streetscapes, Local Interactions, Traffic and Transport, Street Art
Architectural
Interiors, Building detail, Urban Landmarks, Skylines
Nature
Flowers, Forests, Lakes, Rivers, Weather, Sun and Moon
Wildlife
Animals, Insects, Birds, Reptiles, Marine Life, Habitat
I could break down these genres and destinations even more but I don’t want your eyes glazing over.
Just as you would plan your travel or holiday experience you also need to plan your photography beforehand.
Working out what photos you will have the opportunity to take and which ones you want to take, will not only help you enjoy your experience but also bring home some ‘awesome’ photos.
So you can see that there are lots of different types of travel photography. These can be classified as genres but also working out what types of photos you will be taking at your destination plays a big part.
Some of these genres e.g. Wilderness also have other challenges not necessarily related to the act of taking a photo.
Research and Planning is essential
But remember, if this feels too overpowering you can always just select some or one area to specialise in to begin with.
Any questions then please contact me here
Feel free to share this to your social media of choice
Just click on any of the images for a larger version and for other options


A barber resting between clients, Bikaner, Rajastan, India. Click on the image for a larger version and for other options

An Introduction to Travel Photography
Definition
According to Wikipedia the definition of Travel Photography “is a genre of photography that may involve the documentation of an area’s landscape, people, cultures, customs and history.
The Photographic Society of America defines a travel photo as an image that expresses the feeling of a time and place, portrays a land, its people, or a culture in its natural state, and has no geographical limitations.
There are other definitions but those two pretty much nail it.
Travel Photography, unlike most other genres is a later addition to Photography.
When Photography was first invented in the early 1800’s few people travelled and for the next few generations any who did were only the wealthy ones.
The major pioneers in travel photography were explorers who wanted to visually document their experiences whilst exploring.
But you had to be keen as they had to carry the bulky equipment.
Not only was the camera equipment itself heavy but, as the frames needed to be developed almost immediately, the photographer needed to have a darkroom and enough chemicals for a small laboratory.
Of course that all changed when Kodak invented a camera that used a roll of film and then introduced the Kodak Brownie.
Almost immediately photography was a lot more accessible and therefore popular with explorers and traveller alike.
But it wasn’t until colour film was introduced that travel Photography became a mass media.
Even then not everyone had a camera or if they did they didn’t use it whilst travelling.
Digital photography changed all that. And then Smartphones come along.
Now anyone who steps outside their door takes pictures.
We have millions of images of exotic and not so exotic locations being circulated by social media and other forms of communication.
It wasn’t until I went travelling that I took an interest in Photography.
It was to be a 7-month trip around the world and I felt that we needed to document, as well as we could, our experiences.
So it was I had 2 very different skills to learn, how to travel and how to take photos of my experiences. It was a challenge, but it was one that I learnt so much from.
That’s the beauty of Travel Photography. Yet, there are times when you must forget all the techniques and the technical stuff and be in the moment of the experience.
Knowing when to take that shot or not is a skill in itself.
That too me is what Travel photography is all about.
Of course, when you travel there are lots of subjects that you will want to take photos of:
Landscapes, People, Festivals, Entertainment, Urban, Food and Drink and Wildlife are the most popular.
Landscape Photography is taking images of usually the area in front of you.
That can be a mountain range, a field of flowers, the desert, pretty much anything that is of a natural beauty.
Some manmade objects e.g. a lakeside house or a sailing boat can help with context.

Always a difficult one to get right. People move, blink, frown and often, whether posed or not, can assume unflattering positions.
Taking portraits in different cultures are a great way to get to know locals and customs.
We are all fascinated by the daily life of those in other countries. Travel Photography gives you the option to capture that.
Festivals
The Colour and movement of some of the world’s most famous and not so famous festivals can make great photos.
Even the local fete can offer some interesting character or scene shots
Shopping in the market, Music and Theatre performances are two events that come to mind when taking photos in the field of entertainment.
But there is also sporting events like a game of footy or nightlife. The latter being particular challenging due to the lack of light.
What is urban? Good question! I guess it’s Street Scenes, Street Art, Sky Lines, Architecture, both inside and outside and even Light Shows.
There are many food and drink situations. You may want to take some photos of where you are, what you are doing, eating or drinking.
In a restaurant, a winery, in a field or at the market.
Food and Drink is quite a diverse genre. But it can also be the most creative and satisfying, especially if you are having a great experience at the same time.

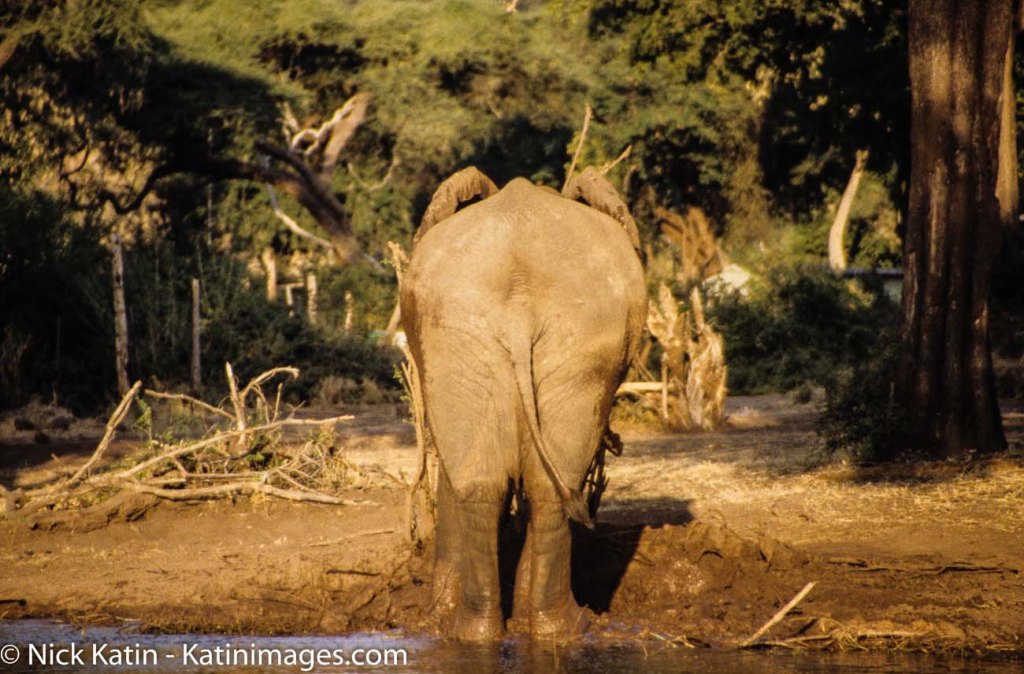
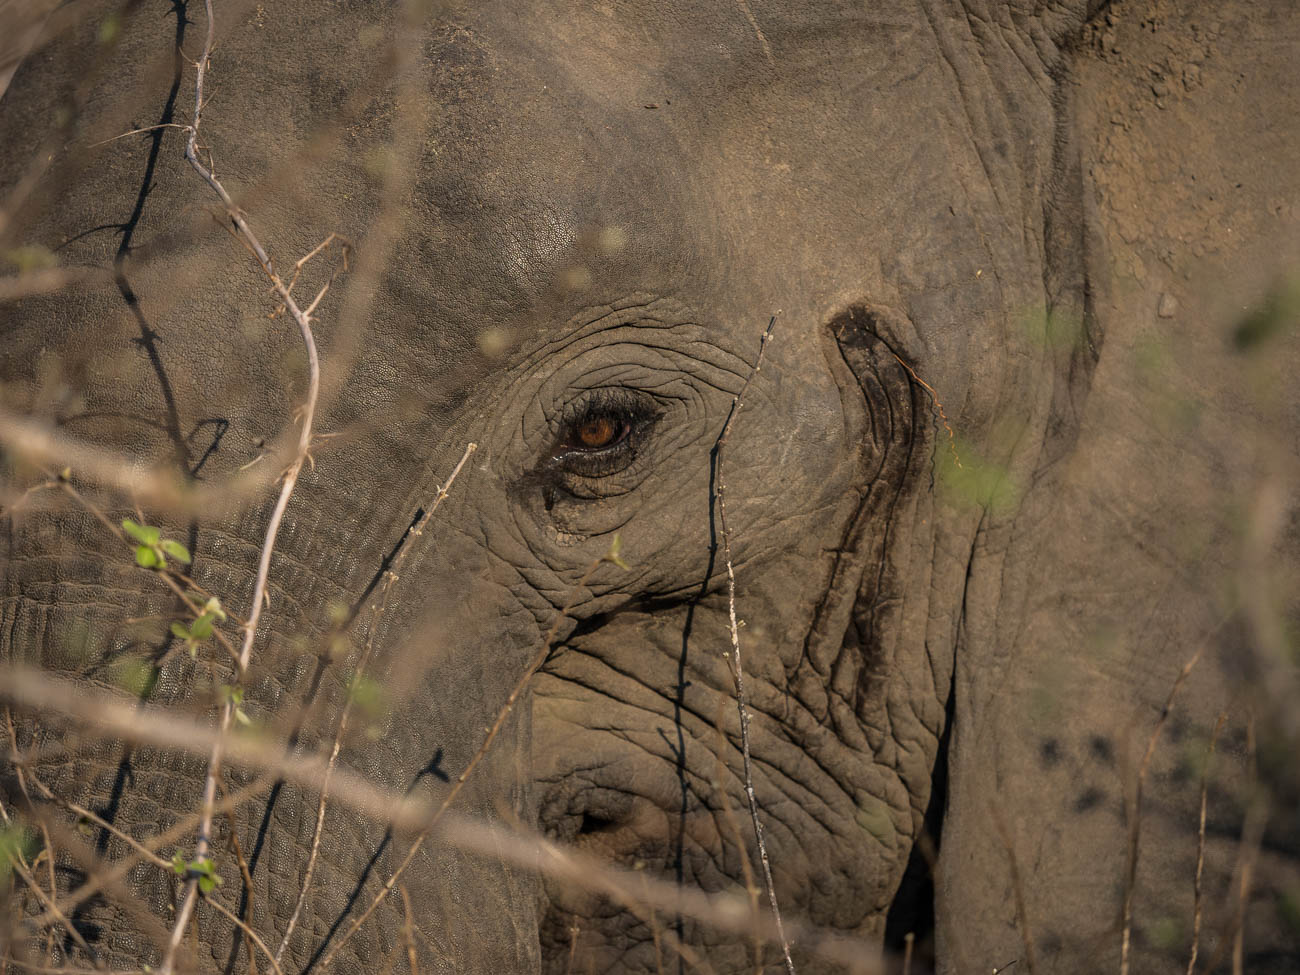
Who doesn’t want to capture that great shot of a Lion or Leopard in the wild somewhere in Africa.
But there is more to it than the big 5 (the big 5 is Lion, Leopards, Rhino, Hippo and Elephant).
Even going to a Zoo or Sanctuary can provide some great photographic opportunities.
There are various types of environment for grabbing a shot or 2 of wildlife. Marine, Forests, National Parks even the Urban Environment can have wildlife.
But be wary of two things, firstly your safety is paramount, don’t be that person who steps outside the car in a Lion park.
Secondly, wildlife photography is challenging.
There are photographers who have devoted their lives to taking great wildlife shots. They will spend days even weeks waiting for that ‘one’ shot.
Travelling over time means you will experience all types of weather which can make it difficult to use your camera equipment.
Rain, Heat, Cold, Snow, Dust they are a few extreme weather extremes that we all will experience in our travels.
But even though taking photos in such conditions will take you out of your comfort conditions, often it will be well worth it.
So, don’t run for cover (unless of course your life is in danger) embrace the challenge.
By copyright I don’t mean your copyright. More and more their famous landmarks (and People) want to control their image.
For example, under French law it is illegal to take photos of the Eiffel Tower’s light show at night.
Of course, we’re not all going to check on every possible landmark but it’s worth a quick google on a big-ticket item.
So you now you know the sort of experiences that you will want to document visually, how do you do it successfully?
Well firstly, you will never stop learning! I’ve been shooting for 22 years and I’m still learning.
That’s not to say you can’t learn to take good even great pictures straight away on your travels.
It takes time to know what to do in certain situations and as you have seen there are many genres that make up Travel Photography.
I hope that this will motivate you to read more from this site and support some of the manufacturers or service providers that I recommend to help you.
Of course, it’s not all about techniques and composition.
If you want to take Travel Photography seriously you need to also be prepared some of the time to:
Plan but be flexible
Be reasonable fit, so that you have the energy to walk for hours at a time
Be Patient enough to wait for the right moment to get that shot.
Develop good social skills so that you can converse with many people, often in a language which you can’t speak
Be creative
Be open to sharing. After all it’s no good taking photos if no one is going to see them!
This introduction to Travel Photography should give you a taste of what’s involved in improving your travel or holiday experiences.
You can see that gaining the skills that allow you to take good or, indeed, great photos will help expand your travels and give other people pleasure.
Travel Photography is about the gear, the composition and being creative
But it’s also about being in a place that’s not your home, adding depth to your experience and bringing home great photos that will live with your memories for a very long time!
Just click on any of the above images to view a larger version and for other options


Surfers waiting for the next big wave at Cottesloe Beach Western Australia. Click on the image for a larger view


