Katin Images Travel Photography

Travel Photos, Travel Photography Tips and Software

Category: Technical

  • How to take an ‘awesome’ selfie

    How to take an ‘awesome’ selfie

    In Why You Need a Professional Selfie I talked about having the need to have a decent self-portrait or ‘selfie’ on your website, social media or publication to show the human face.

    Maybe you’ve decided to get this done but don’t want to use a professional photographer or Uncle Eric who has a good camera.

    In which case read on.

    So just to refresh. In Why You Need a Professional Selfie I suggested that you need to

    Decide what sort of self-portrait you think represents your brand best

    A financial adviser or lawyer may want a more conservative head shot.

    Or they may want a full-length portrait with business like clothes like jacket and trousers.

    A social media site may wish to convey a trendy relaxed image. So, it may decide that, rather than have a headshot, an image of its employees being active may be better.

    Whilst I have concentrated on websites and maybe social media you may also wish to use it for some printed marketing material or even billboards.

    And that’s when the capability of the camera and printing become important

    The four most crucial factors to getting a professional self portrait

    1. Equipment

    I’m going to show you on a smartphone but any camera should do the job provided it works 🙂

    1. Light

    Light is everything. If the light is dull or too bright the image can be too dark or ‘blown out’

    (a term for images that have the highlights way too bright).

    1. A way of mounting the camera.

    How to take a selfie

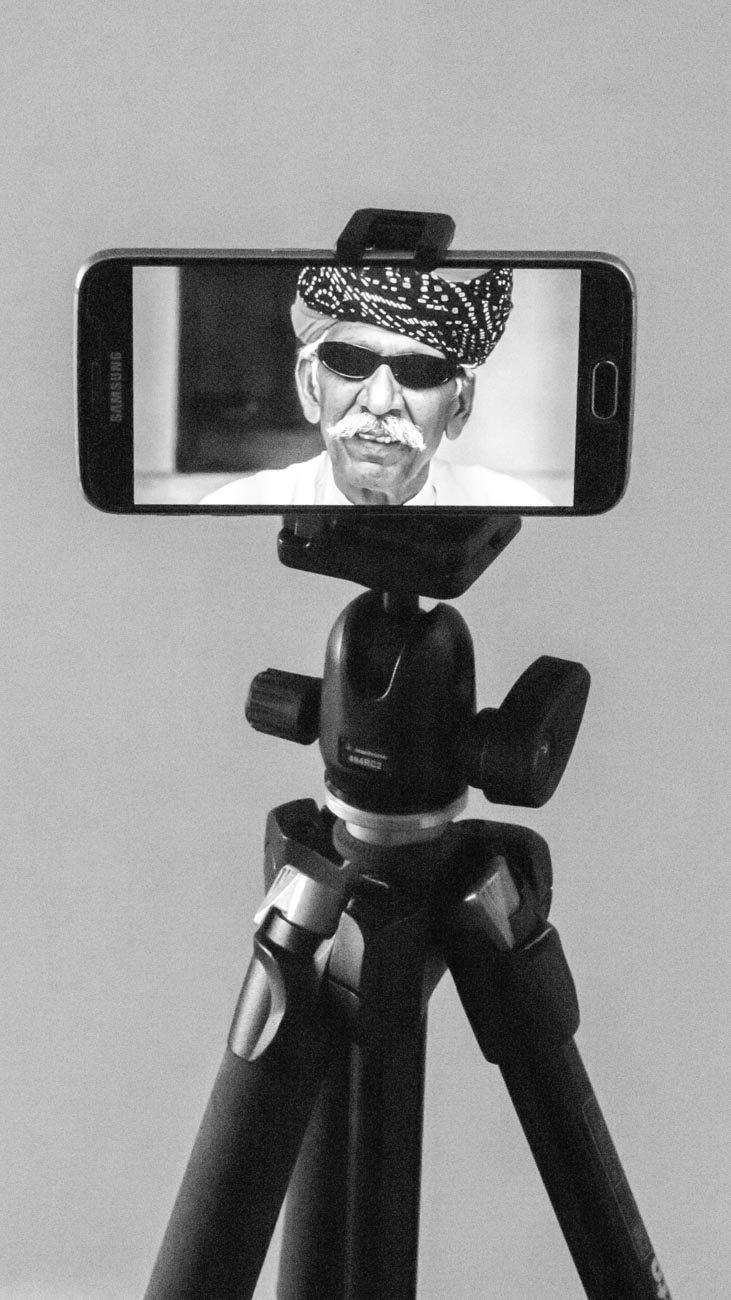
    A tripod is undoubtable the best way if someone e.g. an employee, is not taking it for you

    1. Staging

    Make sure you select the correct pose. You may have to take several different images at different angles to get one you want to use.

    Incidentally there is no rule that says you must use the same image across the all platforms and marketing material.

    Set the camera up;

    1. Regardless of what the use is, make sure you have the biggest resolution. Much better to size down that attempt to upsize.

    On the Samsung S series smartphone cameras for example you will find picture size next to the settings icon.

    Select 16M or 12M or whatever the largest number is.

    The resolution on the IPhone is set to maximum and has no adjustment from that except with the use of a third-party app.

    Some other brands only give you the option to select large or high

    Note: The front camera usually has a much smaller resolution than the main camera so avoid using it for this application

    1. Find the timer and set it to 10 seconds
    1. You can usually just leave the camera on auto if the light is pretty good. But you can change the settings on some smartphones. The only ones I recommend is possibly the ISO or exposure compensation.
    1. Mount the camera on a tripod or any other way you can find to mount.

    I use the Joby Grip Tight Micro Stand a great little find that has a mini stand. It can also be fitted to a standard tripod head.

    Set the scene

    1. Find a well-lit position. You can be creative by sitting or standing near a window and allow the light to be strongest on one side.

    Alternatively, if you want to light up both sides, use a whiteboard on the side away from the light.

    1. Think about the background. Make sure it’s not cluttered and distracting to the eye.

    Again, a whiteboard is handy. White (or off white) backgrounds are always the best way.

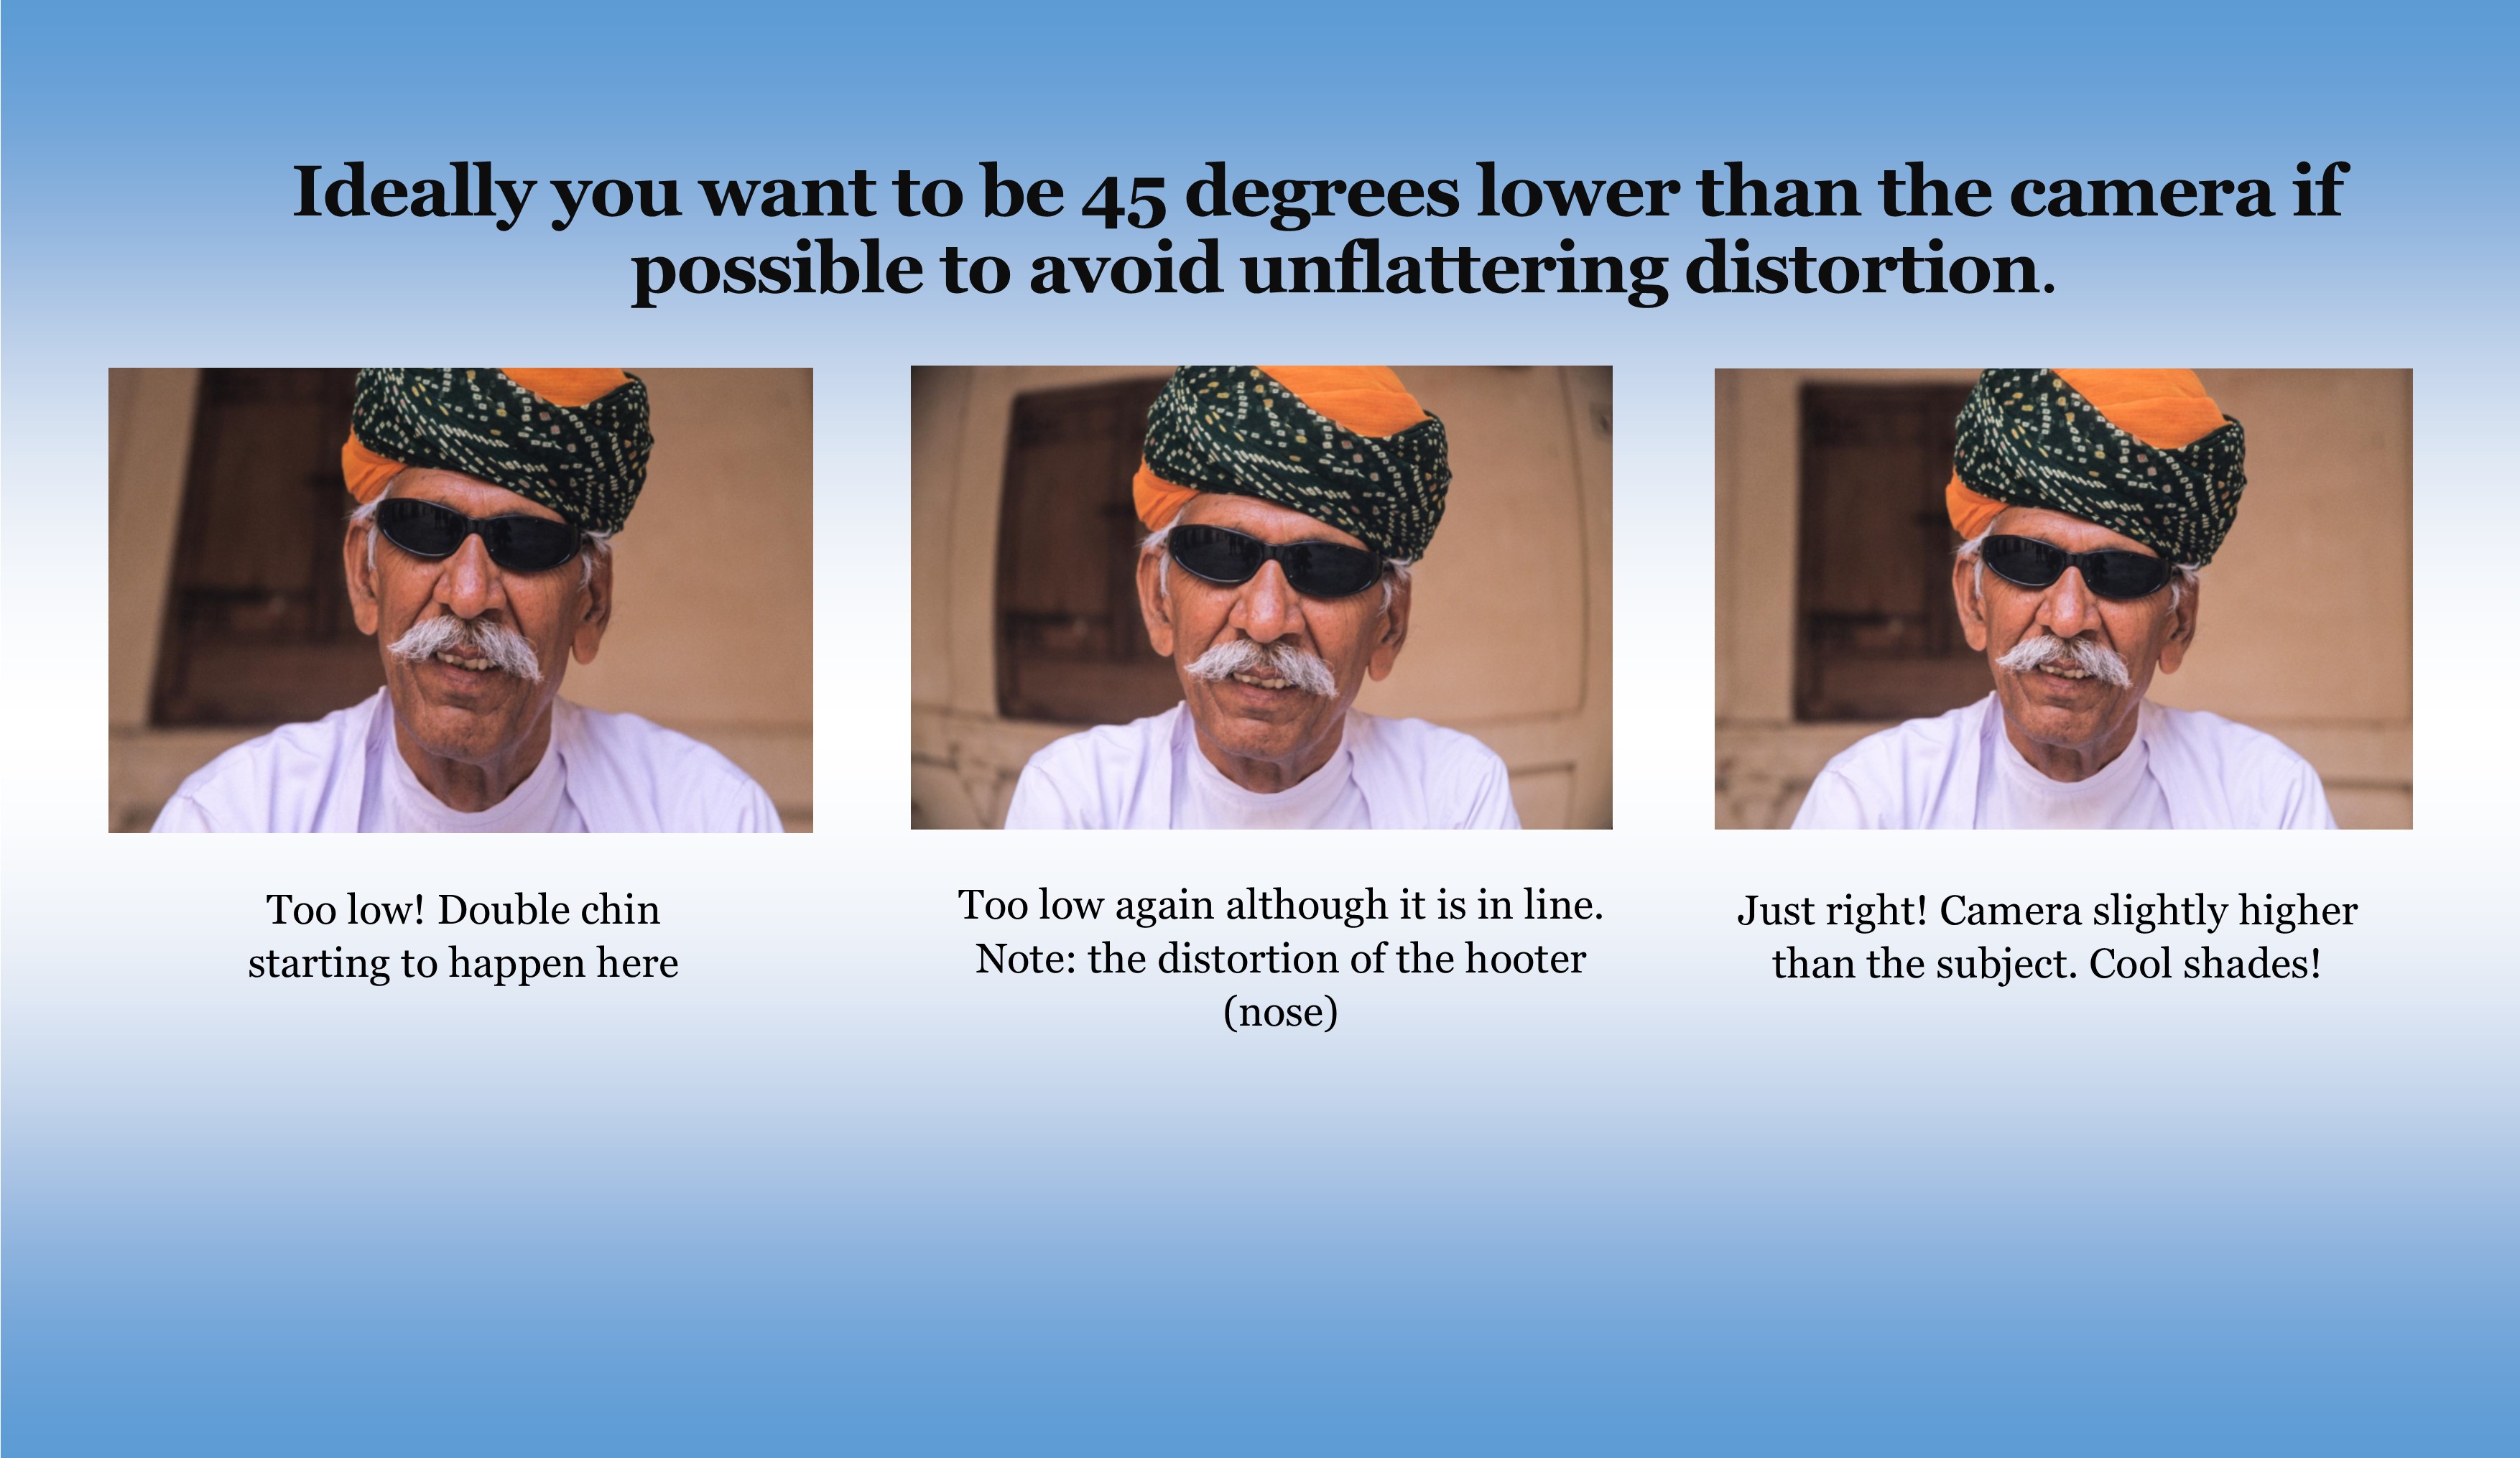
    1. Think about your position. Ideally you want to be slightly lower than the camera if possible to avoid unflattering distortion.
    1. Now comes the tricky bit. Unless you have someone else helping, you are going to have to focus the camera on your final position, be it a full length or head shot.

    The easiest way to do this is to put something in that position and then focus on it.

    1. Just press the shutter button and then get into position.
    1. Take plenty of images trying different poses and maybe different locations. You can’t take too many!

    How to take a good selfie


    Review

    1. Review on your phone and add a filter if you wish. There’s plenty of them out there.
    1. Load the images onto your computer.
    1. Look for softness (slightly blurry), unwanted distractions or items and light
    1. Crop if required. You may need to crop for different applications.
    1. Upload to your website, social media or another platform.
    1. Discuss requirements with your printer if you are using hard copy marketing material.

    Finally

    Rinse and repeat if need be.

    You may think you’ve got it right but there’s always room to improve.


    Is there anything else you want to know? Did you give it a go?

    I’d be really interested in any results that you wish to share.

    Let me know in the comments below.


  • 10 Vital Facts about Camera Aperture

    10 Vital Facts about Camera Aperture

    10 Vital Facts about Camera Aperture

    The aperture of a camera is the centre of the photographic universe.
    Well maybe, the other centre as some would argue, is the shutter.

    No matter, let’s continue as if we haven’t heard Mr ‘some would say’ and show you 10 Vital Facts about Camera Aperture.

    The Aperture and the Heart

    The aperture is pretty much like the human heart, not at a lot goes on in the body without it.

    With your heart, almost everything you do relies on the heart beating at all. Then it needs to beat the correct rhythm to ensure what you want to do can be done.

    It’s often how fast your heart beats that will determine how quickly you can run/walk/cycle up that hill for example.

    So, it is with the aperture.

    If that’s not set properly then the image you get is not what you were expecting.
    Therefore that you won’t be happy with the end result. Especially if the subject you may never get the opportunity to photograph again. 

    So, what’s the 10 Vital Facts about Camera Aperture?

    1. The aperture is hole that allows light into the camera sensor that dictates the end result.
    2. It’s adjustable. You increase or decrease the hole size to get the effect you want.
    3. The amount of light the aperture lets in affects your ability to keep the camera still enough to get a crisp shot.
    4. Contrary to the general belief it’s the aperture not the auto or manual focus that is a major factor in what is in focus and what is not
    5. Aperture is measured in f stops. Confusingly for anyone just getting acquainted with it the lower the number the bigger the hole or opening.
    6. Each f stop doubles the size of the aperture when reduced or halves it when increased.
    7. Depth of field (DOF) is controlled by the Aperture
    8. A large DOF F22 reduces the aperture opening and puts everything in focus from the point of focus to infinity
    9. A small DOF F1.8 increases the aperture opening and just puts the closest item focused on in focus.
    10. The lens you use affects the lowest aperture setting. You may have one lens that will have a minimum setting of f1.8 whilst another could be f4.5

    So why do you need to worry about those 10 Vital Facts about Camera Aperture?

    Well if you are using auto on your camera, you don’t!

    But if you want just a small degree of control then adjusting the aperture is a good place to start.
    Of course, there are filters (and apps for the smartphone users) that you can use to give you some basic creative control.
    But even the best don’t offer the sort of creative control that you can get by understanding how aperture works.


    For example

    This shot of a toy soldier was taken with a large aperture (small f-stop).
    The shot just below was taken with a small aperture (large f-stop).

    If we look at the uses for a small DOF (refer to no 9 above), then you could take an image of, say, someone you came across in your travels. Or it can be anything from a piece of Jewellery to food in the market place.

    The main pool at dusk at the Capital Coast Resort in Cyprus

    On the other hand, you could take a wide angle shot with a large DOF (no 8 above) of a building or a landscape with everything in focus with a small aperture.


    Hope you enjoyed reading this post and found it useful

    Please share if you did. Subscribe to nickkatin.com to get my weekly newsletter for exclusive content and to keep[ up to date.

    You’ll get a free e-book for just entering your email on the form below

    [mailerlite_form form_id=7]

    Let me know if you want me to expand or clarify anything.
    For some further reading check out:
    Understanding the 3 points of the exposure triangle
    and
    Learn how to use aperture priority in 15 minutes

    What other challenges do you have with photography and marketing?

    Leave your comments below.


  • The essential feature to have on your camera

    The essential feature to have on your camera

    This follows on from my previous post Why selecting a new camera is like selecting a new date (or TV).

    Over the next few weeks I’m going to suggest some essential features you need to consider having when you are in the market for a new camera or even mobile phone with a camera.

    At the end of each feature I’ll give a rating out of 10 – 10 being must have.

    At the end of the series if you haven’t had time to read them all then you can scroll to the bottom of the last in the series and get all four in a PDF.

    When we were in the market for a new TV, we discussed all the different features and benefits with retailers and become absolutely confused by salespeople in different shops telling us something different about the same TV.

    For example, one would say this TV doesn’t have Freeview plus whilst another would say that it does.

    In the end I researched on each manufacturers website and even rang them to ensure that the information I had gathered was accurate.

    After doing that we went and bought the TV we wanted.

    So what about the features and benefits of a new camera?
    Well compared to TV’s I think there way more things to think about and personally I believe that there are too many features that are just not needed!

    So over the next few weeks I’m going to suggest some essential features you need to consider having when you are in the market for a new camera or even mobile phone.

    At the end of each feature I’ll give a rating out of 10 – 10 being must have.

    At the end of the series a free cheat sheet for will be available for you to have on hand when you need it.

    So let’s start with absolute must!!

    Mechanical Exposure controls
    Usually on most cameras there are a P, A, S and M modes.

    However, on small compacts there usually is only a P mode and on smartphone cameras, even the best ones, they don’t yet have the option to adjust the exposure the “old fashioned way”.

    So what’s with the “old fashioned way”? Well without going into a great deal of details on how a camera works, I’ll explain:

    All cameras have an aperture and a shutter. Both allow light into the sensor but differently. The aperture allows in light by changing the size of its hole, the shutter allows in light by the speed of its movement.

    Having the option of being able to control both or at least one of these is one of the keys to getting great photography.

    So what do all these letters mean?

    P stands for program and is basically a slightly more sophisticated way of shooting in auto.
    The camera decides which aperture and shutter speed to use but you can also weigh in by using what’s called in the industry “shift”.

    A stands for aperture priority and S stands for shutter priority.
    In both these modes you control one whilst the other one is controlled by the camera. Most pro photographers depending on their specialisation will shoot in aperture priority.

    M is where you have complete control you set both the aperture and the shutter speed and is not something a beginner would dabble in until they have goCamera_0216_017t some experience with the other modes.

    Confused?

    Let’s simplify. Basically if you want to take a photo of a product with all the background blurred than you would need to adjust the aperture.

    If on the other hand you want to take a photo of movement, say one of your dance students practicing or performing then you would more than likely want to adjust the shutter to capture the type of movement you want.

    So It’s really handy to have that degree of control.

    What’s that you say?

    You’re only beginning so you just need auto.

    That’s fine however I would suggest that if you really want to create images that represent your brand then at some time in the future you will need a greater degree of control.

    One additional control that goes hand in hand with exposure is ISO adjustment.

    In fact the aperture, shutter speed and ISO are called the exposure triangle.

    That is to say that adjustment of one affects the other two.

    With each camera manufacturer trying to outdo each other, the ISO on a top end DSLR can now be adjusted to over 400,000 which is crazy, as now the camera can take pictures in the dark!

    When you change your ISO setting, you’re adjusting your camera’s sensitivity to light.

    ISO settings are normally anywhere from 100 to 10,000 (or higher), and these numbers have a direct relationship with the device’s sensitivity and therefore the aperture and shutter speed, so a lower setting means you need more light whilst a high setting needs less.

    Rating: A or S is 10/10

    So did you understand all that? I’m happy to clarify anything you’re not sure of.
    Just post in the comments section below. Don’t be shy.
    While you are at it why not subscribe for future updates here.
    You’ll get my free guide “Eleven easy ways to improve your marketing photography”.