We all know that a picture paints a thousand words. And we know that images are important to our marketing, particularly our online presence.
Why is it then that often the one image that we should have, is missing or at best average?
Which image is that? The SELFIE or as it used to be known as, the self-portrait.
When I visit a website I usually go straight to the about or start here page. It often surprises me how many about pages make no mention of the people behind them. For whatever reason they have no human images.
In my many years of sales and marking there has been one truism people buy from People. Usually people they like but most certainly people they trust and know something about.
There has been a lot of testing and research that confirms a human face on about page increases trust.
When you have trust, the more likely visitors are to stick around and consume your content and/or buy your stuff!
The about (or start here) and contact pages are the usually the most visited pages on a website.
So if you don’t have a picture and some sort of bio you are telling visitors to your site that you are anonymous. We as human beings tend not trust anonymous.
Sure sites like Amazon or Microsoft are anonymous but they have multimillion marketing budgets that go a long way to overcoming their anonymous disadvantage.
So make sure you have a picture of yourself and your key personnel on your website.
So the first 2 steps to think about are:
1. What sort of self-portrait do you think represents your brand?
A financial adviser or lawyer may want a more conservative head shot. Or they may want a full length portrait with business like clothes like a jacket and trousers.
A social media site may wish to convey a trendy relaxed image. So it may decide that, rather than have a headshot, an image of its employees being active may be better.
A tradesperson my want to have an image of themselves in working gear with a tool as a prop.
Real estate agents tend to want half body (torso and head) shots.
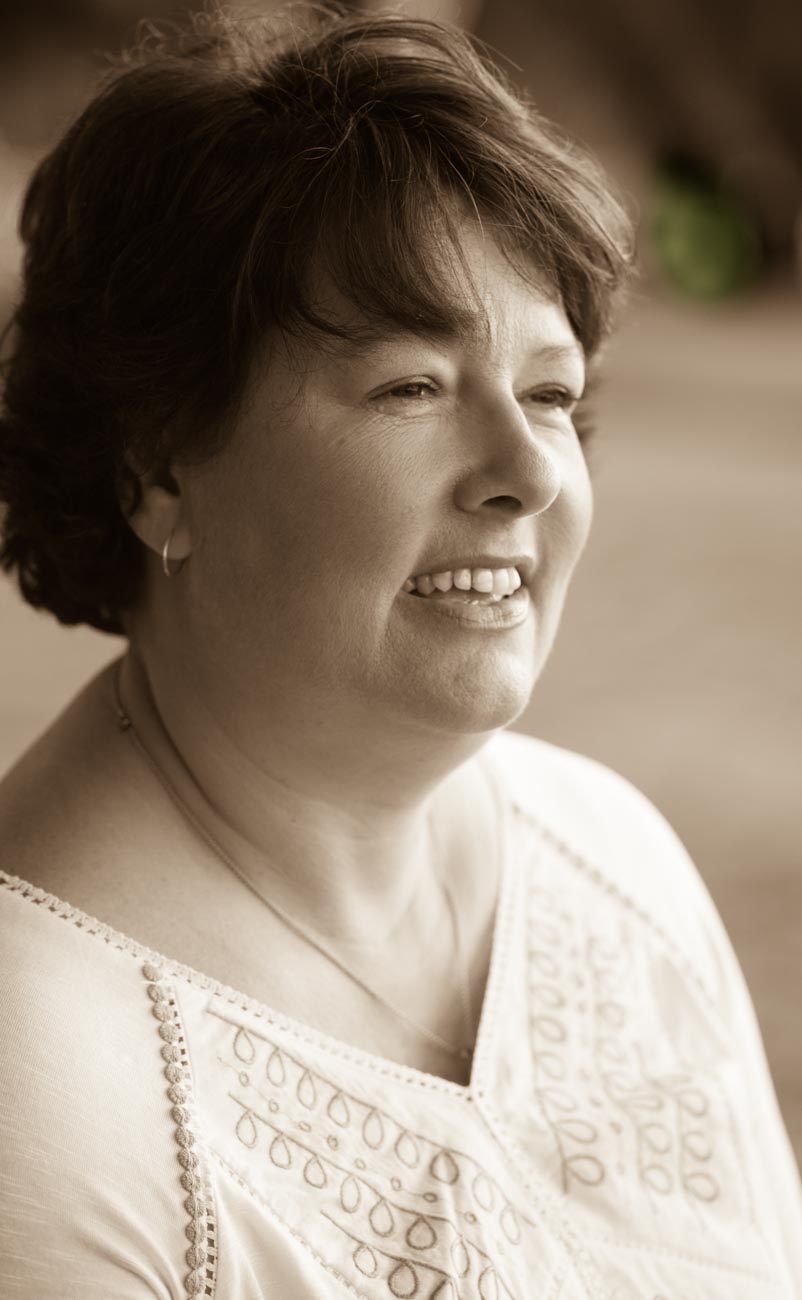
Maybe you want black and white or sepia (a reddish brown hue that resembles the effect of aging in old photographs) as a point of difference.
2. What are you using it for?
Well as I said earlier the priority should be the about page of your website. If you have a team then make sure they too are on that page which could easily be a separate page underneath the main about page.
Social media profiles are also pretty important. They show the human touch and are more likely to attract engagement
You may also wish to use it for some printed marketing material like flyers and business cards.
If you have been featured in publications, then a great head shot. Most publications, primarily due to the cost, are moving away from using a photographer. So having your own portfolio of self-portraits can be very useful
Maybe you’re thinking really big and looking to get your face on a billboard.
Whatever you are using it for make sure you take plenty of images, trying different poses and maybe different locations.
And by the way, there’s no rule that says you have to use the same images across the all platforms and marketing material. You may want to convey a different image on your social media accounts than say, your business card.
Why you are at, why not stick a ‘selfie’ on your contact page. It makes it feel more personal.
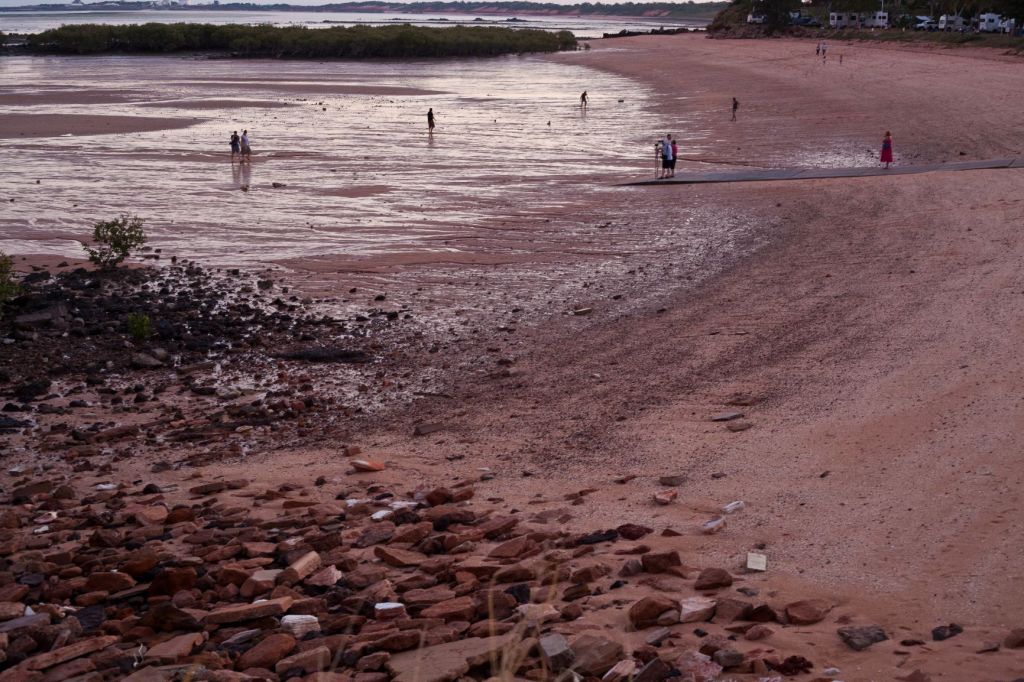
Looks like social distancing at the Town Beach, Broome, Western Australia
I had to ask myself an important question recently. Should I continue to post articles on travel photography during this terrible crisis. After all if we can still afford to travel we can’t! And if we can’t afford to travel now due to a tragic change in our employment status, is travel going to be something we will think about?
Well, if you are following this site then you are interested in travel photography and I imagine you have a camera. Even on the off chance you sold your camera because you now need the money then you will still have a mobile (cell) phone which has a camera. So now is a good opportunity to fine tune your travel photography skills, especially if you have a bit more time. It’s a hobby to most and a good way of taking your mind off the chaos around us at the moment.
If like, most of us across the world, you can’t go far, use your home and garden as photography sets. There are many interesting subjects waiting for you to take imaginative shots of them.
You’ll be amazed how much you can do in the confines of four walls or fences.
Travel Photography is something we all do from time to time whether on vacation or when travelling for any reason. In this well written and researched article “An Introduction to Travel Photography” I will attempt to ‘introduce’ you to the world of Travel Photography
Definition
According to Wikipedia the definition of Travel Photography “is a genre of photography that may involve the documentation of an area’s landscape, people, cultures, customs and history. The Photographic Society of America defines a travel photo as an image that expresses the feeling of a time and place, portrays a land, its people, or a culture in its natural state, and has no geographical limitations. There are other definitions but those two pretty much nail it.
History
Travel Photography, unlike most other genres is a later addition to Photography. When Photography was first invented in the early 1800’s few people travelled and for the next few generations any who did were only the wealthy ones. The major pioneers in travel photography were explorers who wanted to visually document their experiences whilst exploring. But you had to be keen as they had to carry the bulky equipment. Not only was the camera equipment itself heavy but, as the frames needed to be developed almost immediately, the photographer needed to have a darkroom and enough chemicals for a small laboratory. Of course that all changed when Kodak invented a camera that used a roll of film and then introduced the Kodak Brownie. Almost immediately photography was a lot more accessible and therefore popular with explorers and traveller alike. But it wasn’t until colour film was introduced that travel Photography became a mass media. Even then not everyone had a camera or if they did they didn’t use it whilst travelling. Digital photography changed all that. And then Smartphones come along. Now anyone who steps outside their door takes pictures.
We have millions of images of exotic and not so exotic locations being circulated by social media and other forms of communication.
The Travel Experience.
It wasn’t until I went travelling that I took an interest in Photography. It was to be a 7-month trip around the world and I felt that we needed to document, as well as we could, our experiences. So it was I had 2 very different skills to learn, how to travel and how to take photos of my experiences. It was a challenge, but it was one that I learnt so much from. That’s the beauty of Travel Photography. Yet, there are times when you must forget all the techniques and the technical stuff and be in the moment of the experience. Knowing when to take that shot or not is a skill in itself.
That too me is what Travel photography is all about.
Genres
Of course, when you travel there are lots of subjects that you will want to take photos of:
Landscapes, People, Festivals, Entertainment, Urban, Food and Drink and Wildlife are the most popular.
Landscape
Landscape Photography is taking images of usually the area in front of you. That can be a mountain range, a field of flowers, the desert, pretty much anything that is of a natural beauty. Some manmade objects e.g. a lakeside house or a sailing boat can help with context.
Reservoir close to Yosemite NP, California, USA in an area of lakes and reservoirs.
People
Always a difficult one to get right. People move, blink, frown and often, whether posed or not, can assume unflattering positions. Taking portraits in different cultures are a great way to get to know locals and customs. We are all fascinated by the daily life of those in other countries. Travel Photography gives you the option to capture that. As an example of this check out How I took this Travel Photography Image
Festivals
The Colour and movement of some of the world’s most famous and not so famous festivals can make great photos. Even the local fete can offer some interesting character or scene shots
Entertainment
Shopping in the market, Music and Theatre performances are two events that come to mind when taking photos in the field of entertainment. But there is also sporting events like a game of footy or nightlife. The latter being particular challenging due to the lack of light.
Urban
What is urban? Good question! I guess it’s Street Scenes, Street Art, Sky Lines, Architecture, both inside and outside and even Light Shows.
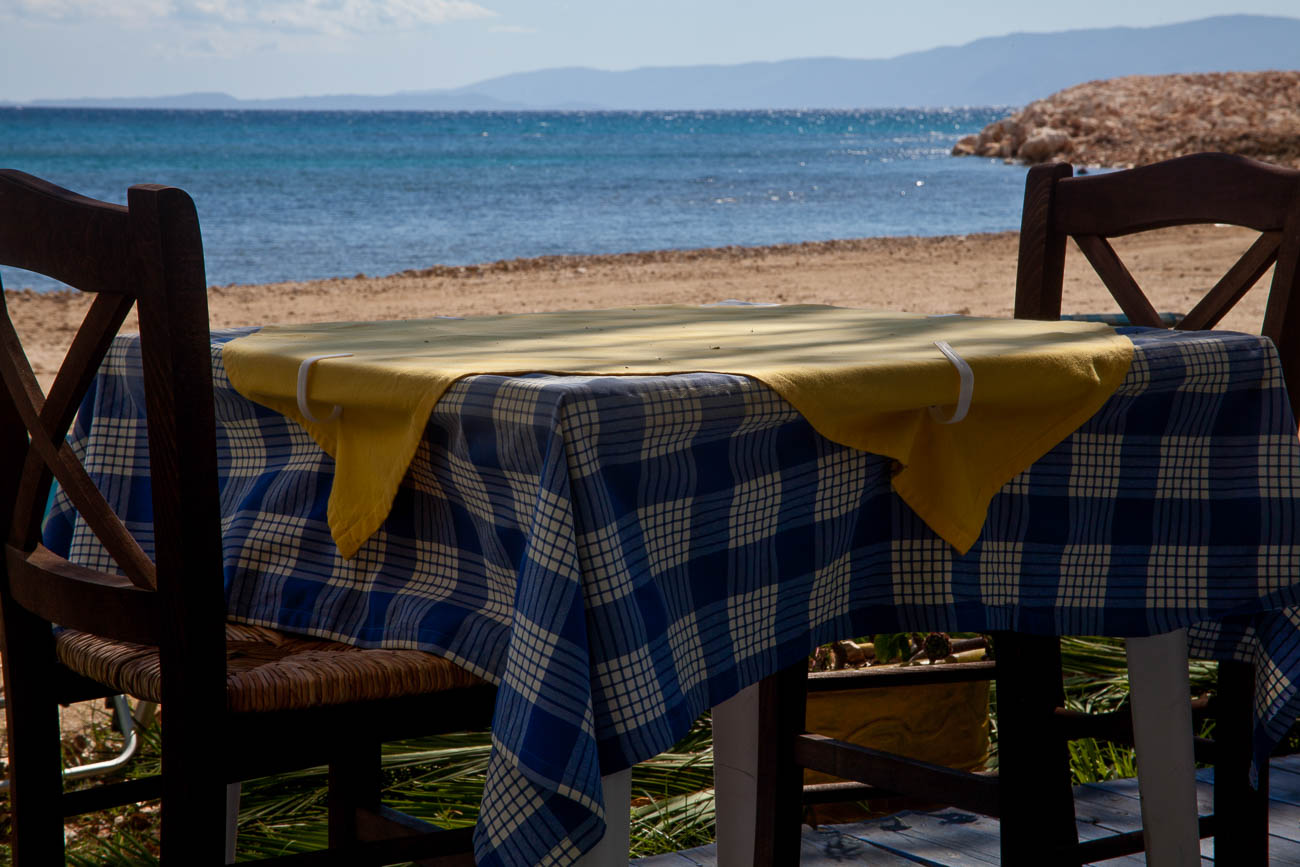
Food and Drink
There are many food and drink situations. You may want to take some photos of where you are, what you are doing, eating or drinking. In a restaurant, a winery, in a field or at the market. Food and Drink is quite a diverse genre. But it can also be the most creative and satisfying, especially if you are having a great experience at the same time.
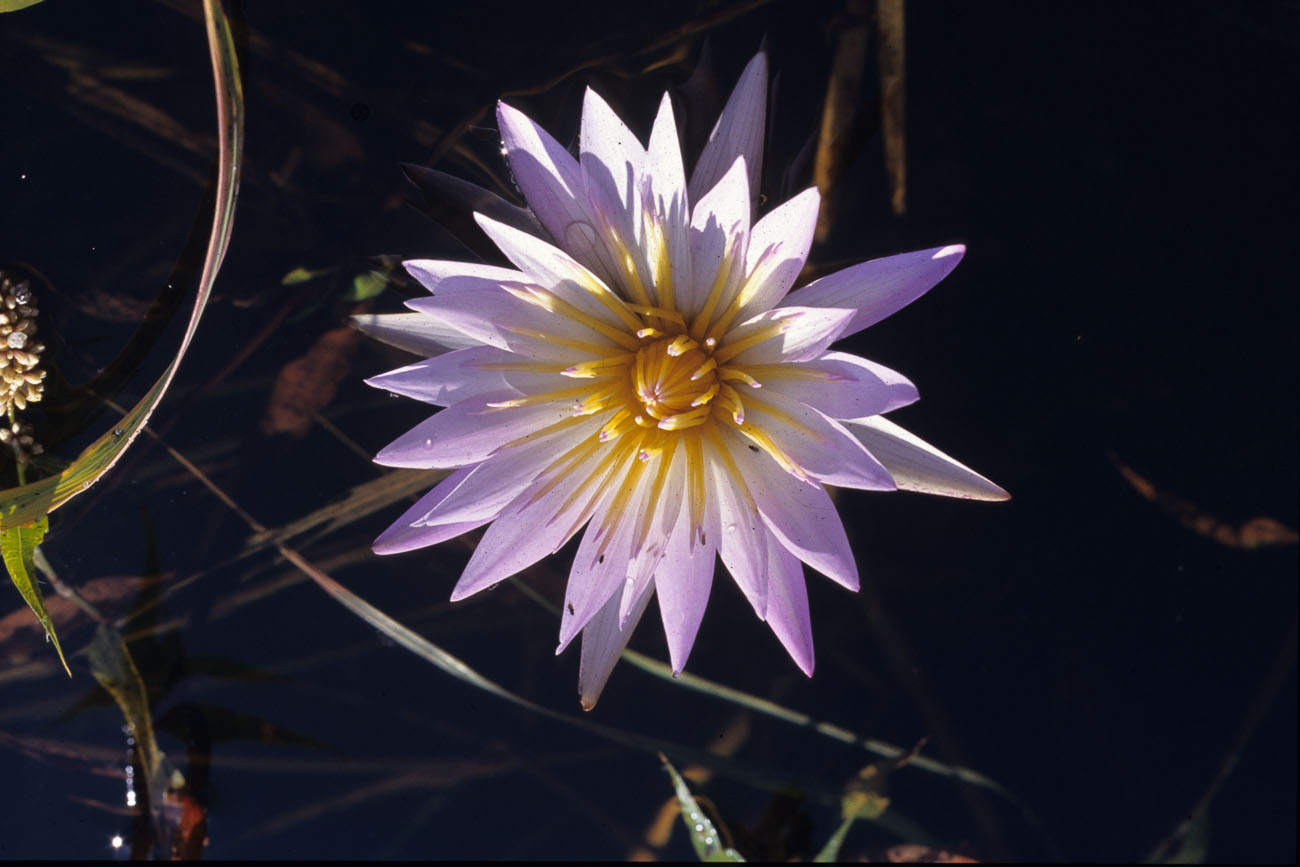
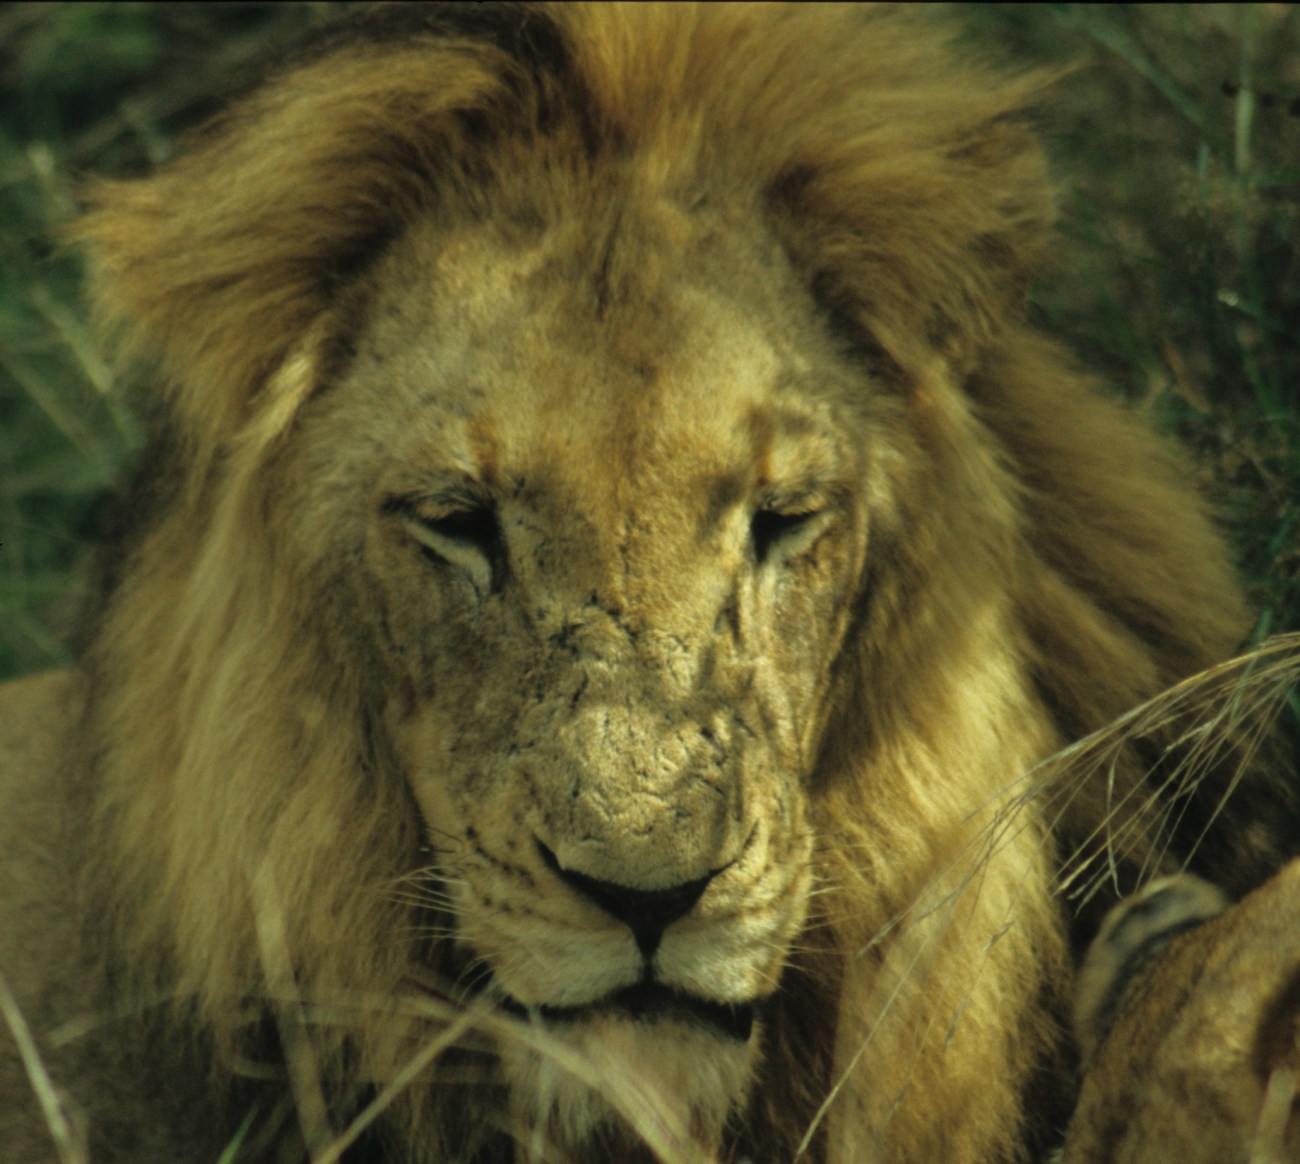
Wildlife
Who doesn’t want to capture that great shot of a Lion or Leopard in the wild somewhere in Africa. But there is more to it than the big 5 (the big 5 is Lion, Leopards, Rhino, Hippo and Elephant). Even going to a Zoo or Sanctuary can provide some great photographic opportunities. There are various types of environment for grabbing a shot or 2 of wildlife. Marine, Forests, National Parks even the Urban Environment can have wildlife. But be wary of two things, firstly your safety is paramount, don’t be that person who steps outside the car in a Lion park. Secondly, wildlife photography is challenging. There are photographers who have devoted their lives to taking great wildlife shots. They will spend days even weeks waiting for that ‘one’ shot.
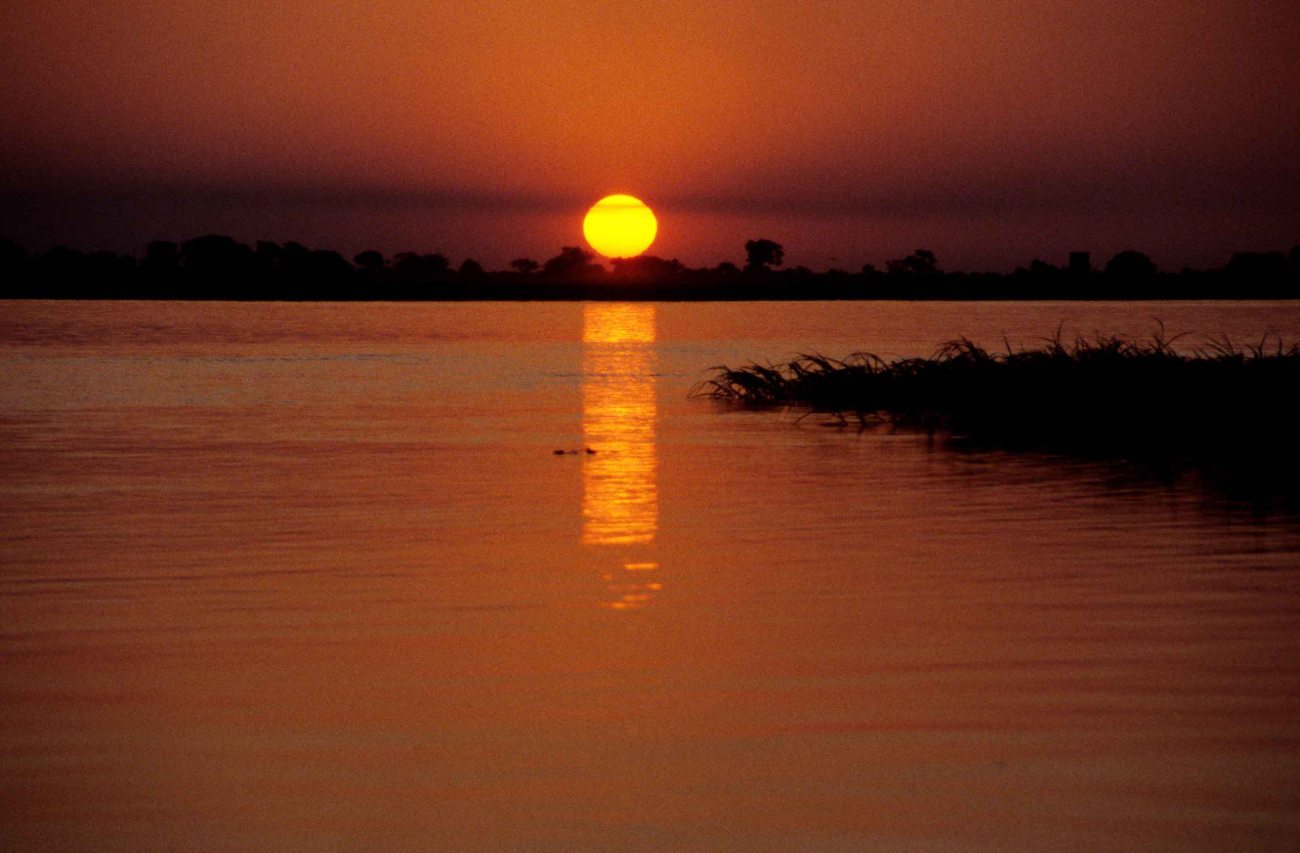
Mother Nature
Travelling over time means you will experience all types of weather which can make it difficult to use your camera equipment. Rain, Heat, Cold, Snow, Dust they are a few extreme weather extremes that we all will experience in our travels. But even though taking photos in such conditions will take you out of your comfort conditions, often it will be well worth it. So, don’t run for cover (unless of course your life is in danger) embrace the challenge.
Copyright
By copyright I don’t mean your copyright. More and more their famous landmarks (and People) want to control their image. For example, under French law it is illegal to take photos of the Eiffel Tower’s light show at night. Of course, we’re not all going to check on every possible landmark but it’s worth a quick google on a big-ticket item.
Photography Techniques
So you now you know the sort of experiences that you will want to document visually, how do you do it successfully? Well firstly, you will never stop learning! I’ve been shooting for 22 years and I’m still learning. That’s not to say you can’t learn to take good even great pictures straight away on your travels. It takes time to know what to do in certain situations and as you have seen there are many genres that make up Travel Photography. I hope that this will motivate you to read more from this site and support some of the manufacturers or service providers that I recommend to help you.
Additional skills
Of course, it’s not all about techniques and composition. If you want to take Travel Photography seriously you need to also be prepared some of the time to: Plan but be flexible Be reasonable fit, so that you have the energy to walk for hours at a time Be Patient enough to wait for the right moment to get that shot. Develop good social skills so that you can converse with many people, often in a language which you can’t speak Be creative Be open to sharing. After all it’s no good taking photos if no one is going to see them!
In Summary
This introduction to Travel Photography should give you a taste of what’s involved in improving your travel or holiday experiences. You can see that gaining the skills that allow you to take good or, indeed, great photos will help expand your travels and give other people pleasure. Travel Photography is about the gear, the composition and being creative But it’s also about being in a place that’s not your home, adding depth to your experience and bringing home great photos that will live with your memories for a very long time!
Need some help with your photos? Why don’t you pop your email in the box below and not only will get content that’s not always posted on this site but you will get a free guide to get you started
Any questions then please contact me here and/or please say hello at these places:
Well just to contradict myself, sometimes it is the gear.
Having certain equipment can give you shots that you may not be able to get without it.
A sports action photographer won’t get some of the shots he would like if the auto focus in his camera is slow.
Fashion photography requires excellent lighting.
Top quality landscape photographers usually use a tripod and high resolution cameras.
Cameras with more settings will generally have more flexibility and therefore give the photographer choices.
Let’s look at what equipment can give you:
1 Artistic opportunities.
It gives opportunities to create something imaginative.
For instance, with some of the filters that are part of almost every camera today, including smartphones, you have options to give your image a Grainy Film, Pop Art or Sepia old worlde tone look.
The image below is a combination of a couple of filters.
2 Freeze motion
When you are taking images of an event that has motion you generally need a high number of frames per second (FPS) to capture several images at a time.
Some cameras have high FPS and some lower and that can make a big difference.
3 Blurring motion
Conversely if you wish to blur motion then you need a camera that will allow a slow enough shutter speed.
That may not always be possible especially in bright light. So, a ND (neutral density) filter can be added so that the amount of light entering the camera is reduced.
4 The ability to take images in low light part 1
There’s no doubt that modern cameras can almost see in the dark.
However not all cameras are created equal. Even though there are cameras that have ISO rating in the 100’s of thousands they may not give the crisp clear images you want.
Why is ISO that important? Well to give you a personal example; when I was first learning photography, back in the film days, I was on a gorilla safari in Uganda.
The forest we were in was dark and as we got a view of the gorillas I snapped away not understanding that I should have had a film with a much higher ISO.
The images were developed some time later and were so disappointing.
Blurred because the camera had a slow shutter speed due to the lack of light.
A priceless experience that was never properly recorded!
Before digital, the ISO rating you had on the film meant that you were locked in for however many frames there were e.g. 36. Now you can change the setting per frame.
Film also only went up to around 1600 and even then, you got a grainy image which is OK if you want to depict a moody grainy photo but not so good if you wanted something crisp and clean.
So, yes, some cameras will give you some great images and high ISO negating the need for tripods or other ways of holding the camera still but not all.
My wife’s camera (granted it’s a few years old now) is ok up to 1600 after that the grain is quite noticeable.
On the other hand, the Olympus OMD5 I have is great up to about 6400.
5 The ability to take images in low light part 2
Image stabilisation can really help if you need to take images in low light or with slow shutter speeds. In some cases, that can eliminate the need for a tripod.
I first saw image stabilisation in Namibia on safari. A photographer had a lens with image stabilisation and he could take images without the need for a tripod in fairly low light. This was 20 years ago when I was first learning photography and that blew my mind!
6 The ability to take images in low light part 3
I’ve always hated carrying and using a tripod but now with these lightweight models and the fact that the cameras are now a lot smaller and weigh less it’s not so much of a burden to carry one. Using it – well that’s still another matter but I will say if you are taking images of products especially in low or artificial light then it’s a valuable tool.
With a tripod, you can take yourself out of the equation and with a wireless (or wired) remote you can take images of subjects reasonably stress free and creatively.
7 Bokeh
Bokeh is the term used for making the subject stand out from its background by ensuring that the subject is in sharp focus and that the back ground is blurred.
The right equipment can allow you to create an image with great Bokeh.
The equipment for this is a little more complex. If you have a full frame camera, then it’s relatively easy with even the package lens to get a reasonable bokeh.
Where it gets tricky is with mirrorless (there is the odd full frame mirrorless but for this purpose, we’ll cater to the majority).
Any none full frame camera is very much dependent on the lens and couple of other factors like distance and zoom.
So, that was my alternative view on the importance of equipment.
Do you agree?
Let me know in the comments section below.
As you’ve got this far why not sign up HERE now to get a free guide on how to start improving your stock and marketing photos.
You’ll also have exclusive content delivered to your inbox.
In Why You Need a Professional Selfie I talked about having the need to have a decent self-portrait or ‘selfie’ on your website, social media or publication to show the human face.
Maybe you’ve decided to get this done but don’t want to use a professional photographer or Uncle Eric who has a good camera.
Decide what sort of self-portrait you think represents your brand best
A financial adviser or lawyer may want a more conservative head shot.
Or they may want a full-length portrait with business like clothes like jacket and trousers.
A social media site may wish to convey a trendy relaxed image. So, it may decide that, rather than have a headshot, an image of its employees being active may be better.
Whilst I have concentrated on websites and maybe social media you may also wish to use it for some printed marketing material or even billboards.
And that’s when the capability of the camera and printing become important
The four most crucial factors to getting a professional self portrait
Equipment
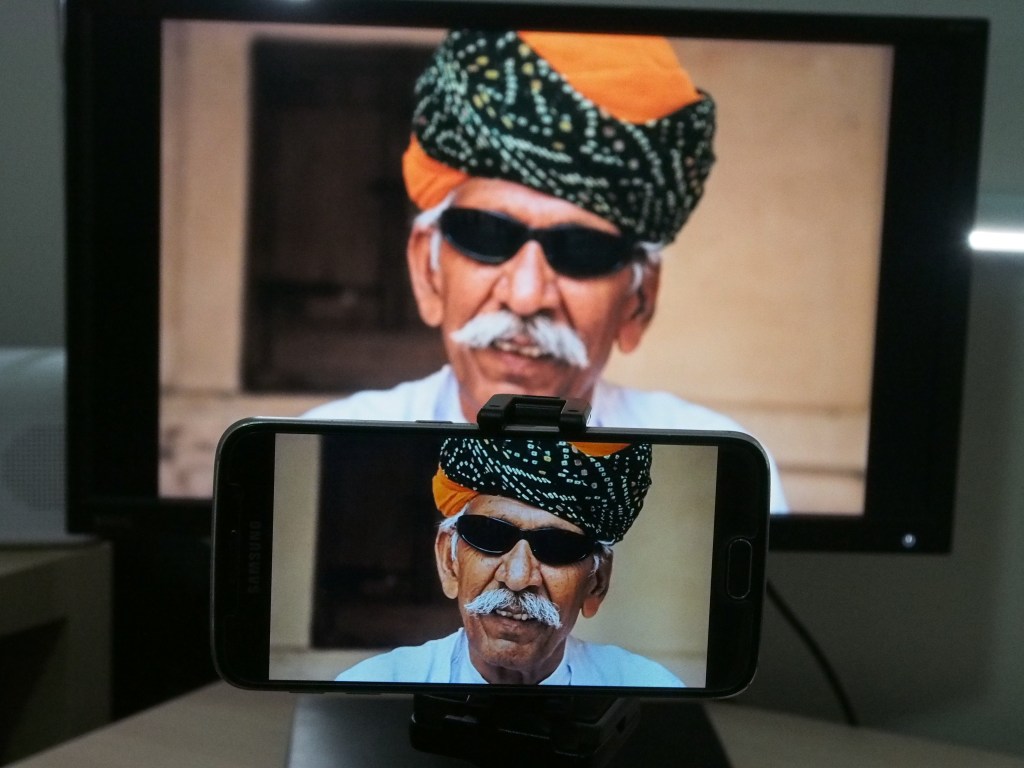
I’m going to show you on a smartphone but any camera should do the job provided it works 🙂
Light
Light is everything. If the light is dull or too bright the image can be too dark or ‘blown out’
(a term for images that have the highlights way too bright).
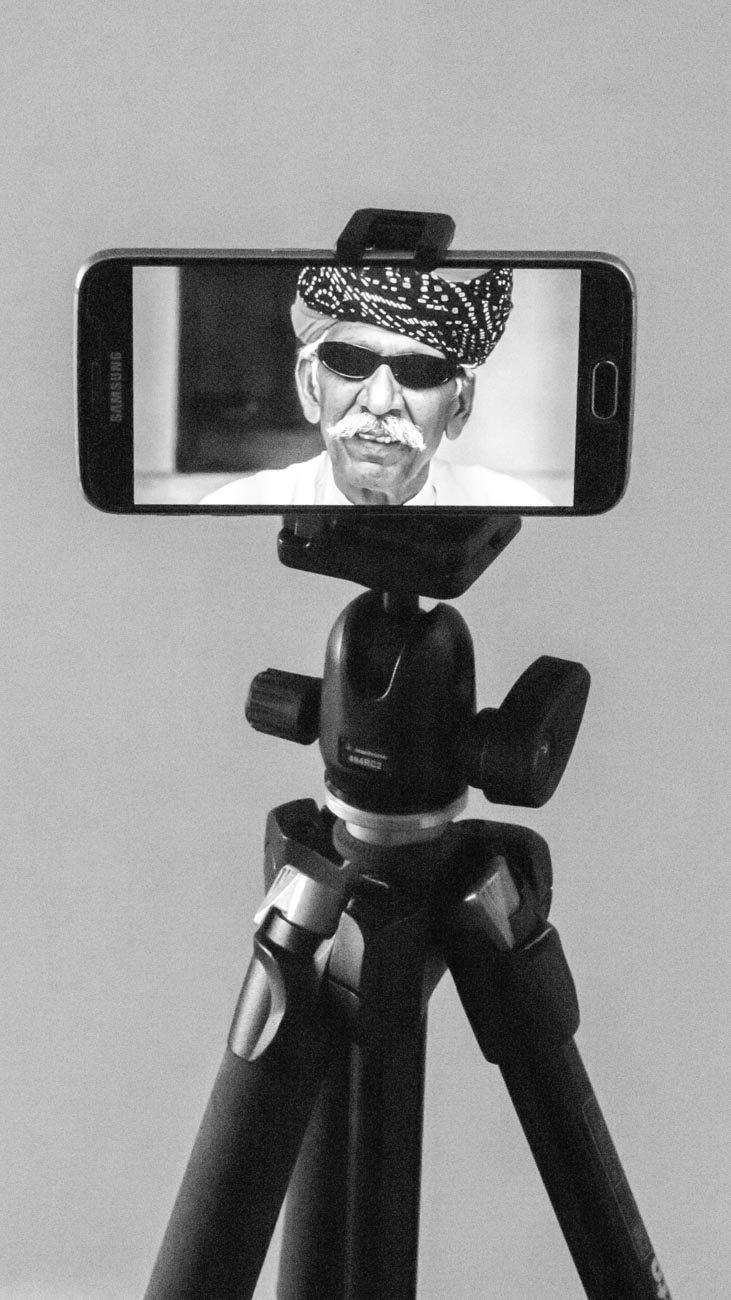
A way of mounting the camera.
A tripod is undoubtable the best way if someone e.g. an employee, is not taking it for you
Staging
Make sure you select the correct pose. You may have to take several different images at different angles to get one you want to use.
Incidentally there is no rule that says you must use the same image across the all platforms and marketing material.
Set the camera up;
Regardless of what the use is, make sure you have the biggest resolution. Much better to size down that attempt to upsize.
On the Samsung S series smartphone cameras for example you will find picture size next to the settings icon.
Select 16M or 12M or whatever the largest number is.
The resolution on the IPhone is set to maximum and has no adjustment from that except with the use of a third-party app.
Some other brands only give you the option to select large or high
Note: The front camera usually has a much smaller resolution than the main camera so avoid using it for this application
Find the timer and set it to 10 seconds
You can usually just leave the camera on auto if the light is pretty good. But you can change the settings on some smartphones. The only ones I recommend is possibly the ISO or exposure compensation.
Mount the camera on a tripod or any other way you can find to mount.
I use the Joby Grip Tight Micro Stand a great little find that has a mini stand. It can also be fitted to a standard tripod head.
Set the scene
Find a well-lit position. You can be creative by sitting or standing near a window and allow the light to be strongest on one side.
Alternatively, if you want to light up both sides, use a whiteboard on the side away from the light.
Think about the background. Make sure it’s not cluttered and distracting to the eye.
Again, a whiteboard is handy. White (or off white) backgrounds are always the best way.
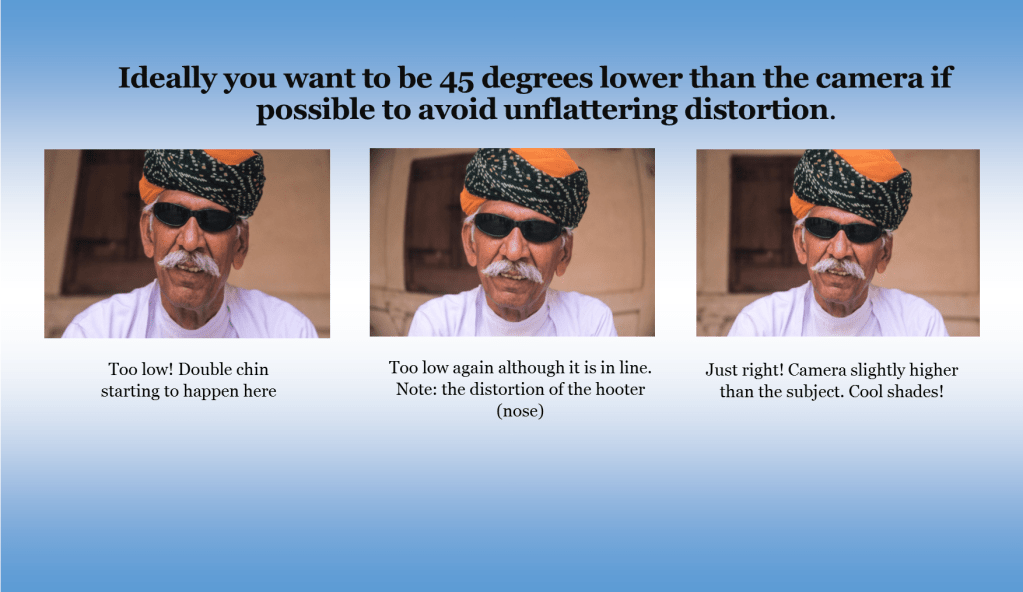
Think about your position. Ideally you want to be slightly lower than the camera if possible to avoid unflattering distortion.
Now comes the tricky bit. Unless you have someone else helping, you are going to have to focus the camera on your final position, be it a full length or head shot.
The easiest way to do this is to put something in that position and then focus on it.
Just press the shutter button and then get into position.
Take plenty of images trying different poses and maybe different locations. You can’t take too many!
Review
Review on your phone and add a filter if you wish. There’s plenty of them out there.
Load the images onto your computer.
Look for softness (slightly blurry), unwanted distractions or items and light
Crop if required. You may need to crop for different applications.
Upload to your website, social media or another platform.
Discuss requirements with your printer if you are using hard copy marketing material.
Finally
Rinse and repeat if need be.
You may think you’ve got it right but there’s always room to improve.
Is there anything else you want to know? Did you give it a go?
I’d be really interested in any results that you wish to share.
In my photographic and marketing journey, I’ve noticed that a lot of people in small business struggle with being able to take good marketing images
So I’m put together an online resource, at nickkatin.com with lots of information to help take better images and understand where that fits into an overall marketing strategy.
So why am I telling you this?
Well I’d really appreciate it if you would take a look and subscribe for future updates (it’s pretty easy) and you’ll get my guide “Eleven easy ways to improve your marketing photography”
Do you have one friend or acquaintance that might be interested in this as well?
If so, give me their email address (send to nick@nickkatin.com) and I will send them an invitation to sign up or alternatively please send them an email and invite them to the list.
So let’s just recap on the tips 5-9: No 5 was a recap of the previous 4 which were briefly: 1. keep your camera on, 2. Turn off the flash, 3. Use auto ISO, 4. Avoid Camera shake by using the viewfinder if fitted or if not, by tucking those arms in.
So number 6: Select a tripod to suit your camera and lens and invest in a cable release or use the timer.
7. Don’t think that because someone has an expensive camera that they will create great images – it’s not the gear that makes great art but the person behind the camera.
8. Use RAW if you want great images but only if you are prepared to invest some time in front of the computer
9. Use JPEG if you don’t want to spend time in front of the camera, can’t afford big memory cards or need speed for quick successive burst shooting.
There are numerous other tips I could give but I’ll stop there and as from next week I will post my top 10 travel photography tips. However feel free to ask me a question on taking photos. I may not know the answer but I’ll probably know where to find it! Ciao
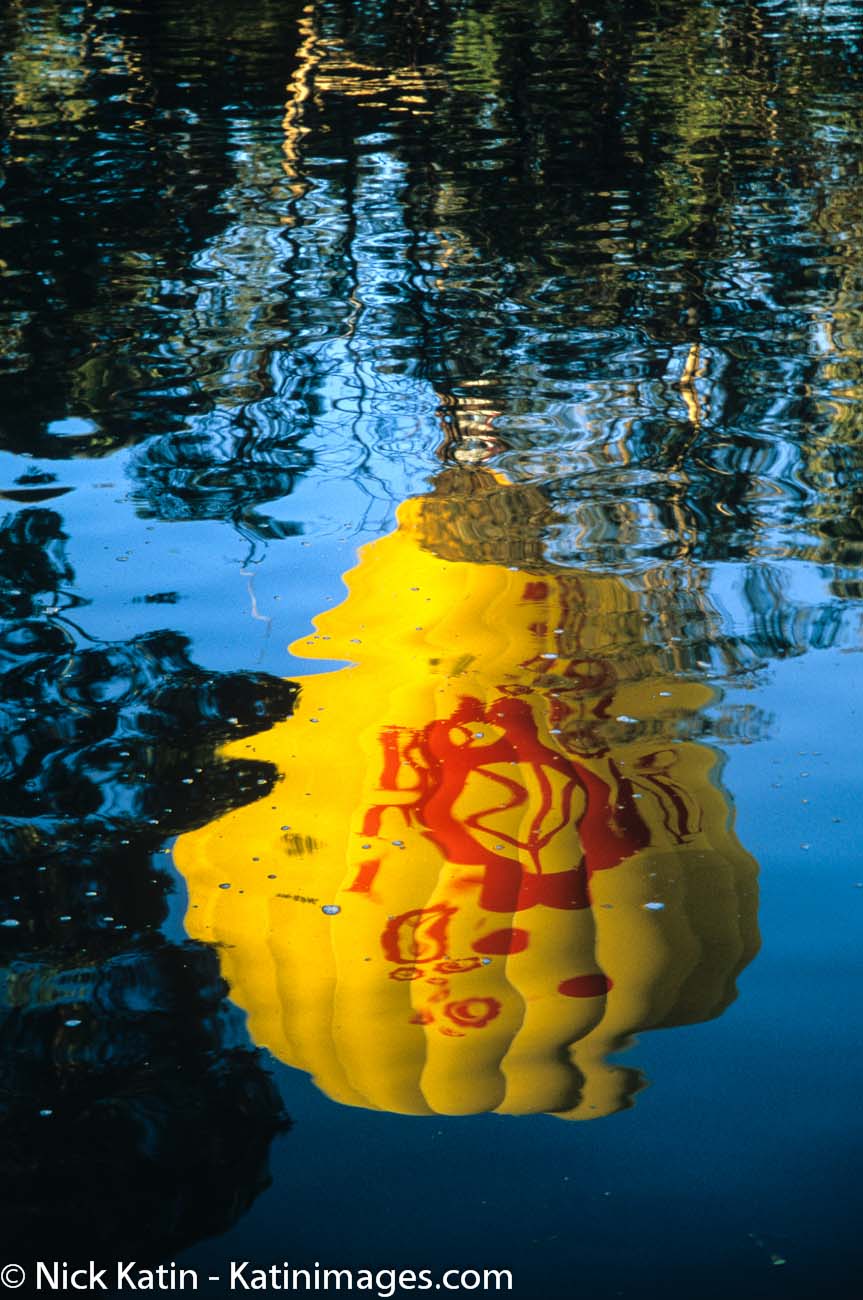
Yellow Balloon reflection on the Yarra river in Melbourne Australia
Want to put this on your wall or licence or share this photo email or contact us
This is a HUGE topic that will be difficult to do justice to but if the question is why? Then here’s a brief answer. I might add that this question (at the moment anyway) only applies to higher end compacts, micro four/thirds and DSLR cameras. If you are using a smartphone or a compact that doesn’t give you the option of shooting in raw, then jpeg it is then. So firstly why raw? Raw is digital negative that retains all the information that the camera sensor can see but needs post processing to get the best out of it. So if you want a outstanding image and are prepared to put in the time in front of a computer to get it then shoot raw. Secondly why jpeg? This depends on what you will be doing it with it. If you are sharing on social media or via email just among friends or they are happy snaps which display memories rather than artistic merit, then jpeg is fine. Bear in mind that even if you shoot in raw you need to convert to jpeg to show or share as raw files can only be read by a small number of programs and the file sizes are pretty big. A final tip on that would be to shoot (if available on your camera) raw + jpeg so you can ‘publish’ the jpeg immediately and fine-tune the raw image later. Happy snapping!
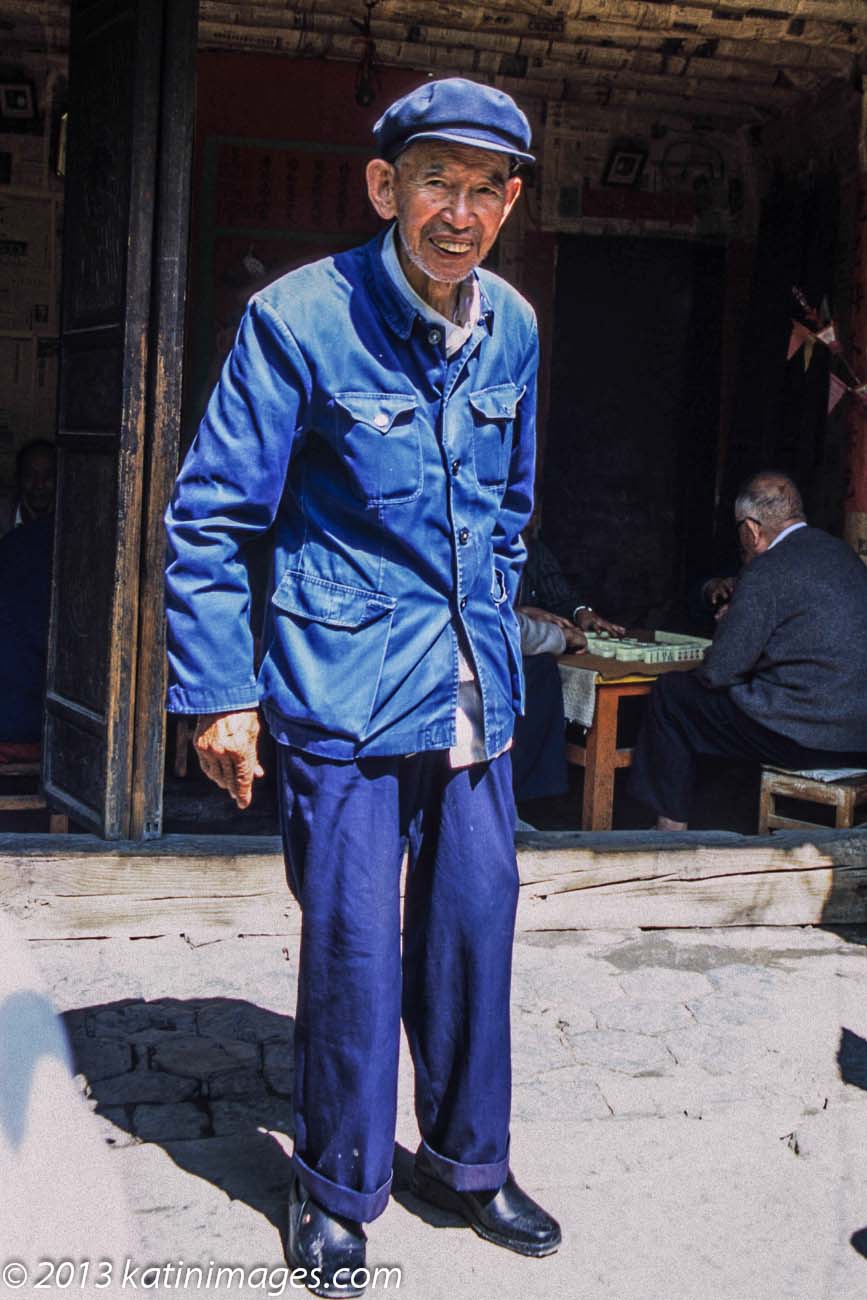
Man in a Zhongshan or Mao suit posing in the village Xizhou near Dali in the Yunnan province of China
Want to put this on your wall or licence or share this photo email or contact us
How many times have you heard either “you must be a good photographer to have a good camera like that” or “what a picture! You must have a really good camera”. Wrong and wrong! A good camera doesn’t make you a good photographer any more than a great shot can only come from a good camera. I know it’s a cliche but it’s not about the camera! It’s about the picture maker – you! How you see the world, What story you want to tell. What beauty (or not) you want to capture. Yes buy a great camera if you can. It gives you more options to create great images. But it doesn’t mean you will. A few years ago I did my first wedding for someone close to me. I did an OK job with my Canon EOS5 (the film forerunner of the current 5D) and after taking the necessary shots of the reception I put all my gear away ready for a good time. I did however have a little Olympus compact film camera with me. It had a fixed lens and virtually no adjustments. But I couldn’t help myself and took a few shots with it and discovered later (remember this was the film days, the instant gratification of digital was still in its infancy) that I had taken by far the best shot of the day of the bride and groom. So remember its not the gear that makes great art but the person behind the camera.
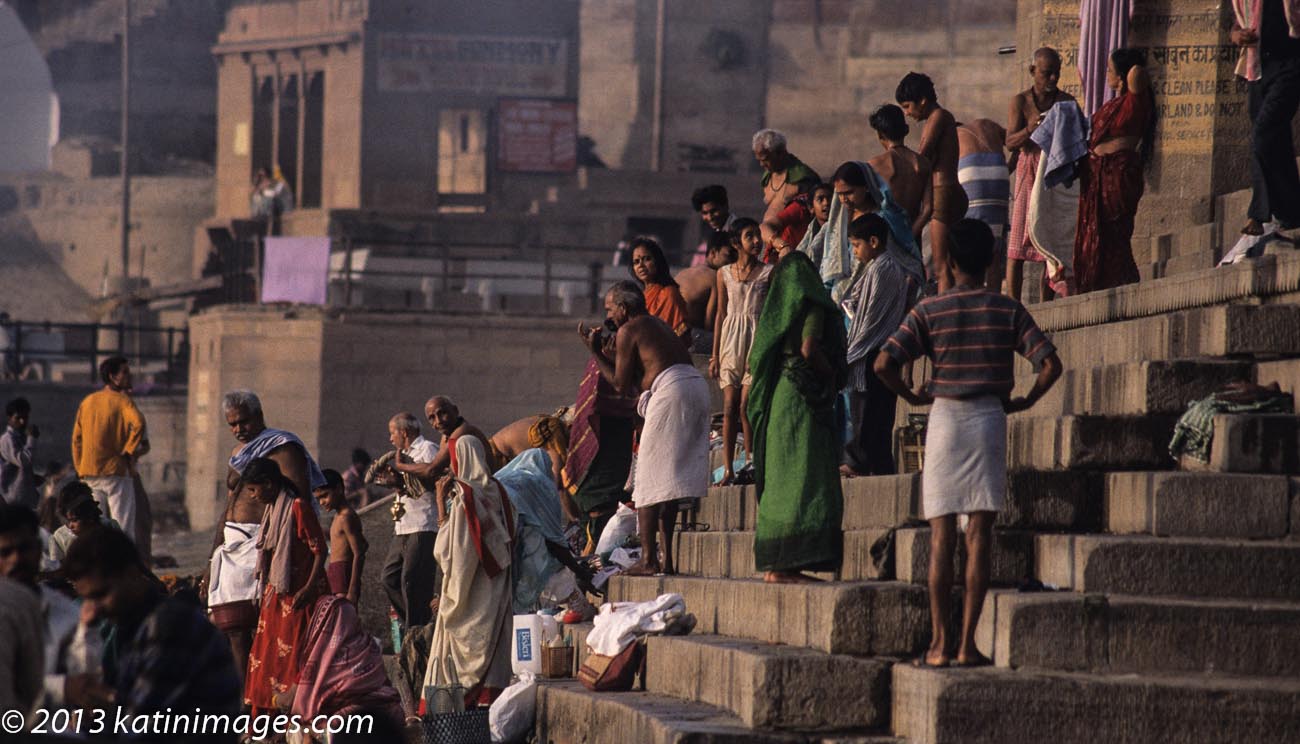
Pilgrims on the Ghats. People on the Ghats or steps on the banks of the river Ganges in Varanasi, India
Want to put this on your wall or licence or share this photo email or contact us
Firstly I have to say that despite having five tripods, I have a love/hate relationship with them! Its not just the carrying but the time taken to set up and get it positioned correctly and I’m quick! But it is worth it! There are lots of tripods on the market and they range from $10 to $’ooo’s and come in all sorts of shapes and sizes but ultimately you get what you pay for. Lightweight aluminium are fine for small compacts but they will vibrate in the wind. Carbon fibre are much more sturdy. Rule of thumb is buy one that has load capacity of your camera’s weight (preferably with the heaviest lens) plus 50%. Tripods used to come with the head fixed. Nowadays you can mix and match legs and heads. Talking of heads, I use a ball head but some like the tilt and pan which is probably better for video and action. Once on the tripod you have to remember that the act of your finger pushing the shutter button will make the camera vibrate, which kind of defeats the purpose of having it on tripod. Ideally you should use a shutter release cable but you can use the camera timer. Just set the timer for its shortest duration and away you go. Of course if the subject is moving then a cable is best so you can choose the moment and not wait 10 seconds. Ciao for now and go get a tripod!
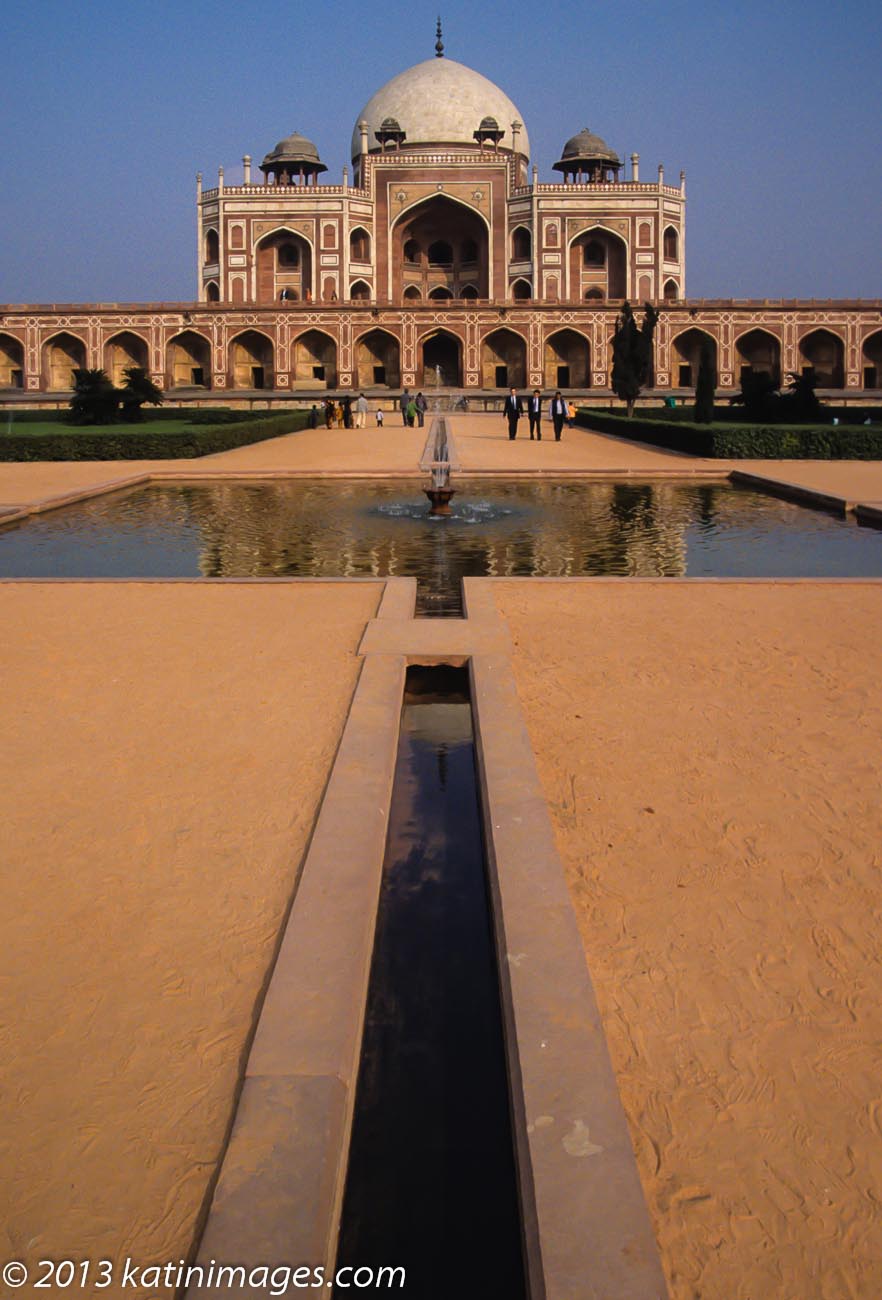
Humayun’s tomb. The tomb of the Mughal Emperor Humayun which dates back to the 16th century and is in Delhi, India
Tobuy a print of or licence or share this photo email or contact us
So lets just recap on the first 4 tips: No 1. To grab a shot at any time keep your camera ON which, depending on what camera you are using, requires you to look at the camera manual.
No 2. Turn off your flash! Again to do this check out your camera manual
No 3. Set your camera to auto ISO and don’t be afraid to turn your ISO up even higher. Just make sure you’ve taken a few images at various settings to see how your model performs at high ISO’s
No 4. Avoid Camera shake by using the viewfinder if fitted or if not, by tucking those arms in. Tip no 6 next week.
Camera shake! The enemy of a clear photo. Most people take pictures and look at them on the camera’s rear screen and think they are OK or even great. Its not until they download them and see them on their computer, laptop, tablet etc. do they realise they are a bit ‘fuzzy’ (soft is the technical term). That’s usually caused by camera shake. In other words the picture taker moved whilst taking the shot. My tip – if you have DSLR or micro 4/3 rds with a view finder, USE IT! Its much easier to hold the camera steady with the camera against your face than it is holding it at arm’s length. If you don’t have a view finder i.e. the majority of compacts and smartphones, then try to bring the arms back and tuck them into your sides. Obviously the other alternative is to use a tripod and I’ll talk about this on a future post. For now – Hold that camera still!!
Cameras need light and when there’s not enough of it the picture taker has a couple of options. A tripod is the preferable option and I’ll cover that in another tip. So lets talk about ISO. In the days of film you couldn’t change the ISO easily You had to change the film or using exposure compensation “push” or “pull” the film a couple of stops but you couldn’t change back again until you changed the film again. But now the ISO can be changed at a whim. All cameras, including compacts and smartphones these days, have an ISO setting. So there are two options. Have the ISO setting on auto which is fine for the majority of the time. But auto is usually set at a maximum of say 1600 which may not be high enough. Alternatively change the ISO setting to suit the conditions. E.g. in low light select a high ISO. However whilst the top end DSLR’s have amazing results from ridiculously high ISO’s there are some models where grain or noise becomes more pronounced the higher you go. So its worth taking a few images at various settings to see how your model performs at high ISO’s. Having said that grain does add mood to certain scenes. For now though, find that ISO setting!
This is a contentious one! Turn off your flash! Unless you can control the power and the way it falls on the subject, inevitably the results you get tend to be cold and often washed out. I see so many people taking pictures outdoors with the auto flash on. In these cases unless you have the subject within a few metres, its a waste of time and power and can detract from the overall scene. So instead of having the flash on as a default, have it off as a default. All cameras including compacts and smartphone have this option. That’s not to say you shouldn’t use it from time to time but more as a last resort. How to overcome low light – that’s the next tip.
I keep getting requests for the odd tip or two on photography from people about to go travelling. So I thought I’d combine my normal post of travel photos with the occasional very short tip. First the photo of the Chapel of the holy Cross just out of Sedona and built into the bright coloured rock formations of the tableland. It’s a pretty spectacular sight, especially from the base. The wisps of high cloud drifting across the top give a eerie feel! 1/125 @ f8 24mm ISO100
And so to the tip – if you want to grab a shot at any time keep your camera ON. On both DSLR’s and compacts you need to disable the power saving option (you can always turn it back on later). For smartphones the camera app needs to be on or at least on your home page.