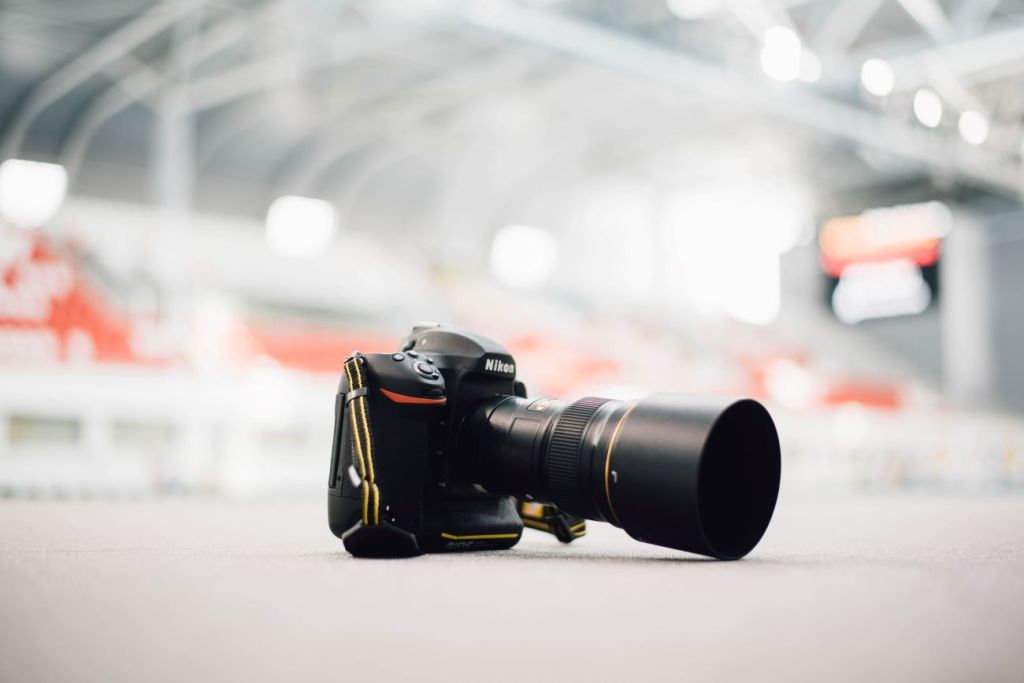
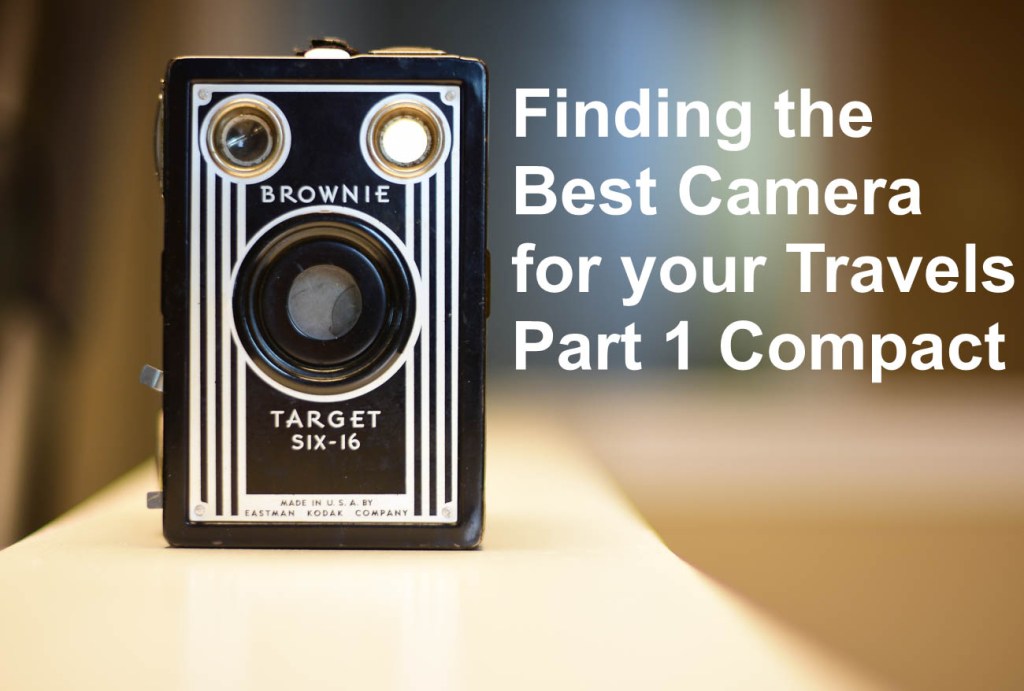
Finding the best Camera for your Travels Part 3 DSLR
In The basics of camera equipment – Best camera equipment for travel photography, I mentioned That “despite those who say its’s not about the gear, you need a camera that will suit your style and objectives.” This is especially true when you are off travelling. Having a camera that you are comfortable with and that can help you take photos that you will proud to bring home with you is essential.
Maybe you aspire to getting your travel photos published. If one or all of these is YOUR goal, I can help. Sign up in the box below to subscribe to my exclusive Travel Photo Tips Newsletter.
Remember if you want to take great travel photos
that you can share and display.
that help you relive your travel experience
that give you a chance to have your travel photos published
then sign up below and subscribe to my exclusive Travel Photo Tips Newsletter.
Finding the best Camera for your Travels Part 2 Mirrorless
In The basics of camera equipment – Best camera equipment for travel photography, I mentioned That “despite those who say its’s not about the gear, you need a camera that will suit your style and objectives.” This is especially true when you are off travelling. Having a camera that you are comfortable with and that can help you take photos that you will proud to bring home with you is essential.
In the second of this series I will defer to some reputable camera reviewers who can help guide you. Only two this time as DP Review don’t distinguish between SLR’s and Mirrorless
So, without further ado please read this one from Camera Labs below
Do you see yourself taking some great travel photos that you can share or display? Or can you see yourself reliving your travel experience by bringing home some emotive travel photos? Maybe you aspire to getting your travel photos published. If one or all of these is YOUR goal, I can help. Sign up in the box below to subscribe to my exclusive Travel Photo Tips Newsletter.
Remember if you want to take great travel photos
that you can share and display.
that help you relive your travel experience
that give you a chance to have your travel photos published
then sign up below and subscribe to my exclusive Travel Photo Tips Newsletter.
In The basics of camera equipment – Best camera equipment for travel photography, I mentioned That “despite those who say its’s not about the gear, you need a camera that will suit your style and objectives.” This is especially true when you are off travelling. Having a camera that you are comfortable with and that can help you take photos that you will proud to bring home with you is essential.
In the first of this series I will defer to some reputable camera reviewers who can help guide you.
Do you see yourself taking some great travel photos that you can share
or display?
Or can you see yourself reliving your travel experience by bringing home some
emotive travel photos?
Maybe you aspire to getting your travel photos published.
If one or all of these is YOUR goal, I can help. Sign up in the box below to
subscribe to my exclusive Travel Photo Tips Newsletter.
You’ll also get my free eBook “9 ways to improve your Travel Photography”.
Remember if you want to take great travel photos
that you can share and display.
that help you relive your travel experience
that give you a chance to have your travel photos published
then sign up below and subscribe to my exclusive Travel Photo Tips
Newsletter and for your trouble get my eBook “9 ways to improve your Travel
Photography”.
There are so many features now on a camera that its’ both mind blowing and confusing.
The TV Analogy
When we were in the market for a new TV, we discussed all the different features and benefits with retailers.
By the time we had finished we were totally confused. Salespeople in different shops seem to tell us something different about the same TV. For example, one would say this TV doesn’t have Freeview plus, whilst another would say that it does. In the end, I researched on each manufacturers website. I even rang them to ensure that the information I had gathered was accurate. After doing that we went and bought the TV we wanted.
So, what about Camera features? Well compared to TV’s there are way more things to think about.
In my opinion there are too many Camera features that are not needed! This article is to help you navigate the different Camera features. I’m going to suggest some essential camera features you need to consider having.
Either when you are in the market for a new camera or mobile phone or that you should review on your existing camera. This article consists of 4 sections:
1. The single essential camera feature you must have 2. Four Camera features you need 3. Eight Camera features to have 4. Six Camera features you don’t need
After each Camera feature is a rating out of 10 – 10 being must have.
The single essential Camera feature you must have
So, let’s start with absolute must!!
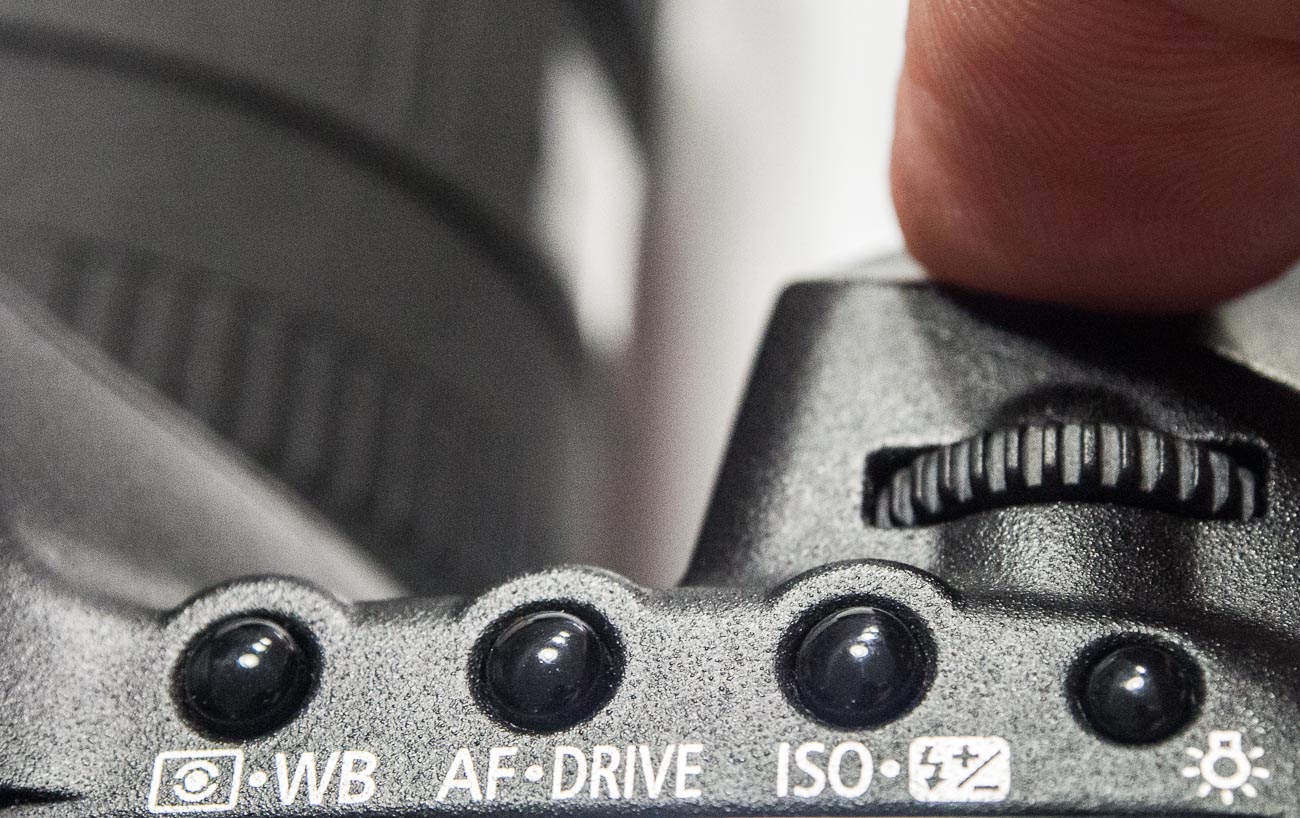
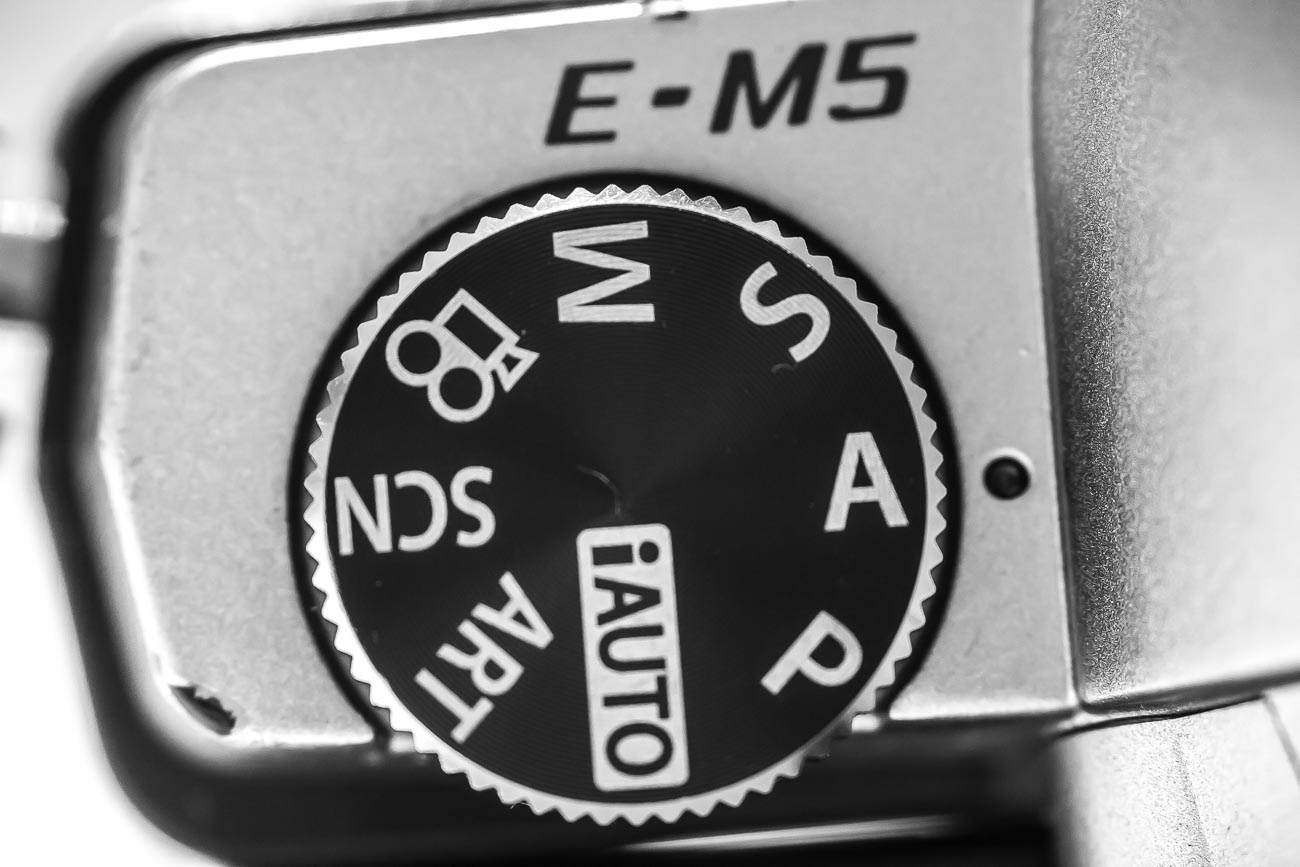
Mechanical Exposure controls
Usually on most cameras there are a P, A, S and M modes.On small compacts there usually is only a P mode.
On smartphone cameras, even the best ones, they don’t yet have the option to adjust the exposure the “old fashioned way”. So what’s with the “old fashioned way”? Well without going into a great deal of details on how a camera works, I’ll explain: All cameras have an aperture and a shutter. Both allow light into the sensor but in different ways.
The aperture allows in light by changing the size of its hole, the shutter allows in light by the speed of its movement. Having the option of being able to control both or at least one of these is one of the keys to getting great photography.
What do all these letters mean?
P stands for program and is a more sophisticated way of shooting in auto. The camera decides which aperture and shutter speed to use.
However the difference is that you can also weigh in by using what’s called in the industry “shift”. A stands for aperture priority and S stands for shutter priority. In both these modes you control one whilst the other one is controlled by the camera.
Most pro photographers depending on their specialisation will shoot in aperture priority. M is where you have complete control. You set both the aperture and the shutter speed.
This is not something a beginner would dabble in until they have got some experience with the other modes
Confused? Let’s go into more detail
If you want to take a photo of a subject with all the background blurred then you would need to adjust the aperture. If on the other hand you want to take a photo of movement.
Let’s say, a dancer practicing or performing then you would more than likely want to adjust the shutter to capture the type of movement you want.
That can be blurred motion or freezing the action. So, it’s handy to have that degree of control.
What’s that you say? You’re only beginning so you only need auto!
That’s fine. However I would suggest that if you want to create images that you can be proud of, then at some time in the future you will need more control.
The ISO factor
One extra control that goes hand in hand with exposure is ISO adjustment. In fact, the aperture, shutter speed and ISO make up the exposure triangle. That is to say that the adjustment of one affects the other two. With each camera manufacturer trying to outdo each other, the ISO on a top end DSLR can now be adjusted to over 400,000.
Which is crazy, as now the camera can take pictures in the dark! When you change your ISO setting, you’re adjusting your camera’s sensitivity to light. ISO settings are normally anywhere from 100 to 10,000 (or higher). These numbers have a direct relationship with the sensor’s light sensitivity.
Therefore the affect both the aperture and shutter speed. so a low setting means you need more light whilst a high setting needs less.
Rating: A or S is 10/10
Four Camera features you need
Drive
Drive selection is the option to select single, continuous or timer shooting. Single is one shot each time the shutter button is pressed.
Whilst continuous can be anything up to 15 frames per second (FPS) which is great for action pictures. The self-timer option is great for selfies. It’s also handy if the self-timer has two intervals. For example, a short, say 2 second, interval can be handy to use if on a tripod in low light instead of using a remote cable or wireless device. One thing to be aware of is that cameras these days are really mini computers.
So sometimes there can be a lag if you shoot in continuous, especially in Raw format due to the larger file size. Drive selection is standard on most cameras.
Rating: 10/10
Bracketing
I mentioned earlier that I’m a champion for getting the shot right first time in the camera, well bracketing helps this. Bracketing allows you to automatically take 3 shots of the same subject at different exposures, usually by one or half a stop each. I.e. aperture and/or shutter speed settings. You take the shot at the setting you think is correct and the camera will adjust the exposure settings for your next 2 shots to make those images lighter and darker. Handy when taking images of scenes or subjects where there is a lot of contrast. Some cameras allow you to bracket at different ISO, white balance and flash settings. Apart from the flash option these are a little superfluous.
Rating: Exposure bracketing 8/10 ISO, white balance and flash settings 3/10
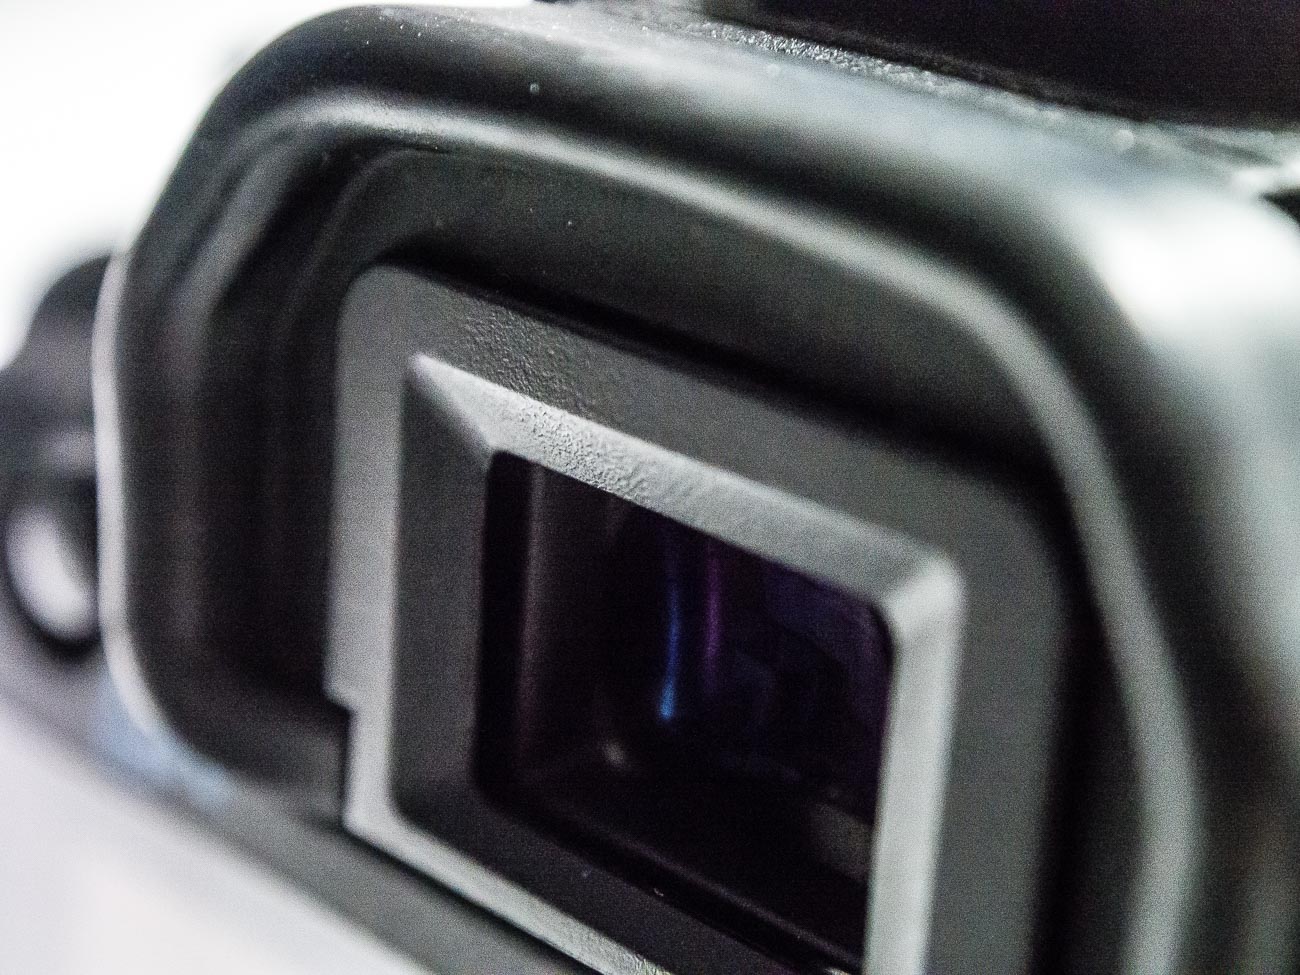
Viewfinder
In the early years of digital cameras, very few had viewfinders.
Camera manufacturers thought that everyone would migrate to the rear screen or monitor on the back of the camera. However, the exception to the rule was the DSLR which retained the optical view finder. Nowadays Electronic Viewfinders have come into their own and very good they are too. Why use a view finder at all? Why not the rear monitor? Well 3 reasons come to mind
1. Camera shake is reduced. Holding the camera out from your body means it is a lot harder to keep still.
2. Competing light. Ever looked at the rear screen on a sunny day? You can’t see a bloody thing!
3. Battery power. An LCD screen will always use a lot more power than a viewfinder either optical or electronic.
But there are viewfinders and there are viewfinders. Make sure it feels comfortable. The frame should be 100% not have any cropping, has a central view i.e. as if you were looking through the Lens.
Rating: 10/10
Shooting and viewing videos
This is usually on most cameras and is the rapidly becoming the number one medium on social media. This is a whole article on its own so I won’t go too deep. I would say that at this stage the only recommendation is to ensure that the camera shoots in high definition (HD) at the minimum. A lot of cameras are now able to shoot in 4K but like 3D there are still limitations on being able to view 4K videos. That will change as it’s only a matter of time until 4K TV’s and Monitors will be more common as the price drops. Unfortunately, the image and video quality available is not yet matched by the audio quality that comes standard with most cameras. So, make sure you buy a good microphone that’s compatible.
Rating: 10/10
Eight Camera features to have
Being able to turn off Flash.
Controversially I used to rarely use flash, preferring natural light. Yet the degree of control some of these cameras allow you to have over flash means that it can be used to enhance daylight and improve the image. Because of this, I use it more and more these days. There are options to use flash in several different ways, Fill in, Slow, Red Eye reduction, Auto, Off or On etc. But it’s the option to be able to turn it off, especially if the camera comes with an inbuilt flash, that’s so important. Speaking of inbuilt flash. Avoid using them as much as possible. The ideal flash should be off camera. Something I’ll discuss in a future post.
Rating: On camera flash 4/10. Turn off flash 10/10
Focus targeting
Like most cities in the USA, Anchorage has a big fourth of July parade. This one was in 2012
Another option again almost universally supplied is focus targeting. Looking through the viewfinder and/or the rear screen you can bring up a rectangular or square grid of around 30 boxes that you can select to use as a focus target. Options usually include single, selected groups or all targets.
Rating: 6/10
Exposure Compensation
Exposure compensation is great!
The ability with just a twist of a dial to alter the exposure or brightness without having to alter the aperture or shutter speed that you’ve already set is very handy. Of course, it does adjust something so it should only be used for small incremental changes.
Rating: 10/10
Metering
Metering, whilst another handy option to have, is not used much. I think that’s because it’s not understood by most camera buyers. That too is a post for another day but suffice to say it’s a must have for the future.
Rating: 7/10
Image Stabilisation
The street art act, Dream State Circus at the Street arts festival in Fremantle, Western Australia. the festival attracts over 100,000 spectators over the Easter long weekend.
Many years ago, I met a photographer who was taking clear and sharp images of wildlife at dusk without a tripod. That was my first introduction to image stabilisation. Basically, it compensates for camera shake caused by slow shutter speeds and is a must have. Initially they were only available on the lens but nowadays most cameras have it inbuilt. So now you don’t have to worry about what lens to use. Again, a must have.
Rating: On camera 10/10
AEL/AFL Lock
(Auto exposure Lock/Auto Focus Lock)
I use this option all the time. The ability to be able to lock your exposure and/or focus is invaluable. How does work? Well usually there is a button on the camera that allows you lock the exposure and or the focus and then recompose. When would you use it? In lots of situations Landscapes, Portraits, Products, even macro work
Rating: 10/10
White Balance
What’s white balance?
Well it’s on every camera these days, so if you leave the setting on auto you don’t have to think about it.
But (always a but) there are times when auto doesn’t get it right. For example, tungsten or fluoro lighting tend to confuse it a bit. That’s when you take it off auto and set it to appropriate setting like, duh, tungsten or flouro
Rating: 8/10
RAW Format (Image Quality)
One phrase that is somewhat misleading is the term “Image quality”. Used for having the choice of what format to use i.e. JPEG or Raw.
I’m not about to expand too much on what the difference is but if you shoot in Raw then you will need to do some post processing whilst JPEG is mostly ready to go. That’s simplifying it but to do the argument justice I like to use a cooking analogy.
You could say that Cooking a supermarket bought ready to go meal that you sling in the microwave is a JPEG.
Whilst a meal that contains the raw ingredients you have bought at the local farmer’s market and prepared and cooked from scratch is a Raw file. The former is what you see is what you get (unless you can’t cook and cock it up altogether).
Whilst the latter is a creation that you can manipulate to give you whatever flavour and presentation you like. Clear? Another future post maybe. Anyway, most cameras will give you the option to select either and/or both and other variations. But the option to be able to shoot in Raw is a must, if not to use now but in the future!
Rating: Raw Option 10/10
The 6 features you don’t need on your camera
Cafe in Lixouri. Coffee drinkers in Lixouris main square
As you can see I have strong opinion on what you should have on your new (or existing) camera but guess what?
I have an equally strong opinion on what you didn’t need as well.
So, let’s get into it:
Picture Styles
Pike Place markets in Seattle, Washington, USA
Often there are picture styles, modes or scenes available and they can be countless;
Action, Portrait, Landscape, Panorama, Sunset, Candle, Fireworks, Beach & Snow, Fisheye, Wide-angle, Macro etc Some models also give you some tips for certain photo genres in the same mode. E.G. “Tips for flower Photos” What is often not discovered until the camera is used is that some of these modes, e.g. Fisheye, Wide-angle or Macro need to have lens that support those scenes. There is, however, one camera that it’s probably better to have some modes available for and that’s a good smartphone camera, e.g. the Samsung, Google or Apple varieties.
Most images taken by a smartphone are shared so it can be a shortcut to getting a good image first time.
Rating: 2/10
3D
Here’s a useless option ‘3D Photography’.
3D TV’s bombed and as far as I can tell there’s not many 3D monitors either, so why would anyone want to shoot a 3D image or video. It is used for some specific industries e.g. Computer-graphics, Architecture or Health. However, in my humble opinion, it’s useless as it relies on the viewer having the equipment to view it.
Rating: 0/10
Multiple Exposures
Not so useless but not essential is the recording of multiple exposures.
Multiple Exposures are photographs in which two or more images are superimposed in a single frame.
If you really want to try this for your travel photography be aware that it is somewhat tricky. In fact it’s much easier to do it in something like Photoshop.
Rating: 4/10
Digital Zooms
Digital Zooms are commonplace at the compact level and all phone cameras have it.
Personally I avoid using them as much as possible and will use an optical zoom over a digital one. What’s the diff? Well an optical zoom is a true zoom lens. They produce much better-quality images. A digital zoom uses some in-camera image processing.
When you use a digital zoom, the camera enlarges the image area at the centre of the frame and trims away the outside edges of the picture. The result is the same as when you open an image in your photo-editing program, crop away the edges of the picture, and then enlarge the remaining portion of the photo. By using the in camera digital zoom you lose the information around the crop. Whilst if it’s cropped during post processing you can keep the entire frame for use later on.
Rating: 2/10
Face Priority
My pet irritation is Face Priority. Personally, I think it’s a gimmick.
Originally in small compacts it’s spread its way into smartphone cameras and now even DSLR’s. If you are taking a portrait, then supposedly the camera will aid your focus by detecting the face.
Rating: 0/10
Printing
Printing is on its way back. Whilst the option to directly print from the camera could be handy, it’s also generally restrictive.
This feature often requires certain functions to be available on the printer. At the end of the day, if you are going to do any post processing even if it’s minimal, you should be able to print from that software.
Another option is to take it to a print shop if you are looking for high quality. Of course, you can always use the self-service machines that are everywhere.
Rating: 2/10
Conclusion
Of course, there are other Camera Features not mentioned here. But these are the main ones you will most likely come across. As you can see there are lots of different Camera features and I didn’t cover them all.
But the one thing to remember is it’s not the camera that takes the images, it’s you. All features and benefits do is give you more options a lot of which you will never use or use once or twice a year at best. A short cut is to decide how much you are prepared to spend, go into a shop and test drive those within your budget, decide on the most comfortable and buy it. When you pick it up it needs to feel comfortable. Does the weight seem too heavy, too light or, just right? If it has a viewfinder, does that fit comfortably against your eye? Is the rear screen easy to see? How easy is it to see when you are holding it? How easy is it to adjust the dials and access the menu/s? Does the grip feel good? Is it easy to turn to portrait or landscape mode? That’s what you need to look for in a new camera and to revisit your existing Camera.
Make your life easier and double check the features on your new or existing Camera by downloading a e-book to Camera Features. Just pop your name in the box below.
In my last post I talked about the best camera to use for travel photography. If you missed it you can find it here. This time I want to talk about the best camera lens for travel photography.
In that article I inferred that the best camera to have is a mirrorless. That doesn’t mean that in this article I’ve assumed that you will have one. As in Ice Cream, there are many different flavours. There are lots of different lenses that do the same thing. There are lots of different lenses that do specific things.
Types of lenses
To ensure consistency I’ve quoted the 35mm equivalent when quoting a focal length. Why? Well most, if not all, camera manufacturers usually quote that in their literature. To cover all the different size focal lengths from each manufacturer would be confusing. E.G. a full frame camera body lens of 50mm is exactly that, 50mm. A DSLR crop sensor camera is usually around 1.6 which means 50mm is 32mm. To confuse you even more, some mirrorless cameras have crop sensors of around 2, which means a 50mm lens is 25mm. AAGH!!! More on that in a future post.
Now we’ve cleared that up, let’s go to the best camera lens for travel photography.
Built in Lenses
There are some top end compact and low end mirrorless cameras that have a built in lens. An example of both would be the Sony Cyber-shot DSC-RX10 III and Fujifilm X100F Most of the lenses that come with these cameras tend to be telephoto lenses and that’s when you need to be careful. Some of them use both Optical and Digital zooms. If you recall from the Best camera equipment for travel photography, a digital zoom is the same as having an image on your computer screen and cropping it. That means you end up with a smaller picture size, e.g. 1000 x 1000 becomes 500 x 500 Pixels.
If you zoom in optically the size remains the same and so does the resolution, allowing for bigger prints or digital sizes at better quality
So, if you are looking at a lens on a camera, ensure that you know whether it’s using optical or digital to zoom. Just because it uses digital doesn’t mean you should disregard it. If it also has an optical zoom as well, then you can choose to use the digital zoom sparingly.
Built in Telephoto lenses tend to range from around a minimum of 28mm to sometimes around 250mm. When it’s longer than that, then it’s usually at the long end that the digital zoom comes into play.
If you are going for an all-rounder, which you would be if you are considering a compact camera, then 28-150mm is the sweet spot. If you can get wider than 28mm, say 24mm, than all the better. Remember you can always, where practical, zoom in with your feet.
Great Langdale in the Langdale ranges ,Lake District, England
Click on the above image to view a larger version and for other options
Interchangeable lenses
Now we are talking about a separate lens. That is, a lens that can be removed from the camera.
With interchangeable lenses, you need to establish what you can afford and whether you want more than one lens.
The first camera I had (which was a film camera, but the principle is the same) had a 28-200mm lens. I also had a 1.5 Teleconverter with it, which meant that I could get a maximum zoom of 300mm.
So, there are other ways of having flexibility with only having one lens.
But if you are thinking about going for a camera with Interchangeable lenses, then it’s worth the price to invest in glass. The thing is that the lens is a more important and longer-term investment than the camera body. If you get a good lens, then you will keep it far longer than the camera body.
Telephoto Lenses
With a telephoto lens you have options with what you want to carry. And there are some genre’s that need telephoto lens. Wildlife and entertainment are hard to do without having a Zoom. Street, Architectural and even Landscapes can give you different viewpoints that you wouldn’t get if you have a fixed focal or prime lens.
As I mentioned in the Built in Lenses section above, the usual sweet spot for a generalist is 28-150mm.
So, you’ve decided on the length of zoom you have. Now you need to decide on how ‘fast’ you want it to be. What’s Fast? Well that relates to the maximum aperture size.
Most consumer lenses are around F4.5 and as you zoom out, so the maximum will be higher. A range of 4.5- 6.5 is common. They are fine for the majority of Travel Photography subjects.
However, if you want to get serious, then the next level up are pro lenses. They tend to have a fixed aperture i.e. don’t change as you zoom. But not only are they a lot more expensive they are also heavier and bigger. So you have not only have to consider your budget you have to consider your back as well!
Prime or Fixed Focal lenses
What’s a prime lens? Well basically it’s a fixed length. The most popular Prime Lens length is 80mm, as it’s a bit of an all-rounder and matches what you see with your eyes.
A prime lens is more restrictive but usually offer you better quality. Unlike the Telephoto lens, they have fixed apertures like a pro telephoto.
If you buy one with a large aperture of f1.2 or 2.4 you have a lot more flexibility when it comes to getting different areas of your photo in focus.
But they are probably not so good for Wildlife but depending on the size you can use it for pretty much anything. As I said before you can still zoom with your feet.
Wide-Angle Lenses
They are normally around 20-24mm and offer you, as the name suggests, a wide-angle view which can be also used for an artistic interpretation of a subject.
Some street photographers and Photo-Journalists use them a fair bit. However it’s landscape photographers that use them the most. Getting a full wide landscape can be very satisfying.
Speciality Lenses
There are many types of speciality lenses.
Tilt and shift lenses are mainly used to correct that narrowing of a building that you get when taking some architectural shots.
Macro lenses are great for small objects such as insects and flowers. A macro setting is often built into some camera bodies. But more often or not you usually need to have a prime lens that has that facility as well.
Then there are super telephotos for wildlife and sports. You see them around the boundary in sports stadium. As there are not many, if any, consumer level super telephoto lens, they are big and expensive.
Then there are the distortion type lenses, such as those that manufacturers like Lens Baby makes. Most popular of these are the Fish Eye lenses, a wide angle that makes everything look like it was in a fishbowl.
Again, whether you have these or not depends on what type of Travel photography you are going to specialise in
Let’s map those genres to a specific lens and wrap up this article on the best camera lens for travel photography.
General – Telephoto Lens plus a 80mm Prime Lens
People and Street – 50 or 80MM Prime Lens plus a 28-150mm Telephoto
Journalistic or lifestyle – 80 or 100mm Prime Lens plus a Telephoto Lens of 28-150mm
Landscape – 24mm Wide-Angle plus a Telephoto with a minimum focal length of 100mm
Architectural – 24-100mm Telephoto and a 35 or 50mm ‘Fast’ Lens i.e. F1.2 or 2.4.
Wildlife and Nature – Big Telephoto as long as you can afford (*See below) plus a Macro if you are intending to shoot flowers or insects or the smaller world.
*There is always the option to hire a lens, depending on your location. A couple of years ago, I hired a 100-400mm Canon Lens for a trip I did to Northern Canada to see the Polar Bears. Often you may not use some of the more specialist lenses all the time, so It’s a good idea to hire them. More on this in another post.
Food and Drink – Food and Drink is a tricky genre to suggest the best lens for.
If you are looking to take low light plated food, e.g. in a restaurant, then you would need a wide angle or 50mm lens with a large maximum aperture of F1.2 or 2.4.
However, if you are taking images of food in its raw state e.g. farming or even a farmers’ market, then a telephoto may be the best way to go. Same applies to drink. Vineyards, Wineries and breweries are semi landscape. And you can be really creative using a macro lens to shoot bottles of Wine or Spirits or even fluid in a glass.
Entertainment – Like Street Photography with the exception that you many need a fast lens if you are inside a concert hall and flash is not allowed
As you can see there are lots of different ways of looking at the lens you may require. If you are not sure then the best way to start is, as I’ve indicated in the general genre, to purchase a telephoto and if possible a 80mm lens.
Summary
Finding the best camera lens for travel photography can be a challenge.
Two things to remember:
1. The quality and build of a lens is more important to the quality of your images than the camera body.
2. You are likely to keep your lens for a lot longer than the camera body.
So, ensure you spend as much as you can afford on your lens.
There are many types of lenses but the most useful tend to be telephotos of around 28-150mm and 50 or 80mm prime lens.
Unless you are specialising in some tight niche, then purchasing a speciality lens like a fish eye or tilt and shift lens is not advisable, as you won’t get the use out of it.
Remember you have the option, most of the time to hire some speciality lenses.
Need some help with your travel photos? Get a free guide by filling in the form below plus you will also get content that’s only available to subscribers
Any questions then please contact me here and/or please say hello at these places:
“If I could tell a story in words, I wouldn’t need to lug a camera” Lewis Hines
Lewis’s quote is relevant to most of us these days. It’s far easier to document something visually than to describe it in words. But to do it well and consistently you do need a ‘decent’ camera.
Despite those who say its’s not about the gear, you need a camera that will suit your style and objectives.
So, if you’ve read my last 2 posts: An Introduction to Travel Photography and Different types of Travel Photography, you are probably wondering what is best camera equipment for travel photography. Or maybe you are not. Either way, when you are travelling or going on holiday, you want to come back with photos that you are proud of. So it’s worth the 5 minutes of your time to read this.
Smartphone Cameras
These days everyone gravitates to their smartphone for most pictures.
Originally, they were mostly used to document items, like a sign or an extract from a newspaper or even a product you were looking to buy.
Only occasionally were they used for happy snappies or selfies.
Fast forward to today and most smartphones are used for selfies first and then general photos of all types second. On my travels, I see lots of people using their smartphones to take travel photos. But are they the best camera equipment for travel photography?
Smartphone Capabilities
Today’s smartphone cameras are better than some of the compact cameras that have been or are available.
But, and you were waiting for the but, weren’t you? They are limited.
Think about it. Physics dictates that, whilst lots of things are becoming smaller and retaining quality, optics are still a way behind.
A smartphone camera has a small lens and that means you are restricted on what it will do well. Especially compared to mirrorless or a DSLR camera.
Even with the new software and multiple lens of the latest offerings you still have limitations.
If you are happy with that, then that’s absolutely fine.
But if you want more flexibility, then consider either a mirrorless or a DSLR.
What a smartphone camera can’t do well.
Well the first thing is it doesn’t perform well in low light. Let’s say you are taking photos with a Smartphone Camera inside a Basilica somewhere in Europe. Unless you are using a tripod, which is often banned in some public places, you will find your images will appear blurred. That’s camera shake.
Even if you are using a tripod, Smartphone Cameras find it hard to replicate the details in low light.
Now I know that will improve and I understand that the Samsung S9 is a lot better in low light than previous models.
But unless you are on a plan that allows you to get the latest model, you will have to find at least $1000.00 to get that in your hot little hands.
Half of that will buy a camera that will perform much better.
Of course, it won’t have a phone or the rest of your life in apps like email, internet, health and fitness etc. etc.
But it will mean you have options.
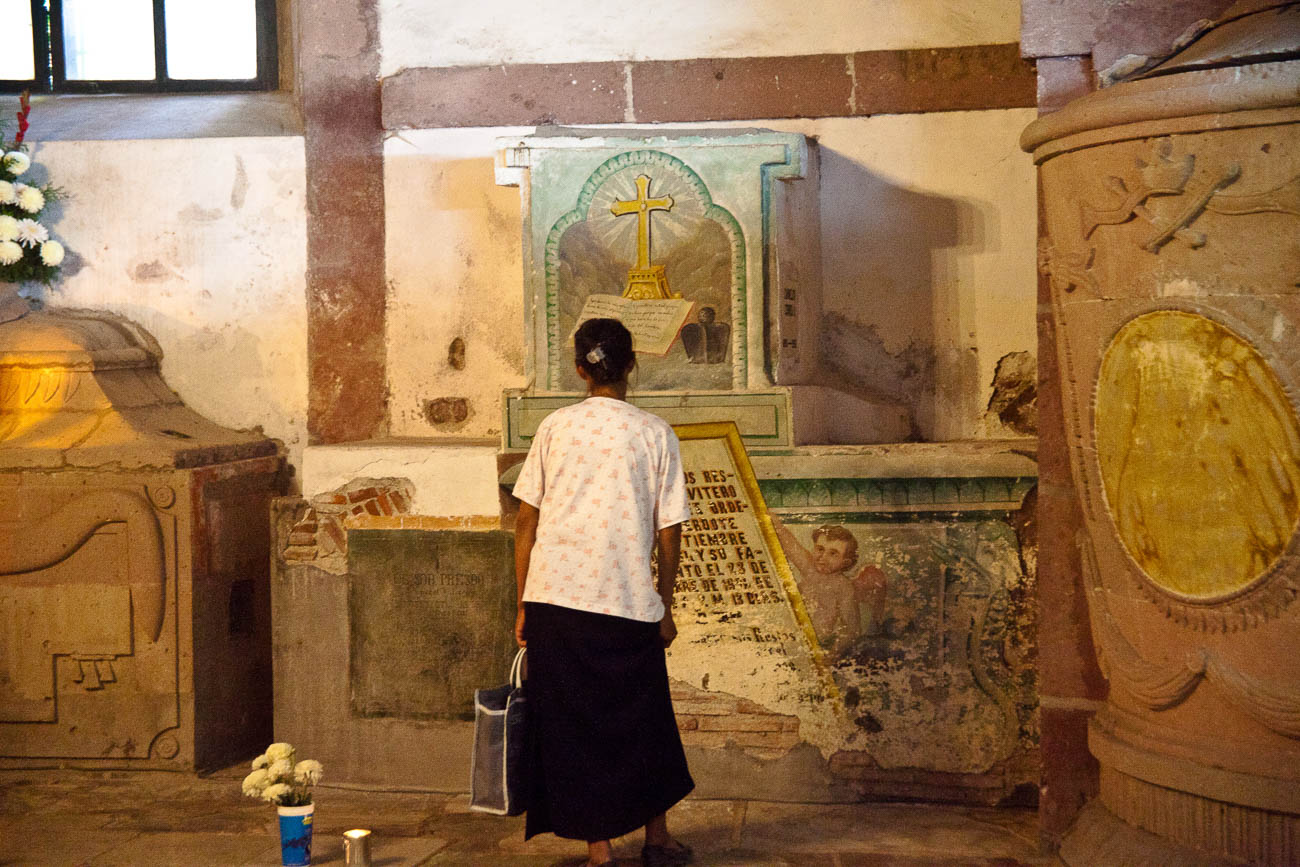
Women grieving in San Miguel de Allende’s parroquia crypt
Optical and Digital Zooms
A smartphone struggles when zooming in, losing not only quality but also resolution.
That’s because it is a digital zoom not an optical one.
The difference?
Well, a technical explanation is not what I want to give you. But I will give you an analogy.
It’s the difference between cropping an image on your computer screen to a smaller picture size. For example, a photo that measures 1000 x 1000 becomes 500 x 500 Pixels. Zooming in optically retains the size and therefore the resolution. Why should you care? Well cropping digital images means to see it at a good size or to print it you must blow it up and that’s when you see the faults.
As the technology of these cameras improves there won’t be such a differential between larger cameras and smartphone cameras.
Having said all that if you want to just take a smartphone camera with your and nothing else then knock yourself out.
Just be aware that you are restricting yourself. So my advice would be to concentrate on taking photos of subjects that a smartphone cameras do best.
Compact Cameras
Ok so now I’ve dismissed your idea of only having a smartphone, what is the best camera equipment for travel photography?
Well if we start at the bottom. Compact cameras are generally the same these days as smartphone cameras. So there’s no point in you taking one of those. Unless of course you don’t have a smartphone.
However, having said that, there are a few high end compact cameras that have great optics and sensors. Ones like the Sony Cyber-shot DSC-RX10 III and Fujifilm X100F come highly recommended but will set you back $1100.00 plus. See DP Review’s take on it.
Mirrorless Cameras
After those we are looking at Mirrorless or Micro Four Thirds cameras.
What is a mirrorless camera?
Well DSLR’s have a mirror protecting the sensor.
When you are looking through the viewfinder you are actually seeing the mirror which is reflecting your subject to your eye. When the shutter button is pushed the mirror lifts up and exposes the sensor to light and the subject.
Having a mirror takes up space and so nearly all DSLR’s are quite big, chunky and relatively heavy.
The mirrorless cameras don’t have a mirror – hence the name “mirrorless”.
Not having a mirror reduces the size and weight of the camera body.
Now I could go into lenses etc now, but I’ll cover that in another post.
Different types of Mirrorless Cameras
Not all mirrorless cameras are equal though.
Some have larger sensors than others.
That doesn’t mean that the larger the sensor the better the quality. But it does mean that it correlates to the size of the lens.
So, the larger the sensor the more likely the lens will be larger and heavy.
Mirrorless cameras do give you a lot more flexibility than compact or smartphones. Because they all have removable lens you can vary your lens according to the subjects you want to photo.
And as I’ve mentioned they are much smaller and lighter than most DSLR’s, which makes them more ideal for Travel.
DSLR Cameras
So, what about DSLR’s? Well in most people’s eyes DSLRs are synonymous with quality. When I take out my DSLR, I get lots of people comment on how I have such a good camera, so “I must take good photos”. The only comments I get on my mirrorless is that they look “cool” as they have a sort of ‘retro’ look.
These days with, the exception of the very high-end models, differences in quality between both types are negligible.
Personal choice.
I do like the feel of my Canon 5D MKII and I often use it for local shoots.
But when it comes to travel that’s when I reach out for my Olympus OMD1 MKII.
It’s so much lighter and even with the pro lens I have, it takes up so little space in comparison.
Of course, if money is no object then the Leica models are lightweight and small and come with fantastic quality. Or if you don’t mind lugging around a big DSLR then the high-end Canon or Nikon cameras will also give you great quality.
But with both you will need to use the same wheelbarrow that you carried the money to pay for them, to carry them around.
Tour de Mont Blanc Path near Les Contamines, France
Conclusion
It’s often quoted that the best camera equipment for travel photography is “the one you have with you”.
But I would challenge that. Unless you are travelling to the same destination over and over again, it’s quite likely that where you travel to next will be a once in a lifetime trip.
Do you want to trust your photo creation equipment to a restricted device when there are so many better options on the market today?
For more about buying a new camera check out these posts:
Buying any sort of technology whether it be a phone, a TV or in this case, a camera, can be mystifying in a lot of cases and more importantly, time consuming.
But it doesn’t have to be.
Ask these questions and you have a fair chance of coming away with a decent camera from a camera store. Note that I said camera store not online store. Sure, you can still buy it from Amazon or B & H or any online store but as with a TV you really want to ‘try before you buy’. Cameras are personal and if doesn’t feel right it won’t help you take the sort of photos you want.
All these questions are for you to answer not the camera store salesperson or online forums, facebook groups but you.
1 What are you going to use it for? Are you are a business looking to take product picture. Are you in the travel industry and looking for a general all-rounder for travel pictures? Do you just want to use it for your blog? Do you also want to take pictures of your family?
You get the point.
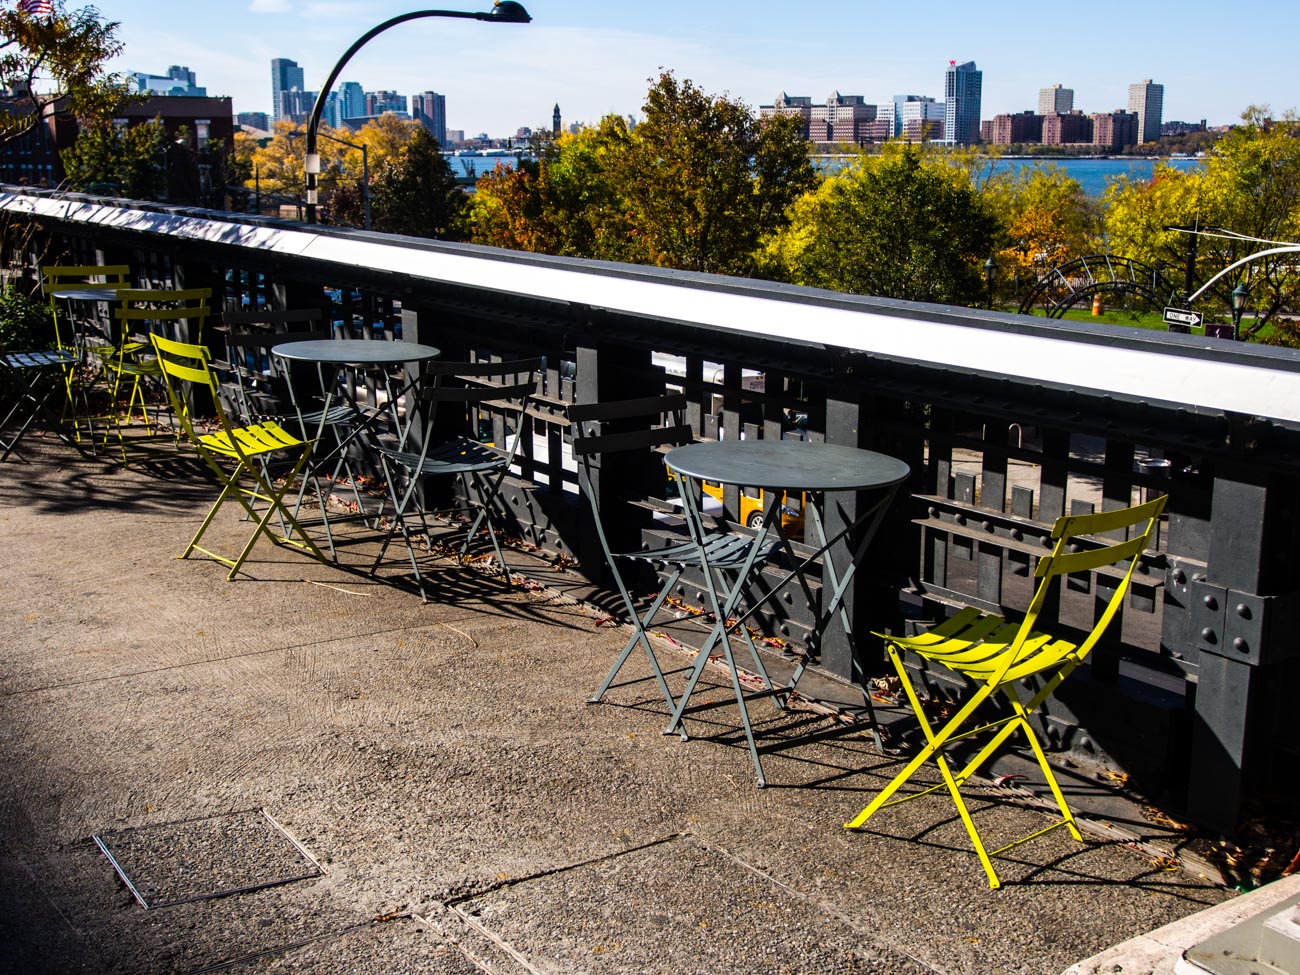
The High Line Walk Way in New York
2 What’s your budget? Whilst the camera is not always the main reason for taking great photos it does give flexibility and that flexibility is usually but no always proportional to the amount of you want to spend. Don’t get into financial stress over it but don’t scrimp if you can afford not to.
3 What size camera do you want? Cameras come in all sort of shapes and sizes. If you’ve been used to using a smartphone then buying a DSLR may not suit. The camera is big and the lenses quite heavy. So maybe a top end compact or a mirrorless camera may be better. If on the other hand you’ve had a DSLR but it’s a bit old in the tooth then consider a Mirrorless. It also depends how mobile you want to be. Do you have an existing interchangeable lens camera that you want to upgrade? In which case you will want to keep to the same brand if possible.
4 Are you the only one going to use it? If one of your staff or another member of your family are also going to use it then it may be worth getting their input as well. On the other hand, that could also confuse the issue so think this one through first.
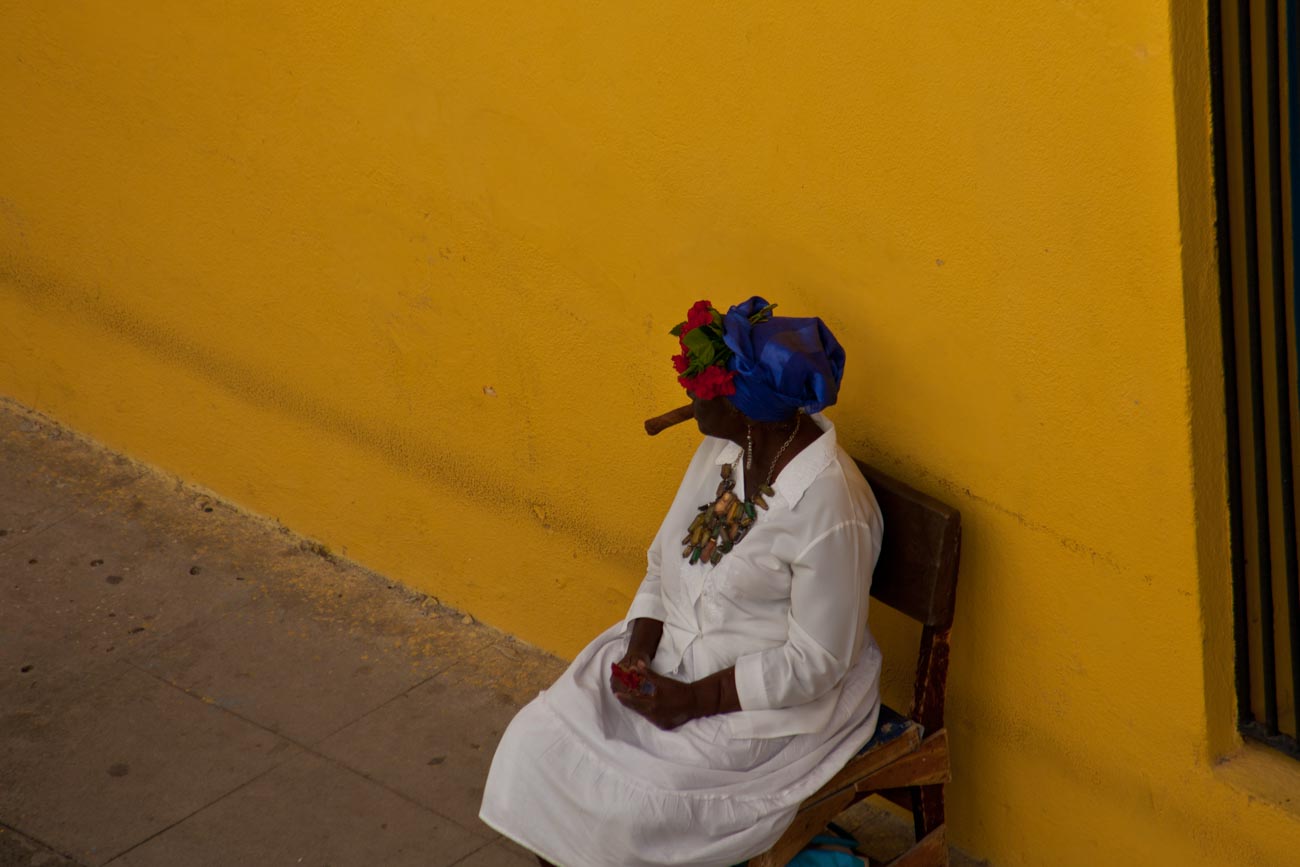
Cigar smoking fortune teller near Catedral Plaza, Havana
5 Are you going to buy more than one lens? Nearly all interchangeable lens cameras come with a ‘kit’ lens which is usually enough to get you started. You can always add to it later
So that’s it. All you need to do now is to go into a camera store and say the following for example:
I want an camera with an interchangeable lens, that’s light, than can be used for portraits that will be used commercially and that I only need one lens for.
Try it out. It’s much quicker and better to ask yourself these questions than spend hours of research on the net and then be totally confused.
You can change your mind once you get into the shop but I’d try and be certain as you can before looking at different cameras so that you can keep on point.
I’ve eaten at lots of good or great restaurants (I’ve eaten at some pretty ordinary ones too but that is a story for another day).
And not once has it occurred to me to think that the equipment in the Chef’s kitchen must be fantastic!
I appreciate the fact that it’s the chef or chefs that created this meal that I found so enjoyable.
From the start of the dish to sourcing and delivery of raw materials to preparation, the cooking and assembling the meal, dishing the meal onto a plate and finally the delivery to your table, it just happens.
But nowhere on this path do we even consider what equipment they are using.
We trust that their systems in place will deliver to us their creation.
They may well have used the latest pan or cooker or have a great point of sale tablet.
They might well have great knives, to die for ovens or the latest work stations.
We, as the consumer, don’t care as long as the food has got to us in the time expected and is good or even great.
Why then as a photographer, Do I often have people say “WOW! You must have a great (or expensive) camera” when they look at my work.
As if it was the equipment that made the images that are they impressed by.
The best camera is the one you have with you.
If you’ve only got one device with you that can take photos whether it’s a phone or a DSLR – then that’s what you’ve got – period.
You can take great images with pretty much anything provided you know how.
Having an expensive camera is not directly proportional to the quality of the image.
I’ve heard it said amongst winemakers that you can make bad wine from great fruit but you can’t make a great wine from poor fruit regardless of the shiny expensive equipment you might have in the winery.
But, you can make great wine from great fruit without having the latest, greatest and most expensive equipment.
Well the same applies to a camera if you have good technique, a good eye and skill then you can make great images with any camera.
Even Stock agencies now accept images taken by mobile phones such as the iPhone or Samsung S series.
The reality is that the vast majority of ‘photographers’, who don’t rely on their cameras for use in specific genres, a simple, usable and light camera is more than enough when you know how to use it.
You see, even with all the right kit it’s easy to take an average photo.
Here’s an example of 2 images I took on a polar bear trip.
The fuzzy out of focus badly composed image on the right was taken with a Canon 5D Mk 11 with a pro 100-400mm telephoto lens.
The one on the left was taken with a soon to be traded in HTC one XL smartphone.
On both I was in the right place at the right time and for the first one I had all the time in the world but still managed to stuff it up.
You can take great photos with anything you just need to know the limitations of the camera you have.
Let’s take smartphone cameras.
Smartphone cameras struggle to take images that will blur or freeze motion.
They are hopeless in low light unless you have a tripod (and even then, it depends on the brand). Despite smartphone manufacturers best efforts phone they still can’t get the same bokeh that a camera with a interchangeable lens can.
It’s physics after all. But eventually smartphones will be able to provide the flexibility and quality of larger cameras.
But a DSLR or Mirrorless camera , can do all these things but you can’t carry it in a pocket or small bag
So, you play to its strengths not it’s weakness.
Use a smartphone for still shots in good light that don’t need that bokeh effect and you’ll have as good as image as you can get based on your ability.
So, there you have it.
Hopefully that helps you realise that you don’t need the latest and greatest camera to take some really good images for your marketing
They are some of the benefits you can get with right equipment. But to reiterate the image is only as good as the person with who has their finger on the shutter button.
To use another analogy, are drivers of Mercedes, Rolls Royce or Porsche cars any better drivers than you or me (assuming you are not one of them)? I think not.
I would be interested in your opinion.
Do you agree?
Did this help you gain some confidence in what camera you have?
Once upon a time I had zero interest in photography but as we were going on the trip of a lifetime I figured I should get a ‘decent’ camera.
I went to a local camera store and spoke to the guy there who had been to some of the places we were intending to visit.
He came up with a camera and a lens and a couple of other bits like a couple of filters etc. and said this what you need and it’s going to cost you $1000.00.
So, I bought it and got hooked on photography.
Now was that the best camera for me? Could I have got a different camera cheaper but with same quality?
Possibly.
Now, granted this was pre-internet and digital cameras, so research was a lot more time consuming. New camera models didn’t get released every 6 months or so as they do today.
But I trusted him and I guess it did the job.
But 18 months later I had upgraded and had a top of the range camera and sold the original one at a second-hand photo market.
So maybe it wasn’t the right one.
What you shouldn’t do
Since then I have bought many cameras and used them for various applications.
In doing that I have developed a fairly simple set of questions to ask when buying a new camera.
Let me go over what most will do when buying a camera.
First, they spend hours trolling through reviews and checking places like Amazon or B & H for the best price.
Then they may go into a camera shop and screw the salesman into giving them the best internet price.
Then they buy and off they go.
Alternatively, they buy online if they couldn’t get the deal they wanted at the bricks and mortar shop.
What’s wrong with that?
Well most people wouldn’t buy a car that way or even a TV.
Buying it that way means that the camera ends up sitting on the shelf unused. And then they blame the camera manufacturer or salesperson for making the damn thing so complicated.
You see everybody is different when it comes to comfort levels and abilities (and lots of other things as well, of course).
How do you know it’s the right camera for you? If it’s sitting on your shelf unused it’s not the right camera!
The Smartphone factor
I know a lot of people have gone for the convenience of using their smartphone instead so the camera they originally bought is now redundant.
Don’t get me wrong I’m not against smartphone cameras, I use mine all the time.
But there are lots of applications that a smartphone won’t pass muster on. That’s a future post I think.
What you should do
Here’s my system
1 Be clear on what you are going to use it for.
Here’s some questions for you to answer:
Q Do you want images with Bokeh (where the background is blurry but the subject is in focus)?
A For best results get a full frame DSLR or Mirrorless (not many Mirrorless have full frame) with a ‘fast’ lens. What’s a fast lens? Well a lens that has a small f stop number of say F3.5
You could also get crop sensor camera with an ‘fast’ lens but it needs have a low F stop number of at least 2.4
Q When would you use it?
A Taking product shots or maybe portraits of your employees or yourself
Q Are you going to take action images
A You will need a camera that has a high number of FPS (frames per second). Depending on the action 6FPS should do but you can go as low as 4FPS
Q When would you use it?
A For freezing motion or multiple shots of an action scene (see examples)
Q Will you be taking workplace shots
A The good news on this is almost any camera will give you images of people in the workplace. However, you may want to go for one that has a reasonably high MB (Mega Pixel) if you are using this for print publications.
12Mb is the lowest you would go.
Q When would you use it?
A Taking groups of workers either in posed or casual situation depending on the sort of image you are trying to portray.
Q Will you be taking Landscapes
A You can take Landscape images with pretty much any camera including the smartphone. However, if you want good quality and flexibility then an interchangeable lens camera with a wide-angle lens that will go at least as wide as 24mm (in 36mm).
You’ll also need a tripod.
This is because to get a Landscape in focus you usually need a high F stop number. A high F stop number reduces the amount of light and therefore will increase the chances of camera shake blur.
Q When would you use it?
A Plenty of examples out there for using Landscape images.
Wineries or Breweries in scenic areas. Restaurants, Accommodation etc. etc.
Anything that needs a sense of place and a scenic backdrop
2 How much can you afford?
Pretty obvious I guess but worth mentioning anyway.
No point taking out a loan or getting into debt over a camera.
Especially if it’s your first one.
After all you may decide that it’s not for you and it gets consigned to the shelf in your office with lots of other redundant tools.
You can get a pretty decent mirrorless or even a DSLR camera for less than a $1000 including lens.
3 Try before you buy
This is the most important factor. Your comfort level with any device will determine how much you use it and what you will get out of it.
Go into a camera shop and test drive cameras within your budget that will give you the features you want, decide on the most comfortable and buy it.
Does the grip feel good? Is it easy to turn to portrait or vertical mode? Does the weight seem too heavy, too light or just right? If it has a viewfinder, does that fit comfortably against your eye? Can you see anything trough it? Is the rear screen easy to see? How easy is it to see when you are holding it? How easy is it to adjust the dials and access the menu/s?
Now I know some of you will try before you buy in the shop and then jump on the web and buy from the cheapest online outlet.
But just remember you wouldn’t be able to test drive it if the shop didn’t exist.
By all means shop around online but a least give the shop an opportunity to match it or get into the ball park.
So to summarise do yourself a favour and ask these 3 questions before you decide which camera to buy:
1 Be clear on what you are going to use it for.
2 How much can you afford?
3 Try before you buy
As an example there is no point getting an expensive DSLR that will give you those ‘bokeh’ shots (where the background is all blurry) if that’s not how you are going to use it. You’re just wasting your money.
Likewise, no point in getting a small compact or smartphone if you do want that ‘bokeh’ because you’re not going to like the results.
There are other questions that could be asked but let’s not confuse the issue too much.
If you haven’t had time to read them all whilst you are here for a visit then you can scroll to the bottom and get all four in a PDF.
I have strong opinion on what you should have on your new (or existing) camera but guess what?
I have an equally strong opinion on what you didn’t need as well.
So, let’s get into it:
1. Picture Styles
Often there are picture styles, modes or scenes available and they can be countless; Action, Portrait, Landscape, Panorama, Sunset, Candle, Fireworks, Beach & Snow, Fisheye, Wide-angle, Macro etc. etc.
Some models also give you some tips for certain photo genres in the same mode. E.G. “Tips for flower Photos”
What is often not discovered until the camera is used is that some of these modes, e.g. Fisheye, Wide-angle or Macro need to have lens that support those scenes.
There is one camera that it’s probably better to have some modes available for and that’s a good smartphone camera, like maybe the Samsung or Apple varieties. Most images taken by a smartphone are shared so it can be a shortcut to getting a good image first time.
Rating: 2/10
2. 3D
Here’s a useless option ‘3D Photography’.
3D TV’s bombed and as far as I can tell there’s not many 3D monitors either, so why would anyone want to shoot a 3D image or video.
It is used for some specific industries e.g. Computer-graphics, Architecture or Health.
However, for marketing purposes it’s useless as it relies on the viewer having the equipment to view it.
Rating: 0/10
3. Multiple Exposures
Not so useless but not essential is the recording of multiple exposures.
Multiple Exposures are photographs in which two or more images are superimposed in a single frame. For marketing images that could be handy although somewhat tricky.
Some would say that it’s much easier to do it in something like Photoshop.
Rating: 4/10
4. Digital Zooms
Digital Zooms are commonplace at the compact level and all phone cameras have it.
Personally I avoid using them as much as possible and will use an optical zoom over a digital one.
What’s the diff?
Well an optical zoom is a true zoom lens. They produce much better-quality images.
A digital zoom uses some in-camera image processing. When you use a digital zoom, the camera enlarges the image area at the centre of the frame and trims away the outside edges of the picture.
The result is the same as when you open an image in your photo-editing program, crop away the edges of the picture, and then enlarge the remaining portion of the photo.
By using the in camera digital zoom you lose the information around the crop, whilst if it’s cropped during post processing you can keep the entire frame for use later on.
Rating: 2/10
5. Face Priority
My pet irritation is Face Priority. Personally I think it’s a gimmick.
Originally in small compacts it’s spread its way into phone cameras and now even DSLR’s.
If you are taking a portrait, then supposedly the camera will aid your focus by detecting the face.
Really!
Rating: 0/10
6. Printing
Printing is on its way back and whilst the option to directly print from the camera could be handy, it’s also generally restrictive, requiring certain functions to be available on the printer.
At the end of the day, if you are going to do any post processing even if it’s minimal you should be able to print from that software or alternatively take it to a print shop if you are looking for high quality.
Of course, you can always use the self-service machines that are everywhere.
Rating: 2/10
Of course, there are others but they the main ones you will most likely come across.
Now over to you do you agree with me?
Do you find some of these useful?
Any others that could be added to the list?
As I mentioned in the beginning got no time to read this now? Download all four articles in one document and read both offline and when it suits you.
Over the next few weeks I’m going to suggest some essential features you need to consider having when you are in the market for a new camera or even mobile phone with a camera.
At the end of each feature I’ll give a rating out of 10 – 10 being must have.
At the end of the series if you haven’t had time to read them all then you can scroll to the bottom of the last in the series and get all four in a PDF.
1. Being able to turn off Flash.
Controversially I used to rarely used flash, preferring natural light.
Yet the degree of control some of these cameras allow you to have over flash means that it can be used to enhance daylight and improve the image.
So I use it more and more these days.
There are options to use flash in several different ways, Fill in, Slow, Red Eye reduction, Auto, Off or On etc.
But it’s the option to be able to turn it off especially if the camera comes with an inbuilt flash that’s really important.
Speaking of inbuilt flash. Avoid using them as much as possible.
The ideal flash should be off camera. Something I’ll discuss in a future post.
Rating: On camera flash 4/10. Turn off flash 10/10
2. Focus targeting
Another option again almost universally supplied is focus targeting.
Looking through the viewfinder and the rear screen you can bring up a rectangular or square grid of around 30 boxes that you can select to use as a focus target.
Options usually include single, selected groups or all targets.
Rating: 6/10
3. Exposure Compensation
Exposure compensation is great!
The ability with just a twist of a dial to alter the exposure or brightness without having to alter the aperture or shutter speed that you’ve already set is extremely handy.
Of course it has to adjust something so it should only be used for small incremental changes.
Rating:10/10
4. Metering
Metering, whilst another handy option to have, is not used much.
I think that’s because it’s not understood by most camera buyers.
That too is a post for another day but suffice to say it’s a must have for the future.
Rating: 7/10
5. Image Stabilisation
Many years ago I met a photographer who was taking clear and sharp images of wildlife at dusk without a tripod.
That was my first introduction to image stabilisation.
Basically it compensates for camera shake caused by slow shutter speeds and is a must have.
Initially they were only available on the lens but nowadays most cameras have it inbuilt. So now you don’t have to worry about what lens to use.
Again a must have.
Rating: On camera 10/10
6. AEL/AFL Lock
(Auto exposure Lock/Auto Focus Lock)
I use this option all the time. The ability to be able to lock your exposure and/or focus is invaluable.
How does work?
Well usually there is a button on the camera that allows you lock the exposure and or the focus and then recompose.
When would you use it?
In lots of situations Landscapes, Portraits, Products, even macro work
Rating: 10/10
7. White balance
What’s white balance I hear you cry!
Well it’s on every camera these days so if you leave the setting on auto you don’t have to think about it. But (always a but) there are times when auto doesn’t get it right.
For example, tungsten or fluoro lighting tend to confuse it a bit.
That’s when you take it off auto and set it to appropriate setting like, duh, tungsten or flouro
Rating: 8/10
8. RAW Format (Image Quality)
One phrase that is somewhat misleading is the term “Image quality”. Used for having the choice of what format to use i.e. JPEG or Raw.
I’m not about to expand too much on what the difference is but if you shoot in Raw then you will need to do some post processing whilst JPEG is mostly ready to go.
That’s simplifying it but to do the argument justice I like to use the analogy of cooking a supermarket bought ready to go meal that you sling in the microwave (JPEG) against a meal that contains the raw ingredients you have bought at the local farmer’s market and prepared and cooked from scratch (Raw).
The former is what you see is what you get (unless you can’t cook and cock it up altogether). Whilst the latter is a creation that you can manipulate to give you whatever flavour and presentation you like.
Clear? Another future post maybe.
Anyway most cameras will give you the option to select either and/or both and other variations.
But the option to be able to shoot in Raw is a must, if not to use now but in the future!
Rating: Raw Option 10/10
So did you understand all that? I’m happy to clarify anything you’re not sure of. Just post in the comments section below. Don’t be shy. While you are at it why not subscribe for future updates here. You’ll get my free guide “Eleven easy ways to improve your marketing photography”.
Over the next few weeks I’m going to suggest some essential features you need to consider having when you are in the market for a new camera or even mobile phone with a camera.
At the end of each feature I’ll give a rating out of 10 – 10 being must have.
At the end of the series if you haven’t had time to read them all then you can scroll to the bottom of the last in the series and get all four in a PDF.
1. Drive
Drive selection is the option to select single, continuous or timer shooting.
Single is one shot each time the shutter button is pressed, whilst continuous can be anything up to 15 frames per second (FPS) which is great for action pictures.
The self-timer option is great for selfies, however it’s really handy if the self-timer has two intervals.
A short, say 2 second, interval can be handy to use if on a tripod and low light instead of using a remote cable or wireless device.
One thing to be aware of is that cameras these days are really mini computers and sometimes there can be a lag if you shoot in continuous, especially in Raw format due to the larger file size.
Drive selection again is pretty much standard on most new cameras.
Rating: 10/10
2. Bracketing
I mentioned earlier that I’m a champion for getting the shot right first time in the camera, well bracketing helps this.
Bracketing allows you to automatically take 3 shots of the same subject at different exposures, usually by one or half a stop each. I.e. aperture and/or shutter speed settings.
So you take the shot at the setting you think is correct and the camera automatically takes another 2 or even more at different settings to make those images lighter and darker.
Really handy when taking images of scenes or subjects where there is a lot of contrast.
Some cameras allow you to bracket at different ISO, white balance and flash settings, which apart from the flash option is a little superfluous.
Rating: Exposure bracketing 8/10 ISO, white balance and flash settings 3/10
3. Viewfinder
In the early years of digital cameras, very few had viewfinders thinking that everyone would migrate to the rear screen or monitor on the back of the camera.
However, the exception to the rule was the DSLR which retained the optical view finder.
Nowadays Electronic Viewfinders have come into their own and very good they are too.
Why use a view finder at all?
Why not the rear monitor?
Well 3 reasons come to mind
Camera shake is reduced. Holding the camera out from your body means it is a lot harder to keep still. 2. Competing light. Ever looked at the rear screen on a sunny day? You can’t see a bloody thing!
Battery power. An LCD screen will always use a lot more power than a viewfinder either optical or electronic.
But there are viewfinders and there are viewfinders.
Just make sure it feels comfortable and that the frame is 100%, has a central view i.e. as if you were looking through the lens and not cropped.
Rating: 10/10
4. Shooting and viewing videos.
This is usually on most cameras and is the future of online marketing.
This is a whole article on its own so I won’t go too deep.
I would say that at this stage the only recommendation is to ensure that the camera shoots in high definition (HD) at the minimum.
A lot of cameras are now able to shoot in 4K but like 3D there are still limitations on being able to view 4K videos.
That will change over time as it’s only a matter of time until 4K TV’s and Monitors will be more common as the price drops.
Unfortunately, the image and video quality available is not yet matched by the audio quality that comes standard with most cameras.
So make sure you buy a good microphone that’s compatible.
Rating: 10/10
So did you understand all that? I’m happy to clarify anything you’re not sure of. Just post in the comments section below. Don’t be shy. While you are at it why not subscribe for future updates here. You’ll get my free guide “Eleven easy ways to improve your marketing photography”.
*Led Zeppelin sang this in (you’ve guessed it) Dazed and Confused in 1969.
They could have been singing about how most people feel when shopping for new electronic equipment these days.
Over the next few weeks I’m going to suggest some essential features you need to consider having when you are in the market for a new camera or even mobile phone with a camera.
At the end of each feature I’ll give a rating out of 10 – 10 being must have.
At the end of the series if you haven’t had time to read them all then you can scroll to the bottom of the last in the series and get all four in a PDF.
When we were in the market for a new TV, we discussed all the different features and benefits with retailers and become absolutely confused by salespeople in different shops telling us something different about the same TV.
For example, one would say this TV doesn’t have Freeview plus whilst another would say that it does.
In the end I researched on each manufacturers website and even rang them to ensure that the information I had gathered was accurate.
After doing that we went and bought the TV we wanted.
So what about the features and benefits of a new camera?
Well compared to TV’s I think there way more things to think about and personally I believe that there are too many features that are just not needed!
So over the next few weeks I’m going to suggest some essential features you need to consider having when you are in the market for a new camera or even mobile phone.
At the end of each feature I’ll give a rating out of 10 – 10 being must have.
At the end of the series a free cheat sheet for will be available for you to have on hand when you need it.
So let’s start with absolute must!!
Mechanical Exposure controls
Usually on most cameras there are a P, A, S and M modes.
However, on small compacts there usually is only a P mode and on smartphone cameras, even the best ones, they don’t yet have the option to adjust the exposure the “old fashioned way”.
So what’s with the “old fashioned way”? Well without going into a great deal of details on how a camera works, I’ll explain:
All cameras have an aperture and a shutter. Both allow light into the sensor but differently. The aperture allows in light by changing the size of its hole, the shutter allows in light by the speed of its movement.
Having the option of being able to control both or at least one of these is one of the keys to getting great photography.
So what do all these letters mean?
P stands for program and is basically a slightly more sophisticated way of shooting in auto.
The camera decides which aperture and shutter speed to use but you can also weigh in by using what’s called in the industry “shift”.
A stands for aperture priority and S stands for shutter priority.
In both these modes you control one whilst the other one is controlled by the camera. Most pro photographers depending on their specialisation will shoot in aperture priority.
M is where you have complete control you set both the aperture and the shutter speed and is not something a beginner would dabble in until they have got some experience with the other modes.
Confused?
Let’s simplify. Basically if you want to take a photo of a product with all the background blurred than you would need to adjust the aperture.
If on the other hand you want to take a photo of movement, say one of your dance students practicing or performing then you would more than likely want to adjust the shutter to capture the type of movement you want.
So It’s really handy to have that degree of control.
What’s that you say?
You’re only beginning so you just need auto.
That’s fine however I would suggest that if you really want to create images that represent your brand then at some time in the future you will need a greater degree of control.
One additional control that goes hand in hand with exposure is ISO adjustment.
In fact the aperture, shutter speed and ISO are called the exposure triangle.
That is to say that adjustment of one affects the other two.
With each camera manufacturer trying to outdo each other, the ISO on a top end DSLR can now be adjusted to over 400,000 which is crazy, as now the camera can take pictures in the dark!
When you change your ISO setting, you’re adjusting your camera’s sensitivity to light.
ISO settings are normally anywhere from 100 to 10,000 (or higher), and these numbers have a direct relationship with the device’s sensitivity and therefore the aperture and shutter speed, so a lower setting means you need more light whilst a high setting needs less.
Rating: A or S is 10/10
So did you understand all that? I’m happy to clarify anything you’re not sure of. Just post in the comments section below. Don’t be shy. While you are at it why not subscribe for future updates here. You’ll get my free guide “Eleven easy ways to improve your marketing photography”.
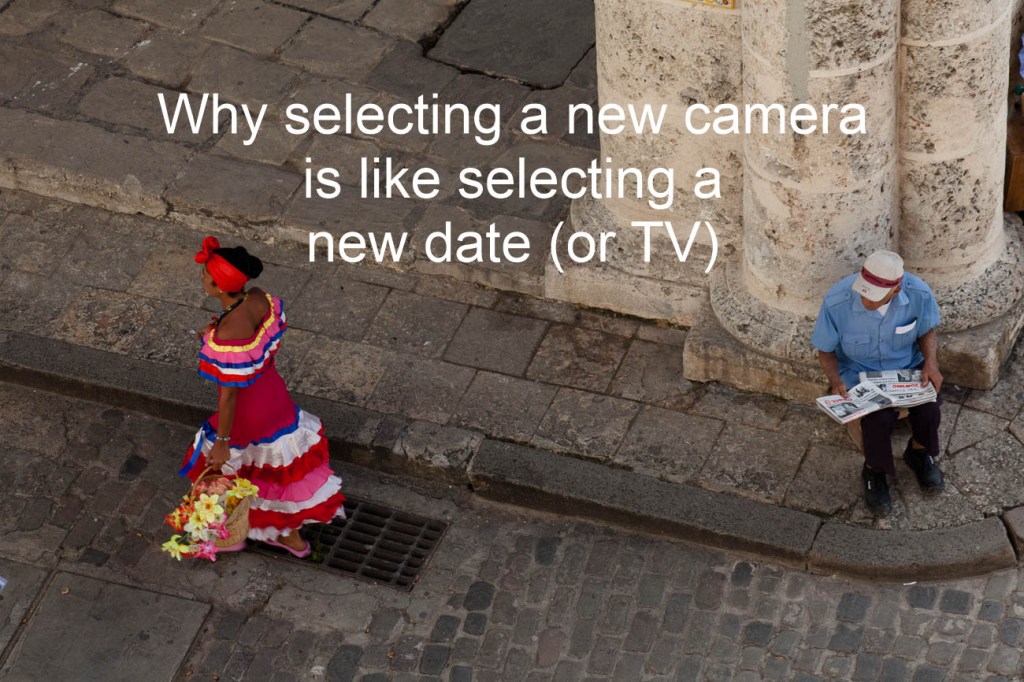
I’m in the market for a new TV at the moment. We went to a couple of stores and there are countless products with different and arguably the same features.
Trying to get the showroom staff to give you accurate info is a challenge.
Like moths changing direction to fly to the light so the sales staff change their song as you look like you are favouring one brand or TV over another. In the end Mr Google helped me clarify what I needed to know. But it’s a confusing experience!
That got me thinking about buying a camera and it’s as bad or maybe even worse. The thing is, like TV’s and many other products today, there are many cameras of all shapes and sizes. So it’s no wonder we don’t know which one to buy.
Do I get a DSLR, a Mirrorless, or a top end compact? Which make? Which model? What features do I need….?
What about lens, filters, bags —- the list is endless.
And then we’re fed this BS that it’s all about the camera
“You must have a great camera to get that shot”, I hear all the time. So the pressure is on us to buy the best we can with what we can afford.
Is it really about the gear?
Well yes and no!
You certainly wouldn’t say to a chef that they must have a great kitchen or cooking equipment after eating a terrific meal at their 5 star restaurant.
And if you did look in their kitchen would the meal been any the less terrific if you found the same tools as anyone else, even those you find in a domestic kitchen.
Are drivers of Rolls Royce or Porsche cars any better drivers than you or me (assuming you are not one of them)?
If you’ve only got one device with you that is capable to taking photos whether it’s a phone or a DSLR – then that’s what you’ve got – period.
You can take great images with pretty much anything provided you know how.
Having an expensive camera is not directly proportional to the quality of the image.
In fact cameras of all shapes and sizes are all good. You just cannot buy a bad brand new camera!
I’ve heard it said amongst winemakers that you can make bad wine from great fruit but you can’t make a great wine from poor fruit regardless of the shiny expensive equipment you might have in the winery.
However you can make great wine from great fruit without necessarily having the latest, greatest and most expensive equipment.
Well the same applies to a camera if you have good technique, a good eye and skill then you can make great images with any camera.
The reality is that even for photographers, who rely on their cameras for their income, e.g. Weddings, Portraits etc. there’s plenty of smaller options than the traditional DSLR.
So for the vast majority a simple, usable and light camera is more than enough when you know how to use it properly.
So how to choose the camera you need?
Well that’s where ‘selecting a new date’ comes in (you were wondering what the connection was weren’t you!)
You see when you select a new date you’re looking for a good fit, in the dating sense its commonality and probably visual cues. Basically you want to be comfortable in their presence
Well it’s the same for buying a new camera. When you pick it up it needs to feel comfortable (the camera that is, not the date).
Does the grip feel good?
Is it easy to turn to portrait or vertical mode?
Does the weight seem too heavy, too light or just right?
If it has a viewfinder, does that fit comfortably against your eye?
Is the rear screen easy to see? How easy is it to see when you are holding it?
How easy is it to adjust the dials and access the menu/s?
This is what you need to look for in a new camera.
Of course before that you will need to decide on features and benefits, or do you.
As I said before, it’s not the camera that take the images but you. All features and benefits do is give you more options a lot of which you will never use or use once or twice a year at best. More on features in the next post in this series.
So a short cut is to decide how much you are prepared to spend, go into a shop and test drive those within your budget, decide on the most comfortable and buy it.
Now I know some of you will try before you buy in the shop and then jump on the web and buy from the cheapest online outlet. But just remember you wouldn’t be able to test drive it if the shop didn’t exist.
By all means shop around online but a least give the shop an opportunity to match it or at least get into the ball park.
So that’s my take on it. What about you?
Have you purchased a camera recently?
Feel free to add your tips and opinions below. I would really like to hear them.
While you are at it why not subscribe for future updates here. You’ll get my free guide “Eleven easy ways to improve your marketing photography”.


