
Thought I’d give a quick demo of my recent project, scanning and cleaning up old photos. So I’ve selected a photo from my collection to show what I do with Luminar Neo.
Scanning Equipment
Let’s kick things off with the gear. I use a Canon 5D Mark 2 for scanning photos and slides. The beauty of this setup lies in its ability to provide high-resolution images, far surpassing what a standard flatbed scanner can offer. Below is a photo of my scanning equipment so you can see the fairly basic setup.

Rotate and Crop
Now, let’s dive into the editing process with Luminar Neo. After selecting the image, the first step is usually some sort of rotation or levelling. Following that, a quick crop to eliminate any distracting elements around the edges.
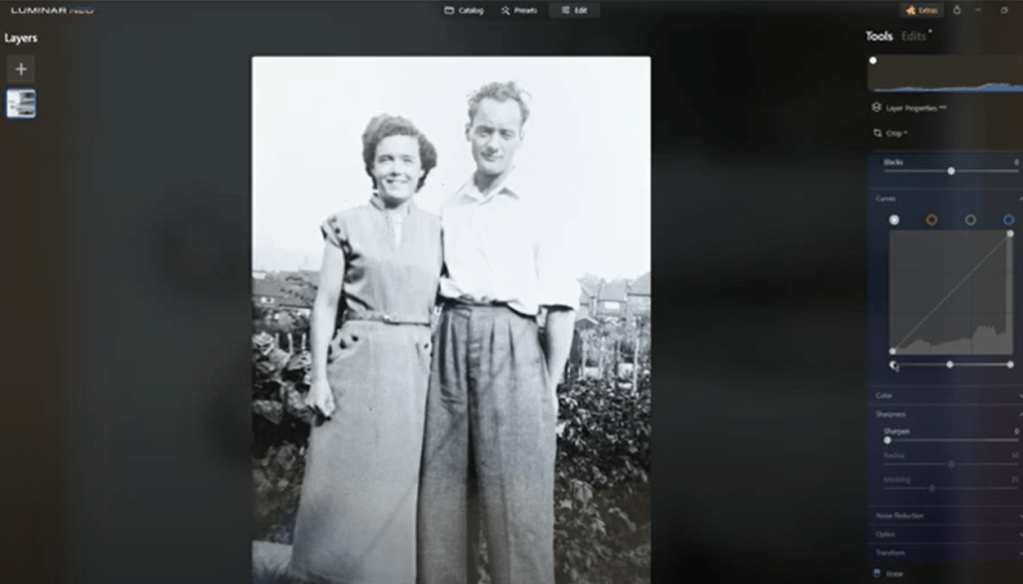
Contrast Via the Develop Module
To breathe life into the photo, tweaking the contrast via Luminar Neo’s develop module is crucial. While the smart contrast button gets us part of the way, tweaking the white and black points manually ensures the optimal balance, avoiding over-darkening or washing out details.
Enhance
Moving on, Luminar Neo’s enhance feature works wonders in refining the overall appearance of the photo. Even if the original image has blown-out areas, enhance can add a touch of magic, transforming it into something visually striking.
Black and White Conversion
Considering the origin of most scanned images tends to be grayscale, I often convert the photo to black and white to maintain the essence of the original image captured during scanning.
Spot Removal
A bit of fine-tuning includes using the erase tool to eliminate any unwanted spots or imperfections. Patience is key, especially when dealing with smaller details.
Detail
To bring out the finer details, a subtle sharpening is applied. Care is taken not to overdo it, ensuring a natural look without introducing artifacts.
Final Touches
While some images might benefit from a vignette, this particular photo seems well-balanced without one. Finally, the edited masterpiece is ready to be saved.
Saving for Different Purposes
I generally save the edited photo as a high-resolution file for potential printing purposes. However, for online sharing or smaller prints, resizing to around 1300 pixels on the longest side is usually good enough.
And there you have it, a glimpse into my photo scanning and restoration process using a camera and Luminar Neo.
Luminar Neo also has some great Generative AI tools. You can see a couple of these by going here.
If you are interested in a free 10 day trial after which you can get 30% off plus and additional 10% if you use the code KATIN10, then you go to Luminar Neo Gen Offer. But you have got to be quick. The campaign runs from 9PM AWST January 19th to 9PM AWST 29th January.
Thanks for watching and reading!


Leave a comment