Katin Images Travel Photography

Travel Photos, Travel Photography Tips and Software

Blog

  • Best Camera Lens for Travel Photography

    The London Eye 0n London's Southbank, England
    The London Eye 0n London’s Southbank, England

    In my last post I talked about the best camera to use for travel photography. If you missed it you can find it here.
    This time I want to talk about the best camera lens for travel photography.

    In that article I inferred that the best camera to have is a mirrorless. That doesn’t mean that in this article I’ve assumed that you will have one.
    As in Ice Cream, there are many different flavours.
    There are lots of different lenses that do the same thing. There are lots of different lenses that do specific things.

    Types of lenses

    To ensure consistency I’ve quoted the 35mm equivalent when quoting a focal length.
    Why?
    Well most, if not all, camera manufacturers usually quote that in their literature. 
    To cover all the different size focal lengths from each manufacturer would be confusing. E.G. a full frame camera body lens of 50mm is exactly that, 50mm.
    A DSLR crop sensor camera is usually around 1.6 which means 50mm is 32mm. 
    To confuse you even more, some mirrorless cameras have crop sensors of around 2, which means a 50mm lens is 25mm. AAGH!!!
    More on that in a future post.

    Now we’ve cleared that up, let’s go to the best camera lens for travel photography.

    Built in Lenses

    There are some top end compact and low end mirrorless cameras that have a built in lens.
    An example of both would be the Sony Cyber-shot DSC-RX10 III and Fujifilm X100F
    Most of the lenses that come with these cameras tend to be telephoto lenses and that’s when you need to be careful.
    Some of them use both Optical and Digital zooms.
    If you recall from the Best camera equipment for travel photography, a digital zoom is the same as having an image on your computer screen and cropping it.
    That means you end up with a smaller picture size, e.g. 1000 x 1000 becomes 500 x 500 Pixels. 

    If you zoom in optically the size remains the same and so does the resolution, allowing for bigger prints or digital sizes at better quality 

    So, if you are looking at a lens on a camera, ensure that you know whether it’s using optical or digital to zoom.
    Just because it uses digital doesn’t mean you should disregard it. 
    If it also has an optical zoom as well, then you can choose to use the digital zoom sparingly.

    Built in Telephoto lenses tend to range from around a minimum of 28mm to sometimes around 250mm. 
    When it’s longer than that, then it’s usually at the long end that the digital zoom comes into play.

    If you are going for an all-rounder, which you would be if you are considering a compact camera, then 28-150mm is the sweet spot. 
    If you can get wider than 28mm, say 24mm, than all the better. Remember you can always, where practical, zoom in with your feet.

    Great Langdale in the Langdale ranges ,Lake District, England
    Great Langdale in the Langdale ranges ,Lake District, England

    Click on the above image to view a larger version and for other options

    Interchangeable lenses

    Now we are talking about a separate lens. That is, a lens that can be removed from the camera. 

    With interchangeable lenses, you need to establish what you can afford and whether you want more than one lens.

    The first camera I had (which was a film camera, but the principle is the same) had a 28-200mm lens.
    I also had a 1.5 Teleconverter with it, which meant that I could get a maximum zoom of 300mm.

    So, there are other ways of having flexibility with only having one lens.

    But if you are thinking about going for a camera with Interchangeable lenses, then it’s worth the price to invest in glass. 
    The thing is that the lens is a more important and longer-term investment than the camera body. 
    If you get a good lens, then you will keep it far longer than the camera body.

    Telephoto Lenses

    With a telephoto lens you have options with what you want to carry. 
    And there are some genre’s that need telephoto lens. Wildlife and entertainment are hard to do without having a Zoom. 
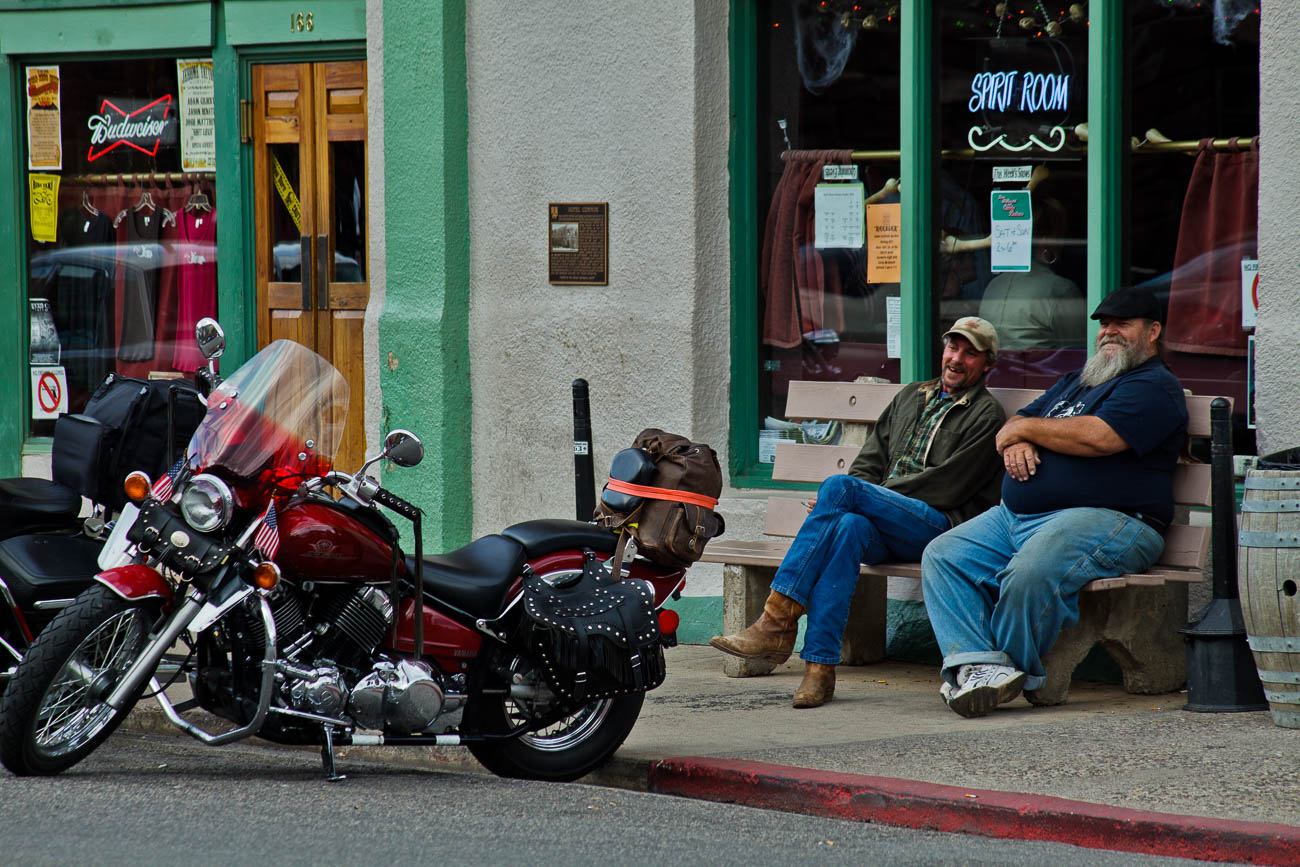
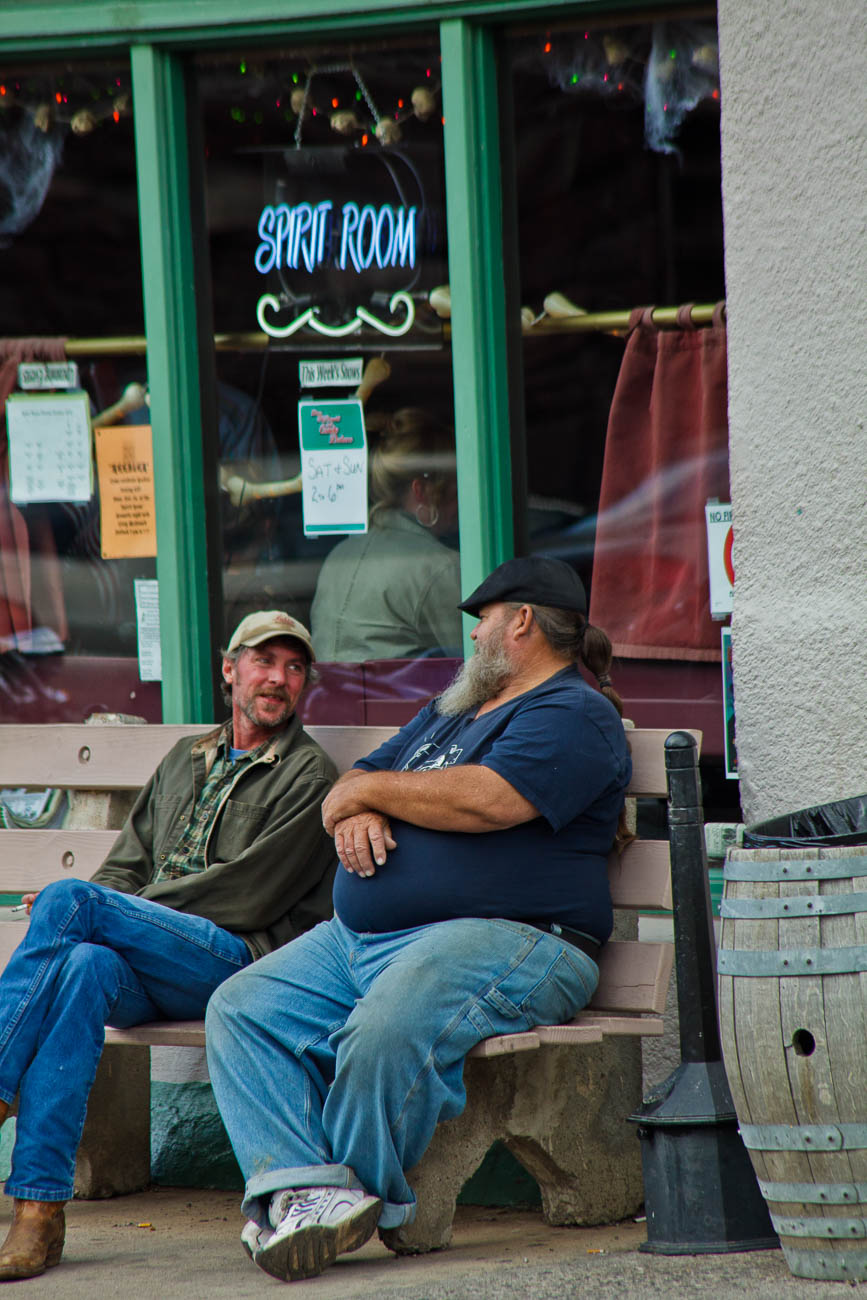
    Street, Architectural and even Landscapes can give you different viewpoints that you wouldn’t get if you have a fixed focal or prime lens.

    As I mentioned in the Built in Lenses section above, the usual sweet spot for a generalist is 28-150mm. 

    So, you’ve decided on the length of zoom you have. 
    Now you need to decide on how ‘fast’ you want it to be. What’s Fast? Well that relates to the maximum aperture size. 

    Most consumer lenses are around F4.5 and as you zoom out, so the maximum will be higher. A range of 4.5- 6.5 is common. 
    They are fine for the majority of Travel Photography subjects. 

    However, if you want to get serious, then the next level up are pro lenses. 
    They tend to have a fixed aperture i.e. don’t change as you zoom. But not only are they a lot more expensive they are also heavier and bigger. 
    So you have not only have to consider your budget you have to consider your back as well!

    Prime or Fixed Focal lenses

    What’s a prime lens? Well basically it’s a fixed length. 
    The most popular Prime Lens length is 80mm, as it’s a bit of an all-rounder and matches what you see with your eyes. 

    A prime lens is more restrictive but usually offer you better quality.
    Unlike the Telephoto lens, they have fixed apertures like a pro telephoto. 

    If you buy one with a large aperture of f1.2 or 2.4 you have a lot more flexibility when it comes to getting different areas of your photo in focus. 

    But they are probably not so good for Wildlife but depending on the size you can use it for pretty much anything.
    As I said before you can still zoom with your feet.

    Wide-Angle Lenses

    They are normally around 20-24mm and offer you, as the name suggests, a wide-angle view which can be also used for an artistic interpretation of a subject. 

    Some street photographers and Photo-Journalists use them a fair bit.
    However it’s landscape photographers that use them the most. Getting a full wide landscape can be very satisfying.

    Speciality Lenses

    There are many types of speciality lenses. 

    Tilt and shift lenses are mainly used to correct that narrowing of a building that you get when taking some architectural shots. 

    Macro lenses are great for small objects such as insects and flowers. 
    A macro setting is often built into some camera bodies. But more often or not you usually need to have a prime lens that has that facility as well. 

    Then there are super telephotos for wildlife and sports. 
    You see them around the boundary in sports stadium. 
    As there are not many, if any, consumer level super telephoto lens, they are big and expensive.

    Then there are the distortion type lenses, such as those that manufacturers like Lens Baby makes. 
    Most popular of these are the Fish Eye lenses, a wide angle that makes everything look like it was in a fishbowl. 

    Again, whether you have these or not depends on what type of Travel photography you are going to specialise in

    Kangaroo Paw in Kings Park Perth Australia
    Kangaroo Paw in Kings Park Perth Australia

    Which ones to buy and/or use

    In Different types of Travel Photography, I go through the types of Travel Photography genres. 

    Let’s map those genres to a specific lens and wrap up this article on the best camera lens for travel photography.

    General – Telephoto Lens plus a 80mm Prime Lens

    People and Street – 50 or 80MM Prime Lens plus a 28-150mm Telephoto

    Journalistic or lifestyle – 80 or 100mm Prime Lens plus a Telephoto Lens of 28-150mm

    Landscape – 24mm Wide-Angle plus a Telephoto with a minimum focal length of 100mm

    Architectural – 24-100mm Telephoto and a 35 or 50mm ‘Fast’ Lens i.e. F1.2 or 2.4.

    Wildlife and Nature – Big Telephoto as long as you can afford (*See below) plus a Macro if you are intending to shoot flowers or insects or the smaller world.

    *There is always the option to hire a lens, depending on your location. 
    A couple of years ago, I hired a 100-400mm Canon Lens for a trip I did to Northern Canada to see the Polar Bears. 
    Often you may not use some of the more specialist lenses all the time, so It’s a good idea to hire them. 
    More on this in another post.

    Food and Drink – Food and Drink is a tricky genre to suggest the best lens for. 

    If you are looking to take low light plated food, e.g. in a restaurant, then you would need a wide angle or 50mm lens with a large maximum aperture of F1.2 or 2.4. 

    However, if you are taking images of food in its raw state e.g. farming or even a farmers’ market, then a telephoto may be the best way to go. 
    Same applies to drink. Vineyards, Wineries and breweries are semi landscape. 
    And you can be really creative using a macro lens to shoot bottles of Wine or Spirits or even fluid in a glass.

    Entertainment – Like Street Photography with the exception that you many need a fast lens if you are inside a concert hall and flash is not allowed

    As you can see there are lots of different ways of looking at the lens you may require.
    If you are not sure then the best way to start is, as I’ve indicated in the general genre, to purchase a telephoto and if possible a 80mm lens.

    Summary

    Finding the best camera lens for travel photography can be a challenge. 

    Two things to remember:

    1. The quality and build of a lens is more important to the quality of your images than the camera body. 

    2. You are likely to keep your lens for a lot longer than the camera body. 

    So, ensure you spend as much as you can afford on your lens. 

    There are many types of lenses but the most useful tend to be telephotos of around 28-150mm and 50 or 80mm prime lens.

    Unless you are specialising in some tight niche, then purchasing a speciality lens like a fish eye or tilt and shift lens is not advisable, as you won’t get the use out of it. 

    Remember you have the option, most of the time to hire some speciality lenses.

    Need some help with your travel photos? Get a free guide by filling in the form below plus you will also get content that’s only available to subscribers

    Any questions then please contact me here and/or please say hello at these places:

    Facebook: Twitter: Instagram: LinkedIn:

    Feel free to share this to your social media of choice

  • How I took this Travel Photography Image

    How I took this Travel Photography Image

    In the historic copper mining town of Jerome, Arizona, USA
    In the historic copper mining town of Jerome, Arizona, USA

    This is the second of a series of articles that uses travel photography to show how you can get a particular type of shot.
    Some of the examples won’t be stock, product or marketing photos, although any image can be used to market anything. 
    Nearly all of them will be travel photography images

    But this is a good starting point for taking similar photos for any reason whether it’s travel photography or for your business. 

    And I hope that this inspires you to go and emulate and even improve on the method I give you here. 

    So, let me clarify that this article is not some much about technique but opportunism.

    Let’s set the scene

    I was travelling through the South West of the USA and stopped off at a little town of Jerome.
    Smack bang in the middle of Arizona and north of Phoenix, its claim to fame is that it was a copper mining town.
    Nowadays it’s a tourist hot-spot. Being at a higher altitude, Jerome is attractive to residents of Phoenix, the big smoke, during their ugly summer months of high temperatures.
    And so, I discovered how attractive it was as I roamed the streets of Jerome taking shots of the interesting sights as well as the landscape beyond.

    Human Interest

    However, what I really became interested in was the locals.
    There’s only around 450 of them and they all seemed to be happy, friendly and smiling.
    Whilst I have done some portrait photography, I’m not a big lover of it.
    I find that taking impromptu spontaneous images tend to bring out much more of the subject’s character.

    Positioning for Street Photography

    When you take any street scene sometimes you get lucky and fire off a few shots straight away.
    Other times you have to kind of go with the flow and watch and see how the street life unfolds.
    That day was one of the latter.
    I wondered around until I found a spot diagonally opposite a bar, a hotel and a winery cellar door, yes, they do have wine in Arizona and good wine it is too.
    The spot I found was a corner or rather a T-junction.
    Normally I would find a café to sit and watch but there wasn’t one where I wanted to be.
    But there was, at that time, enough people around to make me feel inconspicuous.


    The Wait

    So, I waited.
    As it was mid-afternoon and wasn’t a Sunday I figured that there would be a bit of coming and going from the bar.
    There was but not as much as I wanted.
    But I did shoot a few images as I hung around.
    After about 10 minutes some motorbike riders turned up and went into the bar.
    I shot off a few shots of them.
    But being mindful that I didn’t know these guys I was fairly conservative and kept a low profile. 

    Travel Photography
    Harleys in the street in Jerome, Arizona, USA

    The Subject

    After about 5 minutes these couple of guys came out and sat outside chatting and looking at the bikes.

    Travel Image
    Two men talking in the historic copper mining town of Jerome, Arizona, USA

    Now neither of these guys are oil paintings but they were perfect for me. 
    So, I was off a running – not literally, of course.
    This one is the best of the shots I took.

    Travel Photo
    Two men and motorbikes

    One is smiling and the other is laughing and both are looking at the bikes.
    I have no idea whether they were laughing at the bikes or something completely different.

    Technical

    So, let’s get technical.
    My gear was a Canon 5D MKII with a 75-300mm telescopic lens, which is a full frame DSLR
    I usually use aperture priority and had that set at F/8.
    F/8 is the sweet spot for this and most other cameras for subjects that are a short to medium distance away. Ideal if shooting travel photography.
    You should get everything in focus regardless of the focal length you use, which in this case was 180mm.
    It also means that unless the light is low, you should get a fast-enough shutter speed which at 1/200 sec, I did.

    Even though the light was quite good, it was overcast. Having said that, I had the ISO set to auto and it selected 320 ISO, so the light was not as bright as you may think for somewhere like Arizona.
    In this camera you have to get up to about 1000 ISO before there is any noticeable difference to the picture quality i.e. noise or grain.
    I could have set the ISO even lower as I had a lens that had IS, Image Stabilisation but I didn’t feel that I needed to use it.

    Conclusion

    To get a good photo of anything, you need a bit of luck but at the same time you can make your own luck. If you used this example for instance, you would do that by:

    1 Scouting the location
    2 Working out the best position
    3 Being patient
    4 Ensuring you have the correct equipment, which can be the best you have with you.
    But be realistic. For example, using a smartphone is not the best camera to use for all situations.
    5 Setting your camera correctly.

    6 Make sure if you are taking street photos, you are in a location that will allow you to quickly move into a better position.

    One last tip: If you are holidaying make sure you actually make time to enjoy the location. Forget Travel Photography occasionally and move in front of the camera and have a good time!

    Need some help with your photos?
    Why don’t you pop your email in the box below and not only will get content that not always posted on this site but you will get a free guide to get you started

    Any questions then please contact me here and please say hello at these places:

    FacebookTwitterInstagramLinkedIn:

    And feel free to share this to your social media of choice

  • The basics of camera equipment – Best camera equipment for travel photography

    The basics of camera equipment – Best camera equipment for travel photography

    “If I could tell a story in words, I wouldn’t need to lug a camera” Lewis Hines

    Lewis’s quote is relevant to most of us these days.
    It’s far easier to document something visually than to describe it in words.
    But to do it well and consistently you do need a ‘decent’ camera. 

    Despite those who say its’s not about the gear, you need a camera that will suit your style and objectives.


    So, if you’ve read my last 2 posts: An Introduction to Travel Photography and Different types of Travel Photography, you are probably wondering what is best camera equipment for travel photography.
    Or maybe you are not.
    Either way, when you are travelling or going on holiday, you want to come back with photos that you are proud of.
    So it’s worth the 5 minutes of your time to read this.

    Smartphone Cameras

    These days everyone gravitates to their smartphone for most pictures. 

    Originally, they were mostly used to document items, like a sign or an extract from a newspaper or even a product you were looking to buy. 

    Only occasionally were they used for happy snappies or selfies.

    Fast forward to today and most smartphones are used for selfies first and then general photos of all types second.
    On my travels, I see lots of people using their smartphones to take travel photos.
    But are they the best camera equipment for travel photography?

    Smartphone Capabilities

    Today’s smartphone cameras are better than some of the compact cameras that have been or are available.

    But, and you were waiting for the but, weren’t you? They are limited. 

    Think about it. Physics dictates that, whilst lots of things are becoming smaller and retaining quality, optics are still a way behind.

    A smartphone camera has a small lens and that means you are restricted on what it will do well. Especially compared to mirrorless or a DSLR camera. 

    Even with the new software and multiple lens of the latest offerings you still have limitations.

    If you are happy with that, then that’s absolutely fine. 

    But if you want more flexibility, then consider either a mirrorless or a DSLR.

    What a smartphone camera can’t do well.

    Well the first thing is it doesn’t perform well in low light. Let’s say you are taking photos with a Smartphone Camera inside a Basilica somewhere in Europe. Unless you are using a tripod, which is often banned in some public places, you will find your images will appear blurred. That’s camera shake. 

    For more about that go to 5 Ways to Eliminate Camera Shake and How to hold a camera correctly

    Even if you are using a tripod, Smartphone Cameras find it hard to replicate the details in low light. 

    Now I know that will improve and I understand that the Samsung S9 is a lot better in low light than previous models.

    But unless you are on a plan that allows you to get the latest model, you will have to find at least $1000.00 to get that in your hot little hands.

    Half of that will buy a camera that will perform much better. 

    Of course, it won’t have a phone or the rest of your life in apps like email, internet, health and fitness etc. etc. 

    But it will mean you have options.

    Women grieving in San Miguel de Allende's parroquia crypt
    Women grieving in San Miguel de Allende’s parroquia crypt

    Optical and Digital Zooms

    A smartphone struggles when zooming in, losing not only quality but also resolution. 

    That’s because it is a digital zoom not an optical one. 

    The difference? 

    Well, a technical explanation is not what I want to give you. But I will give you an analogy. 

    It’s the difference between cropping an image on your computer screen to a smaller picture size. For example, a photo that measures 1000 x 1000 becomes 500 x 500 Pixels. Zooming in optically retains the size and therefore the resolution.
    Why should you care? Well cropping digital images means to see it at a good size or to print it you must blow it up and that’s when you see the faults. 

    As the technology of these cameras improves there won’t be such a differential between larger cameras and smartphone cameras.

    Having said all that if you want to just take a smartphone camera with your and nothing else then knock yourself out. 

    Just be aware that you are restricting yourself. So my advice would be to concentrate on taking photos of subjects that a smartphone cameras do best.

    Compact Cameras

    Ok so now I’ve dismissed your idea of only having a smartphone, what is the best camera equipment for travel photography?

    Well if we start at the bottom. Compact cameras are generally the same these days as smartphone cameras. So there’s no point in you taking one of those. Unless of course you don’t have a smartphone.

    However, having said that, there are a few high end compact cameras that have great optics and sensors. Ones like the Sony Cyber-shot DSC-RX10 III and Fujifilm X100F come highly recommended but will set you back $1100.00 plus. See DP Review’s take on it.

    Mirrorless Cameras

    After those we are looking at Mirrorless or Micro Four Thirds cameras. 

    What is a mirrorless camera? 

    Well DSLR’s have a mirror protecting the sensor. 

    When you are looking through the viewfinder you are actually seeing the mirror which is reflecting your subject to your eye. When the shutter button is pushed the mirror lifts up and exposes the sensor to light and the subject. 

    Having a mirror takes up space and so nearly all DSLR’s are quite big, chunky and relatively heavy. 

    The mirrorless cameras don’t have a mirror – hence the name “mirrorless”. 

    Not having a mirror reduces the size and weight of the camera body. 

    Now I could go into lenses etc now, but I’ll cover that in another post.

    Different types of Mirrorless Cameras

    Not all mirrorless cameras are equal though. 

    Some have larger sensors than others. 

    That doesn’t mean that the larger the sensor the better the quality. But it does mean that it correlates to the size of the lens. 

    So, the larger the sensor the more likely the lens will be larger and heavy.

    Mirrorless cameras do give you a lot more flexibility than compact or smartphones. Because they all have removable lens you can vary your lens according to the subjects you want to photo.

    And as I’ve mentioned they are much smaller and lighter than most DSLR’s, which makes them more ideal for Travel.

    DSLR Cameras

    So, what about DSLR’s? Well in most people’s eyes DSLRs are synonymous with quality.
    When I take out my DSLR, I get lots of people comment on how I have such a good camera, so “I must take good photos”.
    The only comments I get on my mirrorless is that they look “cool” as they have a sort of ‘retro’ look. 

    These days with, the exception of the very high-end models, differences in quality between both types are negligible. 

    Personal choice. 

    I do like the feel of my Canon 5D MKII and I often use it for local shoots. 

    But when it comes to travel that’s when I reach out for my Olympus OMD1 MKII. 

    It’s so much lighter and even with the pro lens I have, it takes up so little space in comparison.

    Of course, if money is no object then the Leica models are lightweight and small and come with fantastic quality. Or if you don’t mind lugging around a big DSLR then the high-end Canon or Nikon cameras will also give you great quality. 

    But with both you will need to use the same wheelbarrow that you carried the money to pay for them, to carry them around.

    Tour de Mont Blanc Path near Les Contamines, France
    Tour de Mont Blanc Path near Les Contamines, France

    Conclusion

    It’s often quoted that the best camera equipment for travel photography is “the one you have with you”. 

    But I would challenge that. Unless you are travelling to the same destination over and over again, it’s quite likely that where you travel to next will be a once in a lifetime trip. 

    Do you want to trust your photo creation equipment to a restricted device when there are so many better options on the market today?

    For more about buying a new camera check out these posts:

    Why selecting a new camera is like selecting a new date (or TV)

    Buying a new camera? Then read this

    Why having the right camera equipment is important – or is it?

    Buy a Camera in 15 minutes with these 5 Questions

    Plus if you want to know more about the features of a camera then you can download my free

    Camera Features Guide

    Just click on any of the above images to view a larger version and for other options

  • Different types of Travel Photography

    Different types of Travel Photography

    In the previous post, “Introduction to Travel Photography,”
    I touched on the fact that there are several different types of travel photography.
    In this article we cover the different types and genres and how they apply to your future travels

    So, let’s go into more detail.

    The best way I find, is to break it down into destinations. By doing that you are preplanning what skills you need to learn or refresh for your upcoming or future trip.

    Let’s take an easy one. Europe

    What do we travel to Europe for?

    These are a few reasons:

    • History
    • Food
    • Landmarks
    • Landscapes
    • Activities
    • Sporting Activities
    • Language
    • Drink

    So each of these reasons will correlate to a different type of travel photography.

    Let’s take history:

    Interior shots of museums, Churches, Palaces and galleries are a few examples.
    To get some good shots you would need to get comfortable shooting in low light. By learning how to do this and how your equipment will perform will enhance your photography.

    Another genre for History would be architectural.
    Shooting some of the worlds’ most impressive buildings like Saint Peter’s at the Vatican are a must if you are travelling to Rome.

    Then of course there are battlefields from different wars over the ages.
    From Gallipoli to the Battle of Hastings to the trenches of World War I in Belgium. Most of these would be landscapes.

    We now have the theory behind using destinations to think about different types of travel photography.

    Destinations and different types of Travel Photography:

    Europe

    Landscapes, Architectural, Interior, Festivals, Lifestyle, Food and Drink, Street

    North America

    Landscapes, Architectural, Lifestyle, Nature, Wildlife, Street, Food and Drink, Wilderness

    Cowboy on bench In Santa Fe's plaza, New Mexico, USA
    Cowboy on bench In Santa Fe’s plaza, New Mexico, USA

    Asia

    Street, Food and Drink, History, Landscapes

    South America

    Landscapes, Architectural, Lifestyle, Nature, Wildlife, Street, Food and Drink, Wilderness

    Antarctica

    Wilderness, Landscapes

    Africa

    Wildlife, Landscapes, Street, Food and Drink, Wilderness

    Australia and New Zealand

    Nature, Landscapes, Street, Food and Drink, Lifestyle, Wilderness. Wilderness could be considered a part of Landscape. Yet there are some specific challenges that need to be considered when you are out in the remote areas.

    Lake Wanaka New Zealand
    Lake Wanaka New Zealand

    I’ll go into more detail in future posts.

    But the trick is to look at the destination and then decide what sort of images are available and what you would like to take.

    For instance, if you were travelling to France, you may decide that you don’t want to take photos of the landscape as you are only going to be in a couple of cities like Paris and Lyon.
    But even in cities there can be opportunities to take landscape photos e.g. Jardin des plantes des Paris – the Botanical Gardens of Paris

    Choosing what to shoot

    As you can see there are many different types of travel photography.
    But what if you want to choose a few main ones? Which ones should you choose?

    Well if you go back to the list you can see a few that reoccur. Landscape, Architectural and Street are three that would set up any budding travel photographer with the building blocks to improve and learn new skills.

    It also depends on interests.
    If you are an outdoors sort of person and you intend spending time at travel destinations with wild open spaces then you may wish to concentrate on Landscape, Wildlife and Wilderness.

    Genres

    Breaking down these different types of travel photography into subjects is also useful:

    Landscape
    Mountains, Snow, Ice and Glaciers, Deserts, Coastal, Forests, Water,

    Wilderness
    Similar subjects to Landscapes. As I mentioned before, it’s not so much about the subjects but more about the logistics and specific challenges i.e. Extreme temperatures, Remoteness etc.

    Street
    Portraits, Daily Life, Streetscapes, Local Interactions, Traffic and Transport, Street Art

    Architectural
    Interiors, Building detail, Urban Landmarks, Skylines

    Nature
    Flowers, Forests, Lakes, Rivers, Weather, Sun and Moon

    Wildlife
    Animals, Insects, Birds, Reptiles, Marine Life, Habitat

    I could break down these genres and destinations even more but I don’t want your eyes glazing over.
    Just as you would plan your travel or holiday experience you also need to plan your photography beforehand.
    Working out what photos you will have the opportunity to take and which ones you want to take, will not only help you enjoy your experience but also bring home some ‘awesome’ photos.

    Summary

    So you can see that there are lots of different types of travel photography. These can be classified as genres but also working out what types of photos you will be taking at your destination plays a big part.
    Some of these genres e.g. Wilderness also have other challenges not necessarily related to the act of taking a photo.

    Research and Planning is essential

    But remember, if this feels too overpowering you can always just select some or one area to specialise in to begin with.

    Need some help with your travel photos?
    Enter your email in the box below and get content that’s not always posted on this site and a free guide to get you started

    Any questions then please contact me here 

    Feel free to share this to your social media of choice

  • An Introduction to Travel Photography

    An Introduction to Travel Photography

    Table on the beach. Kefalonia. Greece

    An Introduction to Travel Photography

    Travel Photography is something we all do from time to time whether on vacation or when travelling for any reason. In this well written and researched article “An Introduction to Travel Photography” I will attempt to ‘introduce’ you to the world of Travel Photography

    Definition

    According to Wikipedia the definition of Travel Photography “is a genre of photography that may involve the documentation of an area’s landscape, people, cultures, customs and history.
    The Photographic Society of America defines a travel photo as an image that expresses the feeling of a time and place, portrays a land, its people, or a culture in its natural state, and has no geographical limitations.
    There are other definitions but those two pretty much nail it.

    History

    Travel Photography, unlike most other genres is a later addition to Photography.
    When Photography was first invented in the early 1800’s few people travelled and for the next few generations any who did were only the wealthy ones.
    The major pioneers in travel photography were explorers who wanted to visually document their experiences whilst exploring.
    But you had to be keen as they had to carry the bulky equipment.
    Not only was the camera equipment itself heavy but, as the frames needed to be developed almost immediately, the photographer needed to have a darkroom and enough chemicals for a small laboratory.
    Of course that all changed when Kodak invented a camera that used a roll of film and then introduced the Kodak Brownie.
    Almost immediately photography was a lot more accessible and therefore popular with explorers and traveller alike.
    But it wasn’t until colour film was introduced that travel Photography became a mass media.
    Even then not everyone had a camera or if they did they didn’t use it whilst travelling.
    Digital photography changed all that. And then Smartphones come along.
    Now anyone who steps outside their door takes pictures. 

    We have millions of images of exotic and not so exotic locations being circulated by social media and other forms of communication.

    The Travel Experience.

    It wasn’t until I went travelling that I took an interest in Photography.
    It was to be a 7-month trip around the world and I felt that we needed to document, as well as we could, our experiences.
    So it was I had 2 very different skills to learn, how to travel and how to take photos of my experiences. It was a challenge, but it was one that I learnt so much from.
    That’s the beauty of Travel Photography. Yet, there are times when you must forget all the techniques and the technical stuff and be in the moment of the experience.
    Knowing when to take that shot or not is a skill in itself.

    That too me is what Travel photography is all about. 

    Genres

    Of course, when you travel there are lots of subjects that you will want to take photos of:

    Landscapes, People, Festivals, Entertainment, Urban, Food and Drink and Wildlife are the most popular.

    Landscape

    Landscape Photography is taking images of usually the area in front of you.
    That can be a mountain range, a field of flowers, the desert, pretty much anything that is of a natural beauty.
    Some manmade objects e.g. a lakeside house or a sailing boat can help with context.

    Reservoir close to Yosemite NP, California, USA is an area of lakes and reservoirs.
    Reservoir close to Yosemite NP, California, USA in an area of lakes and reservoirs.

    People

    Always a difficult one to get right. People move, blink, frown and often, whether posed or not, can assume unflattering positions.
    Taking portraits in different cultures are a great way to get to know locals and customs.
    We are all fascinated by the daily life of those in other countries. Travel Photography gives you the option to capture that.
    As an example of this check out How I took this Travel Photography Image

    Festivals

    The Colour and movement of some of the world’s most famous and not so famous festivals can make great photos.
    Even the local fete can offer some interesting character or scene shots

    Entertainment

    Shopping in the market, Music and Theatre performances are two events that come to mind when taking photos in the field of entertainment.
    But there is also sporting events like a game of footy or nightlife. The latter being particular challenging due to the lack of light.

    Urban

    What is urban? Good question!  I guess it’s Street Scenes, Street Art, Sky Lines, Architecture, both inside and outside and even Light Shows.

    Food and Drink

    There are many food and drink situations. You may want to take some photos of where you are, what you are doing, eating or drinking.  
    In a restaurant, a winery, in a field or at the market.
    Food and Drink is quite a diverse genre. But it can also be the most creative and satisfying, especially if you are having a great experience at the same time.

    Wildlife

    Who doesn’t want to capture that great shot of a Lion or Leopard in the wild somewhere in Africa.
    But there is more to it than the big 5 (the big 5 is Lion, Leopards, Rhino, Hippo and Elephant).
    Even going to a Zoo or Sanctuary can provide some great photographic opportunities.
    There are various types of environment for grabbing a shot or 2 of wildlife. Marine, Forests, National Parks even the Urban Environment can have wildlife.
    But be wary of two things, firstly your safety is paramount, don’t be that person who steps outside the car in a Lion park.
    Secondly, wildlife photography is challenging.
    There are photographers who have devoted their lives to taking great wildlife shots. They will spend days even weeks waiting for that ‘one’ shot.

    Mother Nature

    Travelling over time means you will experience all types of weather which can make it difficult to use your camera equipment.
    Rain, Heat, Cold, Snow, Dust they are a few extreme weather extremes that we all will experience in our travels.
    But even though taking photos in such conditions will take you out of your comfort conditions, often it will be well worth it.
    So, don’t run for cover (unless of course your life is in danger) embrace the challenge.

    Copyright

    By copyright I don’t mean your copyright. More and more their famous landmarks (and People) want to control their image.
    For example, under French law it is illegal to take photos of the Eiffel Tower’s light show at night.
    Of course, we’re not all going to check on every possible landmark but it’s worth a quick google on a big-ticket item. 

    Photography Techniques

    So you now you know the sort of experiences that you will want to document visually, how do you do it successfully?
    Well firstly, you will never stop learning! I’ve been shooting for 22 years and I’m still learning.
    That’s not to say you can’t learn to take good even great pictures straight away on your travels.
    It takes time to know what to do in certain situations and as you have seen there are many genres that make up Travel Photography.
    I hope that this will motivate you to read more from this site and support some of the manufacturers or service providers that I recommend to help you.

    Additional skills

    Of course, it’s not all about techniques and composition.
    If you want to take Travel Photography seriously you need to also be prepared some of the time to:
    Plan but be flexible
    Be reasonable fit, so that you have the energy to walk for hours at a time
    Be Patient enough to wait for the right moment to get that shot.
    Develop good social skills so that you can converse with many people, often in a language which you can’t speak
    Be creative
    Be open to sharing. After all it’s no good taking photos if no one is going to see them!

    In Summary

    This introduction to Travel Photography should give you a taste of what’s involved in improving your travel or holiday experiences. 
    You can see that gaining the skills that allow you to take good or, indeed, great photos will help expand your travels and give other people pleasure.
    Travel Photography is about the gear, the composition and being creative
    But it’s also about being in a place that’s not your home, adding depth to your experience and bringing home great photos that will live with your memories for a very long time!

    Need some help with your photos?
    Why don’t you pop your email in the box below and not only will get content that’s not always posted on this site but you will get a free guide to get you started

    Any questions then please contact me here and/or please say hello at these places:

    FacebookTwitterInstagramLinkedIn:

    Feel free to share this to your social media of choice